
WITNY Letter Banner Workshop
Before you begin, please download this Banner Letter Template.
Open the file in Adobe Illustrator. Make sure you the Character window available. If it is not there then you can go to Window > Type > Character.

Select the Text Tool (It looks like T; Shortcut: T), then go to the Character window to select the type of font you plan to use, and the size. 100 to 320 points work, depending on the font type.
(You can also right click and go to the Fonts option too, but it only changes the font and not the size.)

Click on the Artboard and type out your letter. Using the Direct Selection tool (The white colored arrow; Shortcut: A) select your letter and move it to the top, smaller rectangle. The bottom of your letter should overlap the rectangle.
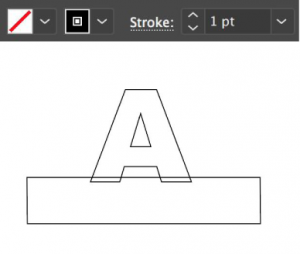
Select your letter and change the Fill to no fill and the Stroke to black and 1 pt. (See above.) If you do not see a Stroke window, go to Window > Stroke to open it.
Select your letter once more and go to Type > Create Outlines.
Open up the Pathfinder window (Window > Pathfinder), then select both the letter and the rectangle. Then select the Unite option. That is the first one in the Pathfinder window, the one that looks like solid squares fused together (see below, circled in red).

Then it’s time to save! Either go to File > Save or Ctrl + S rename the AI template, and hit the Save button. Next we will need to import it for use on the vinyl cutter.
Go to File > Export, and in the drop down menu select AutoCAD Interchange File (dxf). Make sure the file has your name on it before saving.
You may be asked to bring the laptop to the vinyl cutter and talked through the process, or a USB thumb drive may be passed around. Please put BOTH the AI and DXF file on there.