
Animated Optical Illusions
These simple optical illusion toys were very popular in the 18th and 19th century, and were used as early forms of entertainment. These would eventually become the inspiration of modern animation. There are many kinds of these devices, but we will be only focusing on three: the thaumatrope, the phenakistoscope, and the zoetrope.
Part 1: Thaumatrope
Greek for wonder-turner, thaumatrope (thou-mah-trohp), is an optical illusion disc usually made with a heavy paper or cardboard, illustrated with a design on each side with cords on two ends of the circle. When twirled quickly, the illustrations will seem to become one image. Some are stuck atop a stick and when the stick is rubbed between the hands, the illusion occurs.
Here is a thaumatrope from 1825, and a simulation of the animated effect:
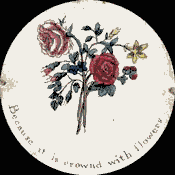


(Images are from Wikimedia Commons and in the Public Domain.)
What You Need:
We have made a list of things that can be easily purchased physically or online, If you’re not sure where to purchase things, you can visit our Materials page, or contact us! Our info is in the Staff page.
- Heavy card stock/Bristol paper OR cardboard
- Glue (if using paper on cardboard) OR tape
- Pencil
- Ruler
- Markers/Colored Pencils/Crayons
- Scissors OR x-acto knife OR box cutter
- String Version: 2 pieces of string or cut rubber band
- Stick Version: A sturdy stick (pencil, dowel, plastic straw, lollipop sticks, needs to be rounded to roll in the palm.)
- Something to make holes (pin, screwdriver, x-acto, hole punch, awl)
- A compass or circular stencil
- OPTIONAL: A Light board
Files for Laser Cutter:
Files for Vinyl Cutter:
- Thaumatrope Vinyl Cutter AI
- Thaumatrope Vinyl Cutter EPS
- Thaumatrope Vinyl Cutter DXF
- Output Guide (Vinyl Cutter)
How to Make a Thaumatrope!
Now assuming you don’t have vinyl cutter or laser cutter on hand, you will need to cut the disk(s) by hand. Either using a stencil, a round object like a can, glass, jar, or bottle, or a compass, draw a circle of at least 2 inches in diameter.

Next, cut out the circles. It’s okay if they’re a little uneven– we’re human after all!

If you’re using the string method, you just need one disk, for the stick version you will need two. Scroll Further down for the stick tutorial.
String Thaumatrope:
Using your pin/needle/etc, poke two holes about 1/8th inch off the the edge. For more precise measurements, you may want to draw a faint in across the middle of the disk and erase it later.
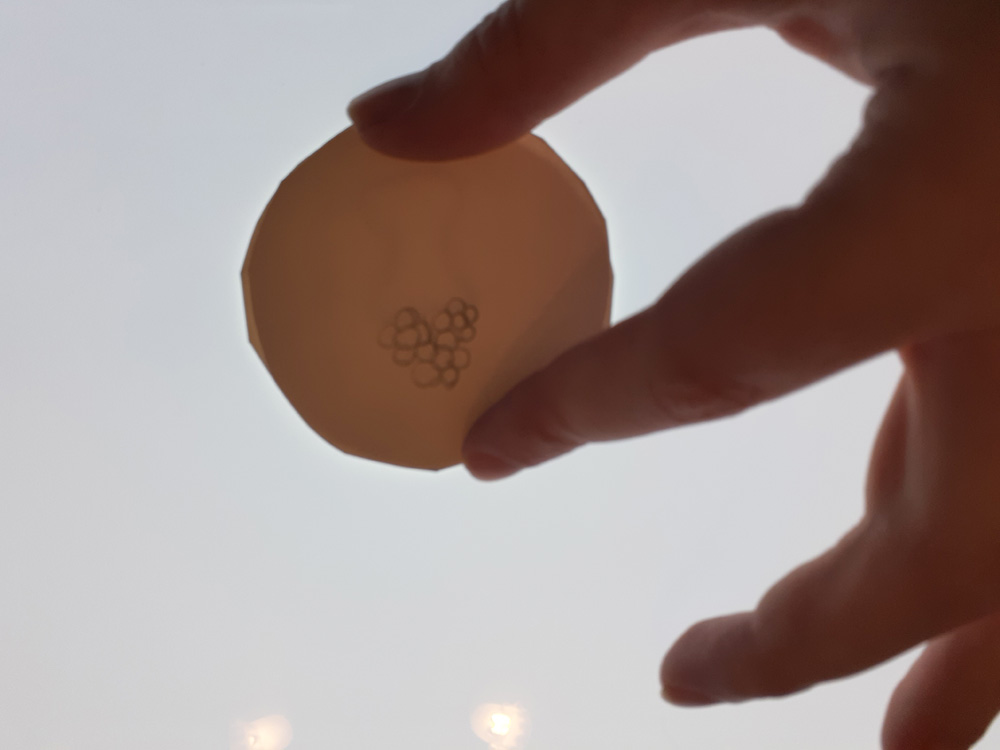
Next, you are going to draw your art. You can use a sunny window or a light table to achieve this part, or just try to be very mindful of your two sides.

As you can see, it helps to see both sides to make sure everything is aligned properly. You can (faintly) see the cage on the other side. I am using Bristol paper, thicker card stocks and cardboard will not be too opaque for the light board.
Another important note, since this is spinning, not flipping, the artwork has to be upside down relative to the other side. If you have strung it top to bottom, however it should not be reversed.

Feel free to go over your pencil with ink/marker to make it more defined.

Now add your string. My holes were two small for the twine, and I went through at least three(!) ripped thaumatropes to get a hole big enough without falling apart before resorting to sewing thread. If you need to expand your holes, be gentle. Sewing thread is not thick enough to get the twisting effect going, however, the animation does work fine if you blow on it gently. Yarn, twine, or thin rubber bands are better options.

String Thaumatrope:
This is a little harder, since you’re using two disks, but doable! One your first disk, draw your first image out. Then flip it over.

Place the second disk on top of that and draw your second image. try to align it to the first the best you can.

Next, ink and color you images at will!

Either tape or glue the two disks to the pencil. To use, rub the pencil back and forth between your palms for the animation effect. You may be able to use the one disk, just simply cut a slit in the pencil eraser and glue the disk in, make sure it’s secure!
 It also should be said, you can use the templates to make images to print out and glue onto the disks too! The analog version is quicker and more accessible, but do not let it limit you!
Part 2: Phenakistoscope
A phenakistoscope (fen-ah-kihst-oh-scohp) comes from the Greek words to me “deceive the eye”. It is an optical illusion disc usually made with a heavy paper, illustrated with a pattern. Attached to a stick in a way similar to a pinwheel, the animation effect occurs when you spin it viewing it through a mirror.
Here is a Phenakistoscope from 1833
Joseph Plateau/Wikimedia Commons
What You Need:
- Paper Plate OR heavy card stock/Bristol paper cardboard
- 1 sheet of regular paper (printer or drawing paper)
- Glue
- 2 pencils ; One to draw, the other unused to use as the stick.
- Scissors OR X-actor knife OR box cutter
- Ruler
- Markers
- A pushpin or thumbtack.
- A compass or circular stencil
- A Mirror.
Files for Laser Cutter:
- Phenakistoscope AI (Has both the 8 & 12 frame disk)
- Phenakistoscope EPS (Has both the 8 & 12 frame disk)
- Output Guide (Laser Cutter)
Files for Vinyl Cutter:
- 8 Frame Phenakistoscope AI
- 8 Frame Phenakistoscope EPS
- 8 Frame Phenakistoscope DXF
- 12 Frame Phenakistoscope AI
- 12 Frame Phenakistoscope EPS
- 12 Frame Phenakistoscope DXF
- Output Gide (Vinyl Cutter)
How to Make a Phenakistoscope!
Using a compass, protractor, or large stencil/jar/bottle, make a circle about 6-8″ in diameter on the heavier paper. I’m using Bristol paper, but card stock or cardboard can work too. Manila folders can be used in a pinch– it just needs to be stiff! If you’re not using a compass, use a ruler to mark your center. This is important.

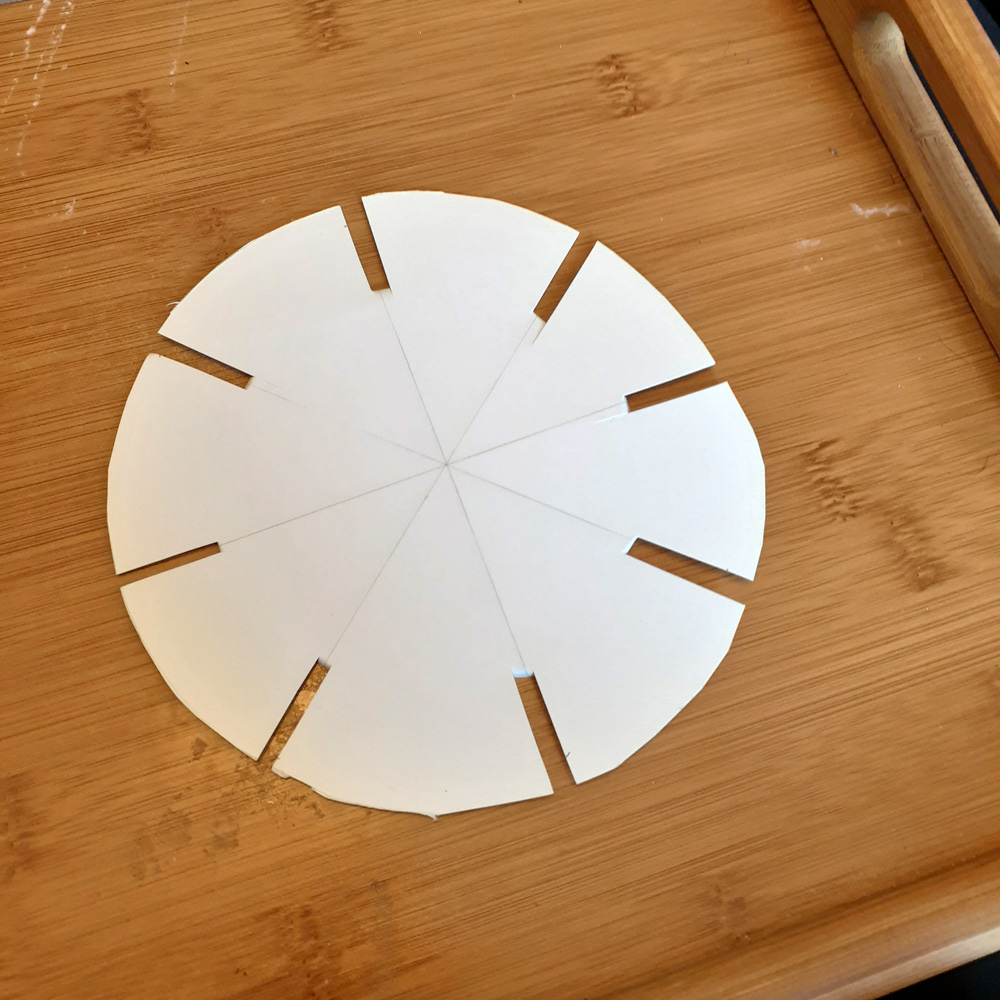
Next, divide your circle evenly. Be aware your animation cycle should be cyclical, 8 frames minimum works fine, but you can do more– but know the space gets smaller and smaller the more you divide. So 8 0r 12 frames works well. I’m making a moon cycle, so I only need the 8. Then cut it out!

Next, on each line, cut out a rectangle about 1 inch long and 1/8th inch wide. (It helps to fold the paper back and then trimming it off.
Next you’ll repeat the first two steps on the printer/drawing paper. Draw a 4-6 inch diameter circle (or 2 inches smaller than your bigger circle), and divide it the same way as the larger circle.

Now to draw your animation! Feel free to ink and color it to make it stand out. (I forgot to do this so mine will be very rough from here on out.)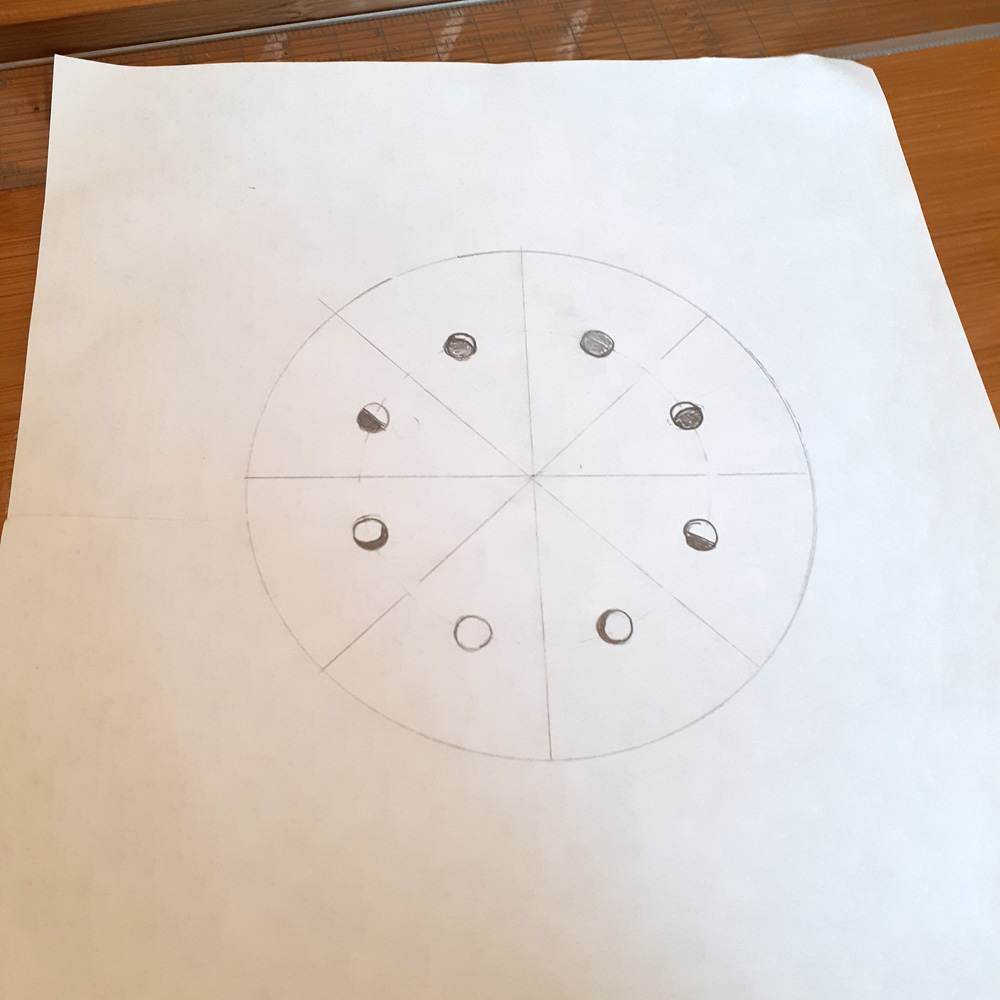
Cut it out! if you’ve used a compass, you may have already have a hole or divot in the center, if you you’ve marked the centers with a ruler before cutting out. next you align the two centers atop each other, then drive the pushpin in to make a proper center.

Then glue the smaller circle on top of the larger circle, making sure to align the lines the best you can. You can keep the pushpin in while the glue dries to help.

Once it’s all dry, stick the pushpin into the eraser of your pencil. but leave some space enough to allow it to spin! Facing the phenakistoscope to the mirror, spin the circle and view the animation through the slots!

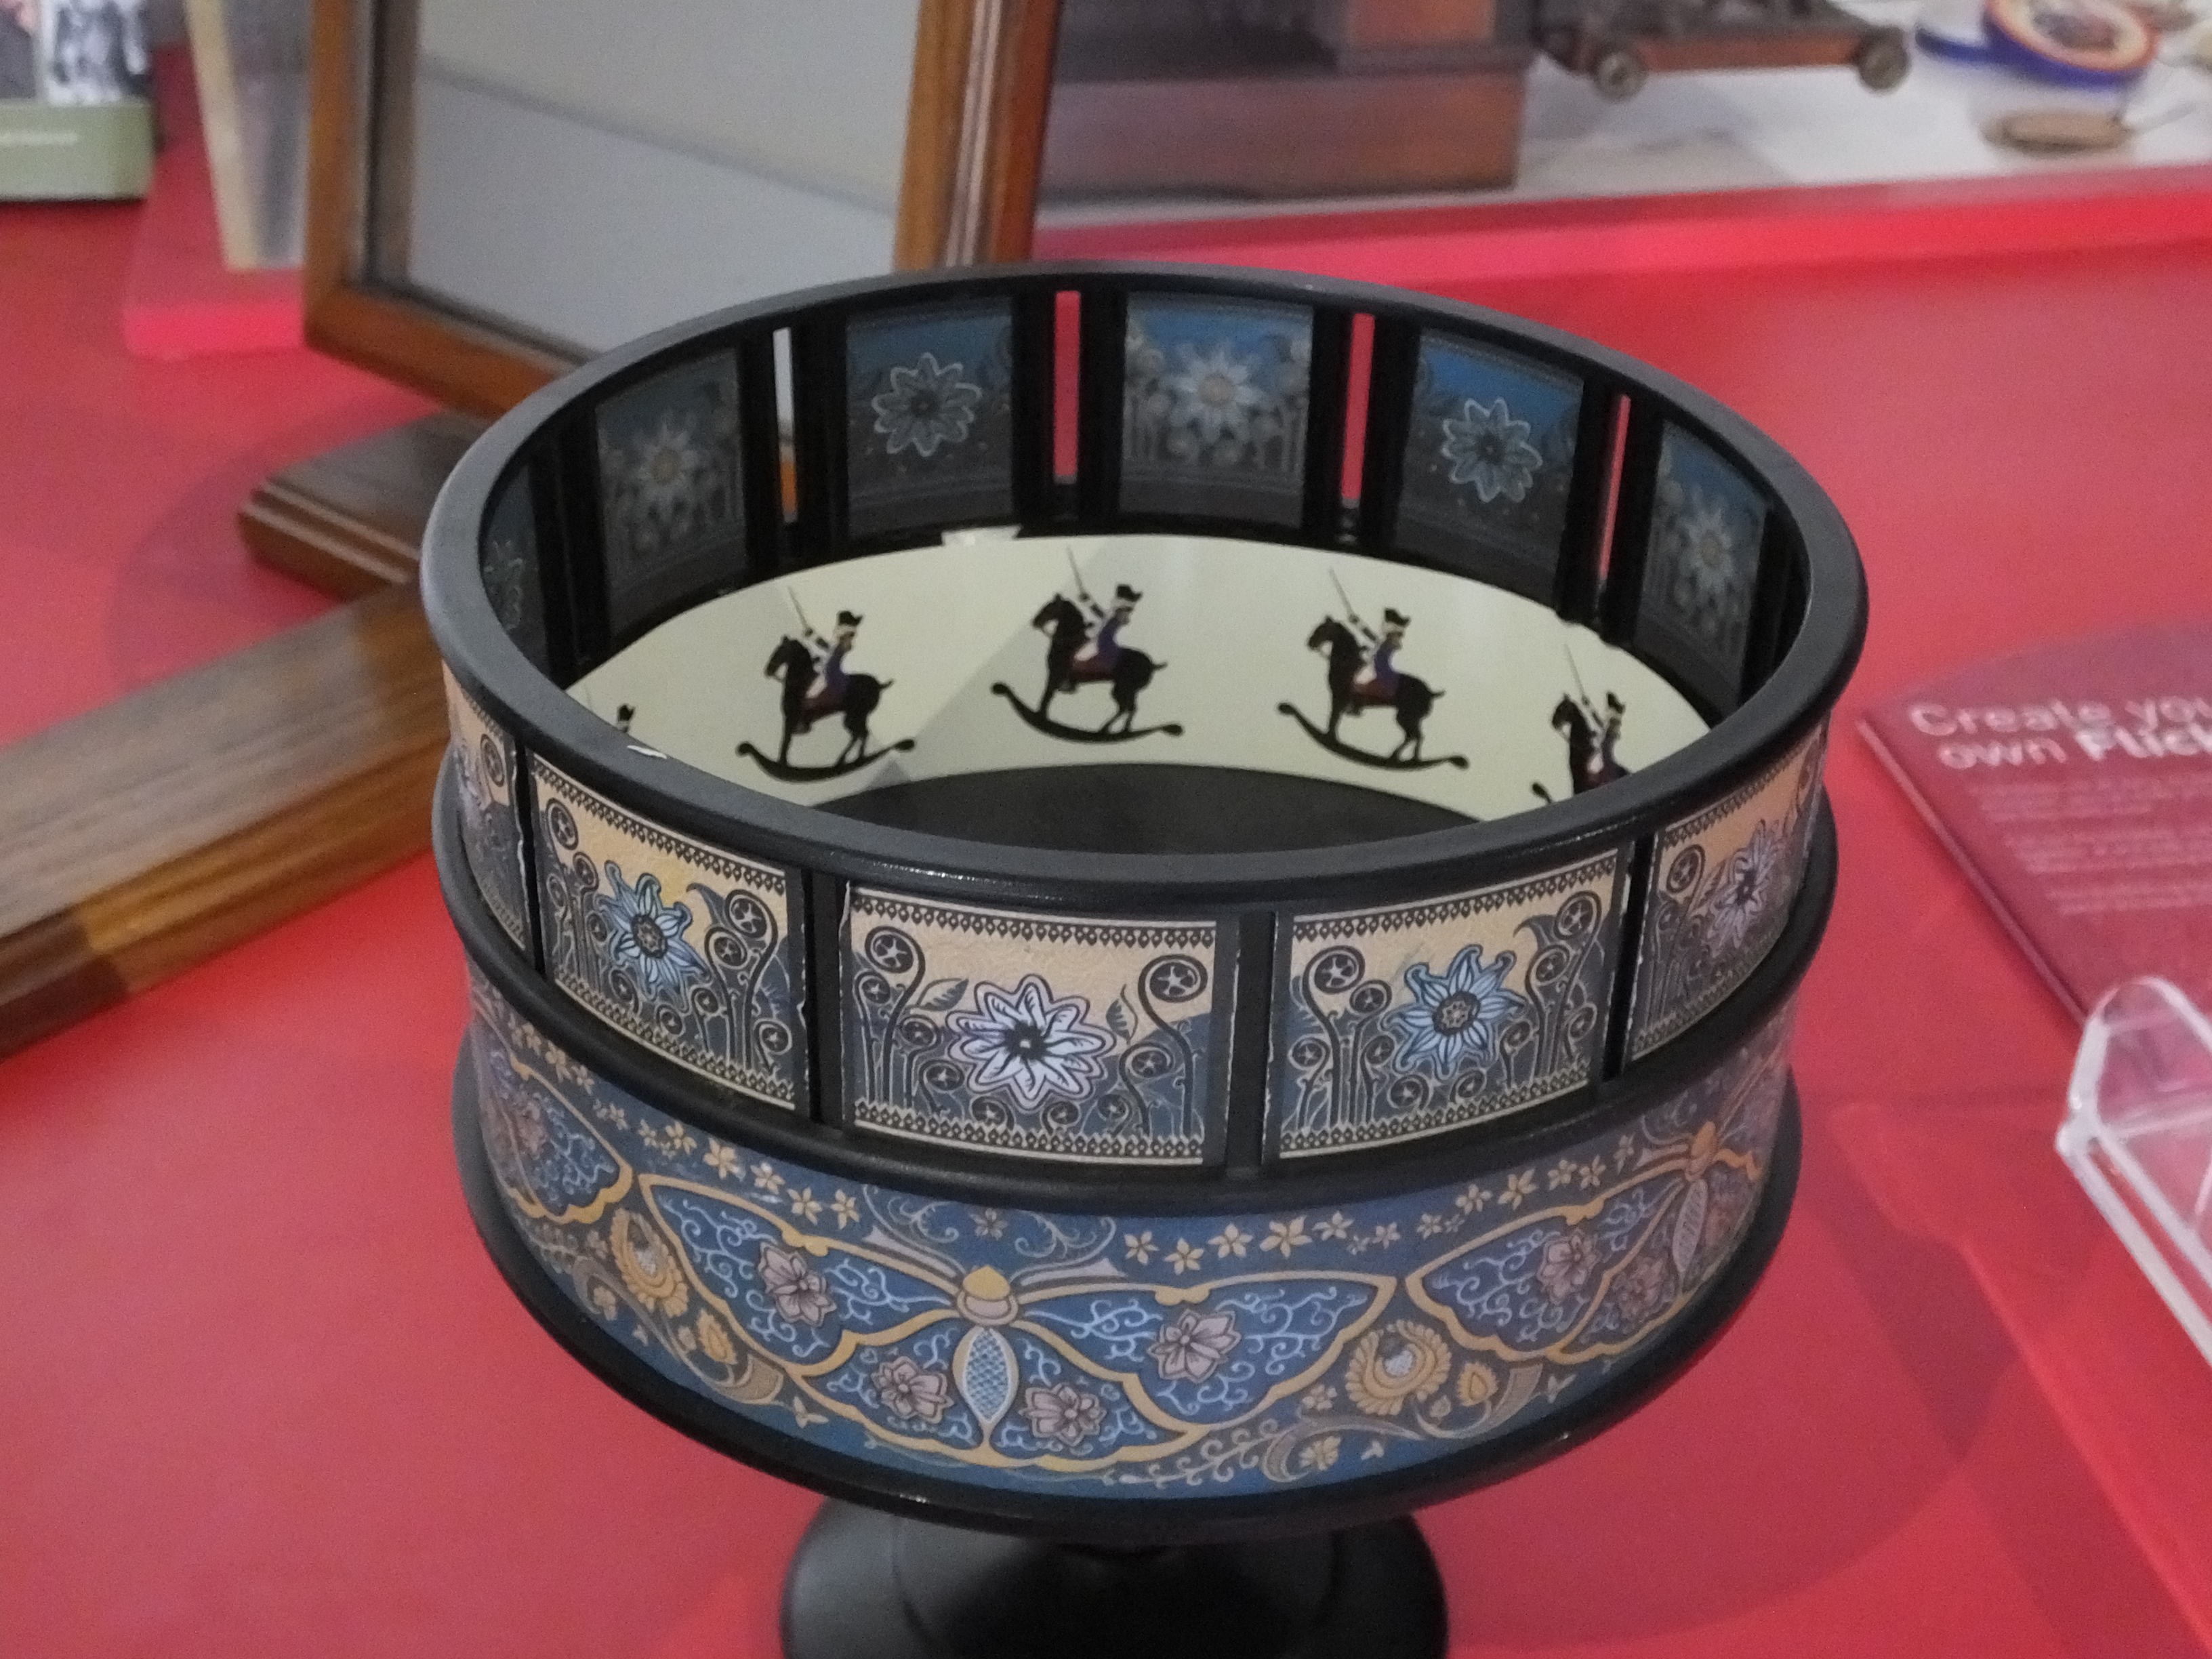
Part 3: Zootrope
A zoetrope (zoh-ah-trohp) comes from the Greek words for “life” and “turn”, and could be translated as “wheel of life”, it is an early animation device. Similar to the phenakistoscope, it is spun to create the animation effect. The difference is it is on the inside of a slotted cylinder as opposed to a disk.
Photograph by Clem Rutter, Rochester, Kent. (www.clemrutter.net). / CC BY-SA
What You Need:
- Paper plate (non glossy) OR heavy cardstock/bristol paper cardboard OR coffee can lid; something sturdy and round for your base.
- Black cardstock/bristol paper (something that’s stiff yet pliable).
- Regular paper (printer or drawing paper)
- Glue
- 2 pencils ; One to draw, the other unused to use as the stick.
- Scissors OR X-actor knife OR box cutter
- Ruler
- Markers/Colored Pencils/Crayons
- A pushpin or thumbtack.
- OPTIONAL: Tailor’s measuring tape
- OPTIONAL: Hot glue gun
Files for Laser Cutter:
Please note this is set to be an 18 inch circumference at 8 frames, you may download the template and edit to suit your frame rate/size.

Some things to note before I begin, I had to use construction paper instead of card stock, meaning it wasn’t as stiff and sturdy and needed extra support, and my paper plate was one of the glossy coated ones, so the glue did not stick well. So you mileage may vary!


I was lucky to have a cover sheet that came with my construction paper to help me determine the circumference of my zoetrope. This may vary depending on what you’re using as a base. You can use scrap paper and then use a flat ruler to find your paper length. Alternatively, you can use a tailor’s measuring tape around the base as well.

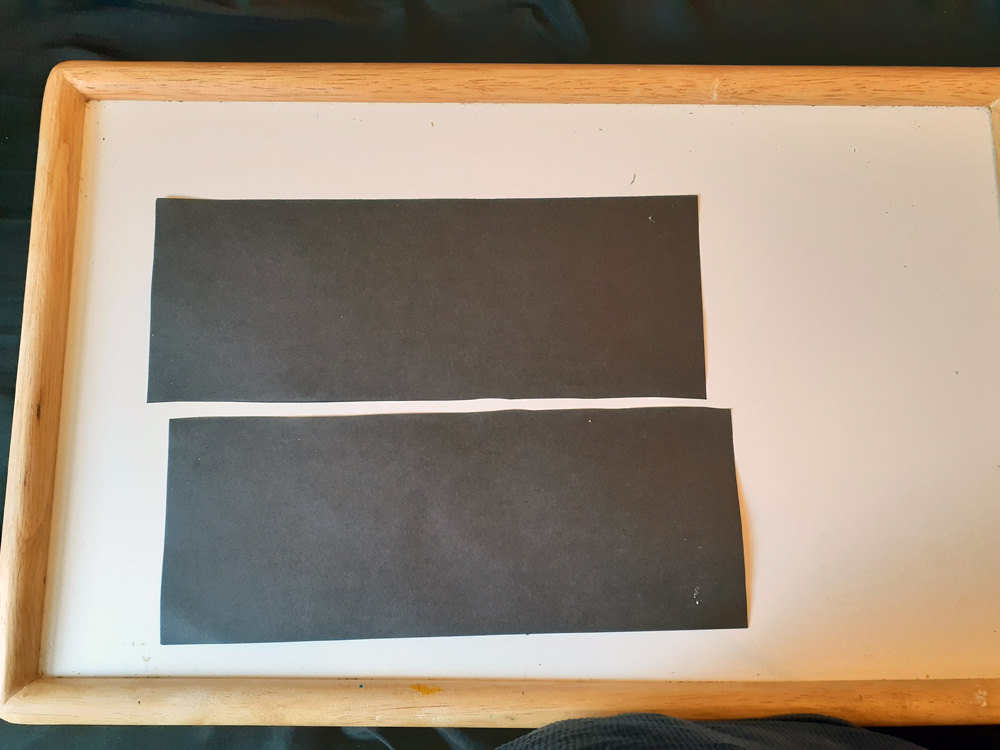

Next, find the center of your black paper, you will be cutting it in half. Then make sure your 2 (or more) pieces match your desired circumference. Be advised: make sure to at least leave 1/4 inches on each end to glue close, and on the edge of any panel you are stitching together.


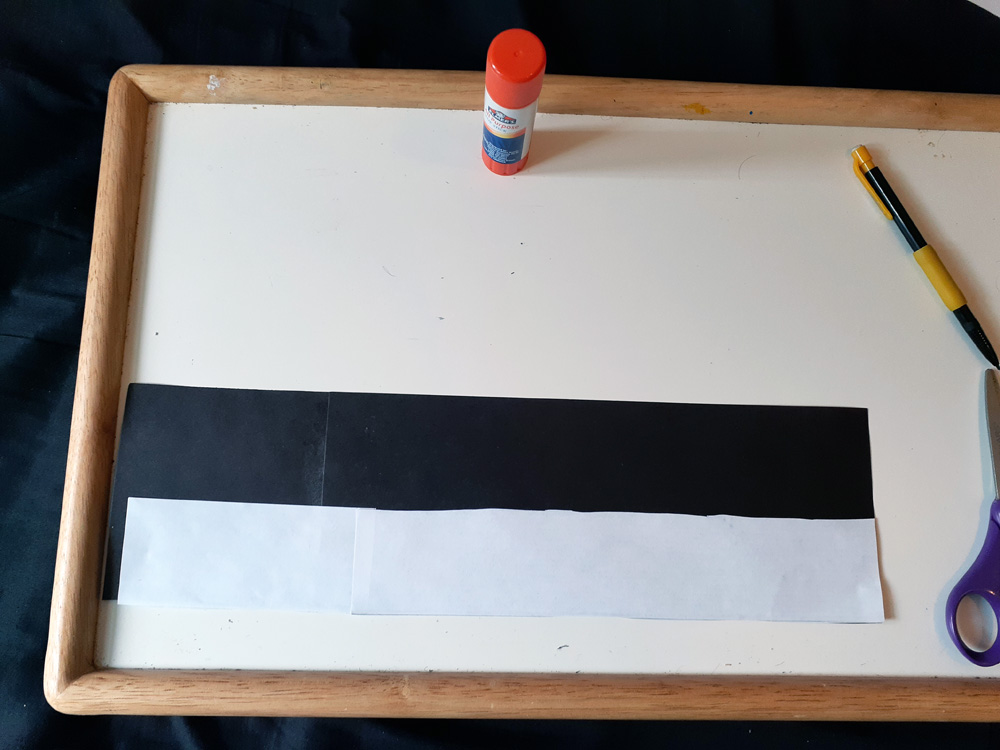
While your glue dries. Repeat this with the white paper. Since this will have to be half of the height of the black paper, 1 sheet should make you 4 strips. Glue and stitch if needed.


Once both strips have dried, glue the white strip to the bottom of the black strip. Wait for it to dry.
Next, divide your paper length (minus 1/4 inch on each end for gluing into your frames.) The more frames, the smaller your space might be. 8-12 frames works best. I am doing another moon cycle, so I’m dividing mine into 8 parts.

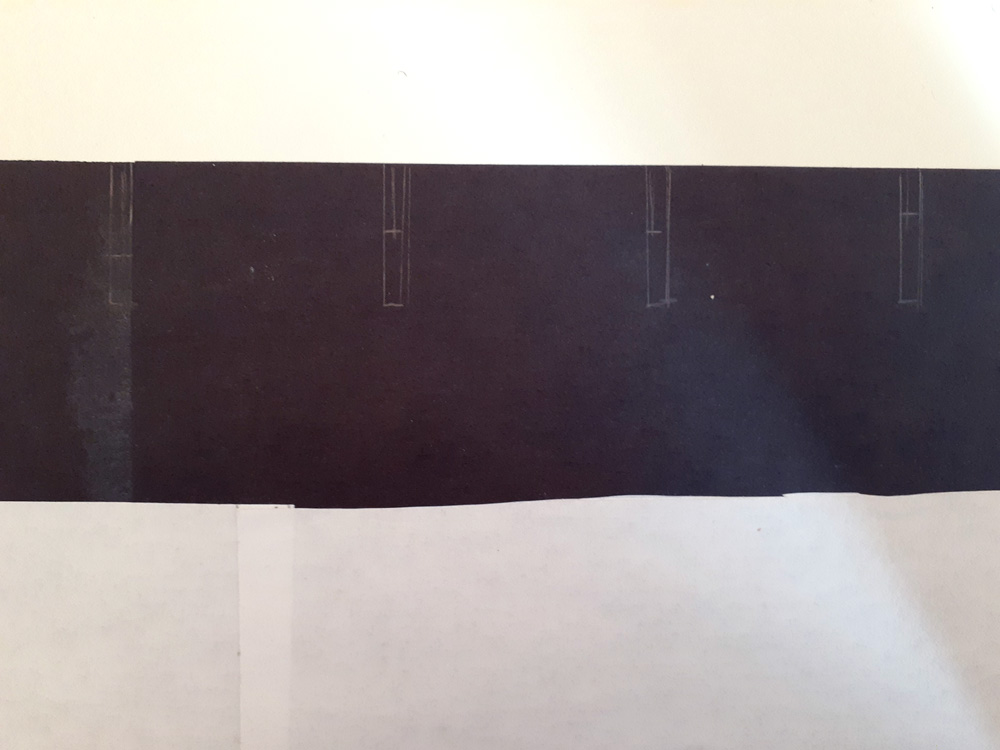
On the borders of your frames, make rectangles about 1-1.5 inches long and 1/8-1/4 in wide. (I did 1 inch long and 1/8 inch wide and found they seemed a little too small).
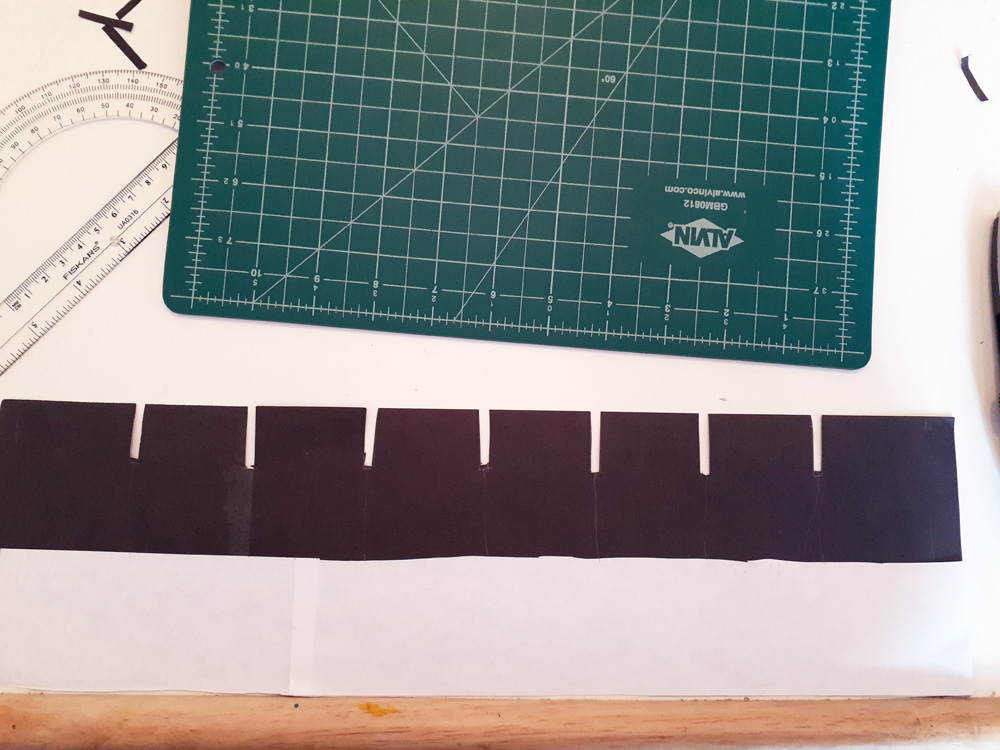
Cut your rectangles out with whatever cutting tool you prefer, I used a box cutter on a cutting mat this time around.

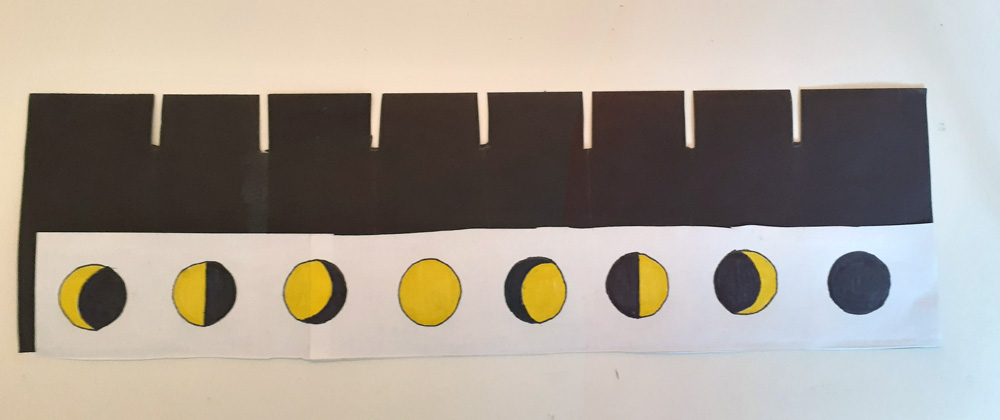
In between the slots will go your frames. Feel free to ink and color to make them stand out more!

Then glue it closed! While it dries, time to prepare the base!


Using a ruler, find the center of your paper plate/base. Stick the pushpin through to make a hole. If need be, use an awl to make the hole instead. Once the zoetrope is dry, glue it to the base. Hot glue definitely would be much better than glue sticks/liquid glue because it adds an extra level of support. (I had to make paper strips and a Bristol paper base to glue onto the glossy paper plate and still had a bit of a wobble).

Using the pushpin, stick it into the center of the pencil eraser, make it snug but not to tight so it can spin.


Like the phenakistoscope, look through the slots as it spins to see the animated effect! Mine had a bit of a wobble, but it happens!
And there you have it! 3 optical illusions!
Show us what you made! Send it to bmcc.makerspace@gmail.com or reach us at bmcc.makerspace on Instagram (or use the the #bmccmakerspace tag) to be highlighted on our page!