Please note: the most recent version of Cura as of writing this guide is Version 4.7. This might be used along older versions with the difference being the UI design and some extra features. It is possible this guide can be used in future version of Cura as well. Please check your software versions and its respective documentation as a precaution.
We will cover this again later in the guide, but please bear in mind the Makerspace prints by time and not volume, meaning many models may not be printable due to their time limit. While the Maximum time is 2 Hours, it may change depending on the availability of the Makerspace staff.
It is suggested you have a mouse available as it makes rotating the view in Cura easier.
Exporting Your 3D Model:
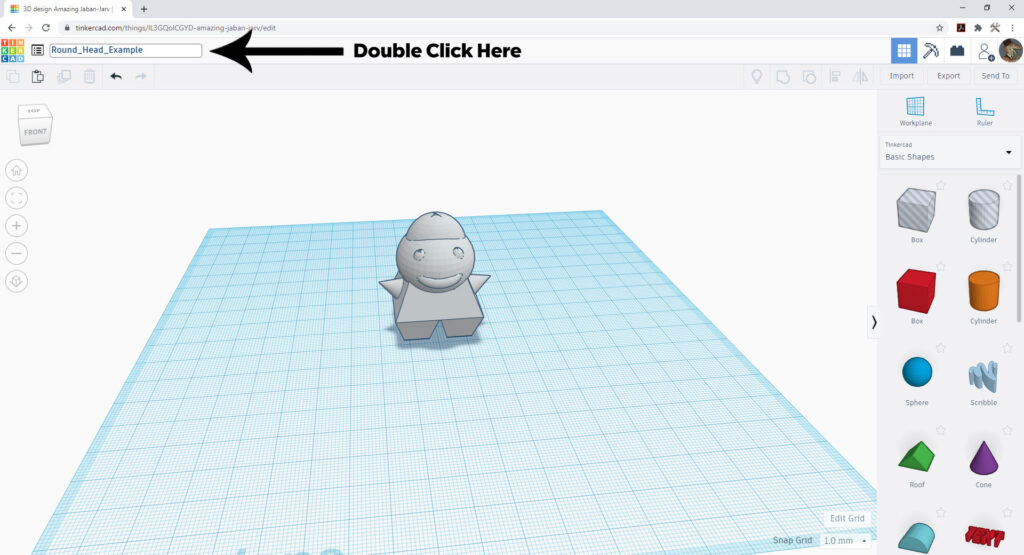
Before you do anything else, RENAME YOUR FILE. While Tinkercad generates a random name it is not helpful for indexing and searching later on. Particularly on a SD card filled with many other similarly named files. This will help you as much as Makerspace staff running the printers.
You can do that by clicking on the name in the UI and filling in your own.
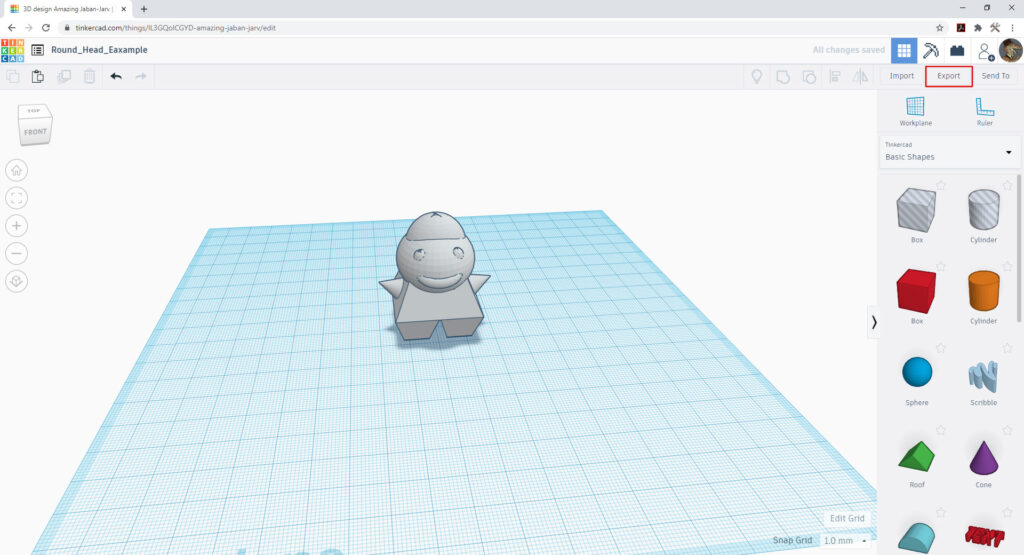
On the Tinkercad browser, please select the Export button on the upper right of the user interface.
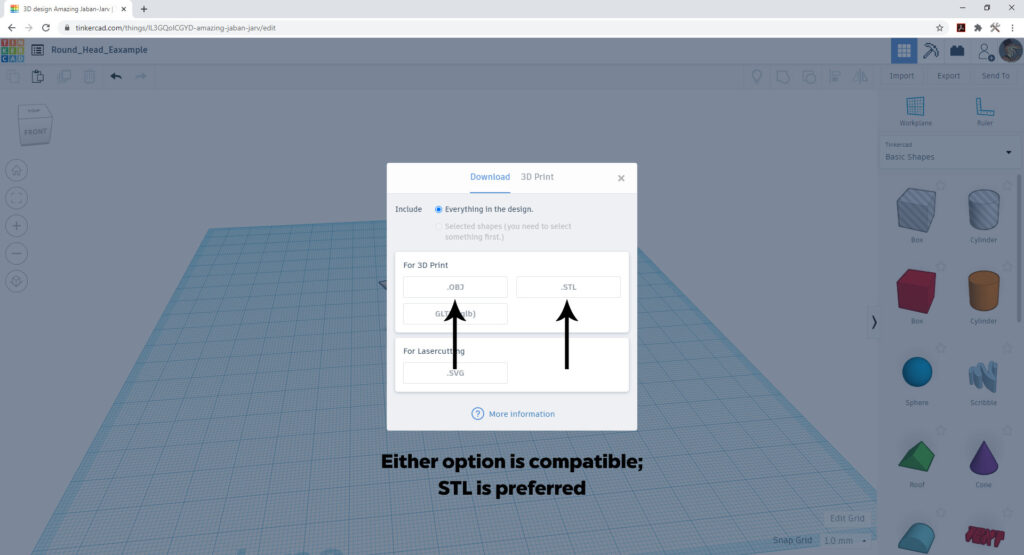
Select .STL (an abbreviation of sterolithography ) or .OBJ (abbreviation for object) . You may wish to download each just in case—file redundancy is always good for troubleshooting!
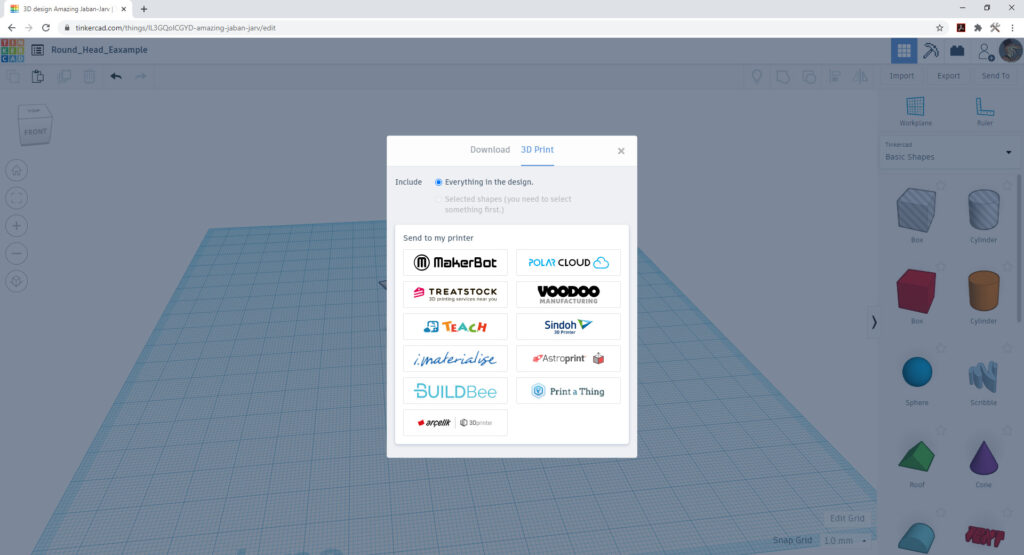
A cool thing to note is you can also send your file directly to one of many On-Demand services as well! While this guide is for printing here in the Makerspace, it’s a nice feature to know.
If you are NOT using Tinkercad, please refer to your program’s respective documentation on exporting STL and OBJ files.
Setting Up Cura:
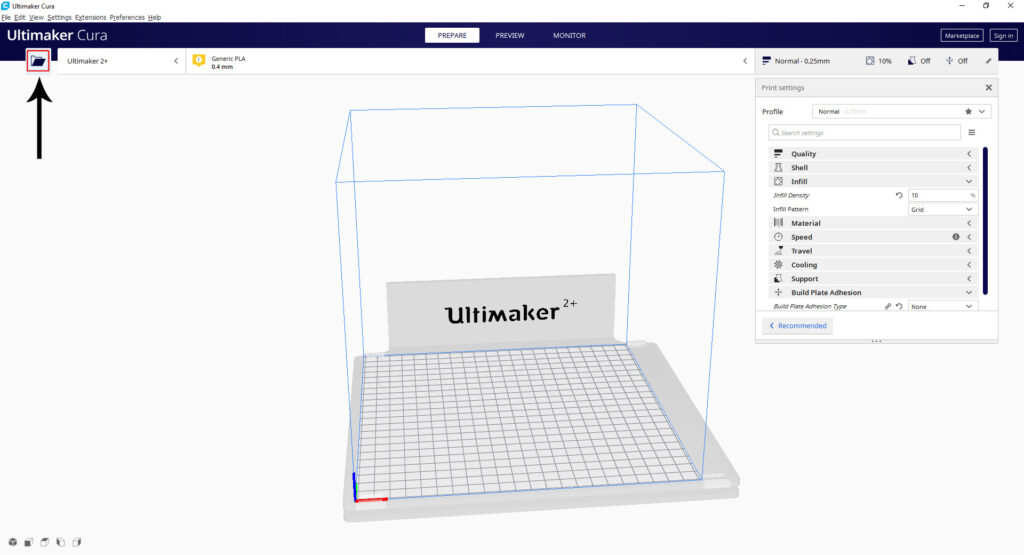
Once you have your file, open Cura. The icon should look like this:

The UI (User Interface) looks like this:
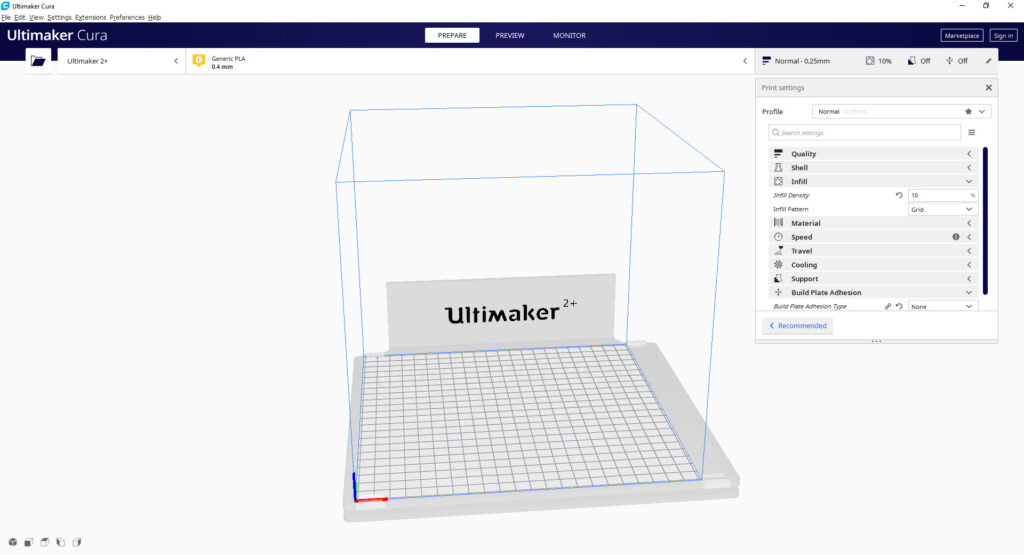
The computers in the Makerspace should have the printer information on it. However if they do not please let the Lab Manager know.
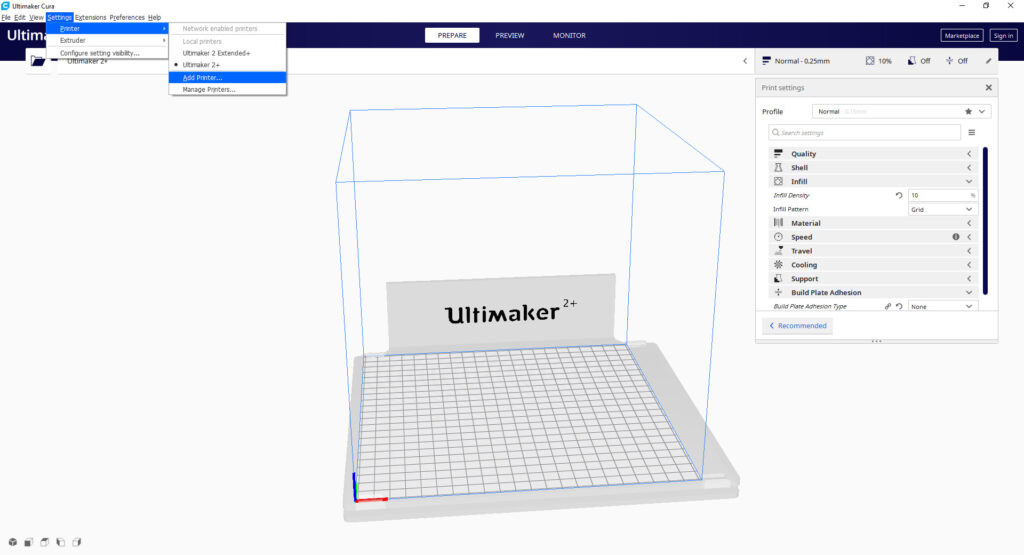
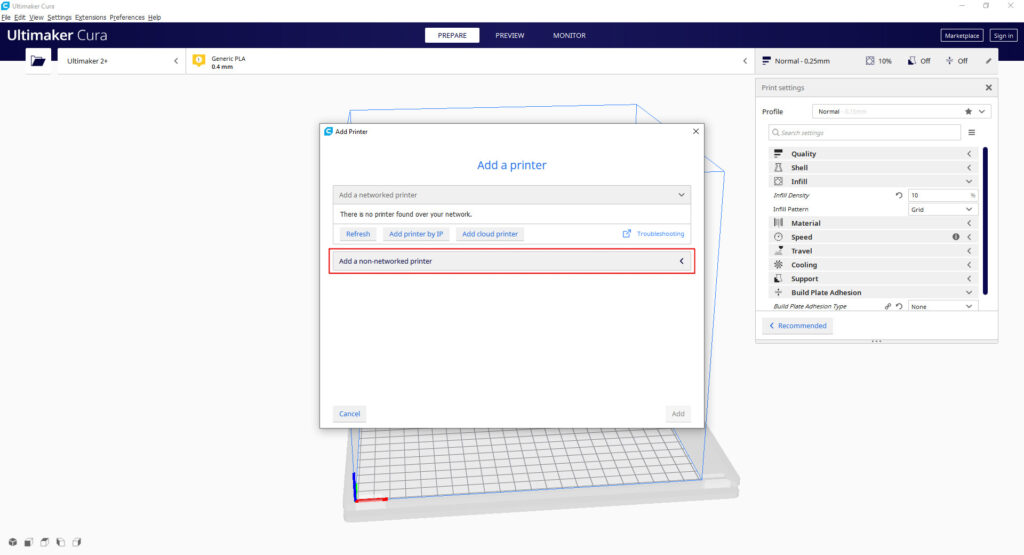
But let’s assume for the moment, you’re working on your own machine at home and you haven’t added your printer information in just yet. Or the Lab Manager just gave you the okay to add a printer. Go to Settings > Printer > Add Printer. Select Add a non-networked printer and choose your printer. Once you’re good, hit Add.
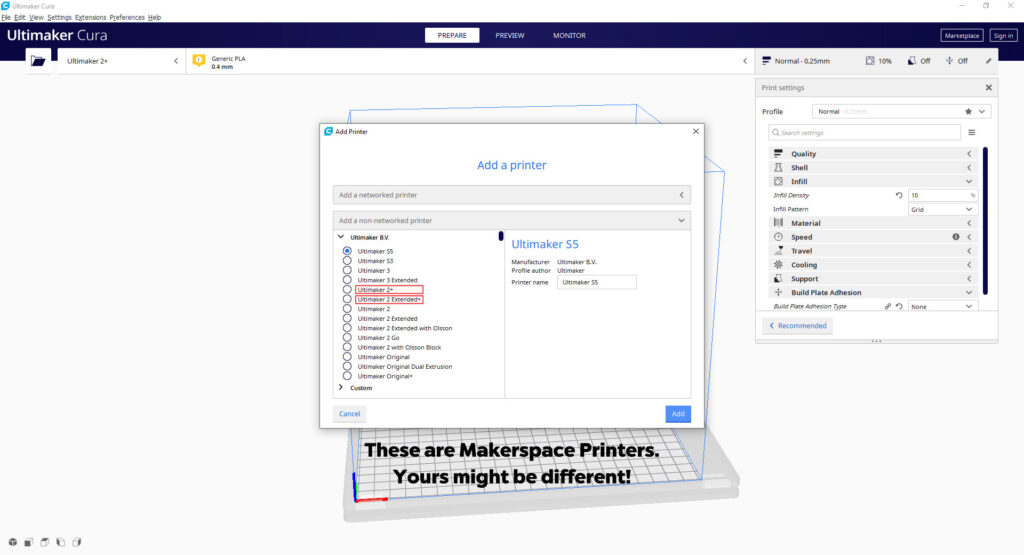
In the Makerspace we have 2 different printers: the Ultimaker 2+ and the Ultimaker 2+ Extended. Make sure to note which one is which when you’ve taken the SD card. (If you have done so already!)
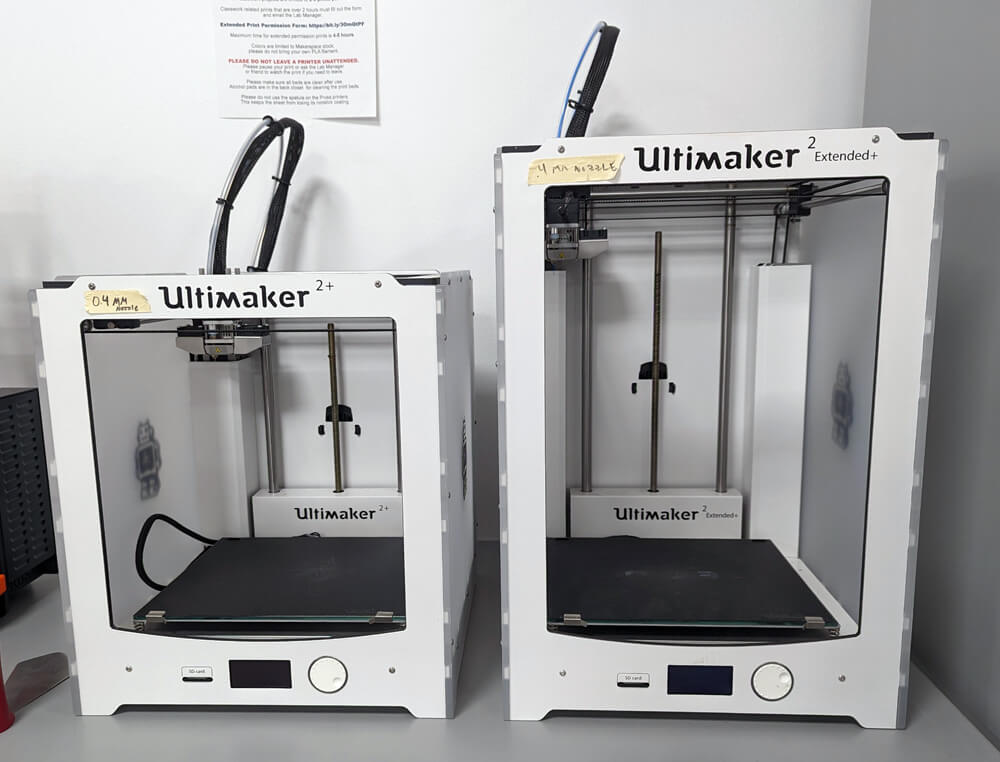
These are what the Ulitmaker printers in the Makerspace look like. The Ultimaker 2+ is shorter, while the Ultimaker 2 Extended + is the taller one.
Once you know which you’ve taken the SD card from, go to the upper left on the UI to select the printer.
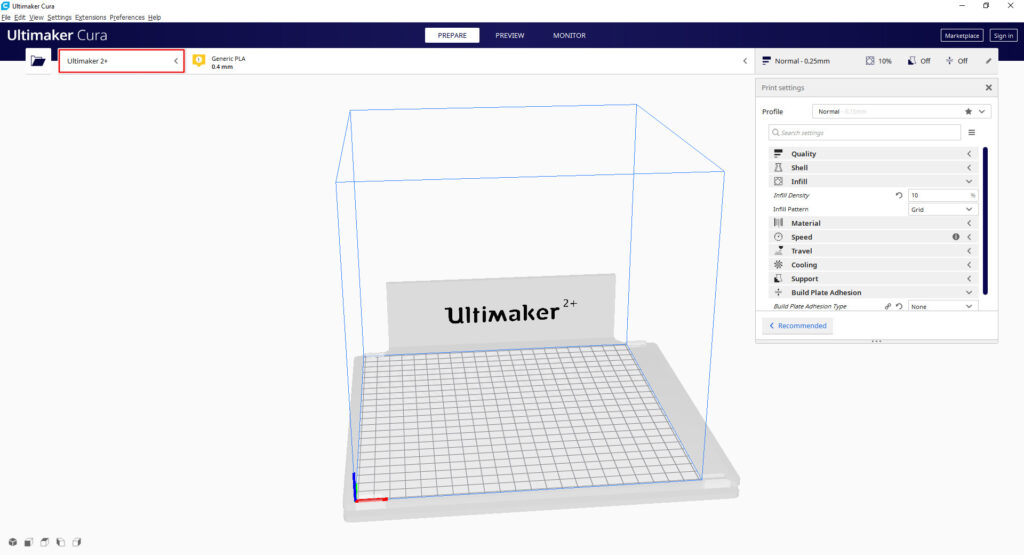
If you’ve haven’t decided on which printer just yet, revisit this part later.
Next, double check your material and nozzle setting.
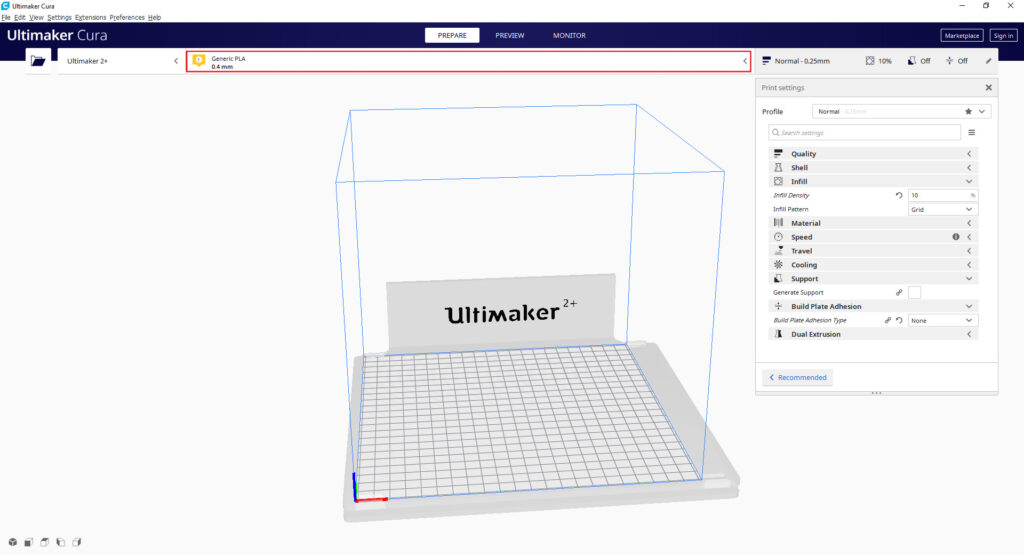
In the Makerspace, we use PLA and our printers use a 0.4 mm nozzle.
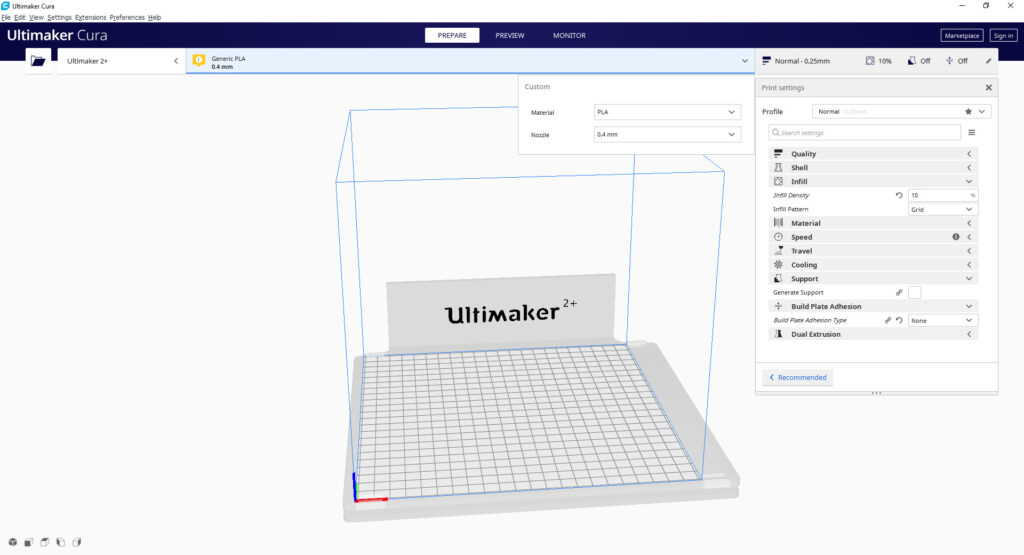
If you are printing at home—simply change your materials or nozzle in their respective dropdown menus.
Importing Your Model:
To open your file in Cura, simply click the button that looks like a folder. You can also go to File > Open Projects or use the keyboard shortcut Cntrl/Cmd + O.
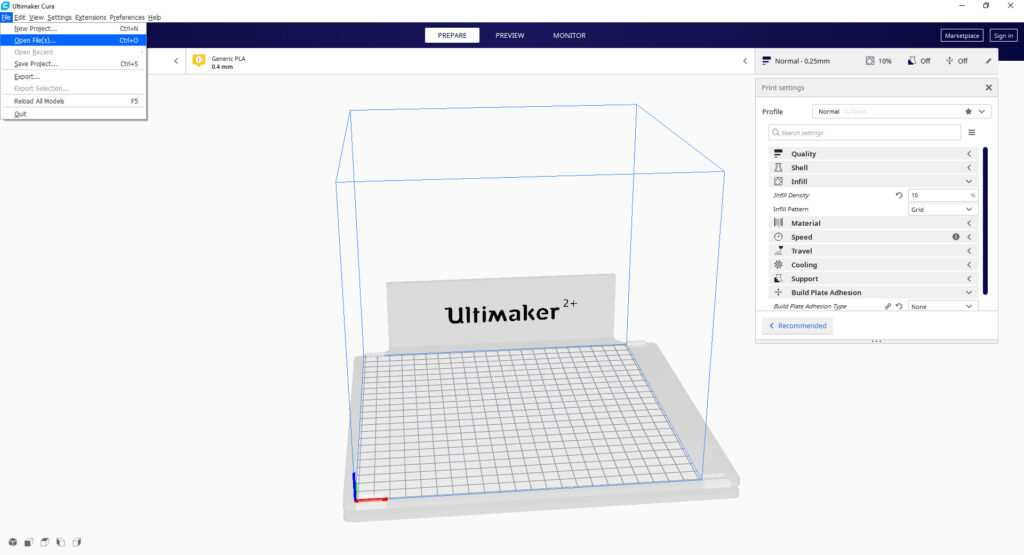
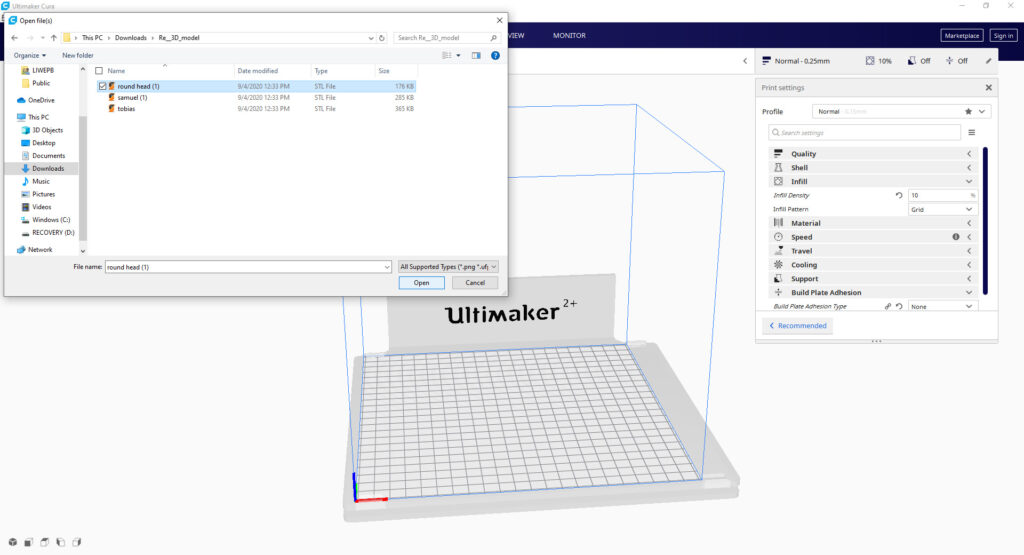
Find where you’ve downloaded your file and select Open.
You make wish to adjust things in Cura. On the bottom left shows your view panel, allowing you to see it from different angles.
On the left are your adjustment settings.
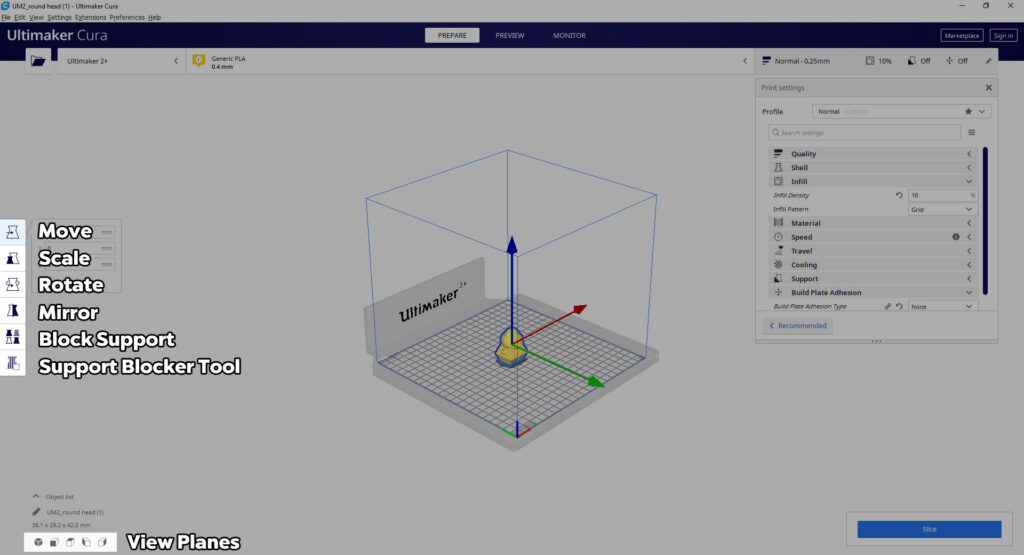
- Move: Moves the model on the plane.
- Scale: Allows you to scale your model up or down. You may need to do this to models in the Makerspace often.
- Rotate: Rotates the model around on the chosen axis.
- Mirror: Mirrors the model on a selected axis.
- Block Support: Allows you to modify the model and possible supports. (We try to print without supports for your ease but you may need them for certain models.)
- Support Blocker Tool: Generates support blocks for your model.
You may not need to use the last two, so don’t feel pressured to remember. If need be, Ultimaker’s support guide will be linked at the bottom of this page for further reading.
Preparing Your Model For Printing:
On the right you see a menu with a many settings. Luckily for you, unless you’re experimenting with your own machine, you don’t have to touch too much. I have on my screen the Makerspace’s defaults.
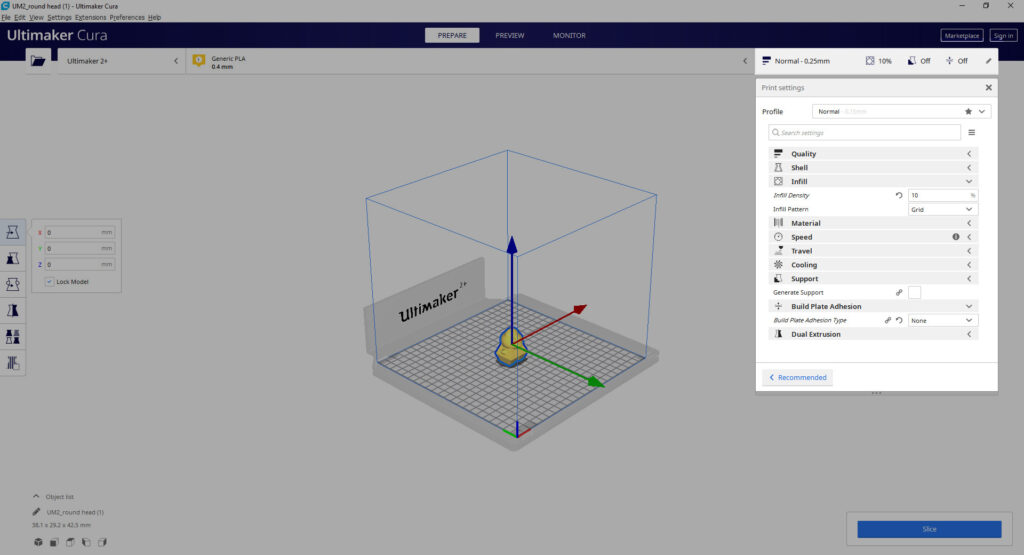
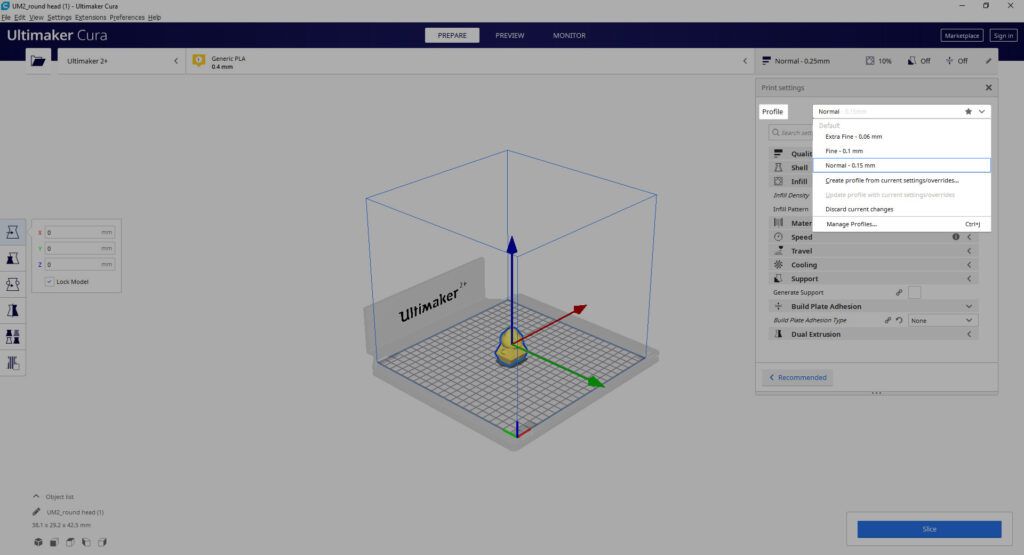
But assuming nothing is set right, here’s how you set it up. Select the dropdown box next to Profile. Select Normal – 0.15 mm.
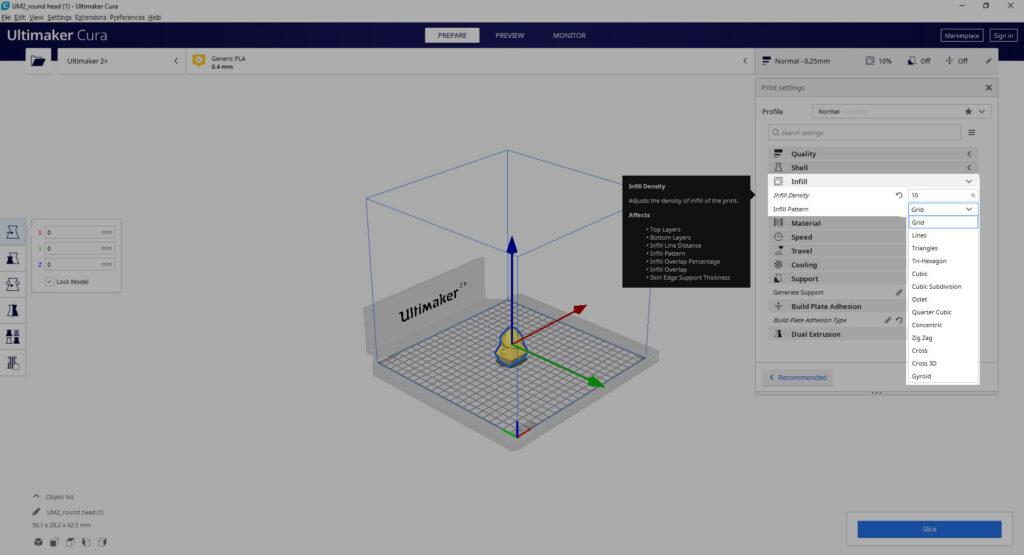
Next go to Infill. Select the percentage of infill you want. The higher the percentage, the more dense the model and the longer this will print. The lower the percentage the more hollow your pieces will be but also may be at risk of certain print flaws due to having no inner support. 10% is the ideal, but we don’t recommend going any less than 5% or more than 20%.
You may even change the infill type, but we recommend keeping it as Grid as it is the most stable. But if you wish to experiment with other infill types, we’re not against it!
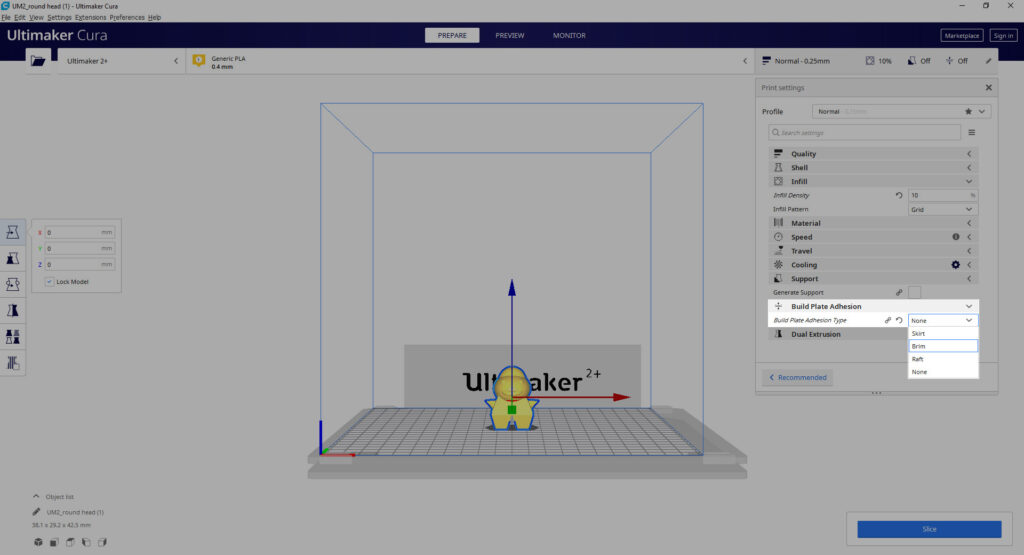
Supports and Build Adhesion are optional for people—it does help print certain models better, but also adds time to the print. You will also need to remove the supports and sand your model as well. If you need to have supports, select the Generate Support checkbox to make them.
If you need some additional adhesion the build plate, select Brim. But the Ultimakers have printed decently without them. You will need to remove and sand your print with a brim, though.
When you’re all good to go for 3D printing hit the blue Slice button on the bottom right. This will give you an estimated print time. Be aware, raising the infill percentage or adding supports/brims adds more time. While it’s mostly exact, we suggest mentally tacking on 5-10 minutes just in case.
As stated above, the Makerspace prints by time, not volume, so be mindful that our current limit is 2 Hours. Please also consider the time needed to clean and the printer to heat up. (So we may have to print it the next day instead.)
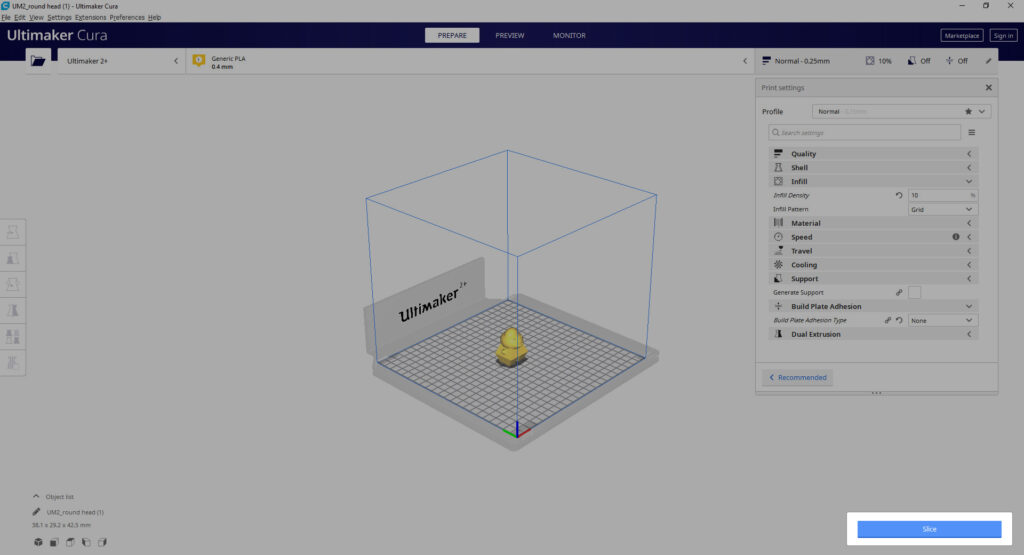
In my example, I do not have an SD card, so it is prompting me to save the gcode onto my computer to move onto the SD card later. You may wish to do so, saving it with your model just in case. When you’ve inserted the SD card into your machine, you can drag and drop it into it.
If you wish to save directly to the SD card in Cura, you may need to reslice to save it directly onto the SD card. (It will be read as Removable Storage in the UI).
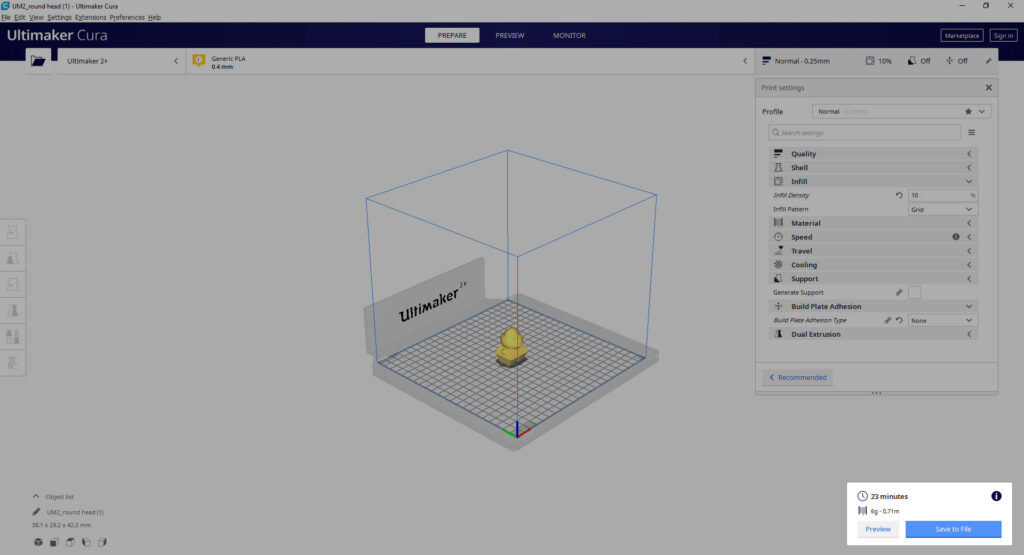
Once it is saved, safely remove your SD Card and insert it back into the printer.
Preparing the 3d Printer for Printing:
Note: As of this writing, we do not have access to the physical space and cannot take images as needed. This will eventually be updated.
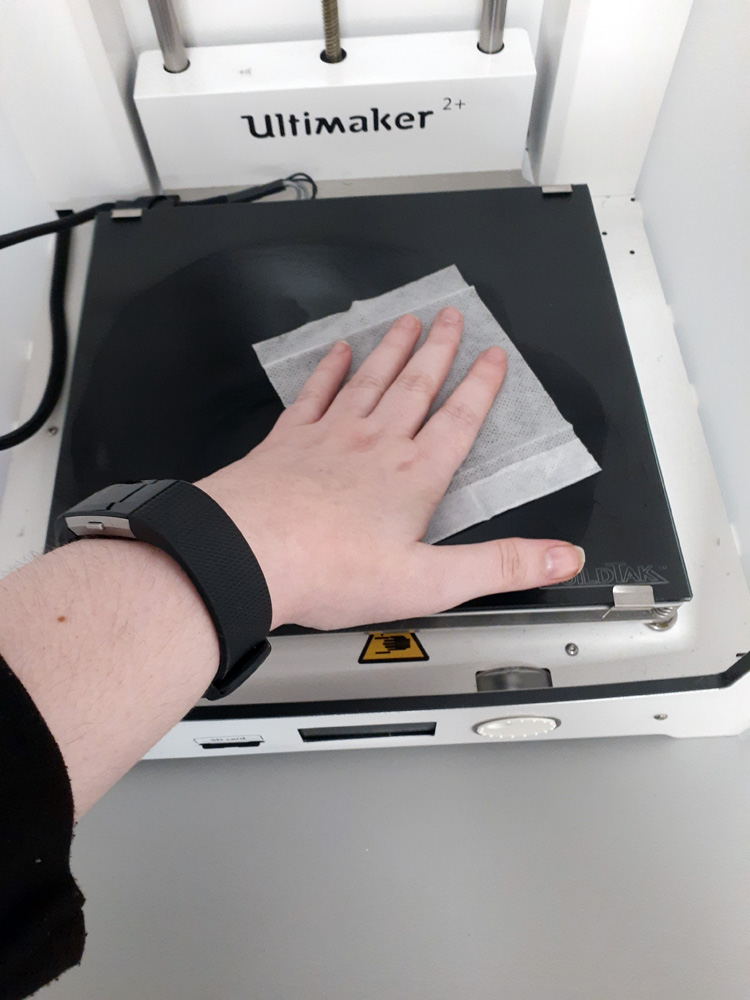
Please use the alcohol prep wipes stored in the back closet to wipe down the surface of the build plate. This will help remove dust or any residue from the previous print.
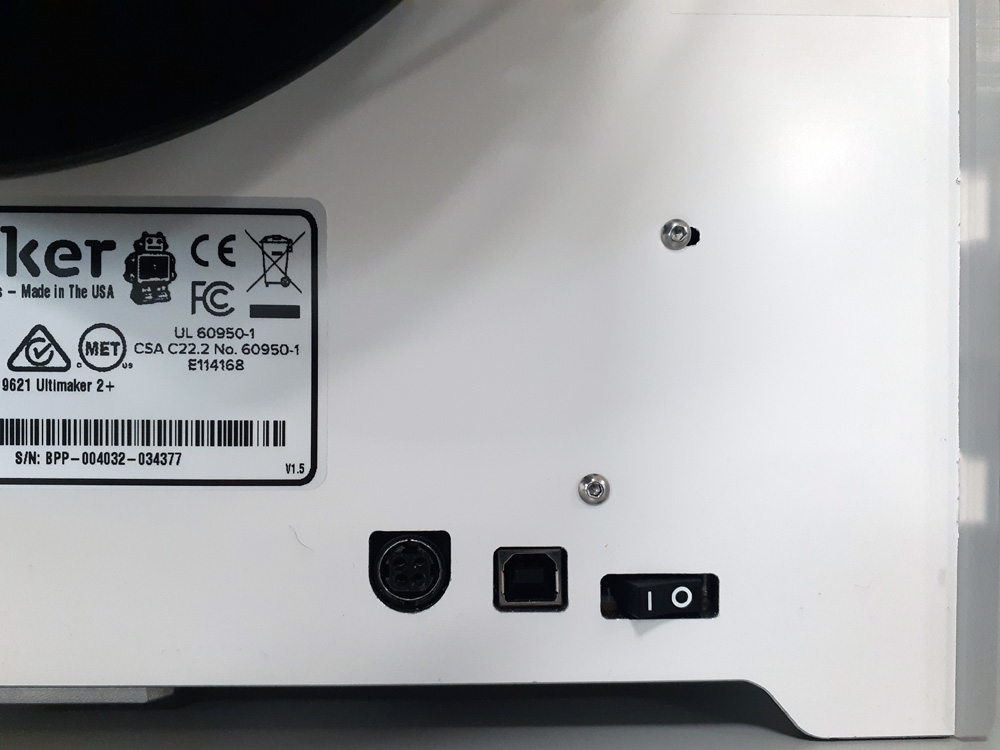
Insert the SD card back into the slot and turn on the machine. There is button on the back of the printer.
Using the wheel, to navigate, select Print by clicking the wheel like a button.
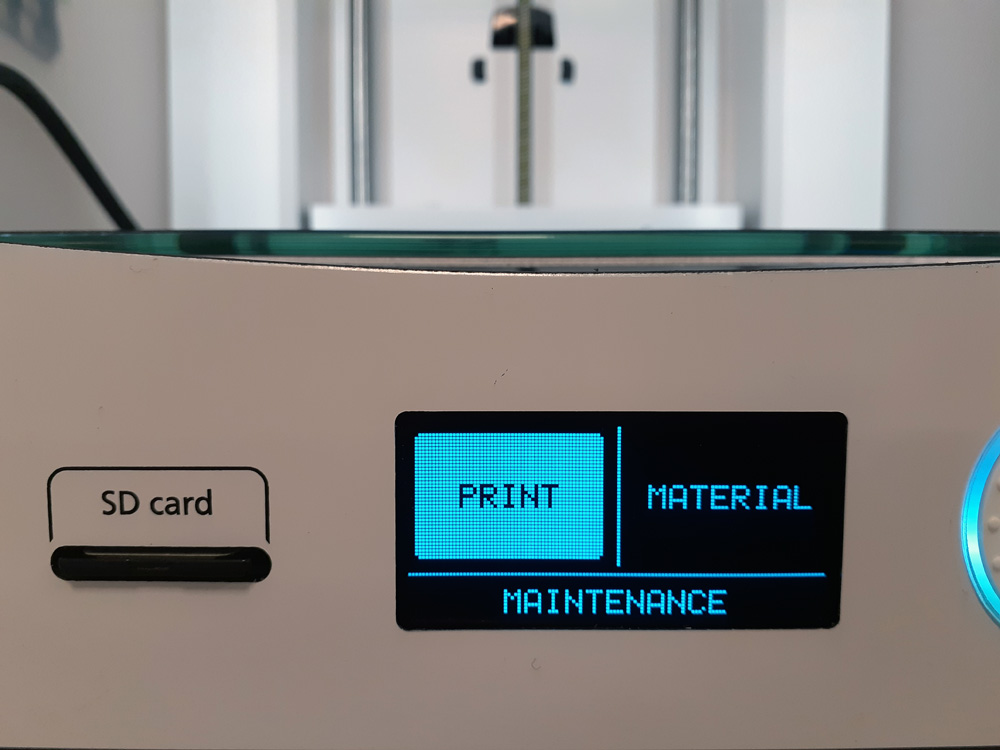
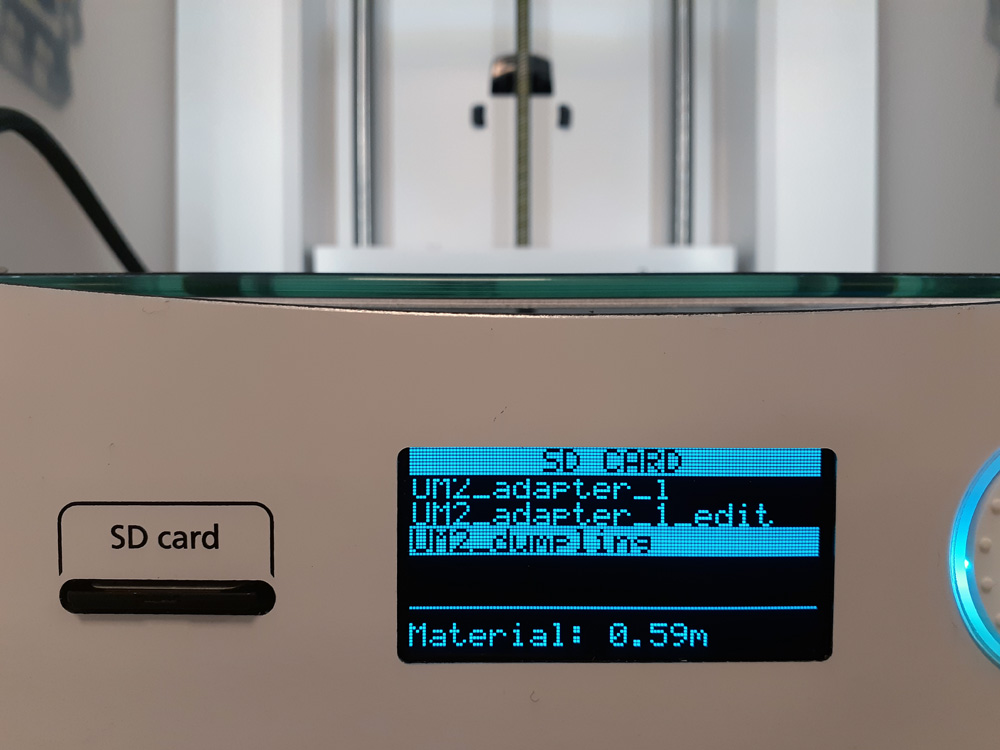
Then use the wheel to find your file. (Be sure to remember what it was called! This is why we suggest you rename your files made in Tinkercad.) Click the file name and printer will start the process of heating up the bed and nozzle.
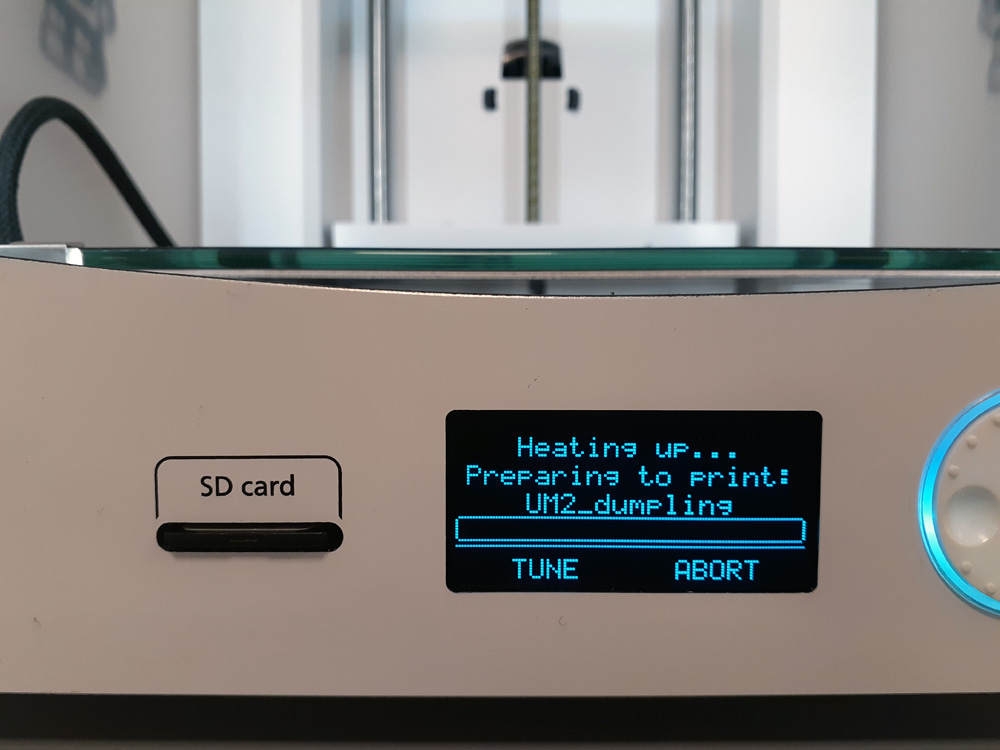
Errors can happen at any time. Please watch your print! If you need to step away, get a friend or the Lab Manager to watch over it.
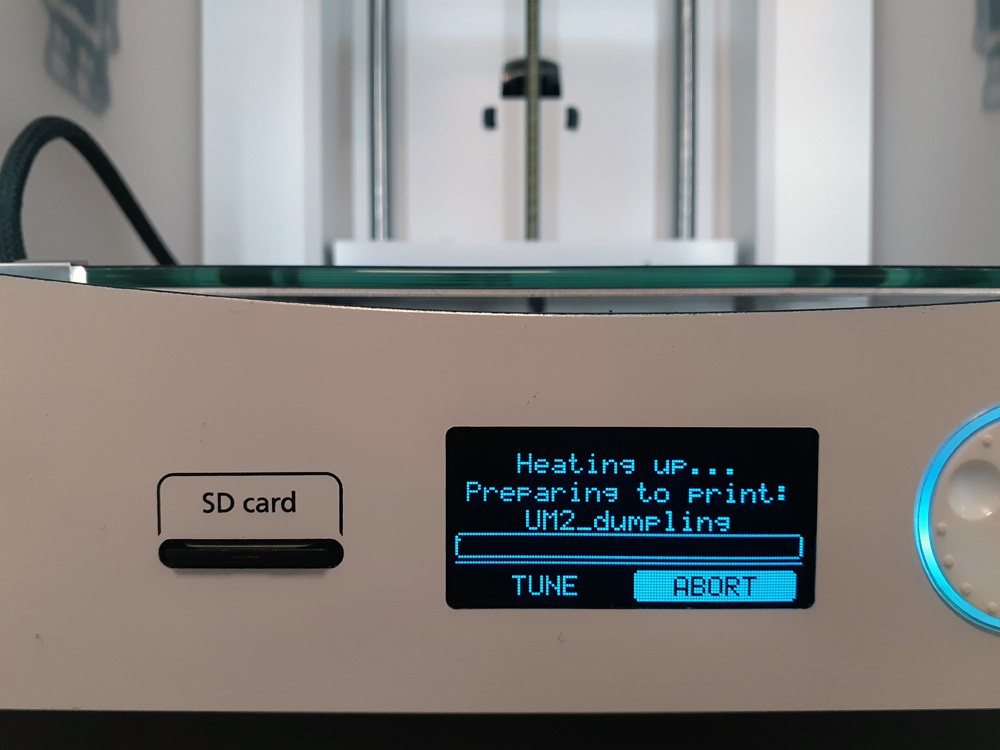
If you ever need to stop it, roll the wheel to Abort and in the next dialog option, select Yes to stop your print.
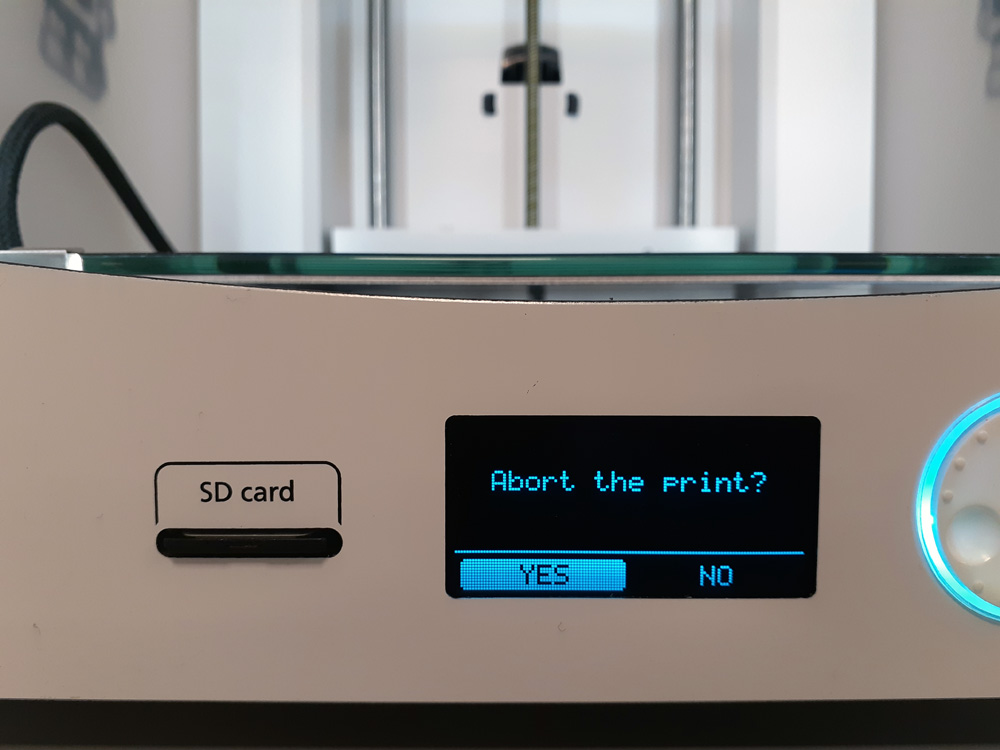
When it is finished printing or aborted the print, wait a few minutes for the print to cool. Using the metal spatula (also stored in the back closet) remove the 3D print from the print bed. Wipe down the bed again with alcohol.
And now you have a 3D print! Hooray!
