
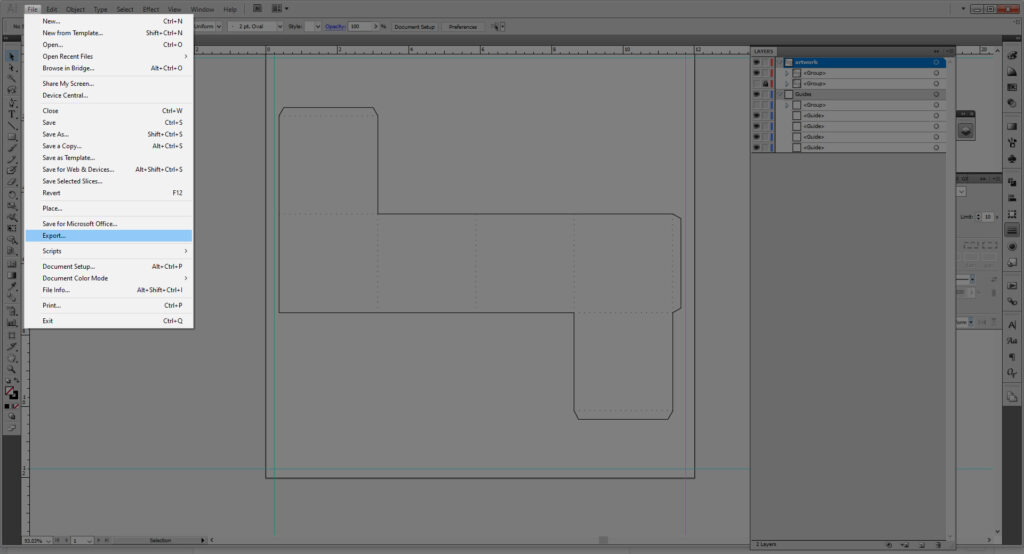
This guide will walk you through the process of creating a two dimensional box template that can be printed out and cut, or cut and scored using a laser cutter or vinyl cutter. It is Illustrator focused, however you may be able to try to use it alongside any other vector editing software. The version of Illustrator used in this guide is an older version, but all of the options are available in the more recent versions (CC 2020 as of this writing).
You can also use parts of this guide to make your own boxes without Illustrator. It is a matter of knowing your measurements and translating them onto your material with a pencil and ruler.
Tools in Illustrator Covered:
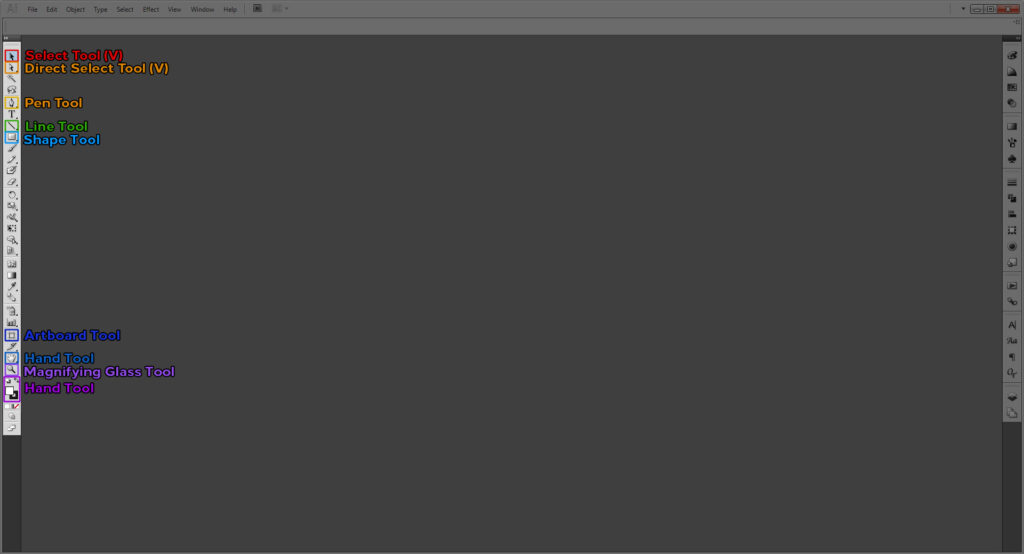
- Select Tool (V) is self-explanatory. It selects items, and if grouped, will select the whole group
- Direct Select Tool (A) selects only the item you click on.
- Pen Tool (P) is nice to know for making certain shapes that cannot be made with the shape tool. You can also add and remove anchor points with the other tools in the panel.
- Line Segment Tool (\) generates straight lines.
- Shape Tool draws shapes. Quick Command M for rectangles and L for circles. Holding down the Shape tool in your toolbar will open up more options for other shapes.
- Artboard Tool (Shift + O) resizes your current artboard. Good to know if you started off in one size and need to output in another (particularly since the vinyl and laser cutter use different dimension artboards…)
- Hand Tool (H) allows you to move around the artboard without disturbing your artwork when zoomed in at higher levels.
- Magnifying Glass Tool (Z) helps you zoom in/out of the image, useful with working on particular details.
- Stroke and Fill (X) allows you to make your shapes filled in solid or just remain outlines, or both. You will need to physically clock on each to set the color. Using D resets your colors to the default white fill and black stroke.
Panels in Illustrator Covered:
If you cannot find these in your workspace go to Window on the top of your main menu. Select the panels as needed.
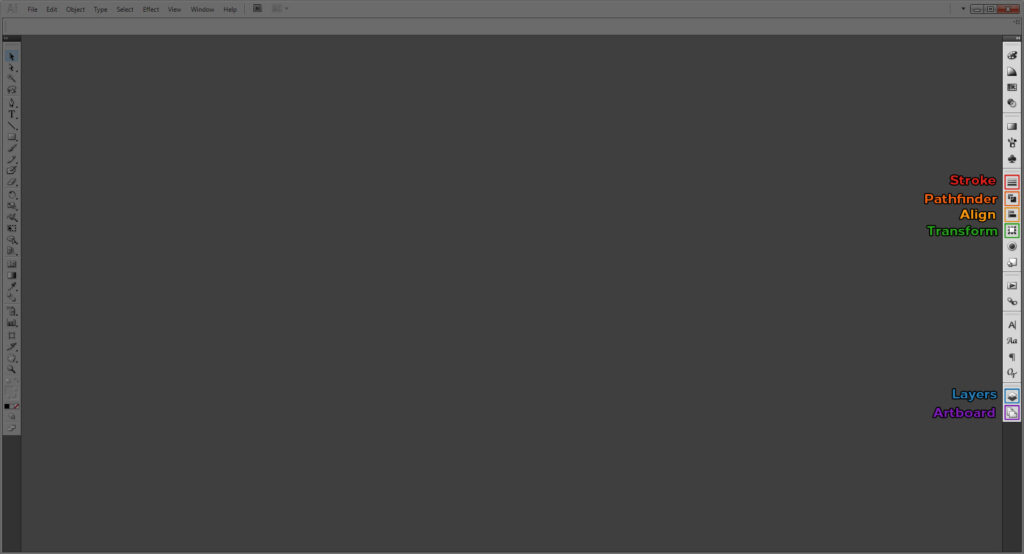
- Stroke allows you to change the appearance of your stroke, its thickness, or to make it a dotted line
- Pathfinder merges multiple shapes together in different ways.
- Align helps you center or stagger shapes relative to your artboard.
- Transform allows you to change the size of your shapes.
- Layers show you every path, shape, and type object you’ve made. You can create new layers, or organize pieces using many different layers, or groups within said layers in this panel.
- Artboards make multiple artboard in the document, meaning you can export it as a multi page document. great if you’re printing for a large surface and limited to the 8.5×11 of a printer sheet.
Windows in Illustrator Covered:
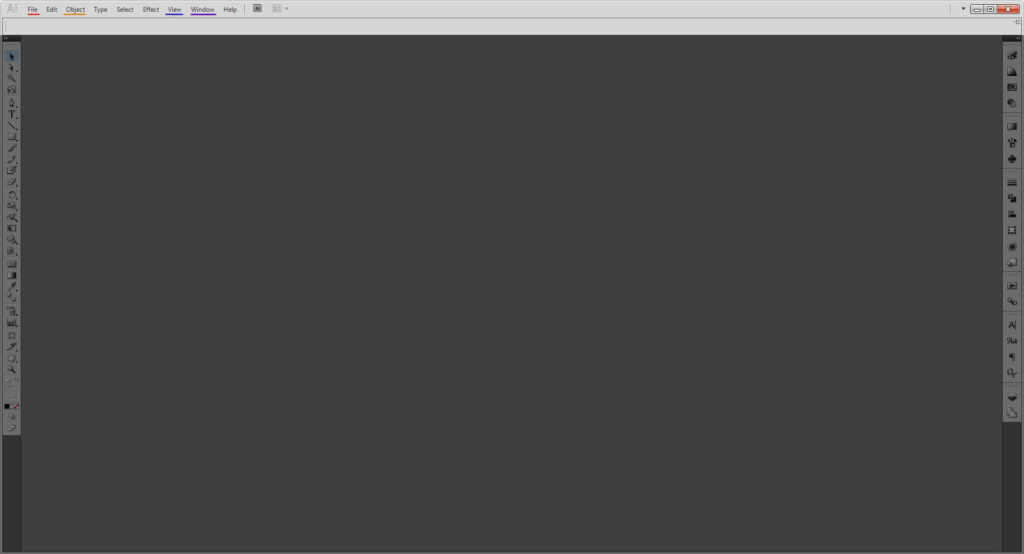
- File is where you check your color mode, or output settings.
- Object allows you to further edit, group, or expand your shapes (important for laser cutting prep)
- View allows you to make, show, or hide guides and grids, or change your preview options.
- Window is where you can access all your panels if they aren’t on your artboard or you accidentally close them.
Shortcuts to Know:
- Ctrl/Cmd + A selects everything
- Shift + Ctrl/Cmd + V pastes an object in place relative to where it was on the previous space; great if you’re moving it to a new file/artboard.
- Ctrl/Cmd + G groups selected items into groups
- Shift + Ctrl/Cmd + G ungroups the group selected
- Ctrl/Cmd + R opens up the rulers on the artboard, allowing you to easily make guides
Creating a Box:
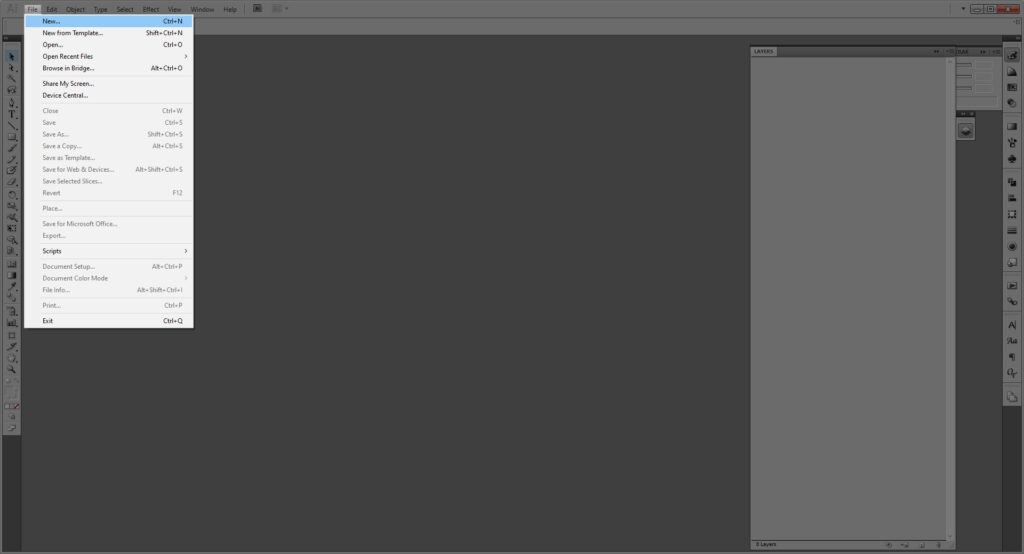
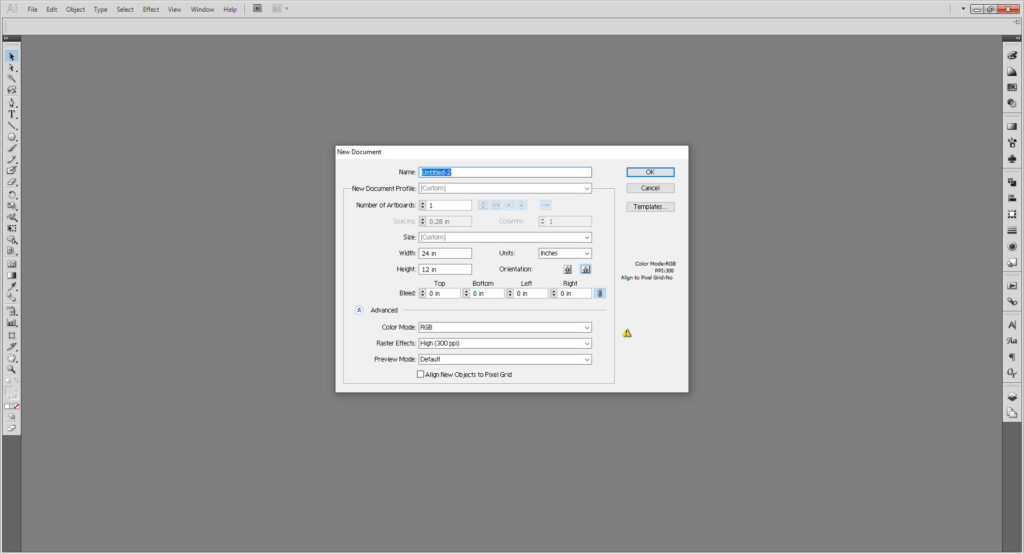
Open up Illustrator and make a new file. Go to File > New or use the shortcut Cntrl/Cmd + N.
Now, set up the artboard in your new file. It is important to know what your dimensions are. For the laser cutter, you want 12 by 24 inches, for the vinyl cutter 12 by 12 inches. If you plan on printing it out, you should know the limits of your paper dimensions– Letter is 8.5 by 11 inches, Legal is 8.5 by 14 inches, Tabloid 11 by 17 inches and so on…
For my box, I will be setting up my artboard for the laser cutter, so I will put 12 and 24 in their respective boxes.
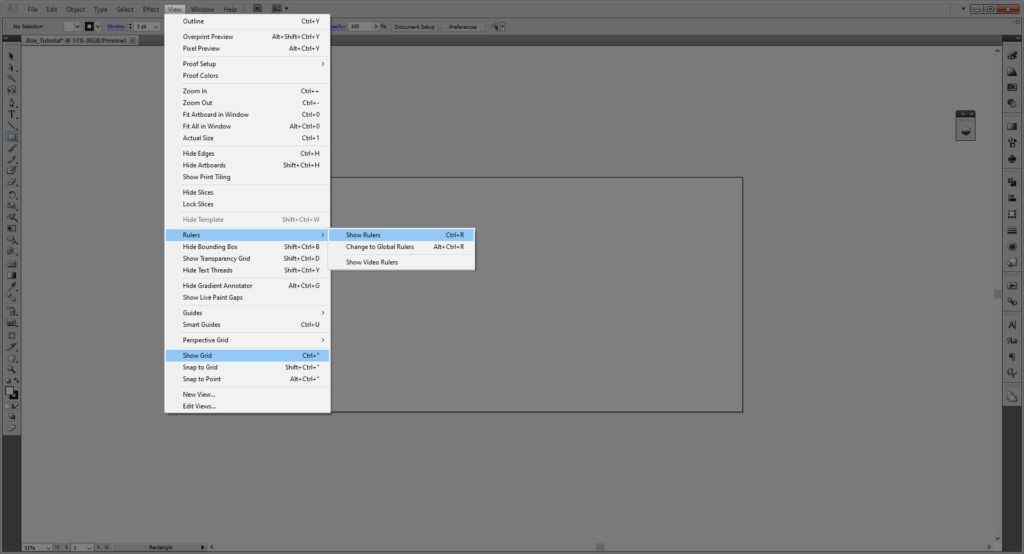
Next, set up your rulers for guides. You can use the shortcut Cntrl/Cmd + R or go to View > Rulers > Show Rulers. Some people might work better with a grid guide, so you can either use the Cntrl/Cmd + “ or go to View > Show Grid.
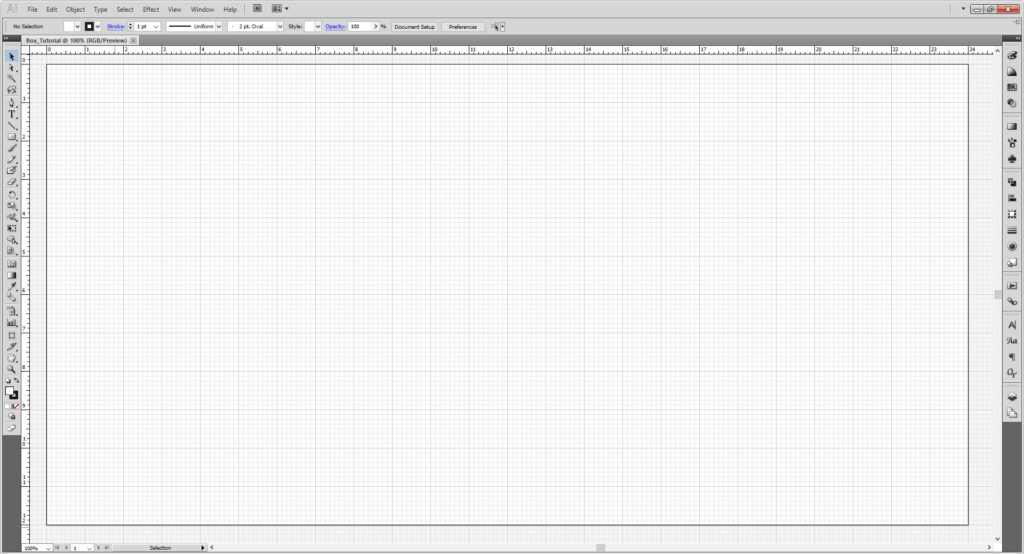
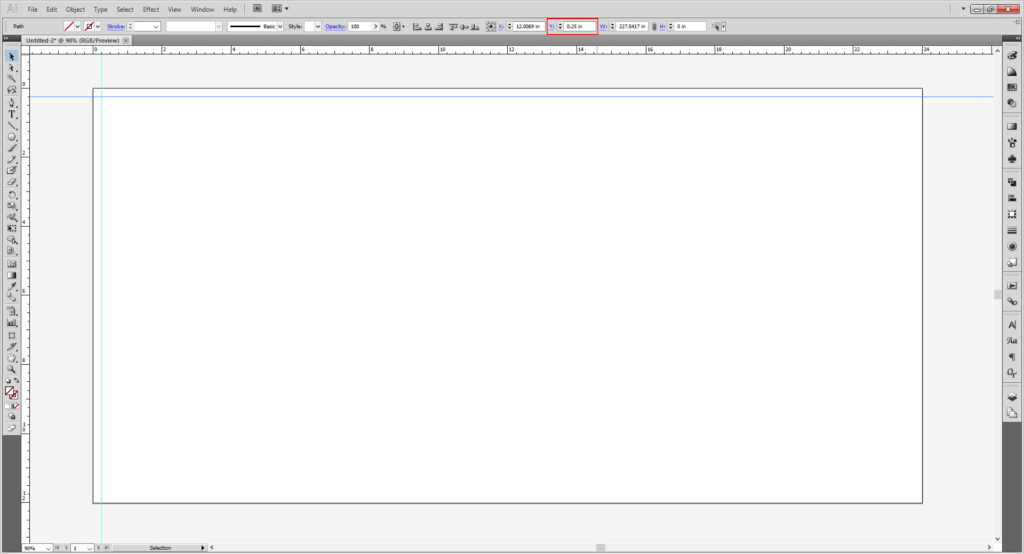
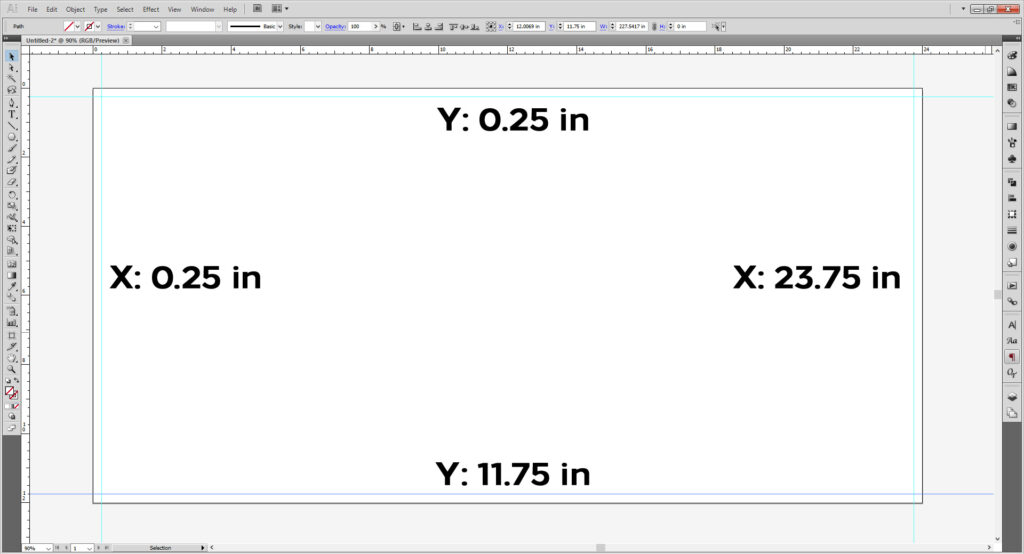
Creating a safety area is also a good idea, either for cutting on the laser or vinyl cutter, or printing. That way you know there’s some space along the edge of your material. Dragging from the ruler on the left creates vertical guides, and dragging from the top creates horizontal guides.
Take your guides and make sure they create a space of 0.25 inches. Using the dialog boxes on the top of the user interface you can position them to an exact measurement. If you are going along with me, the Y (vertical) is set at 0.25 and 23.75 inches and the X (horizontal) are set at 0.25 and 11.75 inches.
In the newer versions of Illustrator, you may need to go to Window > Properties to open the Properties Panel.

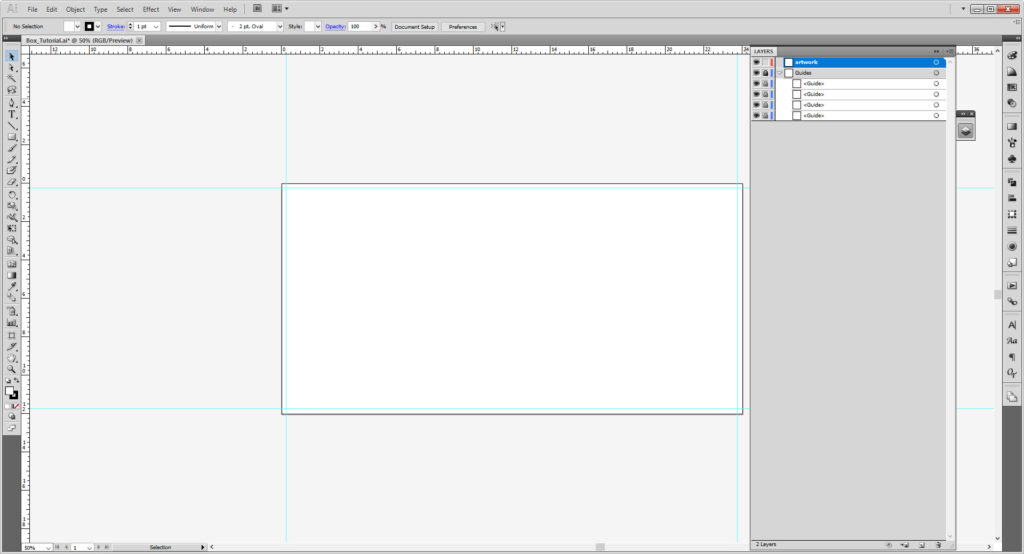
When you have finished setting up, create a new layer and lock the previous one to keep them from being moved.
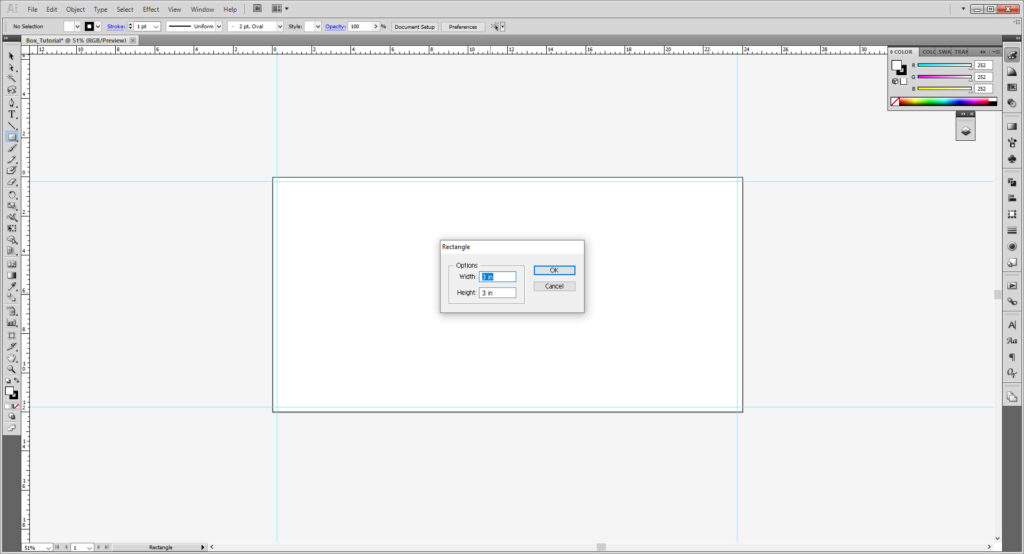
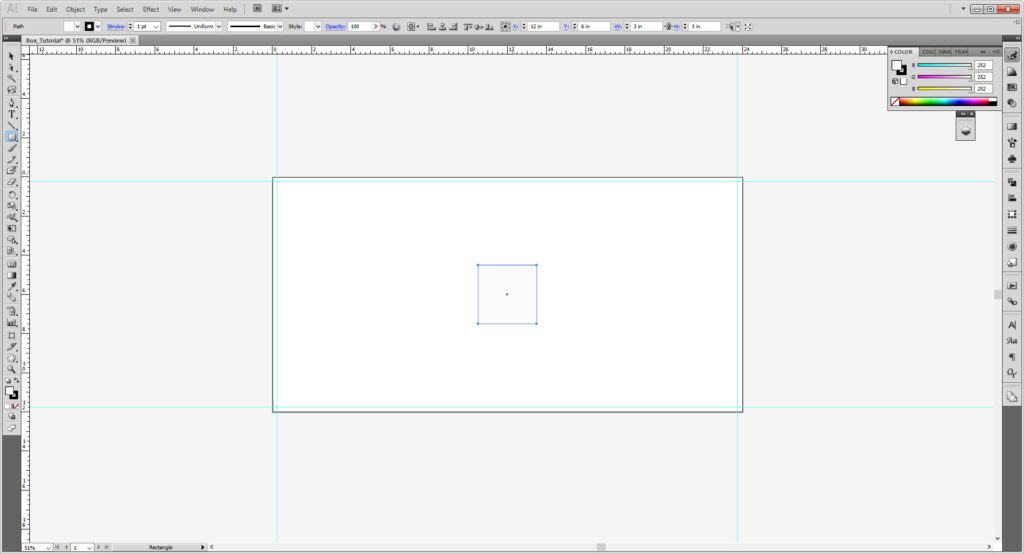
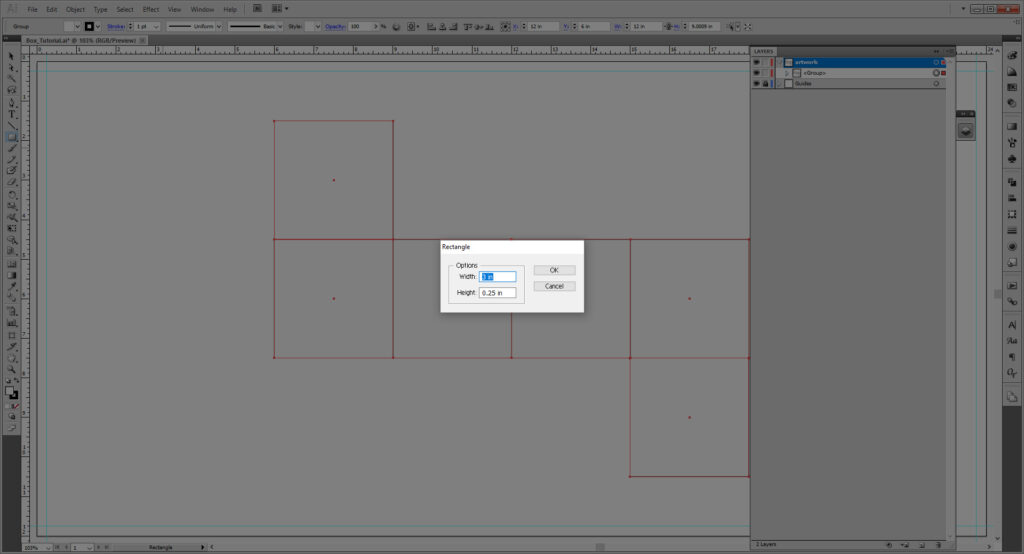
Next select the Rectangle Tool (M) and click your artboard. In the new dialog box put 3 in in both boxes to create a square.

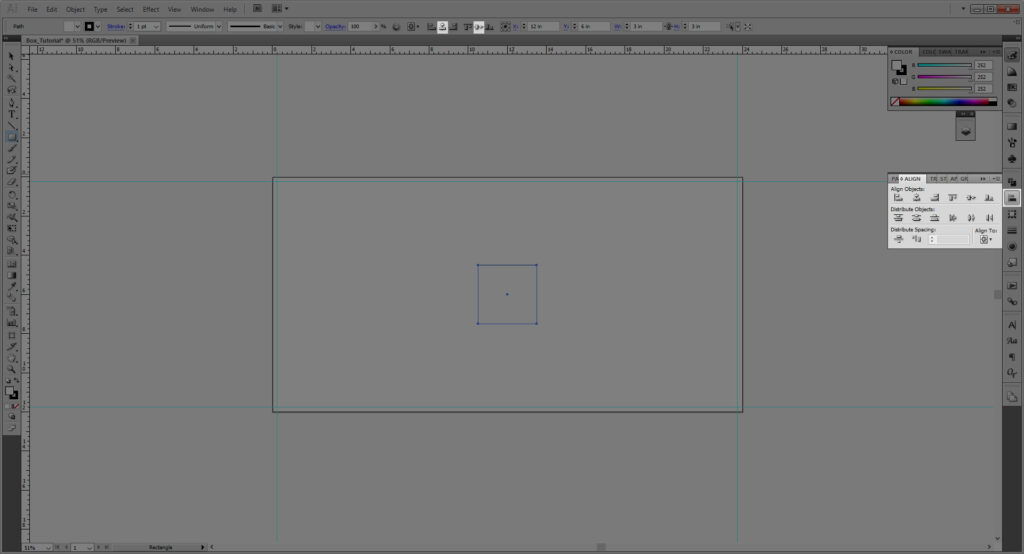
Using the align tool on the top of the user interface, align your square to the center of the artboard. You may need to access it in the Align Panel by going to Window > Align.
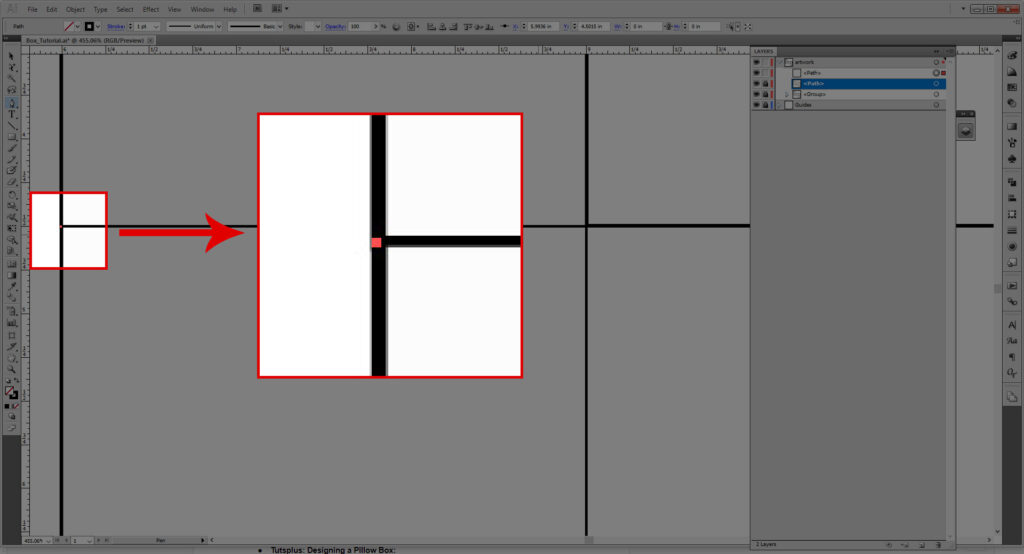
Click the square, hold Alt/Option and drag to make a copy. Place it next to the other square so that the stroke lines overlap. You may want to use the Zoom Tool (Z) or the dropdown menu at the bottom left of the user interface to zoom in. You can hold down Alt/Option and click the artboard while using the Zoom tool to zoom out in increments.

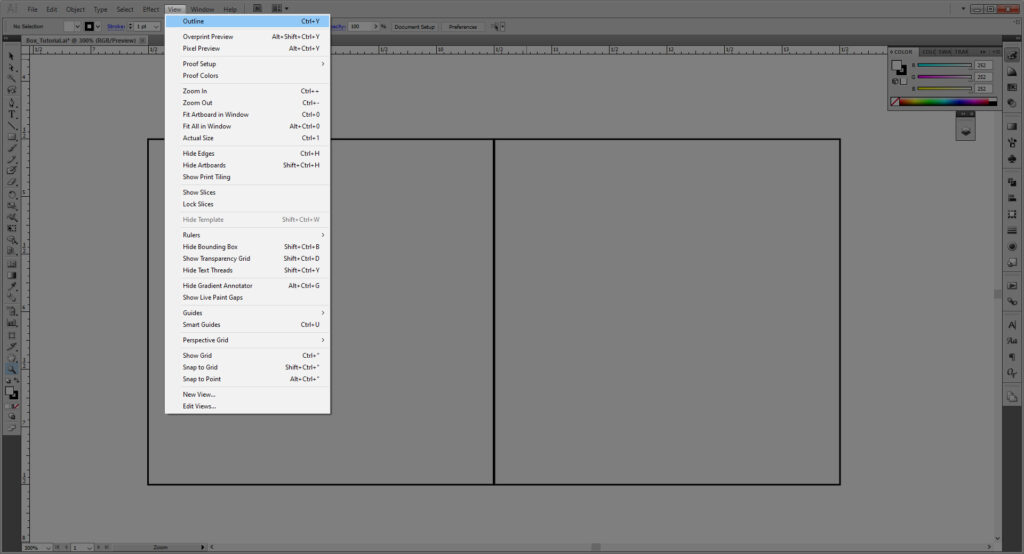
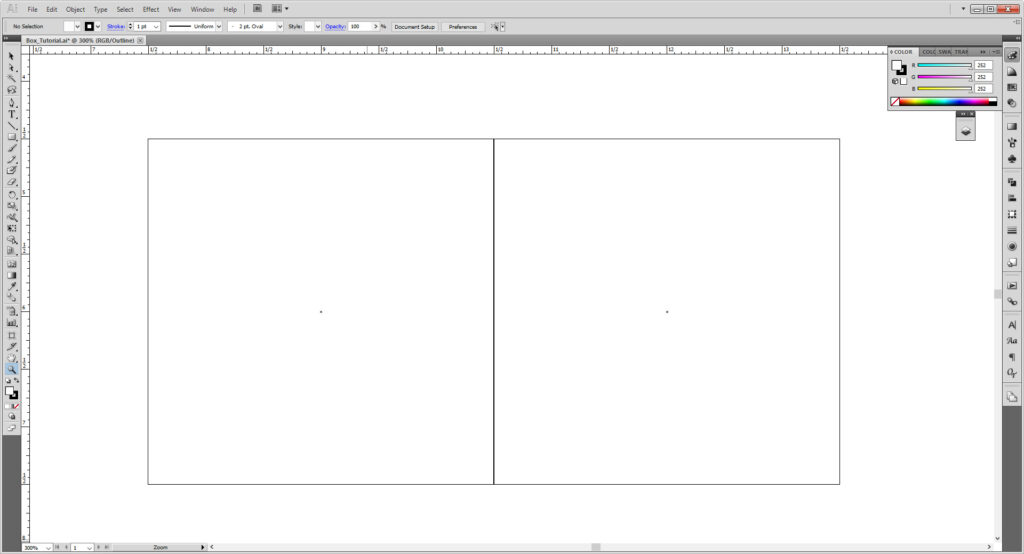
Another quick way to check your lines is Outlines. Go to View > Outlines (Cntrl/Cmd + Y) to reveal the outlines of all your shapes. That slightly thicker line is where the two strokes overlap. Use the same command to switch back to the normal preview.
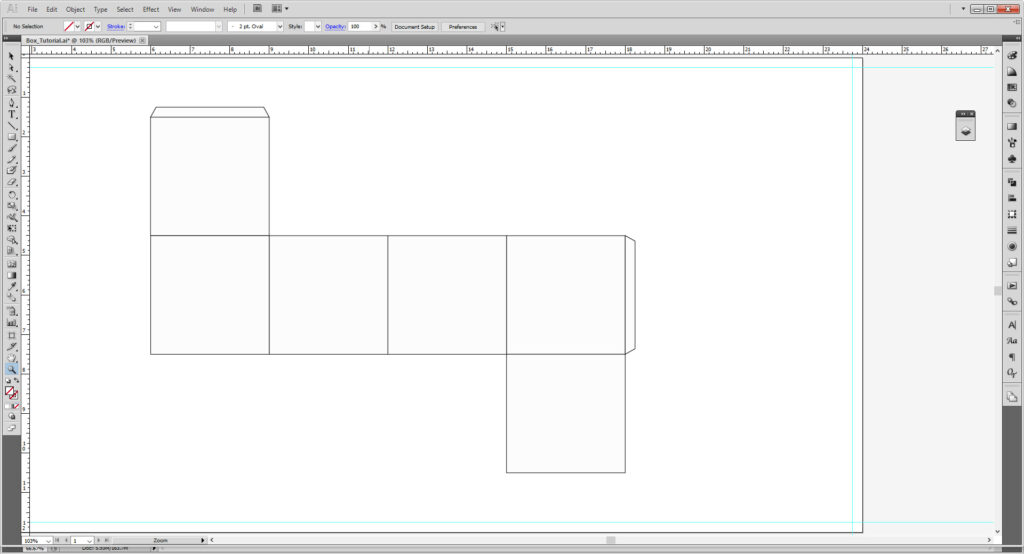
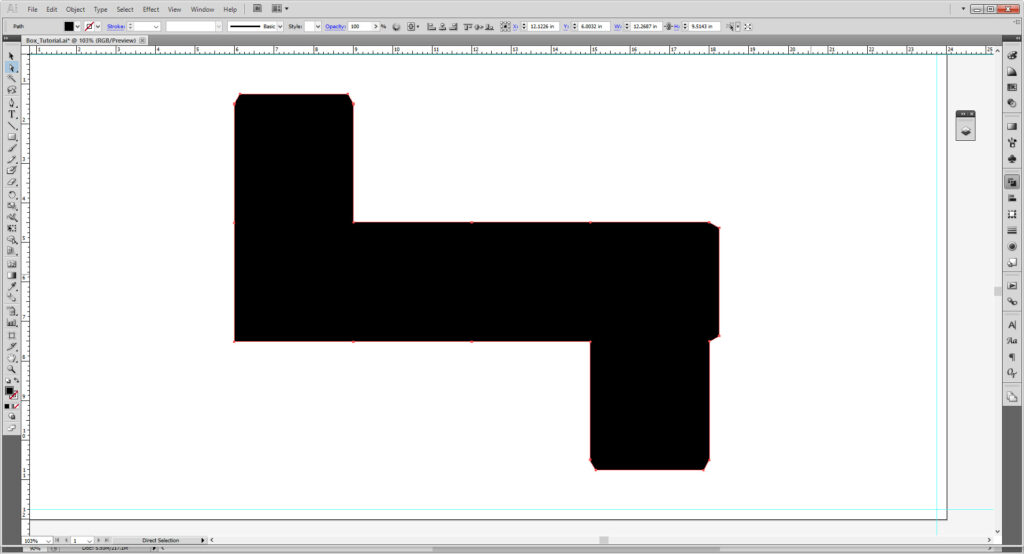
Repeat this five more times for a total of six squares.Four in a row, the fifth on top of the row and the sixth on the bottom like below.
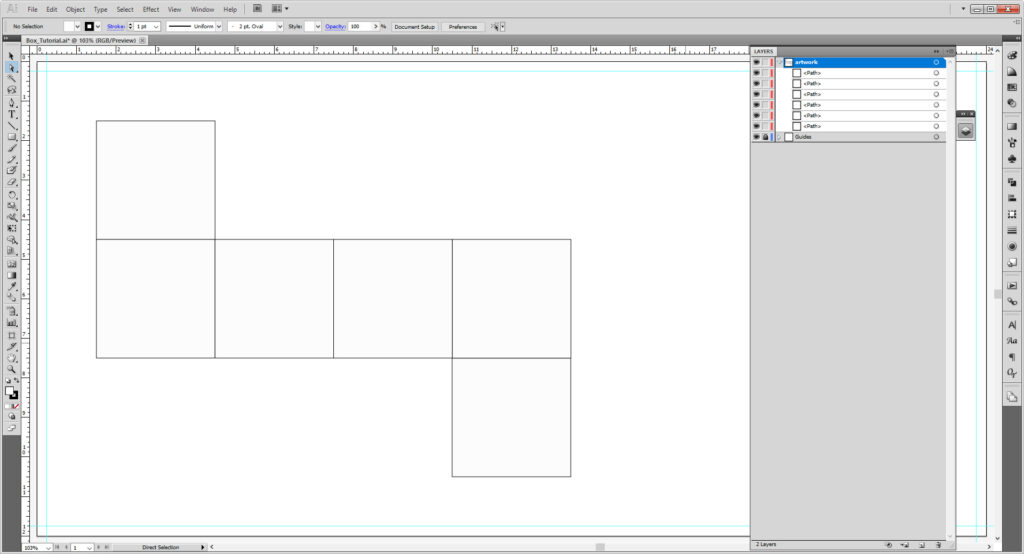
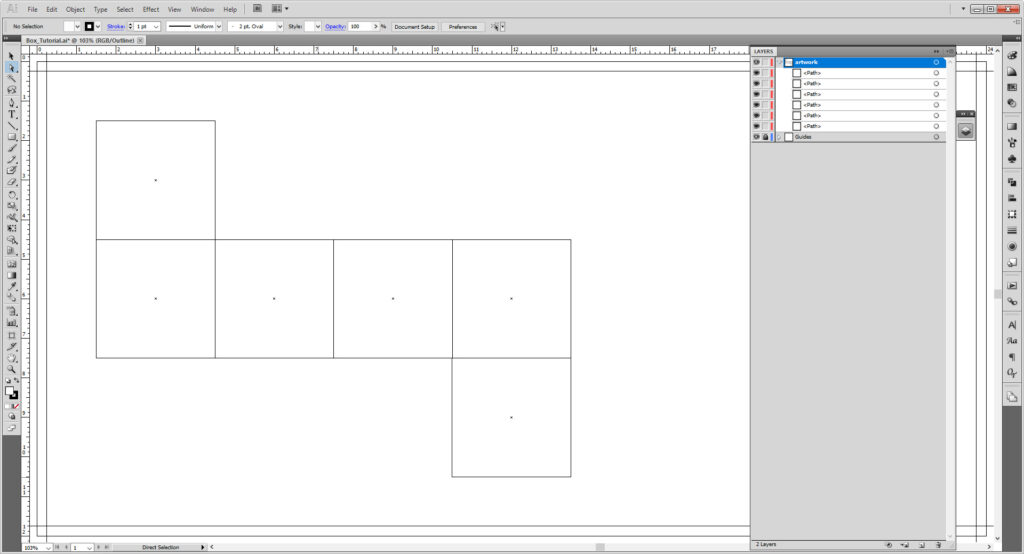
Select everything either by hitting Cntrl/Cmd + A or use the Selection Tool (V) and draw the box around the shapes. Then go to Object > Group or Cntrl/Cmd + G to turn it into a group. Using the alignment tools, center our group once more.

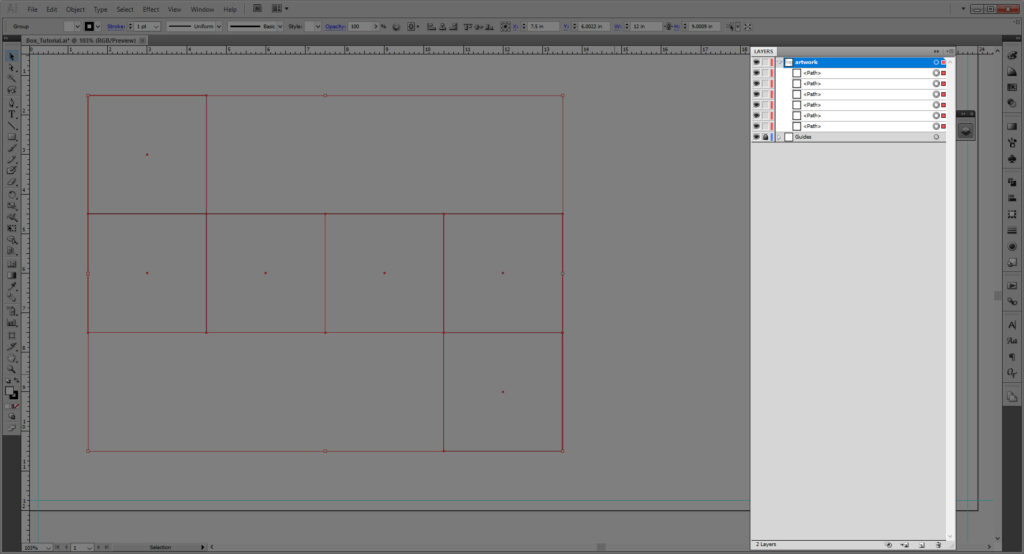
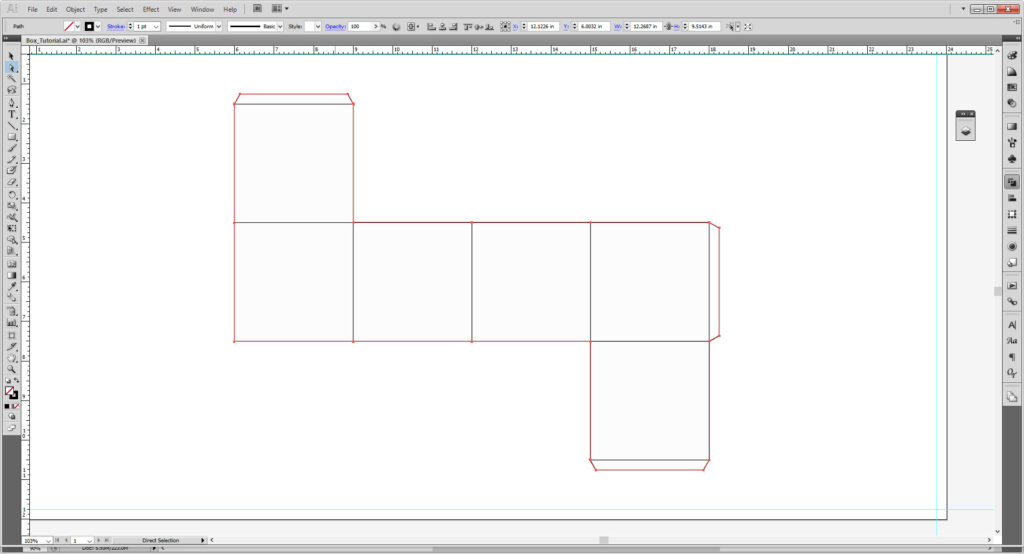
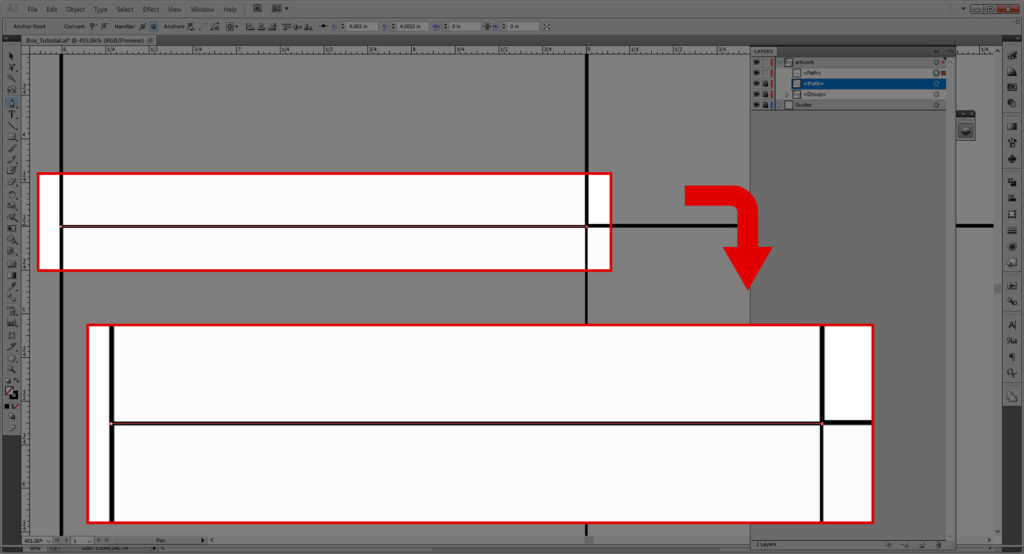
Using the Rectangle tool again to make a rectangle that is 3 in wide and 0.25 in high.
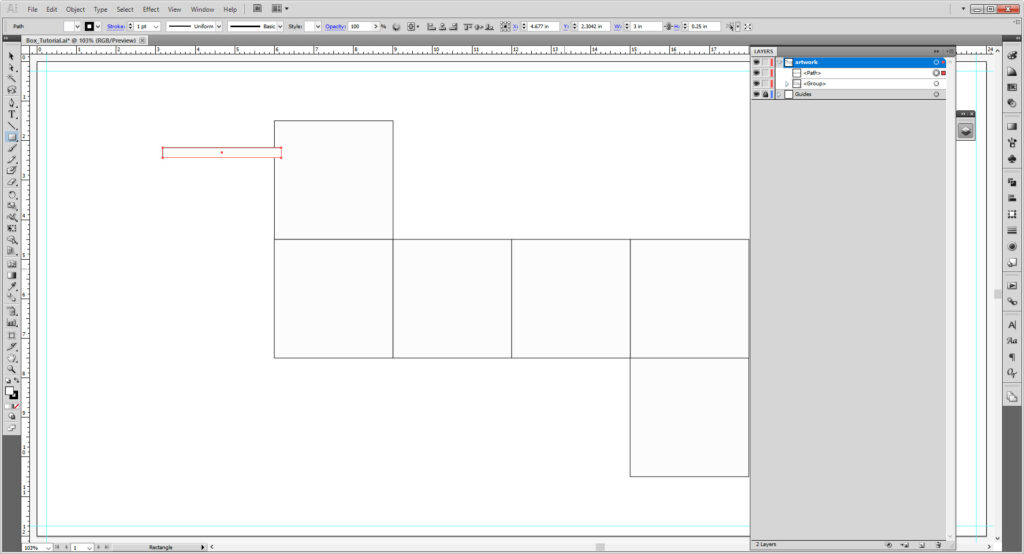
Move that to the top of the topmost square. Use the outlines to help keep it aligned.
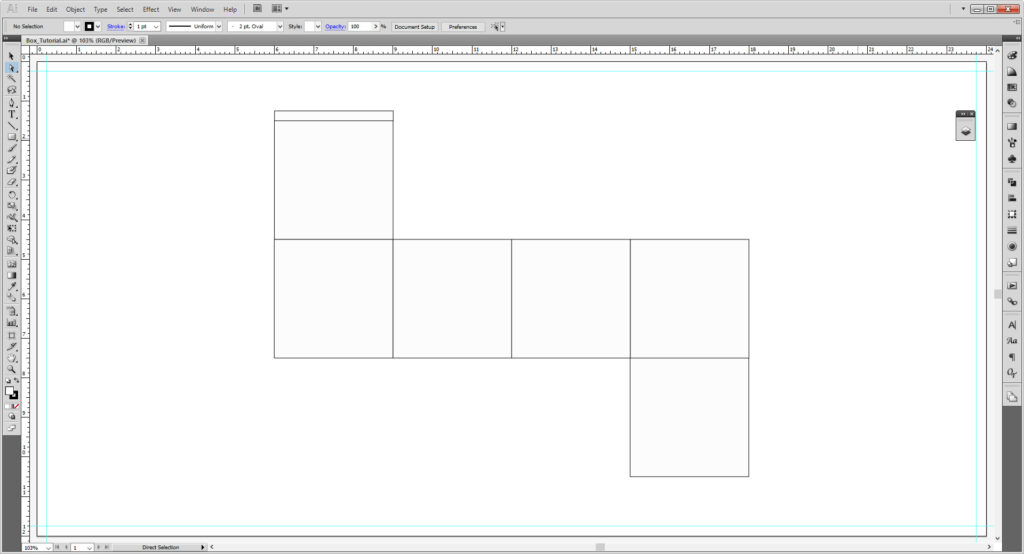
Using the Direct Select Tool (A), click on one of the top anchor points in the corners of the small rectangle. Using the arrow keys you want to move it towards the center. (About ten presses should do it.)
Repeat it with the other point to make a trapezoid like shape. These will be the tabs you would either tape or glue once cut.
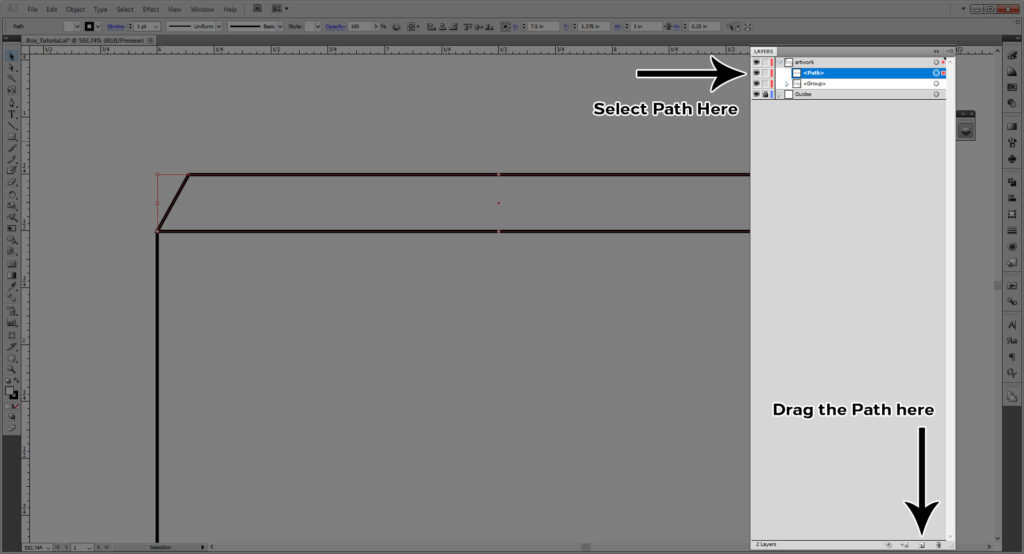
Copy that rectangle either by holding down Alt/Option and dragging/moving with the arrow key or clocking the path and dragging it to the Create New Layer in the layers panel.

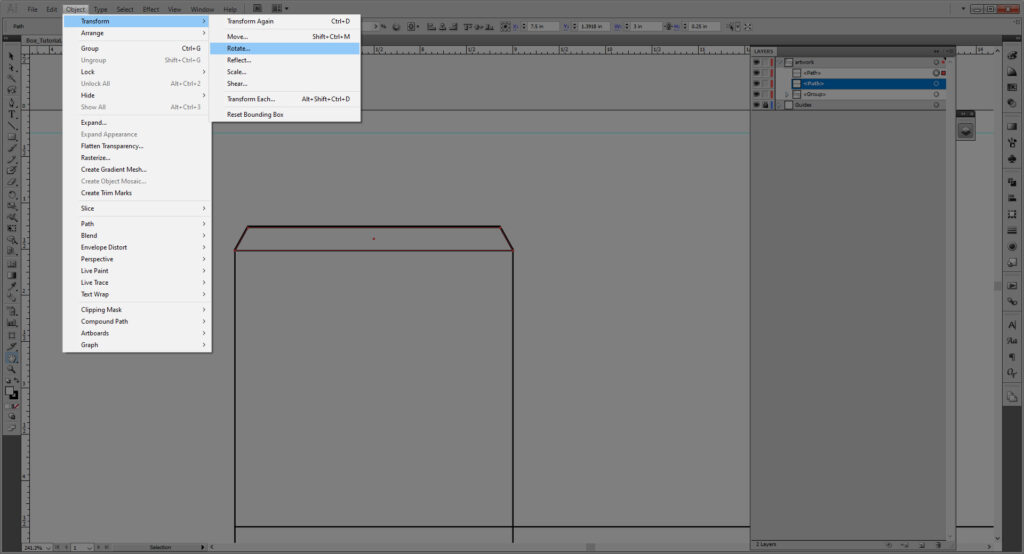
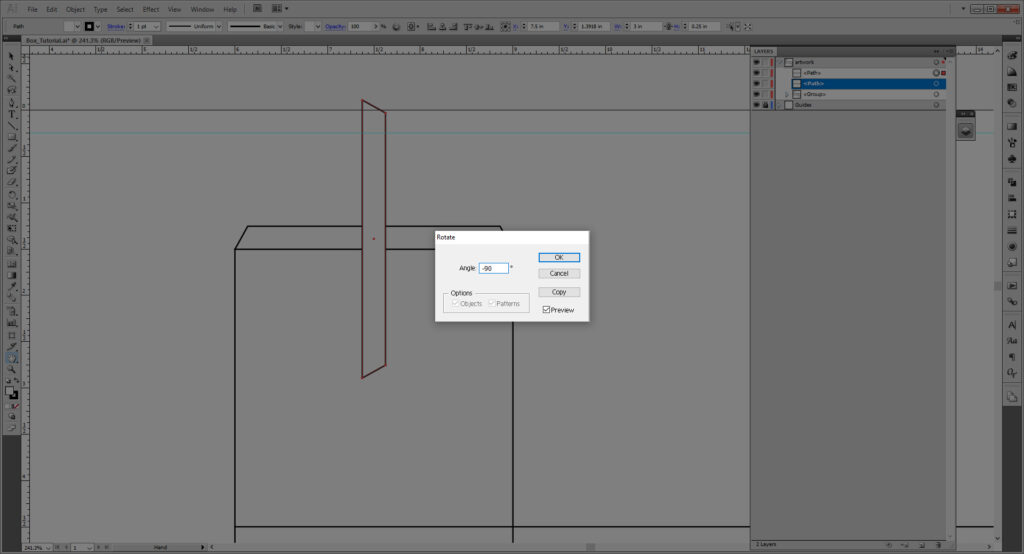
We will need to turn the tab aside. Go to Object > Transform > Rotate. As the name suggests, it rotates objects. Put in -90 degrees. Make sure to check the Preview box to see your shape rotated before confirming. Then hit OK.
You could also go to the Selection tool and hover it near an anchor point until you see a little curved arrow. Hold down Shift and rotate until the shorter side is facing your right.
Once you have it rotated, move it to the edge furthest right of the row of four squares.
Duplicate the top trapezoid again. Then go to Object >Transform > Reflect. Select Horizontal and check the Preview box to make sure it is correct. Then hit OK.
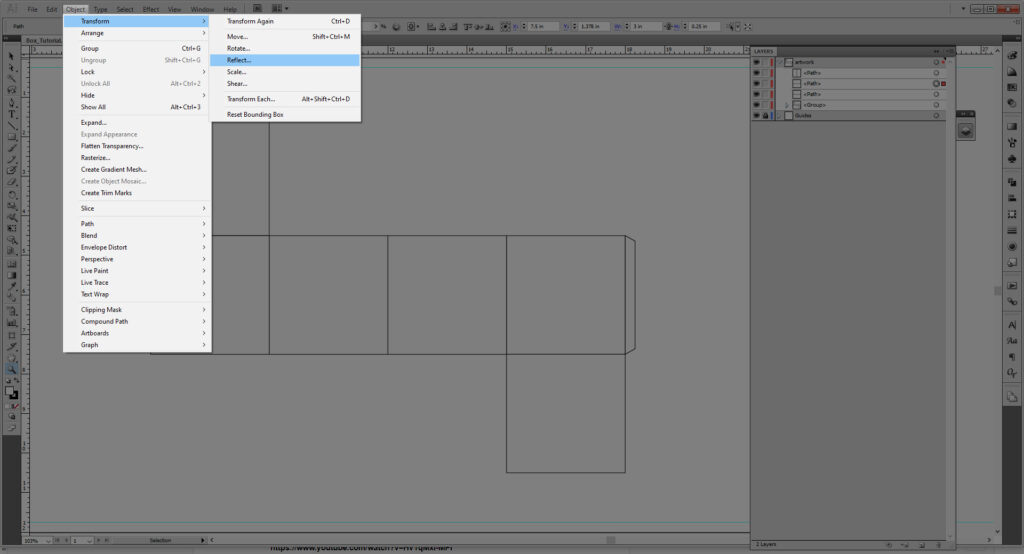
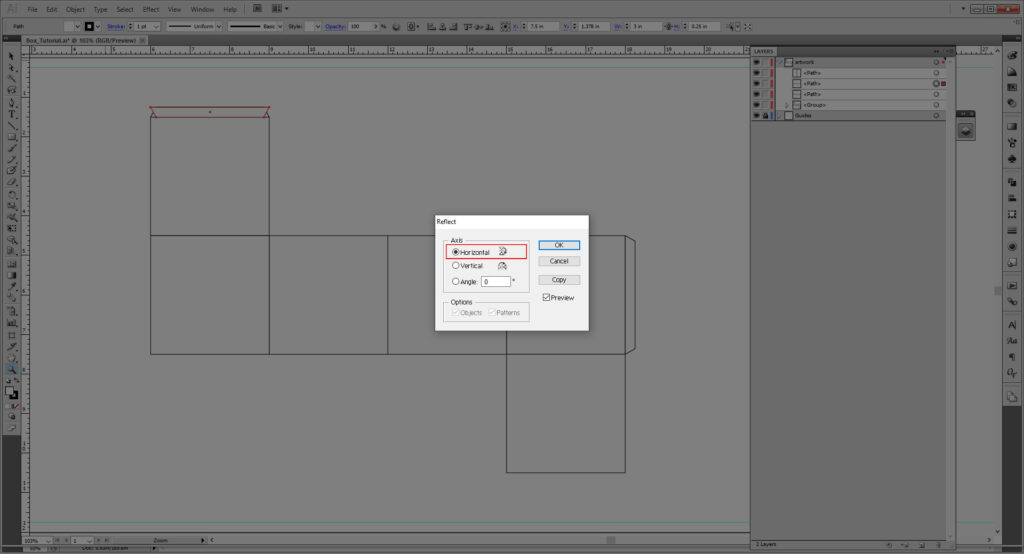
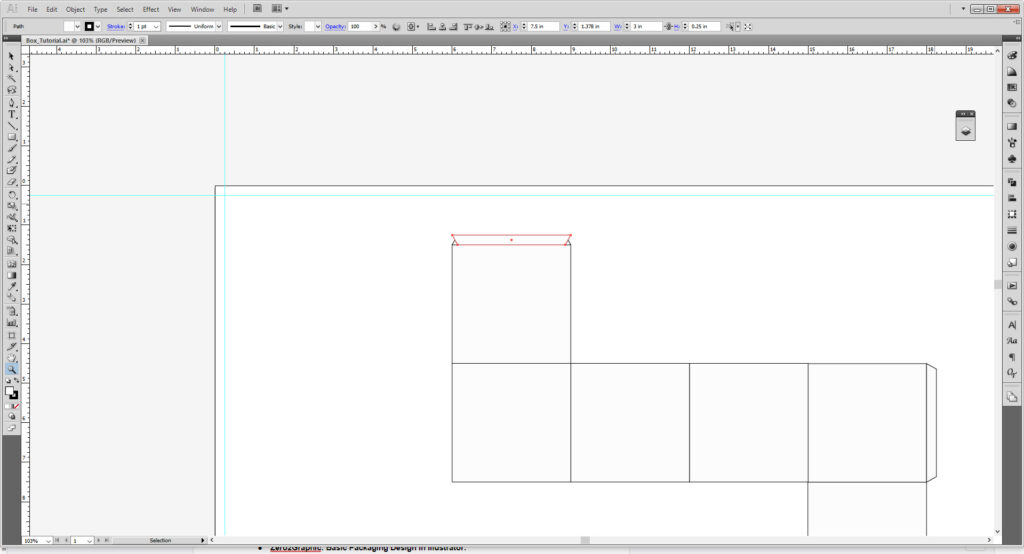
Move that to the bottom square.

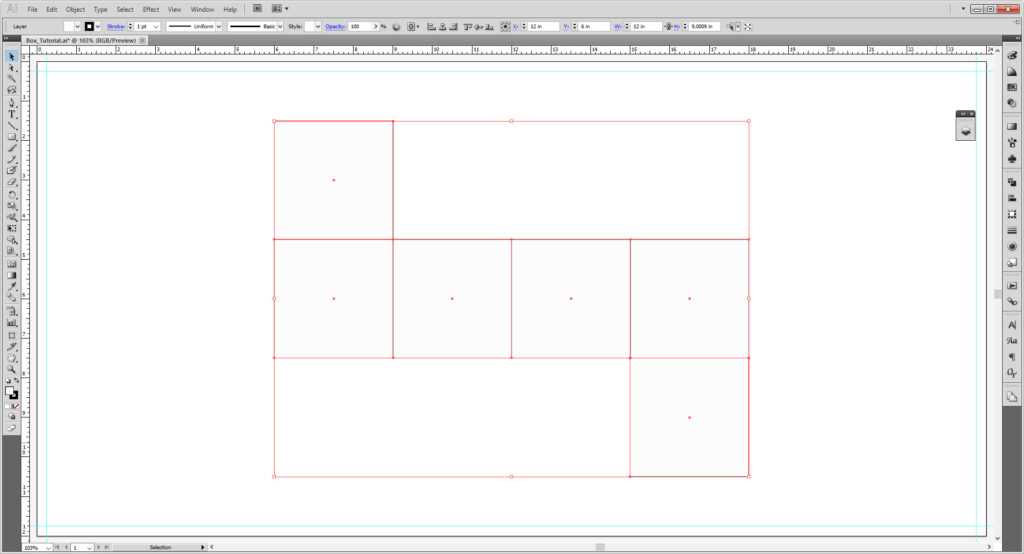
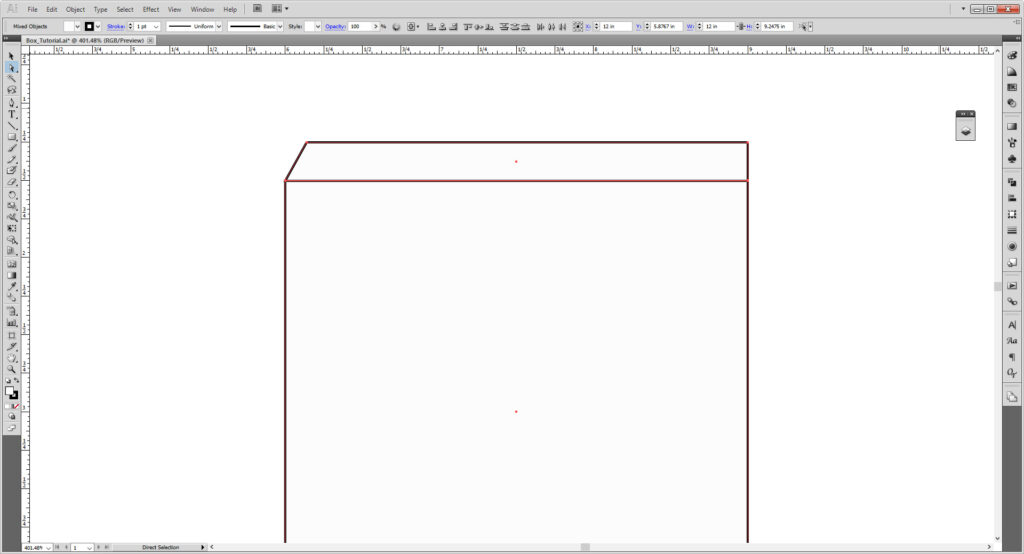
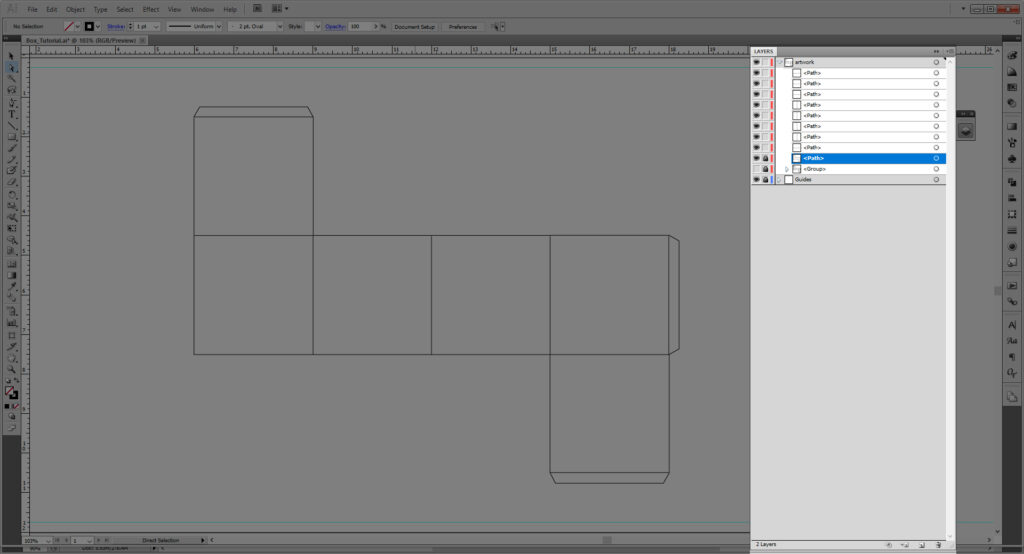
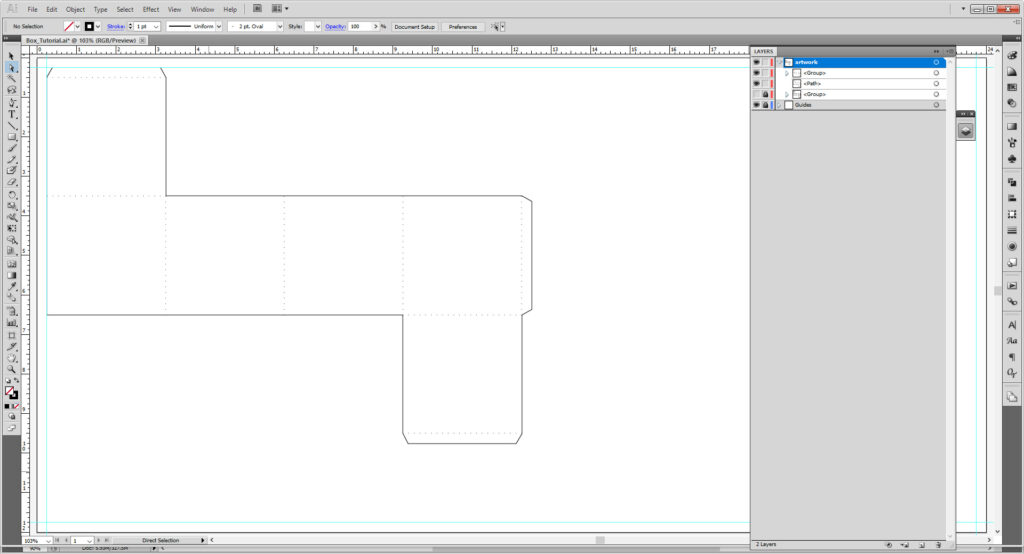
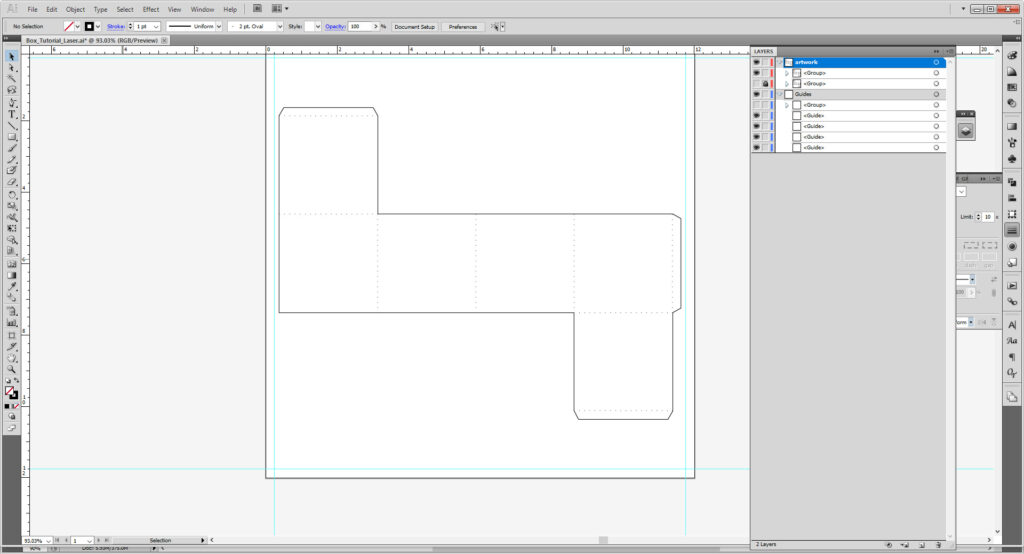
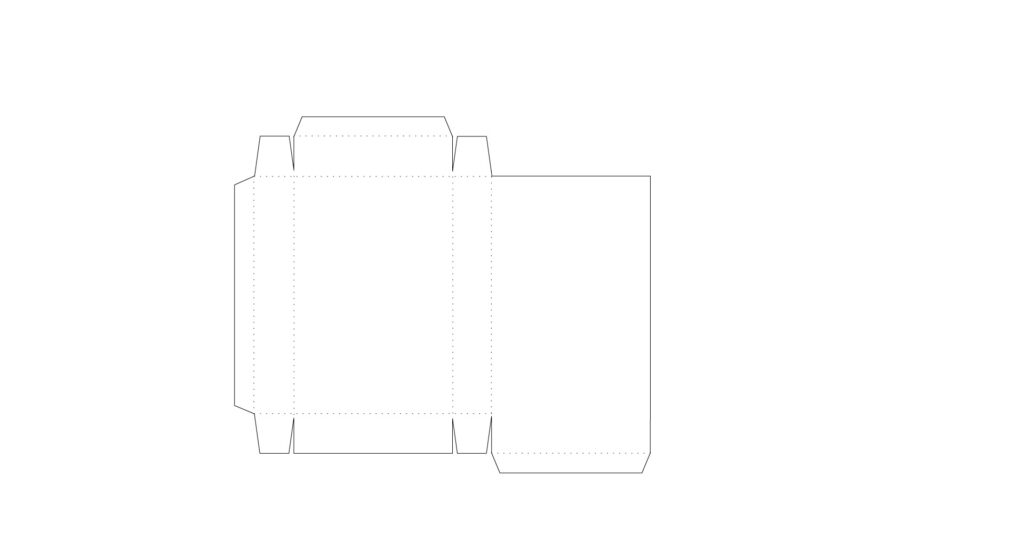
And we have our cube! But we’re not done yet!
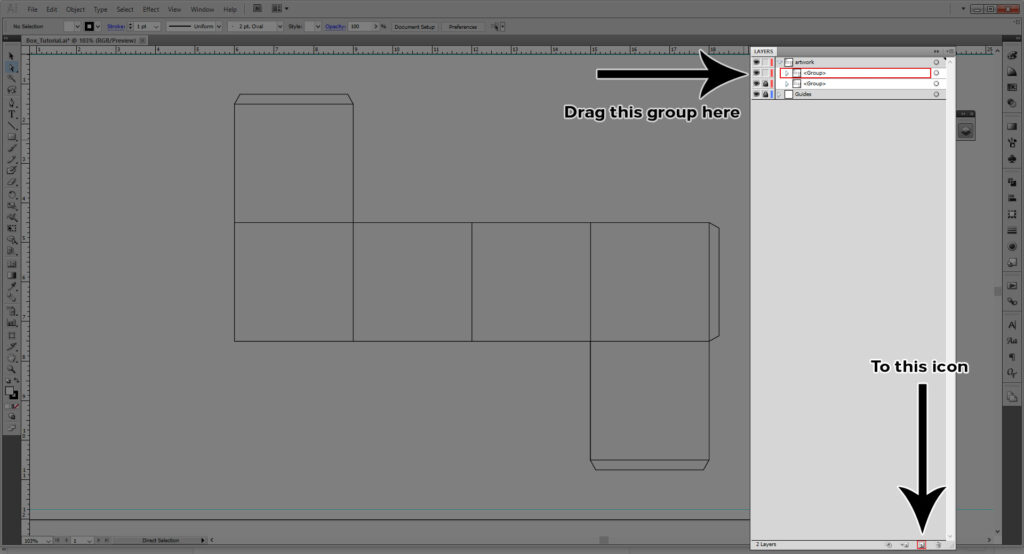
Move everything into the group your squares are in, then make sure everything is selected. Make a copy of the group by dragging it down to the Create New Layer option and lock it. This way you can go back and fix things, or see your lines– more on that in a bit.
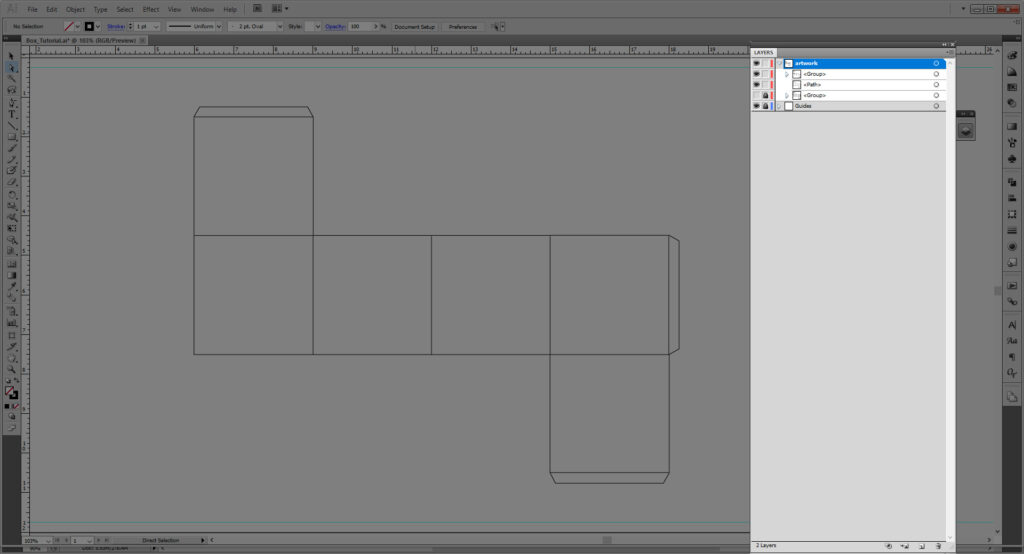
Select the unlocked copy, then go go Object > Expand.
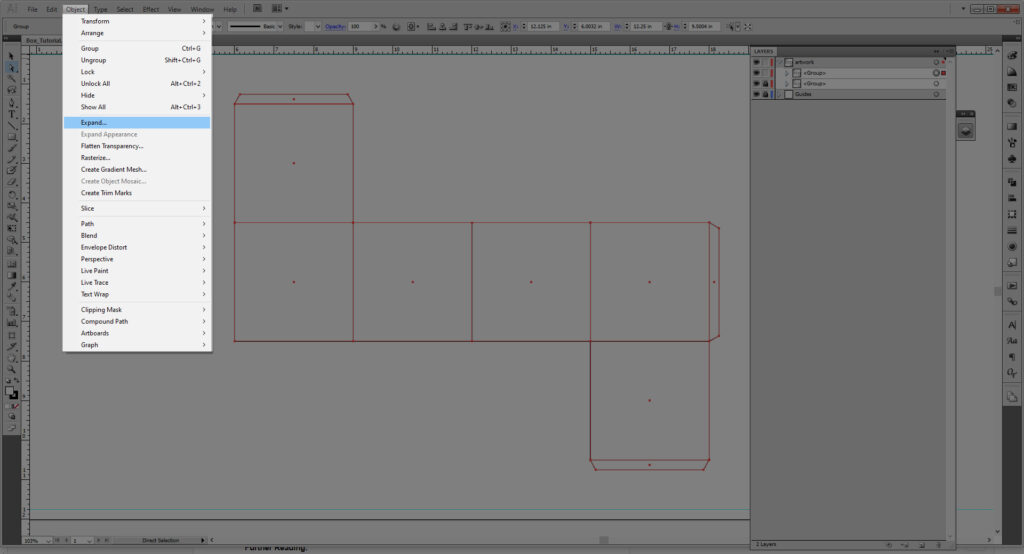
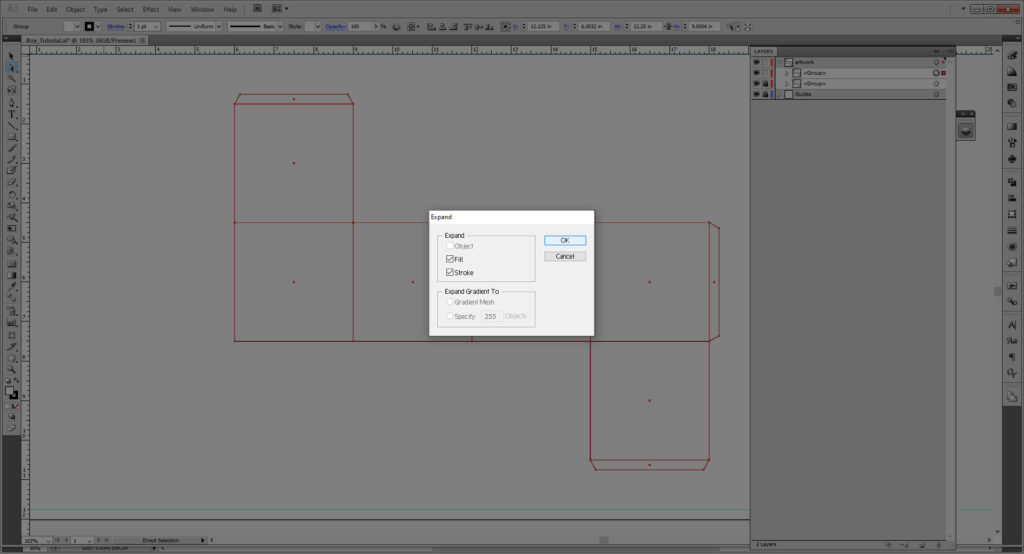
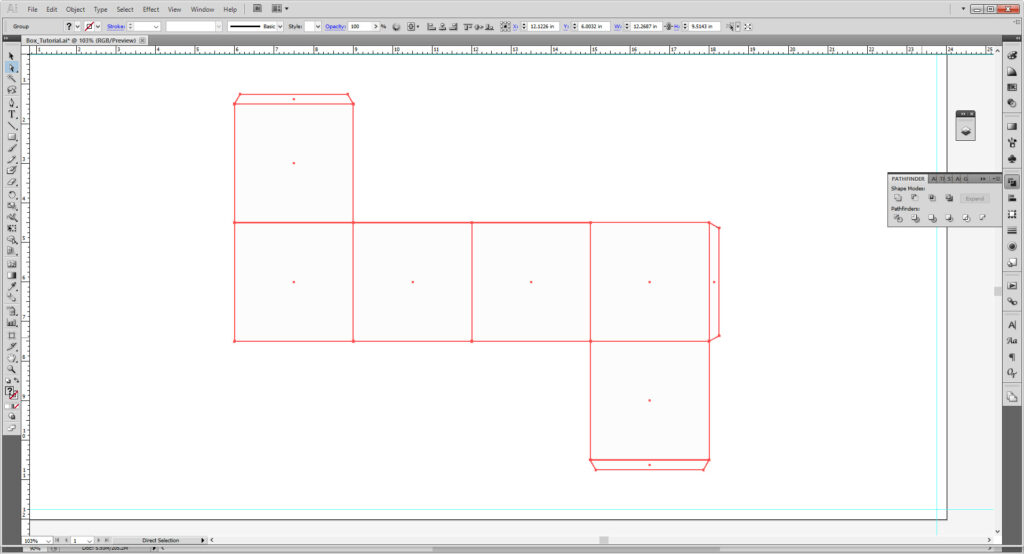
Then go to the Pathfinder Panel. You may need to go to Window > Pathfinder to access it. Choose the Unite option.
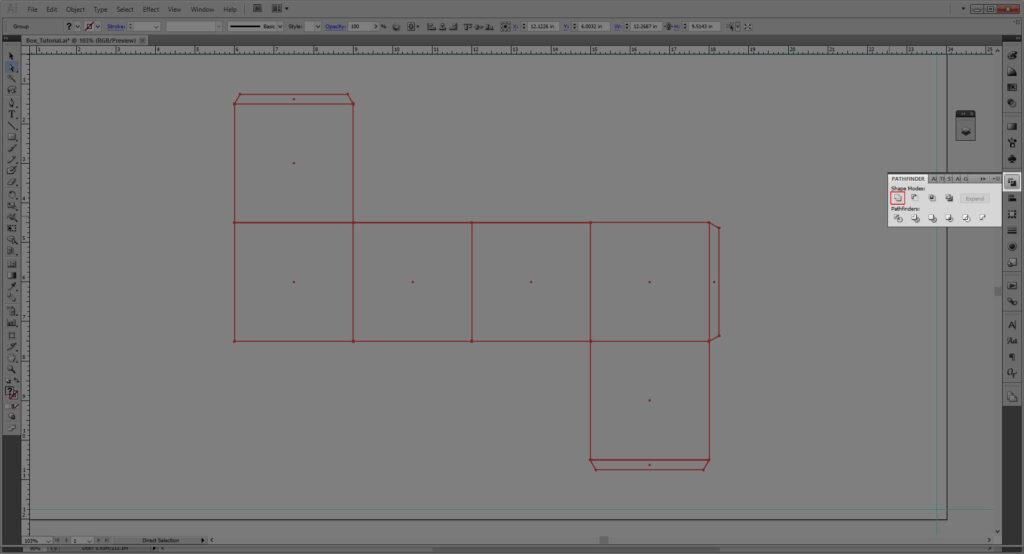
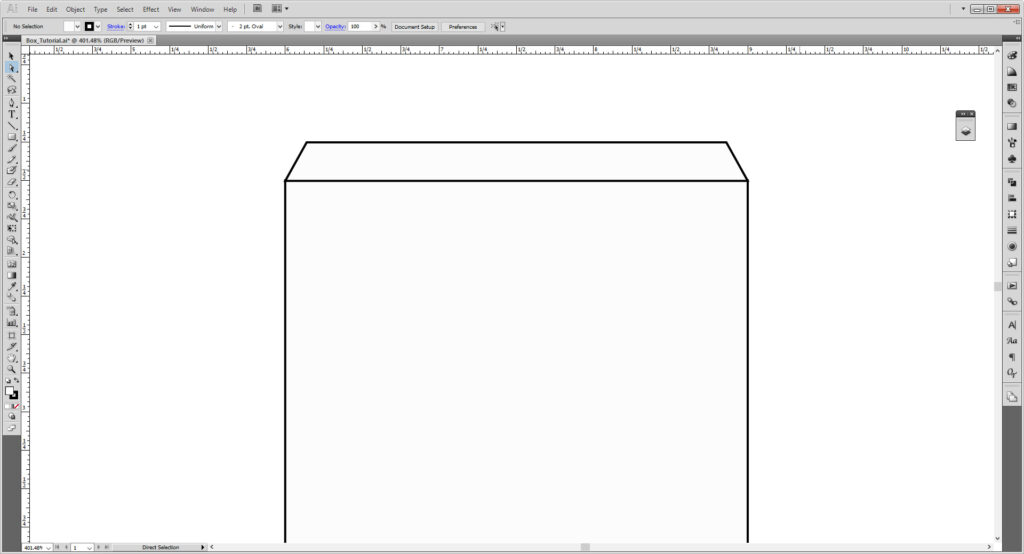
Switch the fill back to a stroke with the Fill/Stroke tool. You should now also see the copy of your original box.
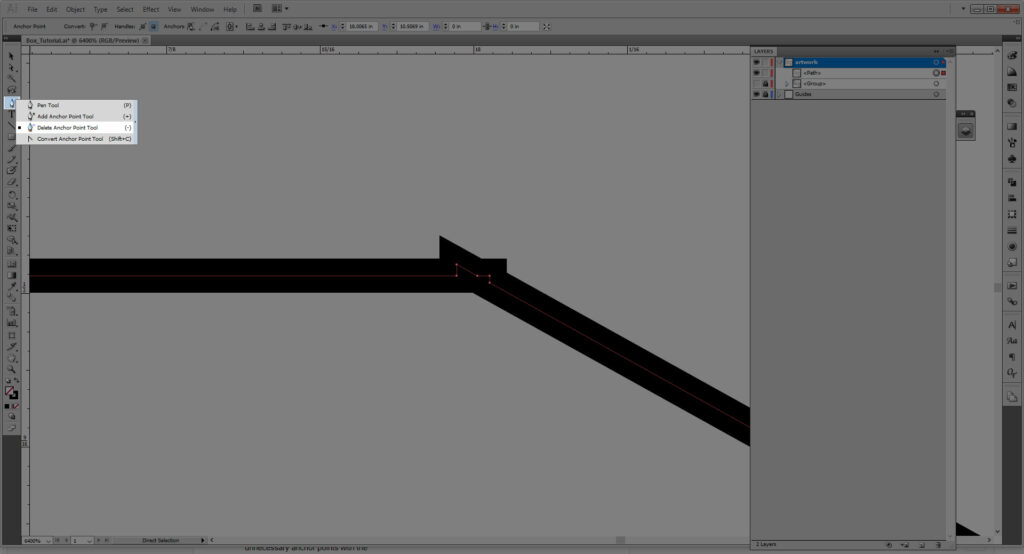
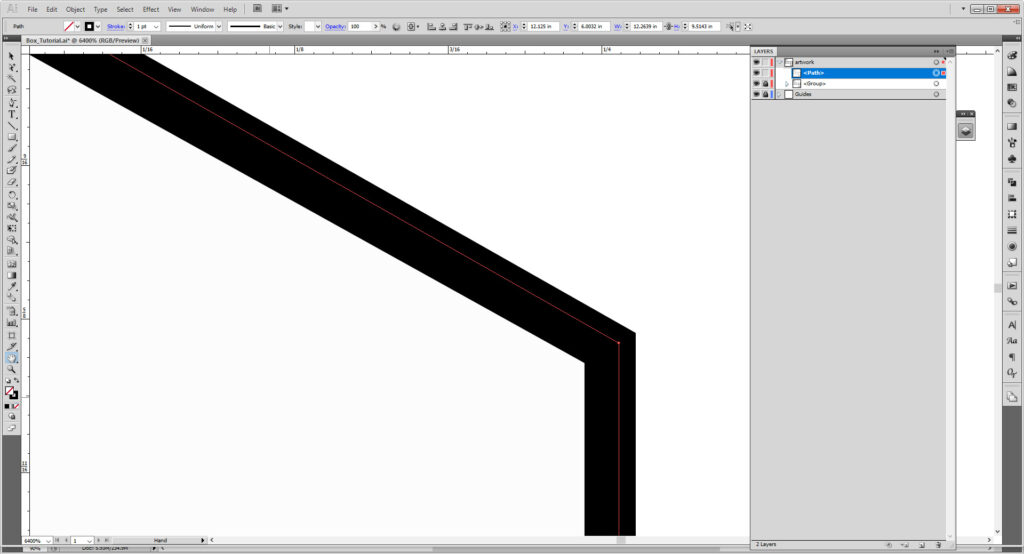
Optional: For those who might be detail oriented, you can go in further and remove unnecessary anchor points with the Delete Anchor Point Tool ( – ). To access this, hold down your right mouse button on the Pen Tool (P) to reveal the panel. Then click on the anchor points you don’t want.
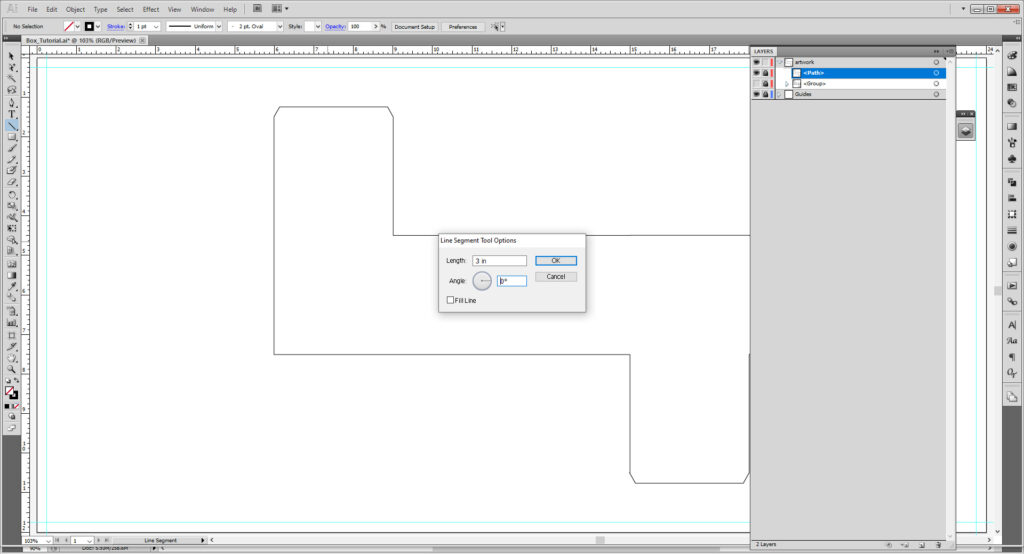
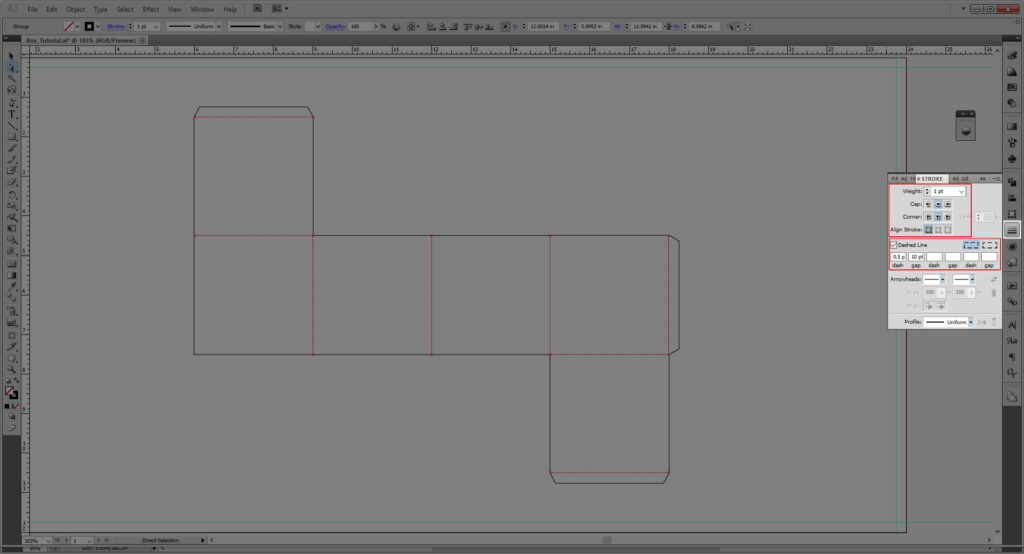
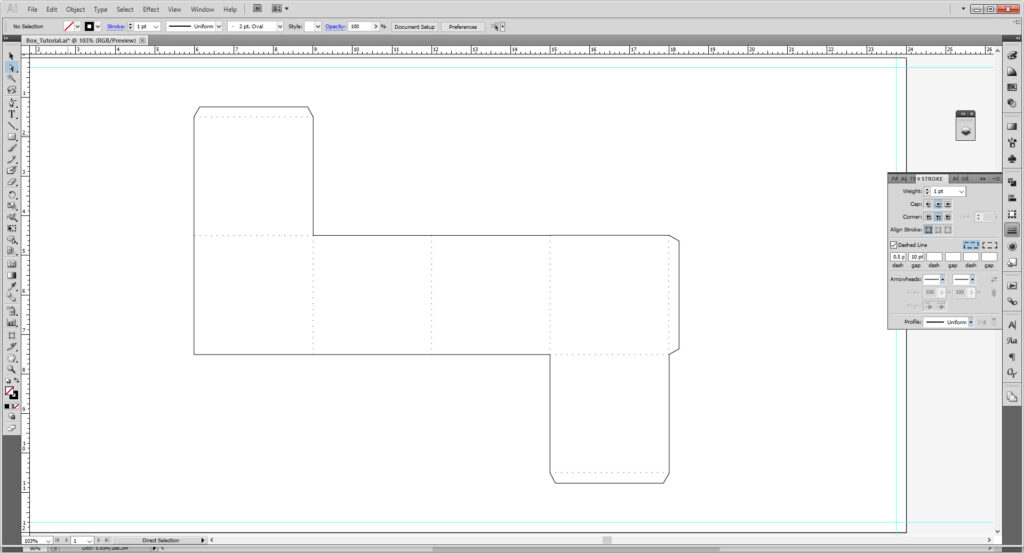
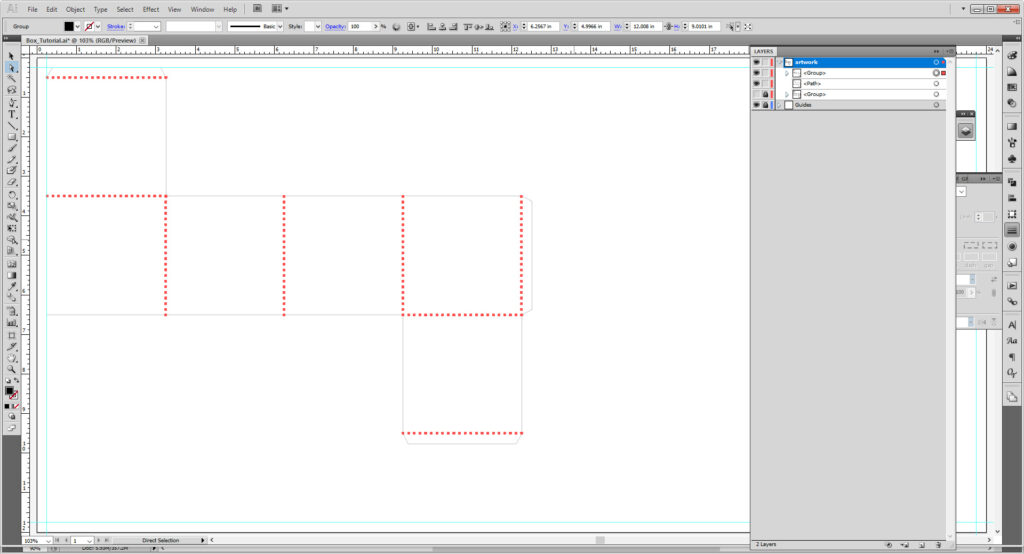
Now we’ll make our score lines. These will be where you will fold your box once it is cut. On the laser cutter or Vinyl cutter they can be pre-scored (or even made into a perforation tear). Using the locked layer as our guide, you can make lines with either the Line Segment Tool ( / ) or the Pen tool.
For the Pen tool click on the artboard and hold down Shift while making your second anchor point. Holding down shift makes just the line you made is straight.
For the Line Segment tool, select the tool and click on the artboard. Make the line 3 in and the angle 0 degrees. Hit OK.
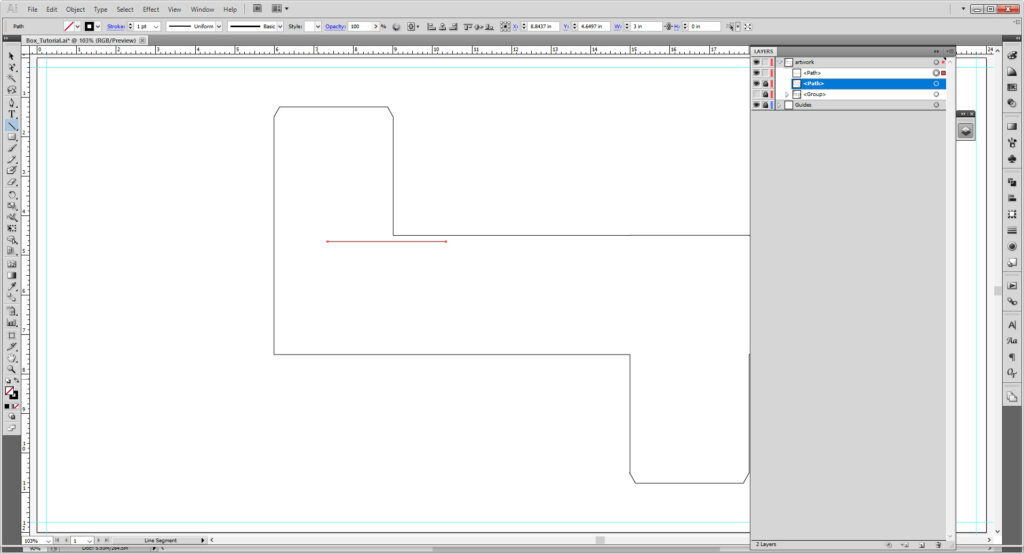
Move the lines to where all the missing lines are by copying and rotating the line you made. Select all your strokes and group them like you did with the squares earlier.
Now we need to head over to the Stroke Panel to make some dotted lines. You may need to go to Window > Stroke to access it.
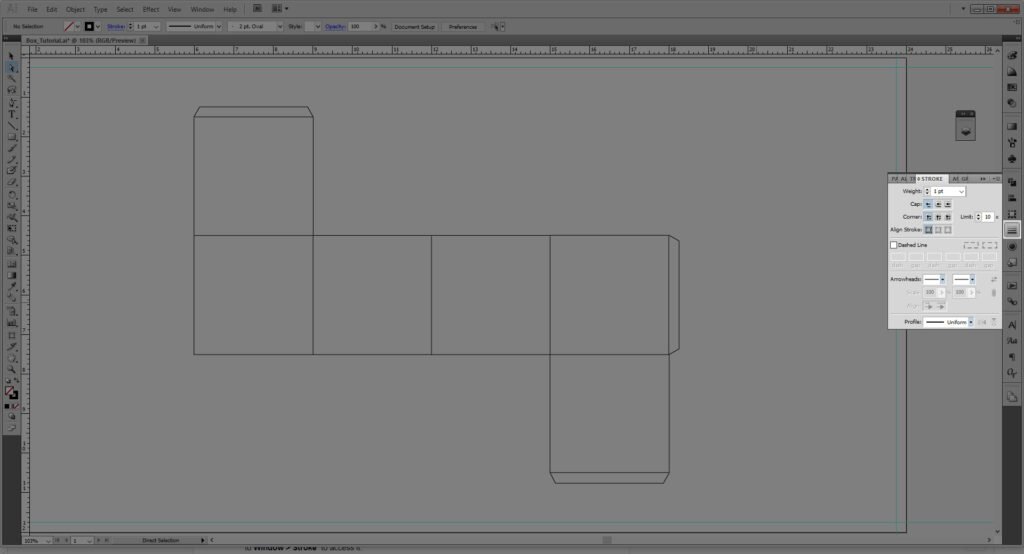
Check the Dashed Line checkbox to activate the options. You may play with the setting as you wish. For me, I like little round dots, so I’ll be choosing Round Cap and Round Join to make things more rounded, and my dash will be 0.5 pts and my gap will be 10 pts.
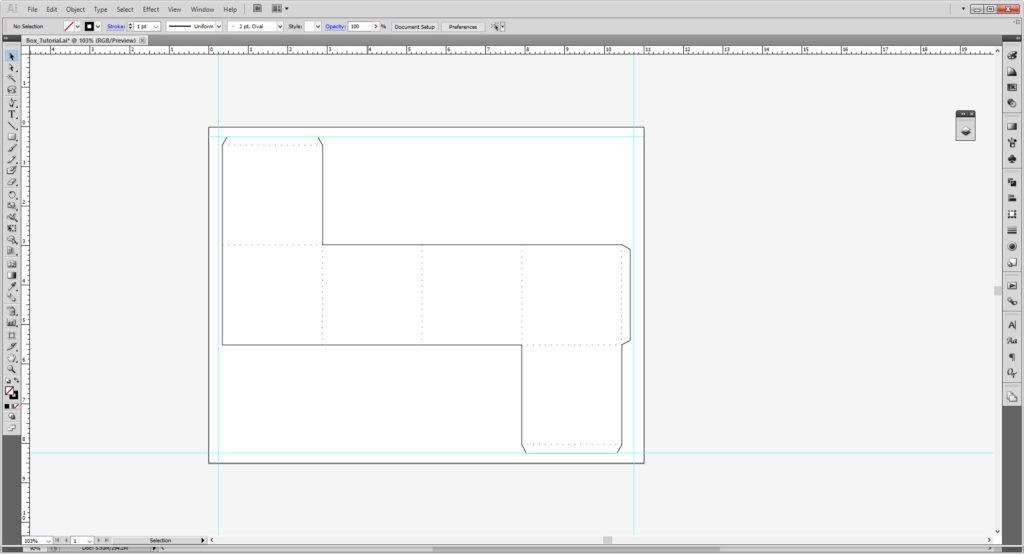
And there you have your box! Now it’s time to save and export it. Please scroll further for the method you need.
Exporting For Print:
This is for those who set up a print based artboard (8.5×11, 11×17, etc). Make sure your box fits in the safety area you made. (8×10.5 for 8.5×11 and so on. Remove .5 inches from each of your original measurements for a .25 bleed.)
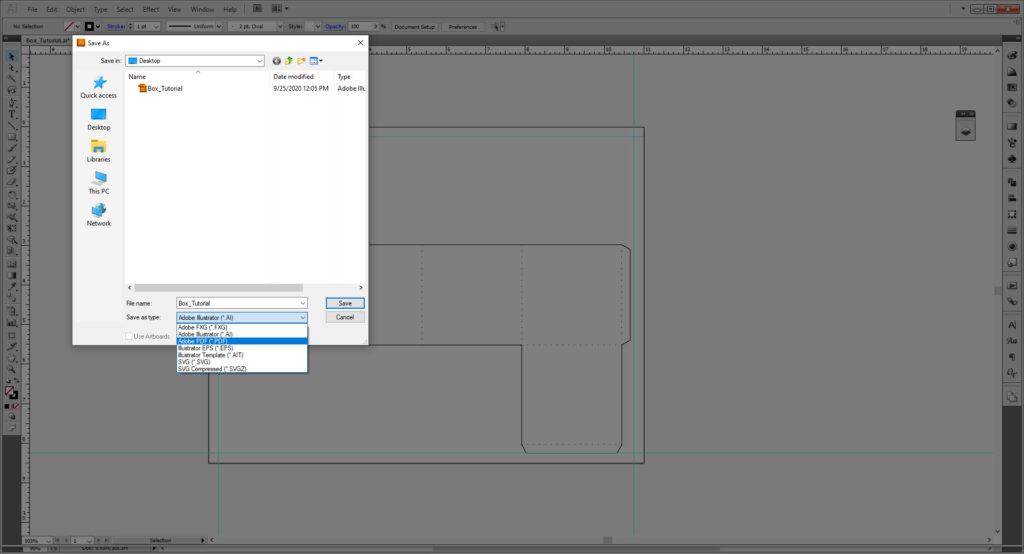
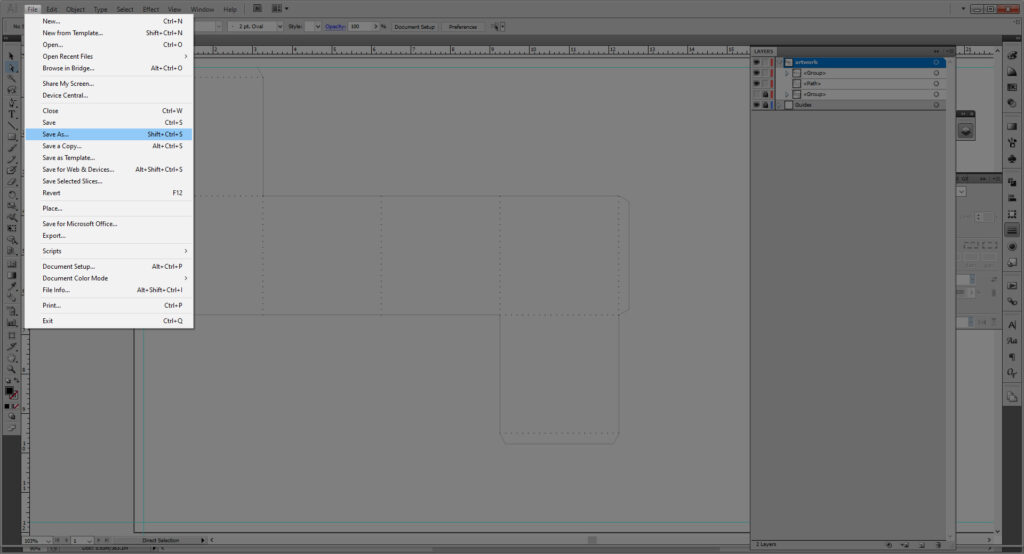
Go to File > Save As and choose Adobe PDF (.PDF) in the dropdown menu.
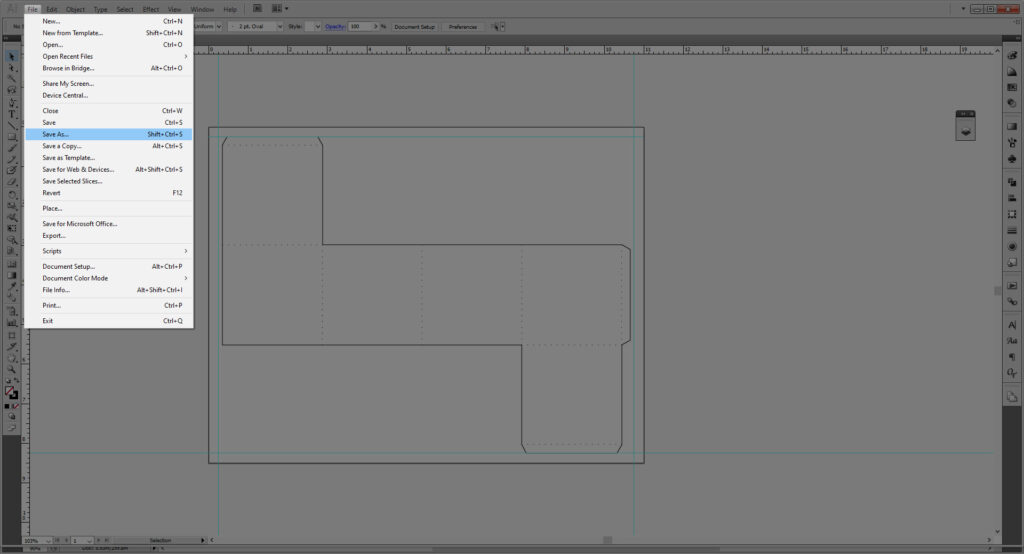
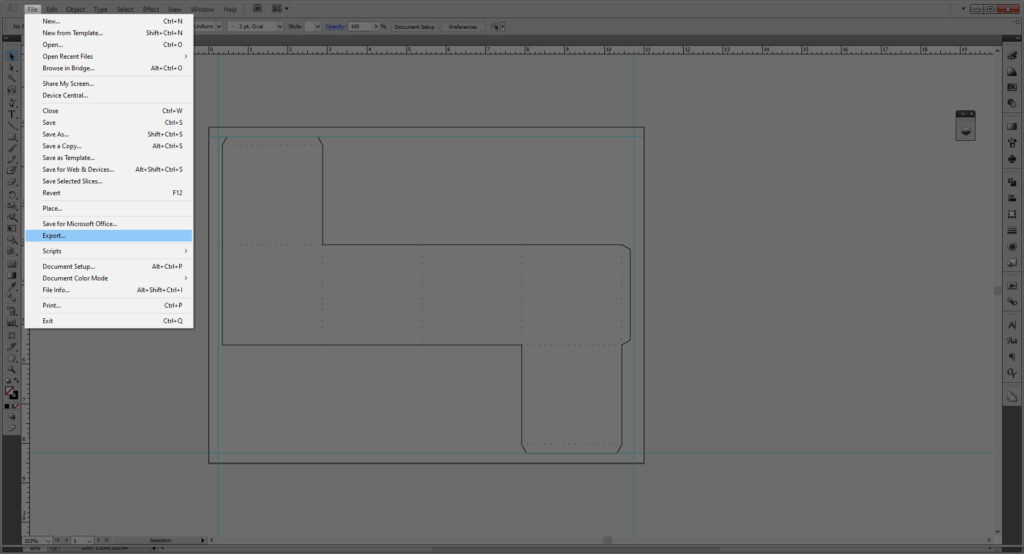
If for some reason a PDF cannot be printed, then save it as a JPG.
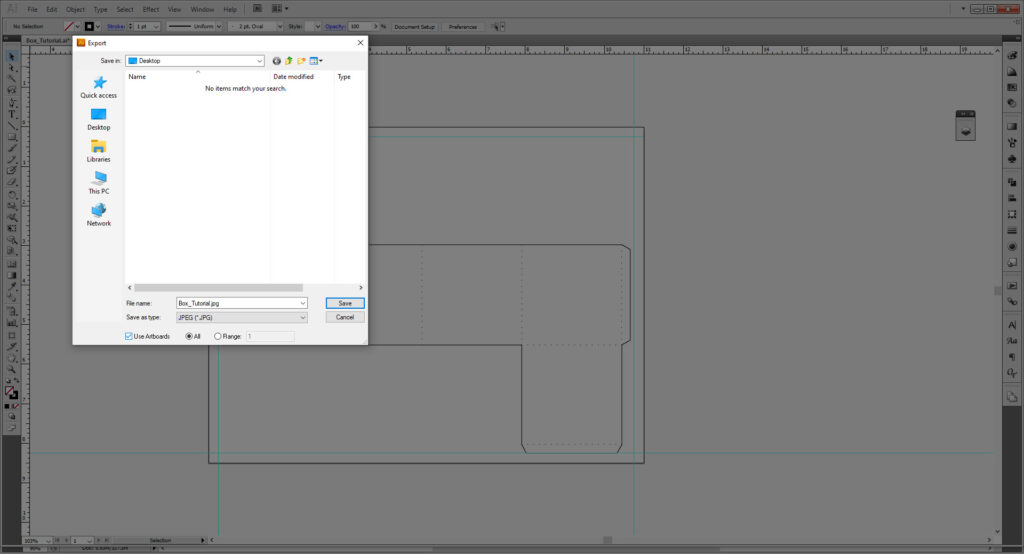
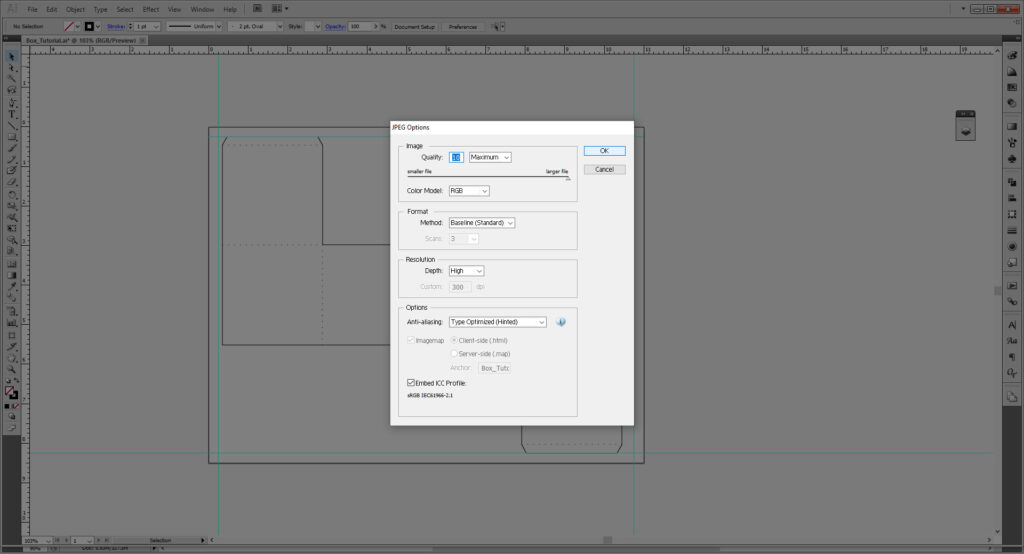
Go to File > Export and choose JPEG (.JPG) in the dropdown. Make sure the Use Artboards box is checked. Double check to see that the quality is set to Maximum and select OK.
Exporting For Laser Cutter:
This is for the laser cutter (12×24 inch artboard). For more detailed information on outputting for the laser cutter, please visit this guide.
Move your box to as close to the guide as possible.
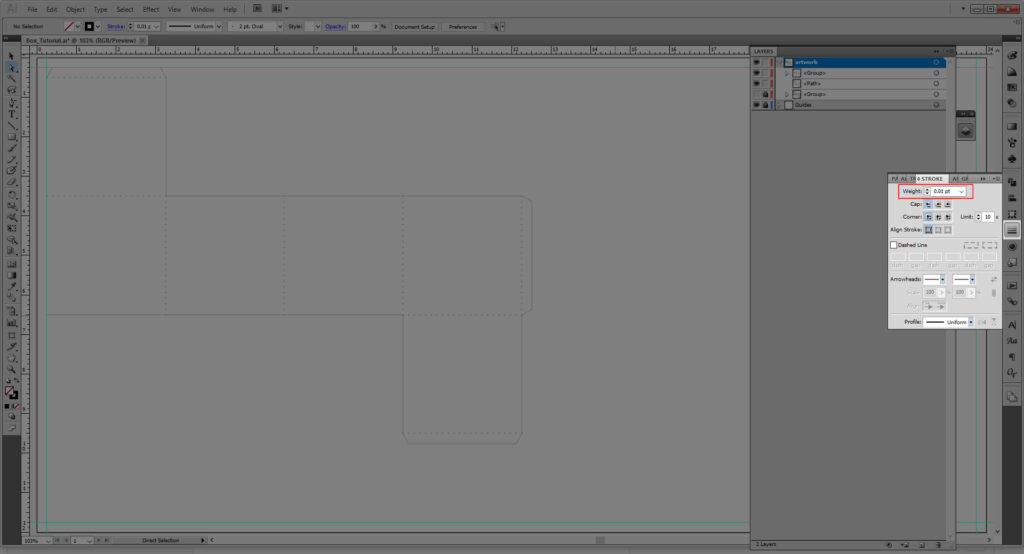
Select the group that is your outline shape and go to the Stroke panel. Set the stroke weight to 0.01 pts.
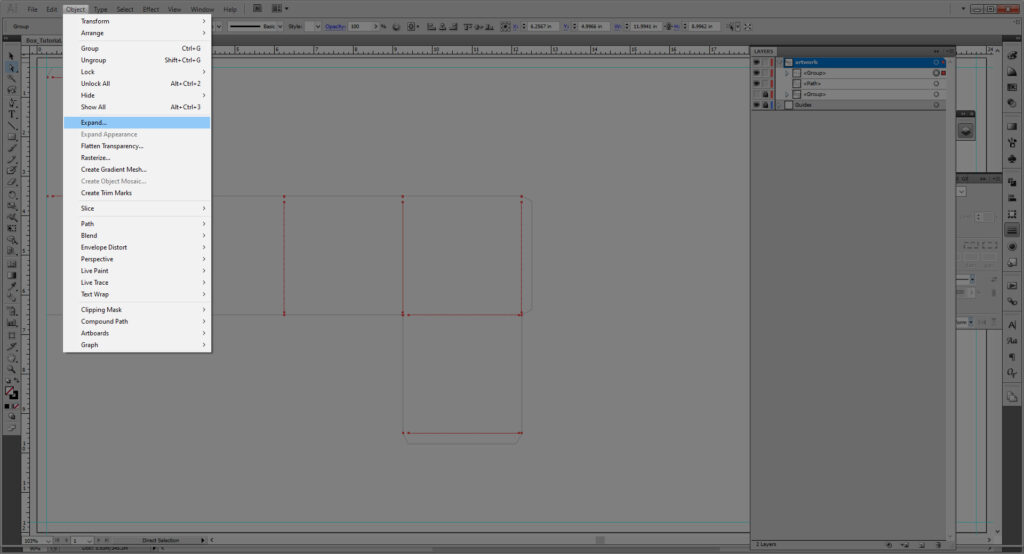
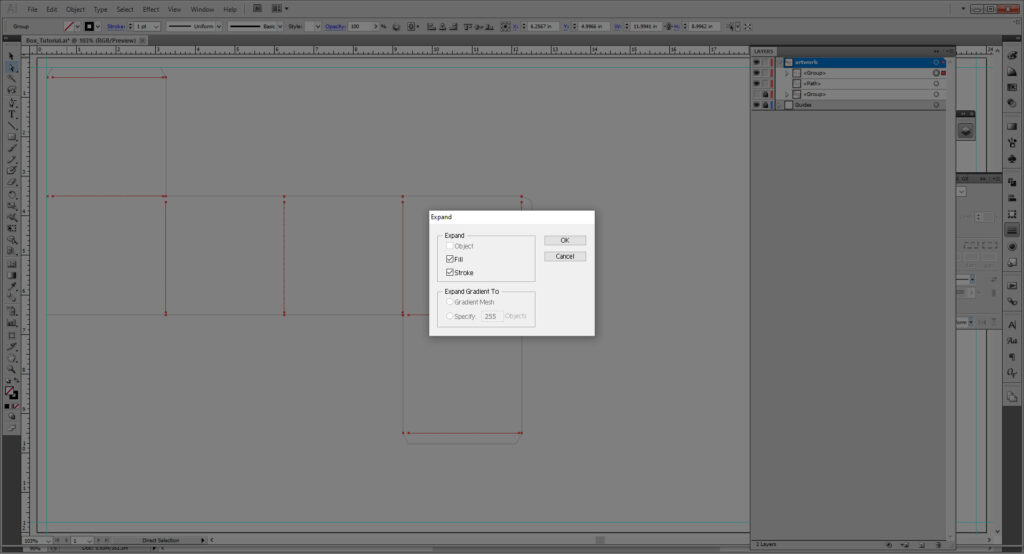
Select the group of dotted lines. Go to Object > Expand Appearance then Object > Expand, and select OK. So now, the laser cutter will know it has to cut the outside and etch the dots.

Go to File >Save As and select Adobe Illustrator (.AI)
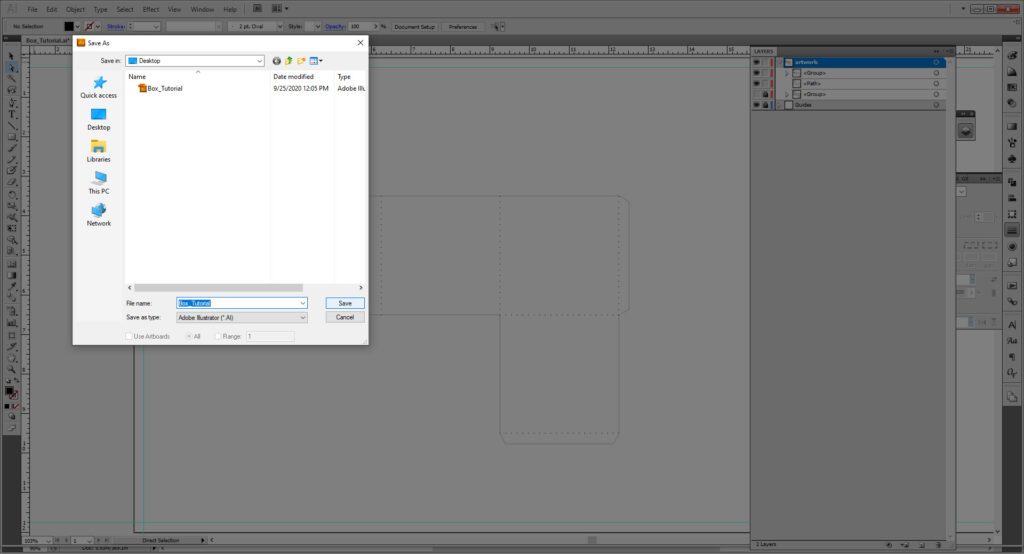
Save to a thumb drive or email to the Lab Manager to cut and etch. Make sure you have you material with you!
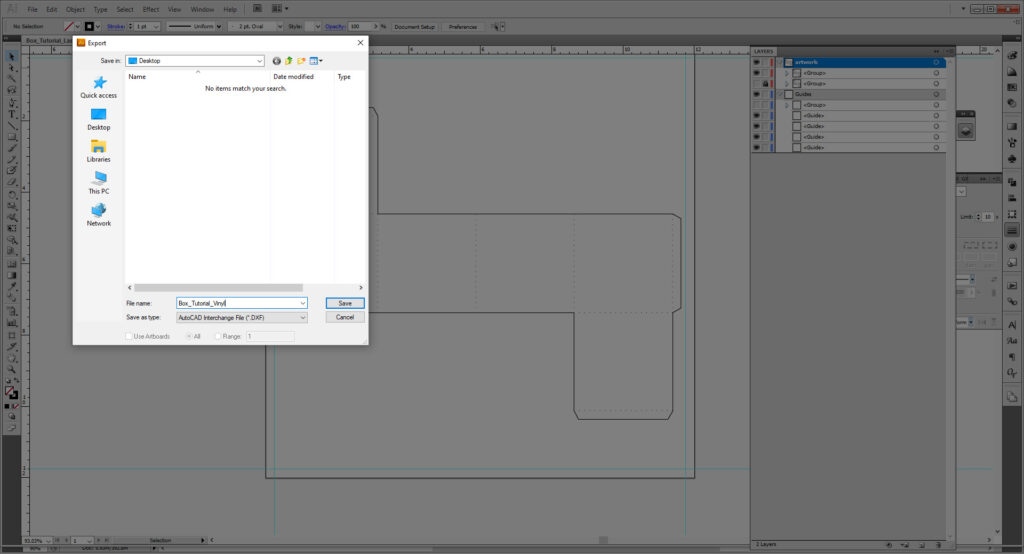
Exporting For Vinyl Cutter:
This is for the laser cutter (12×12 inch artboard). For more detailed information on outputting for the laser cutter, please visit this guide.
Scale down your box to fit within the 11.75×11.75 in Safety Area.
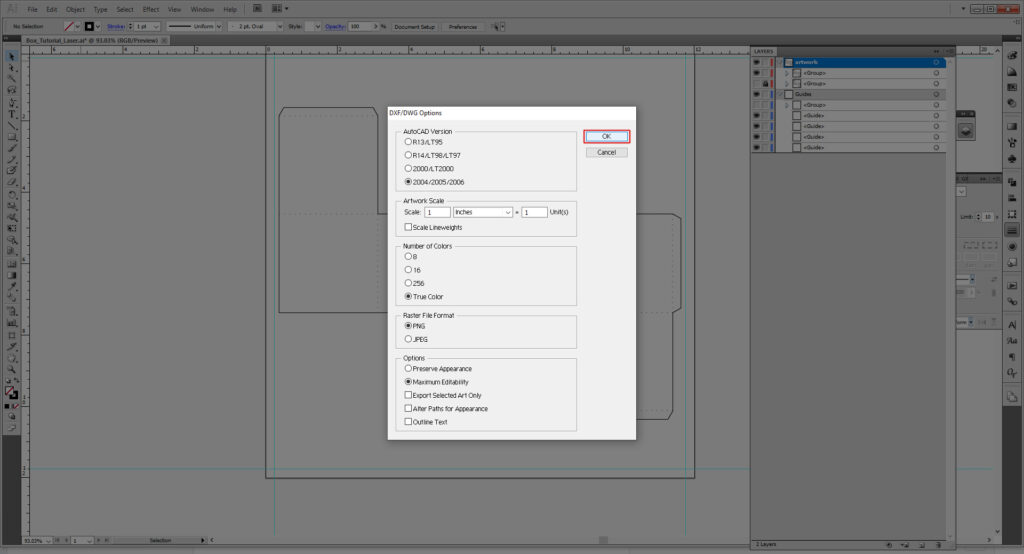
Go to File > Export and choose AutoCAD Interchange File (.DXF) in the dropdown menu. Hit OK in the next dialog menu.
Once it is saved, you can now move over to the vinyl cutter’s proprietary software to cut and score it!
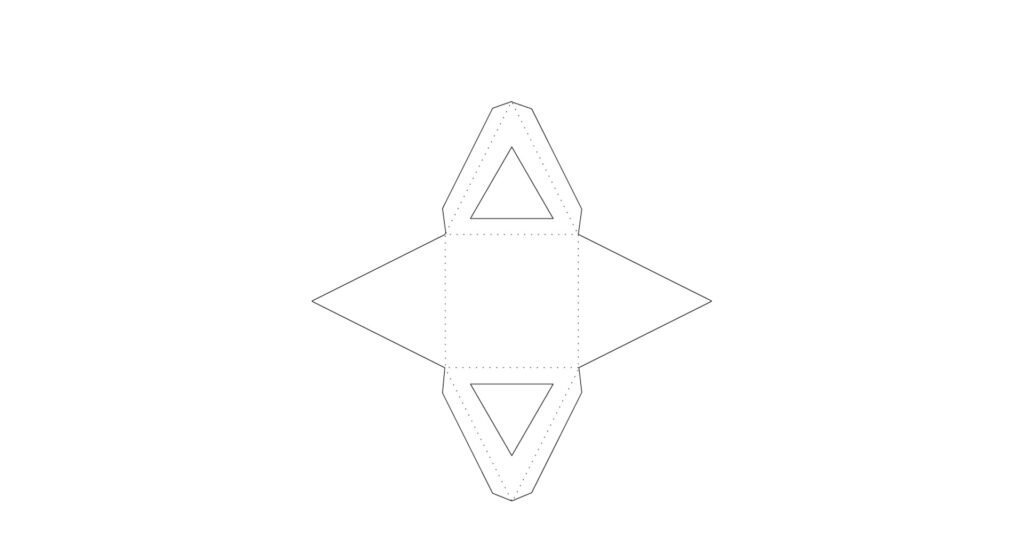
While the cube is a simple example of a box, you can change the sizes of the elements to produce many other kinds of boxes. Below are some examples I put together to show how complex/simple you can go!

Below are some guides that show you how to make a template for other kinds of boxes, as well as preparing mockups. Just like anything else, the only way to get better at it is to keep doing it!
Show us what you made! Send it to bmcc.makerspace@gmail.com or reach us at bmcc.makerspace on Instagram (or use the the #bmccmakerspace tag) to be highlighted on our page!
Further Reading:
- Tutsplus: Packaging for Beginners
- Tutsplus: Designing a Pillow Box
- For Beginners and Beyond: Carton Box Tutorial
- Zero2Graphic: Basic Packaging Design in Illustrator
- Zero2Graphic: Designing a Box Template
- Learn With Passion: Packaging Design In Adobe Illustrator | How To Create Dielines, Bleed Guide & Cut Lines
- Designer’s Book of Dielines
Books:
- The Packaging Designer’s Book of Patterns by Lászlo Roth and George L. Wybenga
- Structural Packaging: Design your own Boxes and 3D Forms (Paper engineering for designers and students) by Paul Jackson (Available as an ebook at the BMCC Library!)