In this guide I will walk you through how to design and create drawstring bags using vinyl cut fabric in two ways: no-sew (using Heat N’ Bond hem tape), and by the traditional sewing using the machine.
What You Will Need:
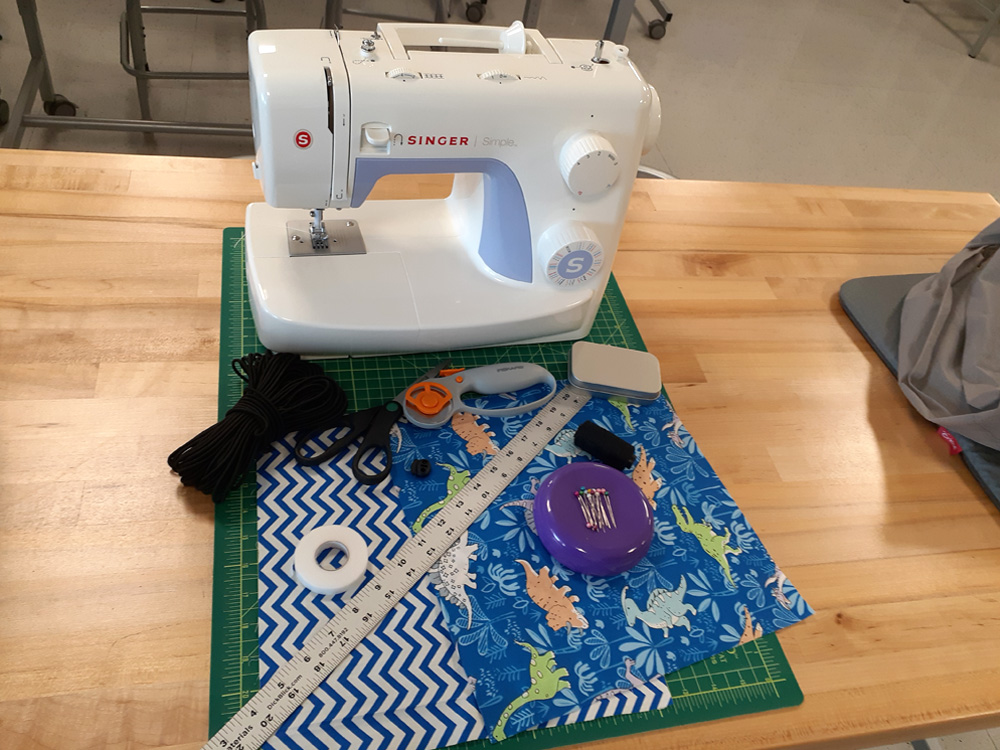
- 2 “Fat Quarters” (18 by 22 inches) of fabric, cut down to 12 by 12 inch squares.
- OR 12 by 12 inch Quilting Squares. (Most Quilting Squares are 10 by 10 inch squares to make sure to check your measurements!)
- A pencil, chopstick, or coffee stirrer– anything that can slide through the fabric channels.
- Scissors
- A fabric cutter (either scissors or a rotary blade– I prefer the rotary blade myself!)
- A cutting mat
- Pins
- Thick cord or rope
- Vinyl Cutter (for us it’s the Cricut Maker with the rotary blade)
- Fabric Grip Cutting Mat (or your brand of vinyl cutter’s equivalent)
- Cricut Rotary blade (or your brand of vinyl cutter’s equivalent)
- A computer or tablet with Adobe Illustrator (or another vector editing software) and your vinyl cutting software (We’re using Cricut Design Space.)
For Sewing Method:
- 1 or 2 Bobbin(s) of thread of your color(s) of choice
- Sewing Machine (I’ll be using the Singer Simple 3232)
For Heat n’ Bond Method:
- Heat N’ Bond Tape (I’m using the 3/8 inch wide roll.)
- An Iron or Heat Press (I am using the Cricut Heat Press.)
- Cricut heat press mat or Ironing Board.
Note: Please be aware that the Cricut Maker, Cricut Heat Press, and Singer Simple 3232 are available to use at the Makerspace if you wish to try it out and do not have the tools!
Designing the Bag:
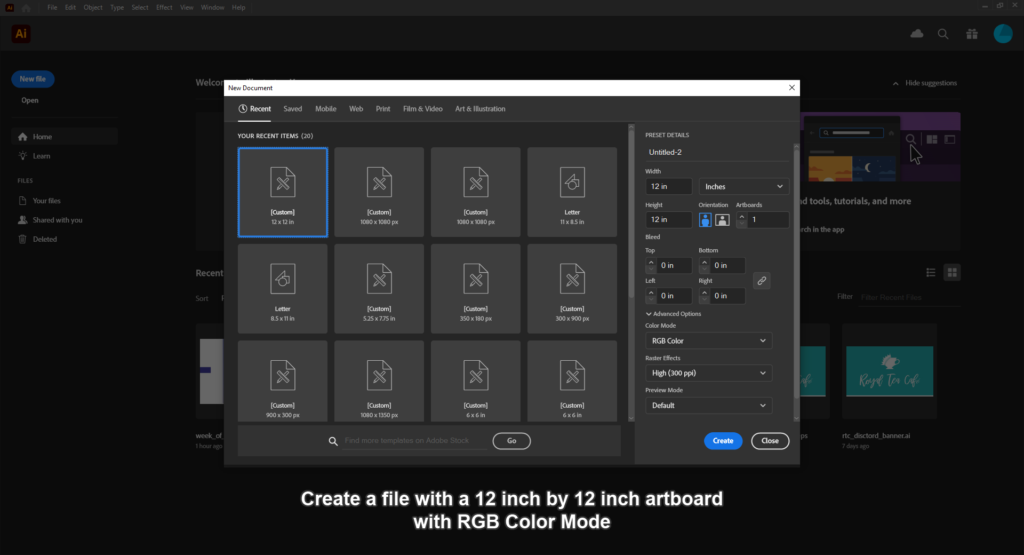
Open up Illustrator and make a file set to 12 by 12 inches. This is the maximum size of our vinyl cutter mats.
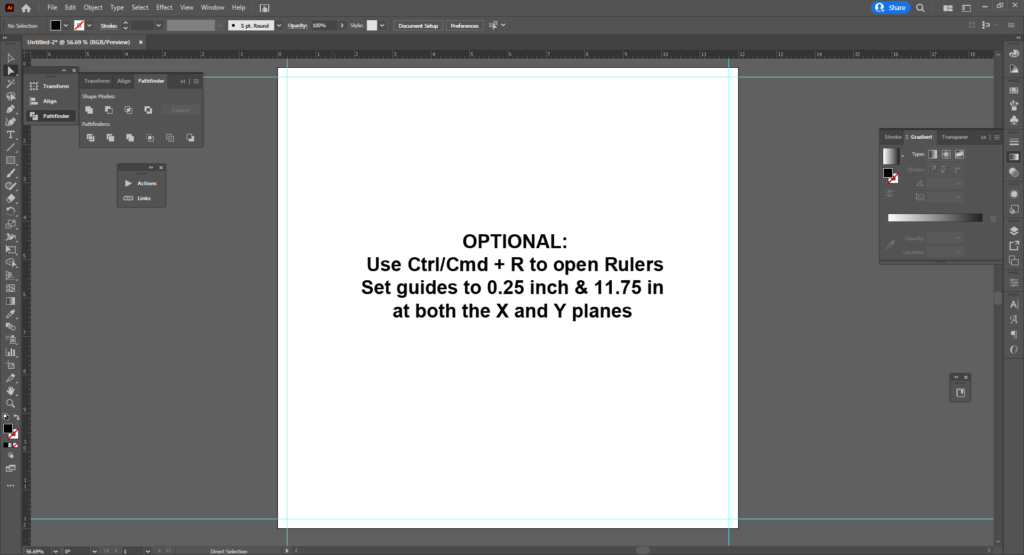
You may want to create a safety area of about 0.25 inches using rulers (Ctrl + R). This will allow space so your project may not be cut off by the vinyl cutter.
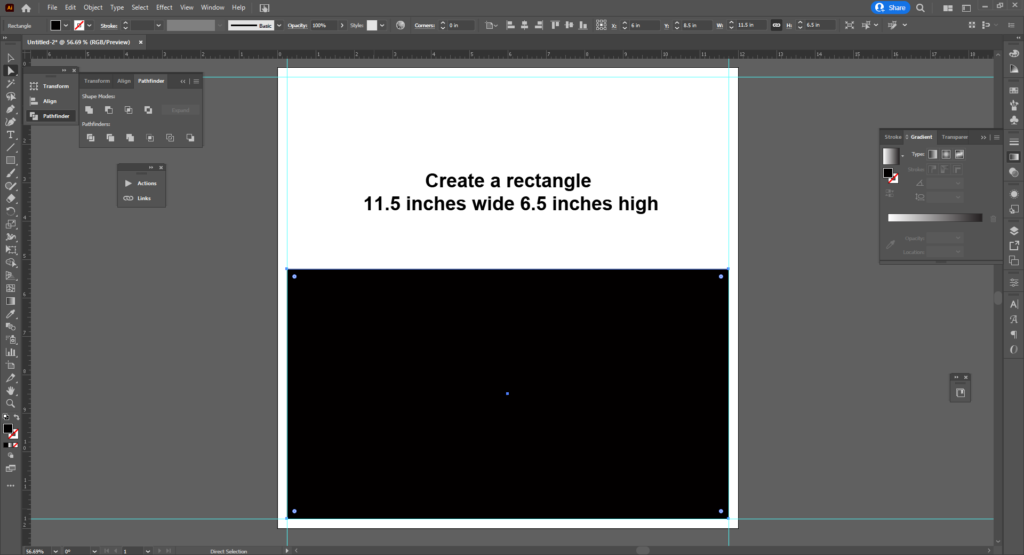
Next make a rectangle that’s 11.5 by 6.5 inches. This will be for both the inside and outside layer for our bag.
After that make TWO 6.5 by 1.5 inch rectangles, these will become the channels that encloses the drawstring.
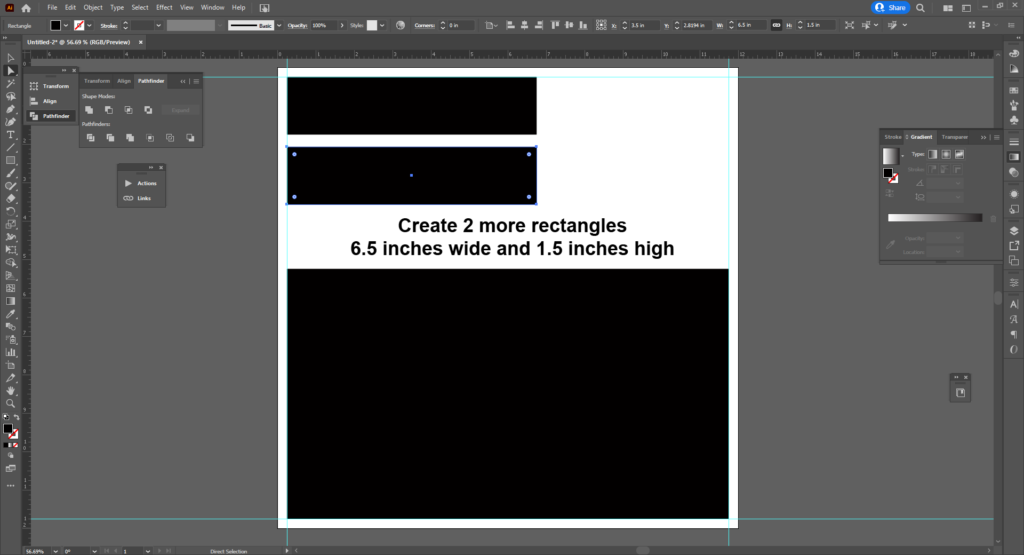
When you are completed, you will need to Export it as an SVG. (Cricut has been finicky with DXF files being made in newer versions of Illustrator.)
Go to FILE > EXPORT > EXPORT AS…
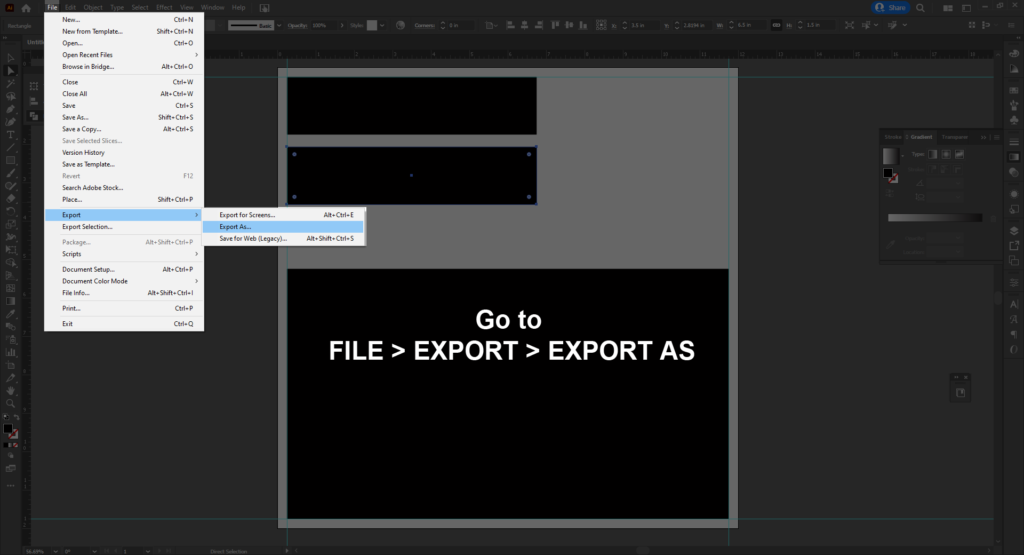
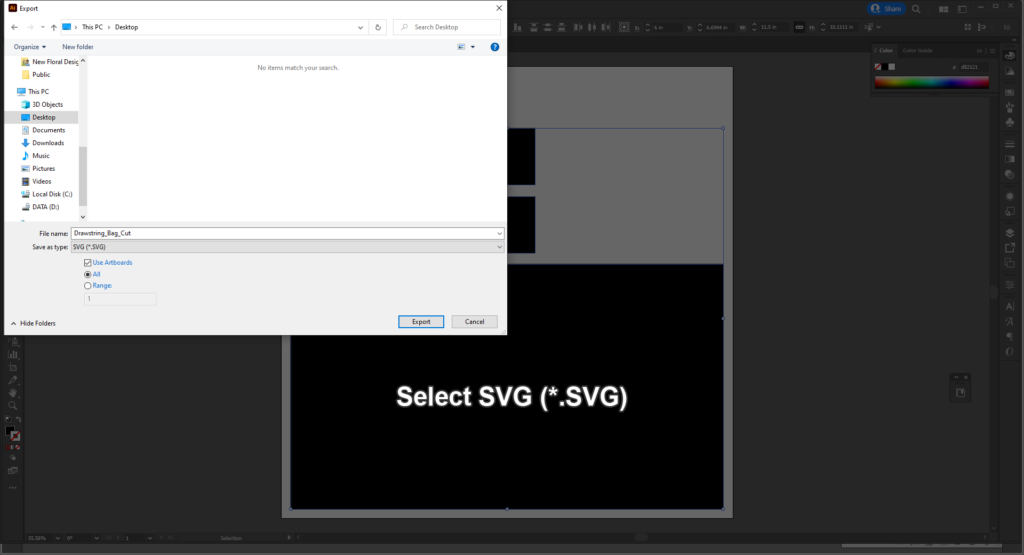
Find SVG (*.SVG) in the dropdown menu, and select EXPORT.
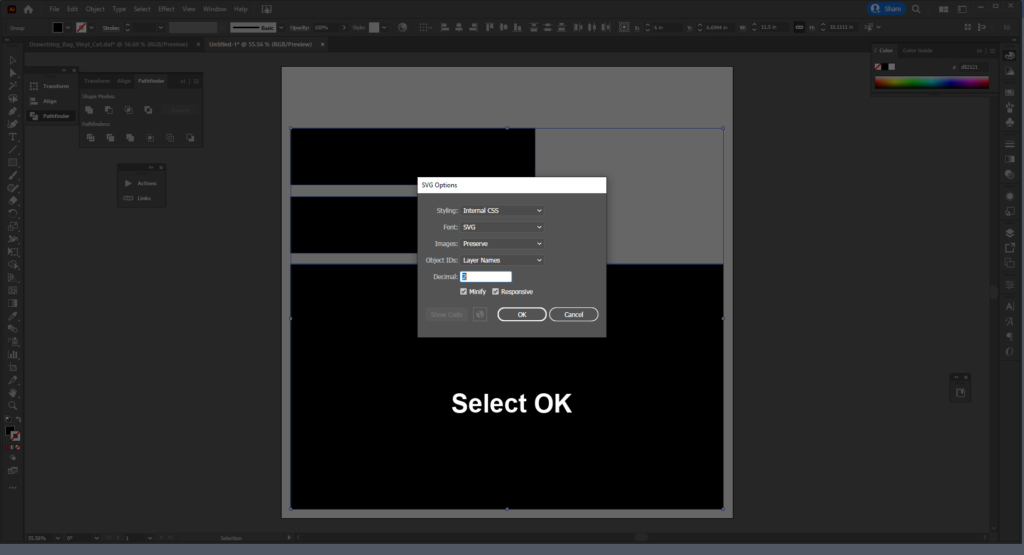
Hit OK in the following menu.
Setting Up the Cricut:
You can do this right before print, but I prefer to set it up before exporting my design. If your fabric is larger than 12 by 12 inches, you will need to cut it down.
You will need the Fabric Grip mat, which is the pink mat for Cricut. For other vinyl cutters, use the standard grip.
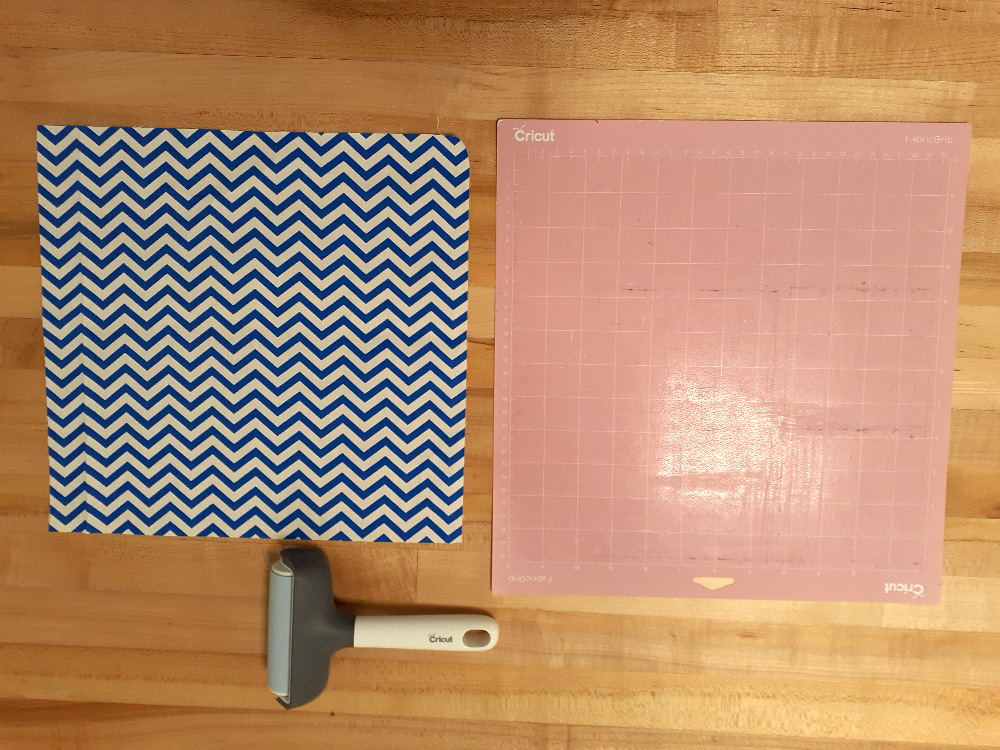
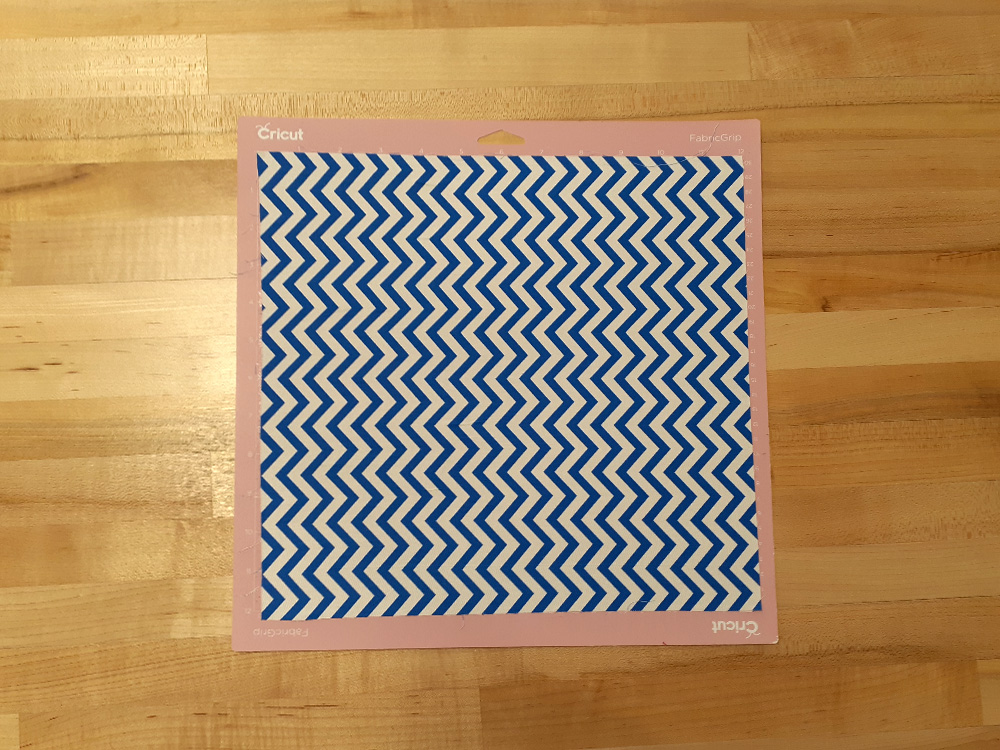
I like using the roller to help the fabric grip to the adhesive better, and to remove any bubbles that may have happened when placing it.
If you haven’t swapped out the blade, you will need to swap it for the ROTARY BLADE. It looks like a little pizza cutter on bottom and large brass gear on top.
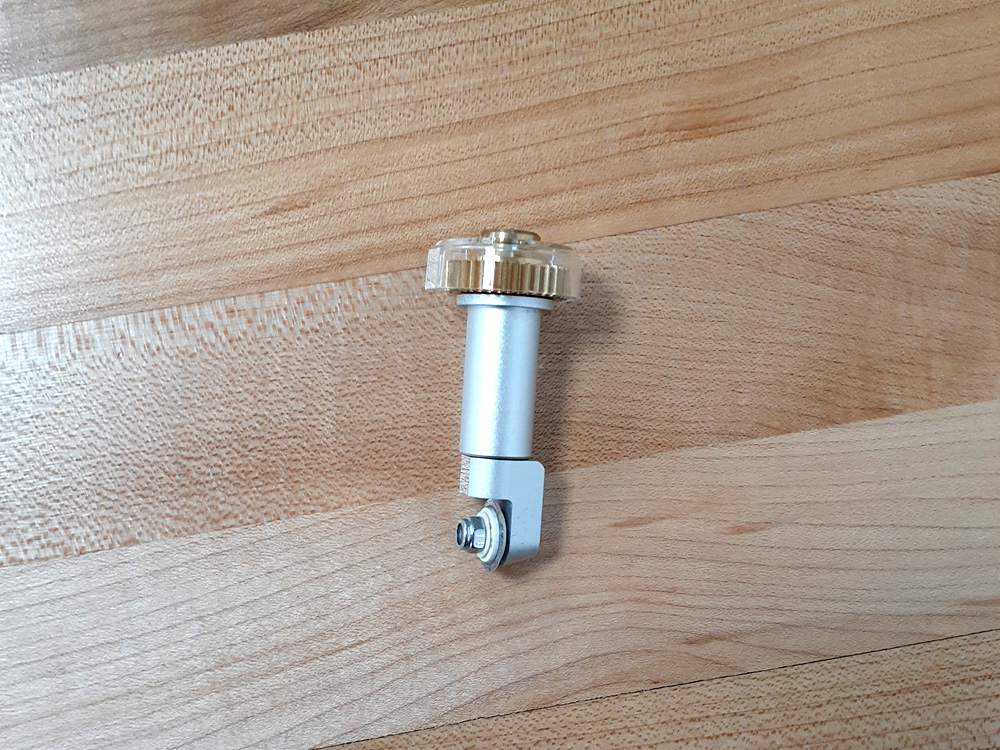
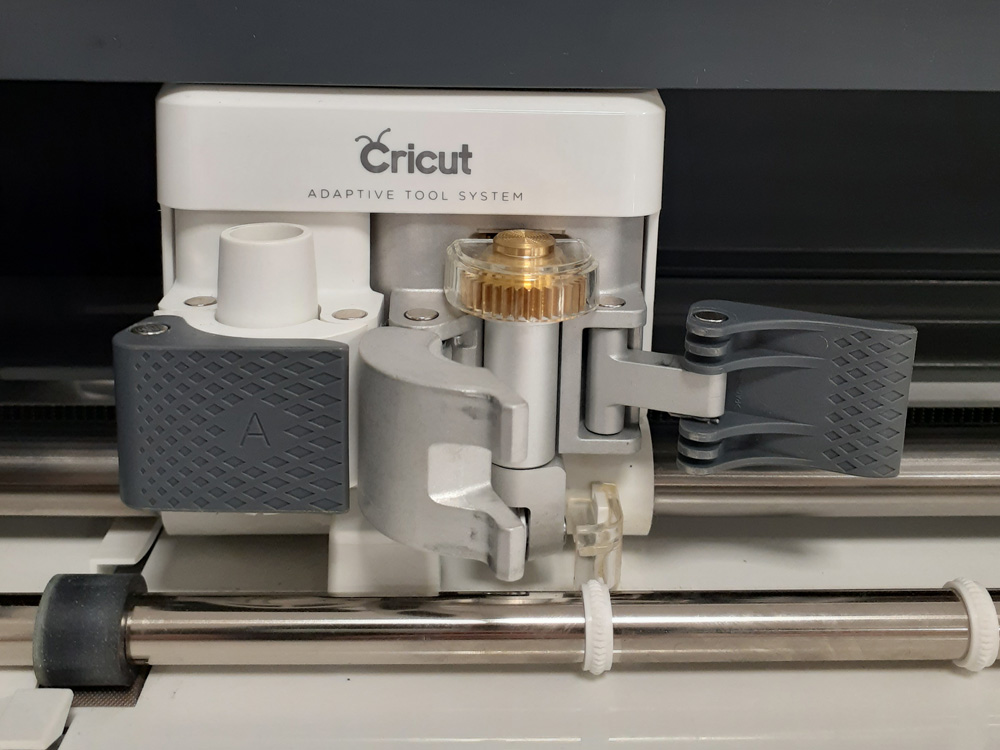
Open up the housing labeled B and remove the blade. Place the rotary blade in with the clear plastic facing you and blade side of the head facing left. Snap it back in when done.
Load in your mat with the fabric between the two white guides.
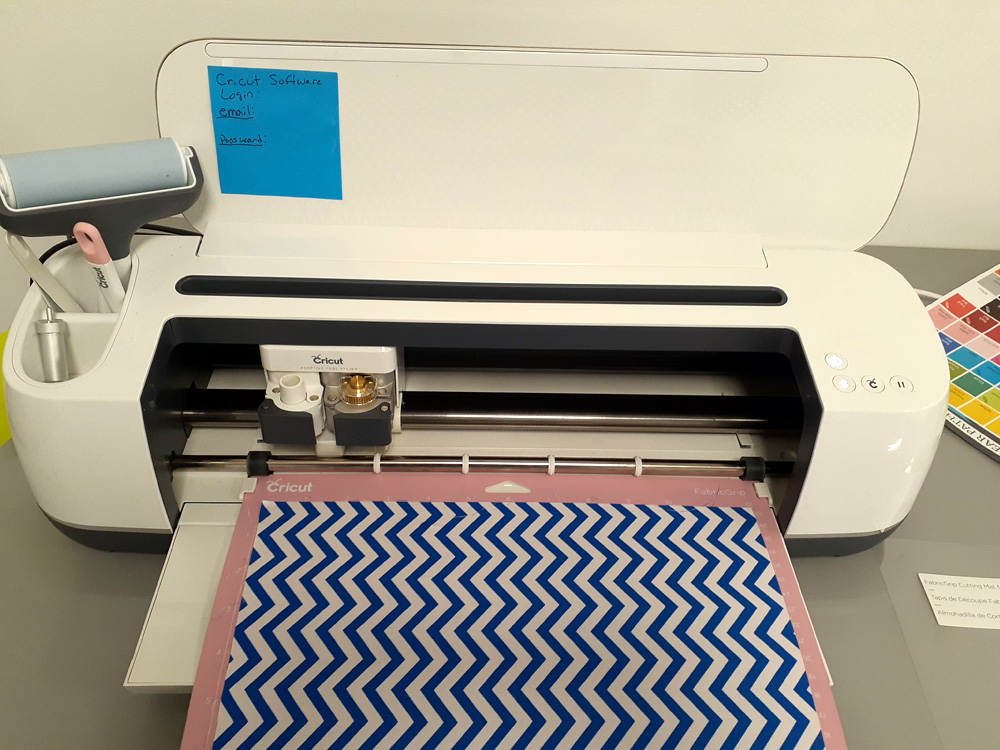
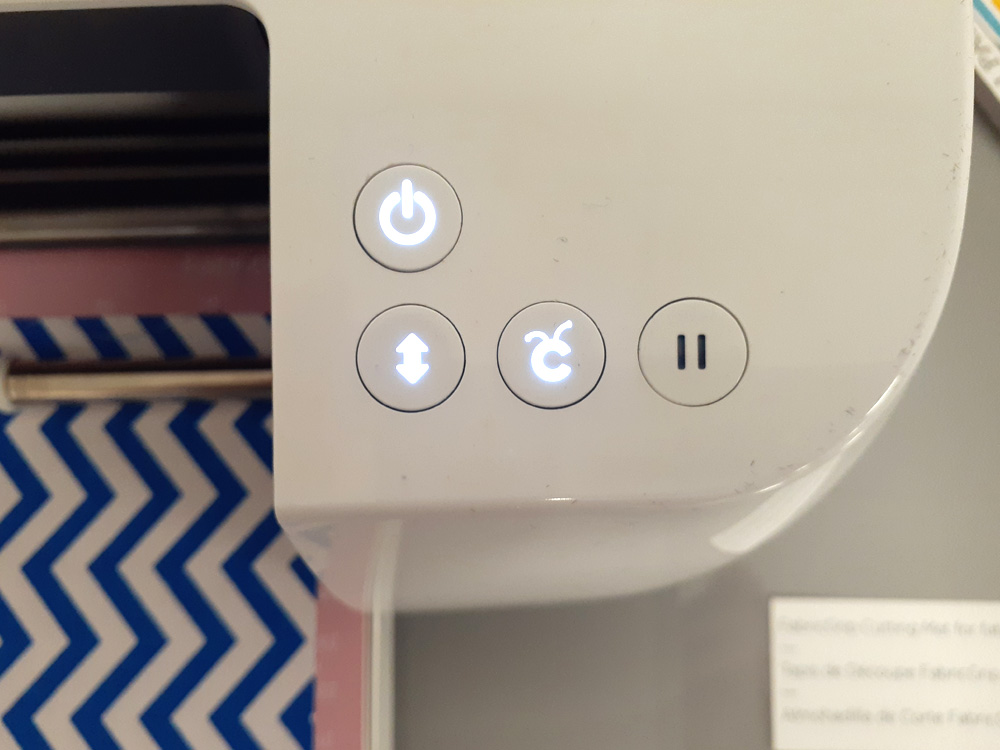
Turn on the Cricut Maker using the POWER button– the top button that consists of a ring and a line. Load the mat in using the LOAD button– the one with the two arrows below the Power button.
Exporting to Cricut:
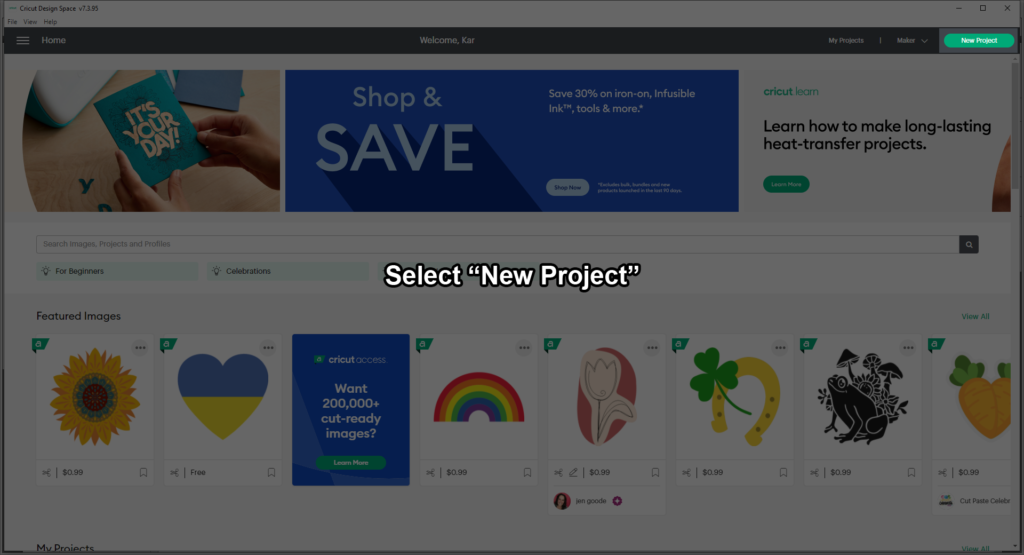
Move from Illustrator to Cricut Design Studio. Select NEW PROJECT located on the upper right of your screen.
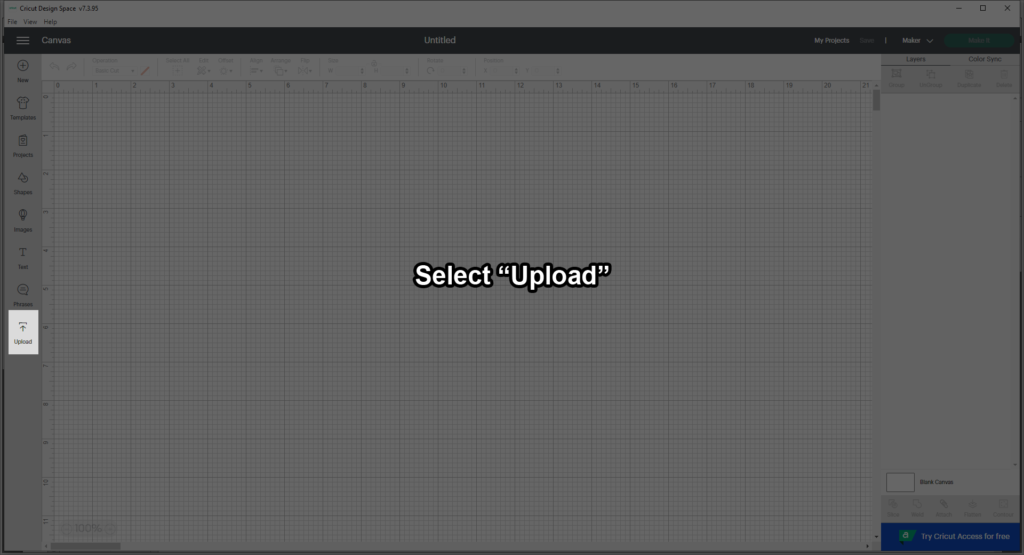
This will take you the design artboard. Select UPLOAD near the bottom left of the User Interface.
Select the UPLOAD DESIGN option under IMAGE.
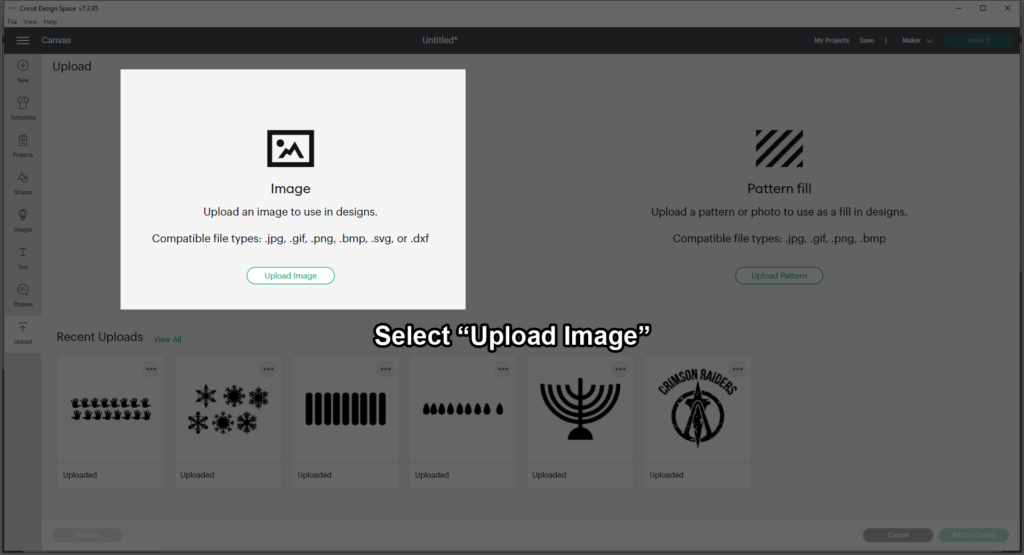
Select BROWSE on the left side.
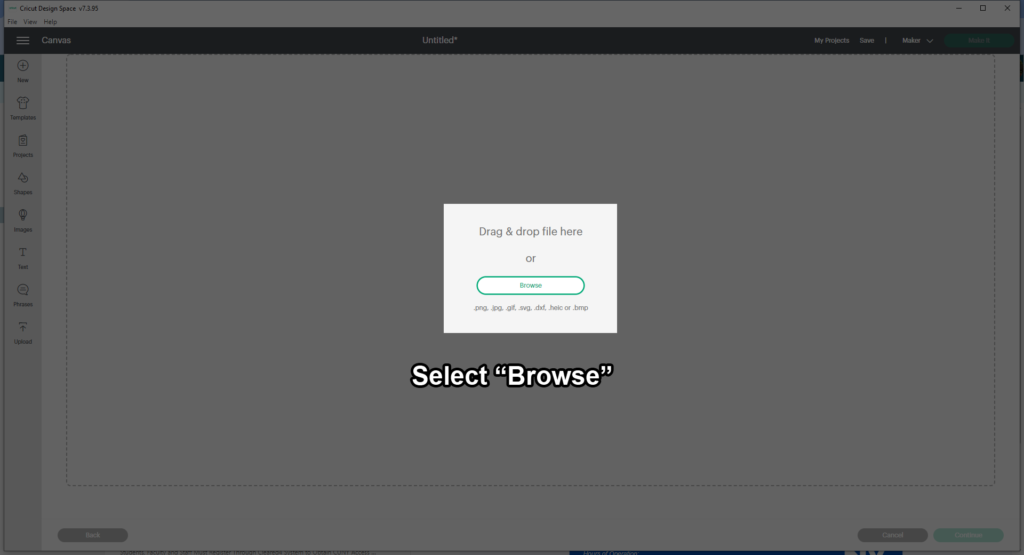
Find your file and select OPEN.
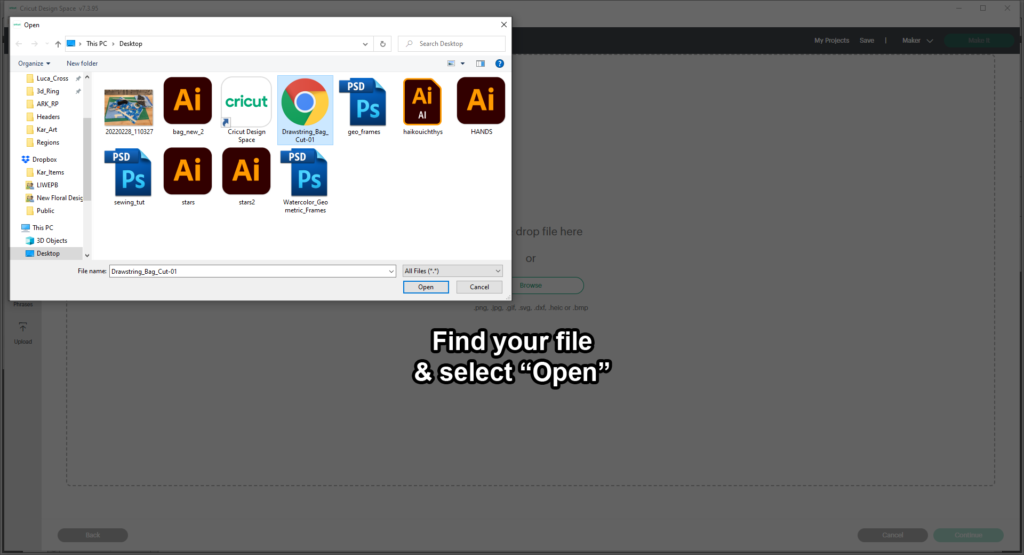
On the next screen select UPLOAD button in the lower right corner.
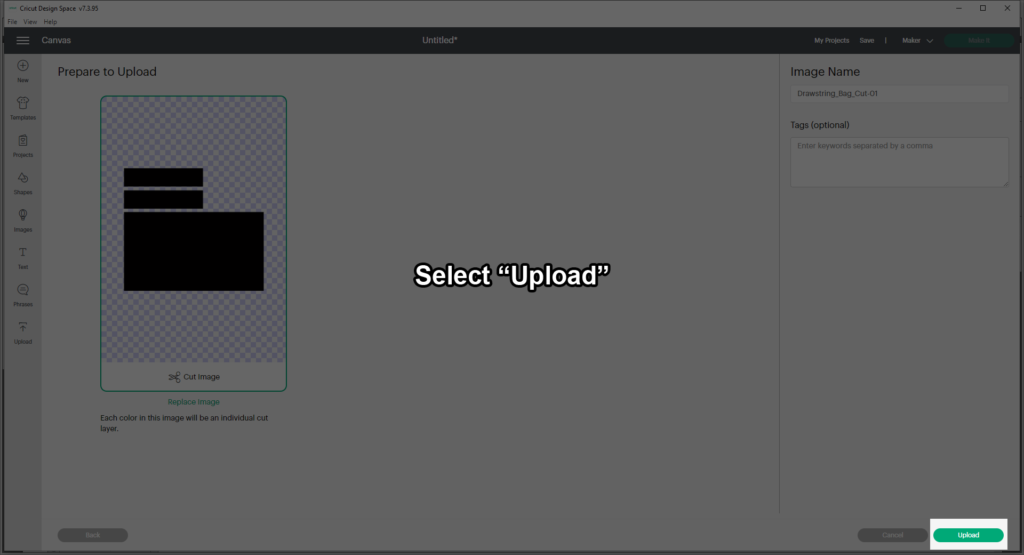
Select your newly uploaded file and select the ADD TO CANVAS button in the lower right corner.
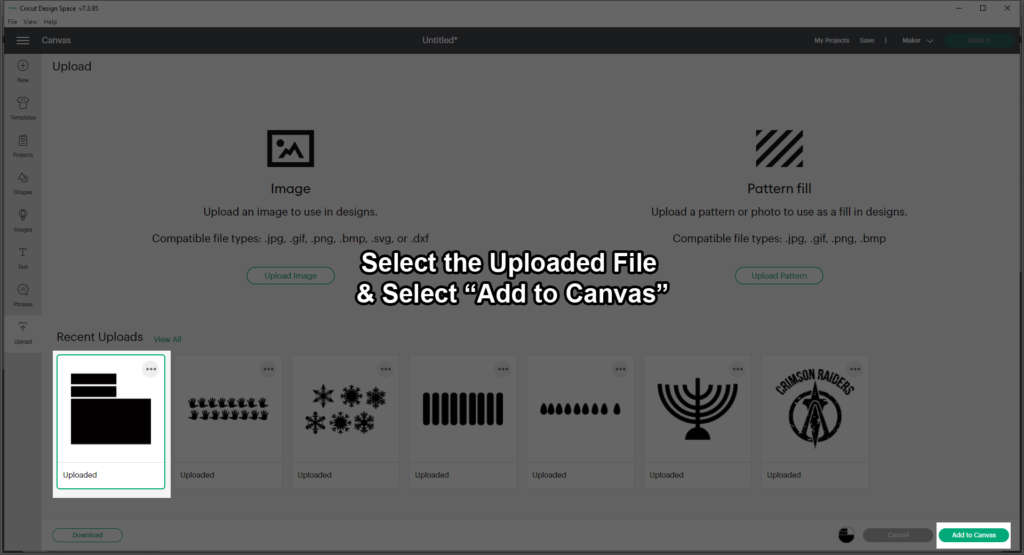
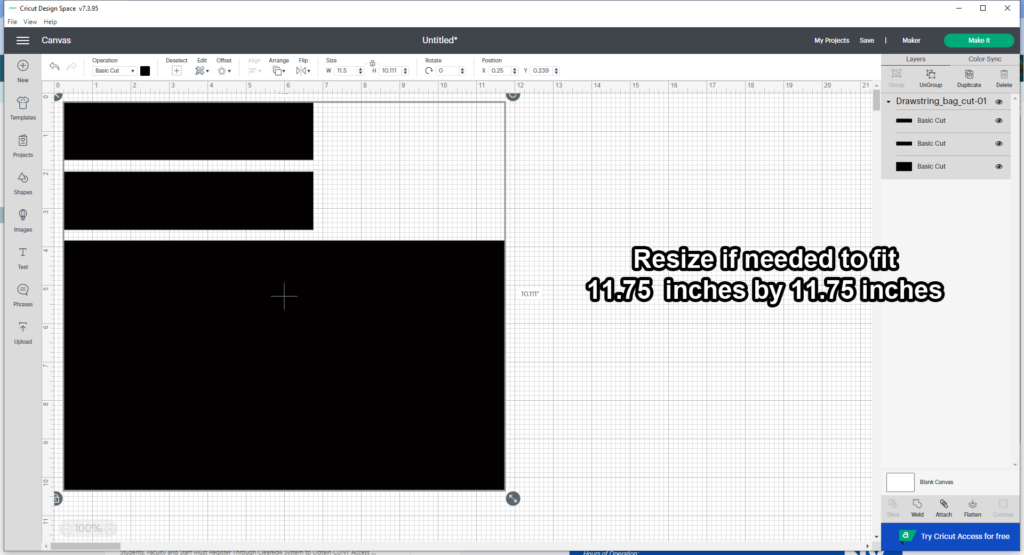
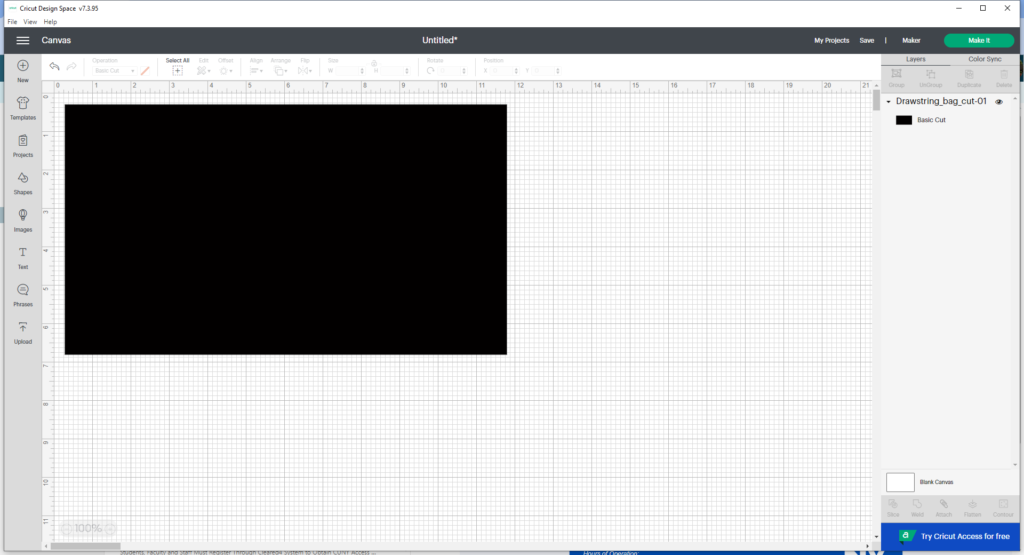
If you are lucky, your file should be placed to actual size. Sometimes it can get placed much larger (likely because of the file resolution set up in Illustrator). However, you can scale it down to size in the canvas. We want to keep our max width and height to 11.75 inches.
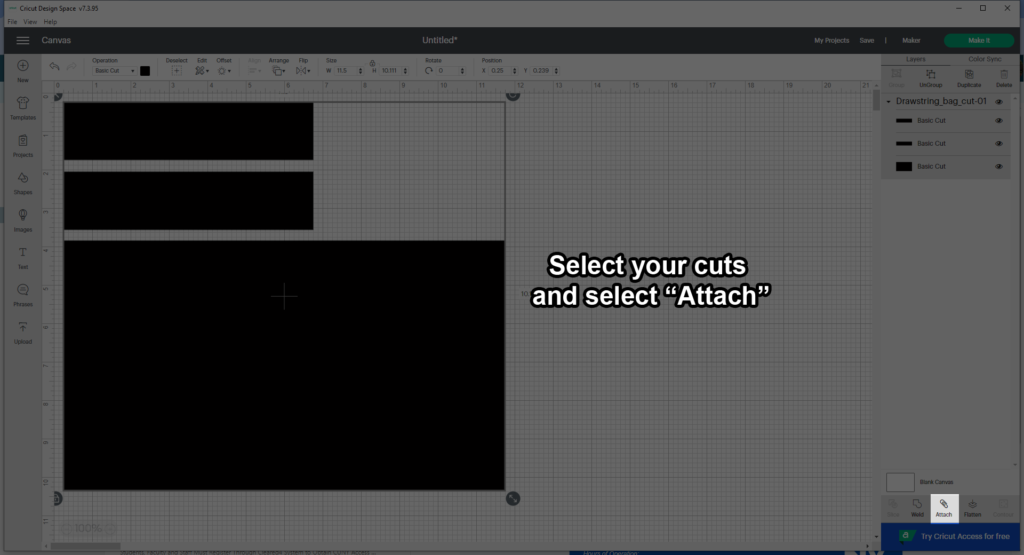
To make sure Cricut keeps you arrangement, select all your cuts and select the ATTACH button on the lower right. This groups your shapes together so Cricut won’t auto arrange it on the board when it exports.
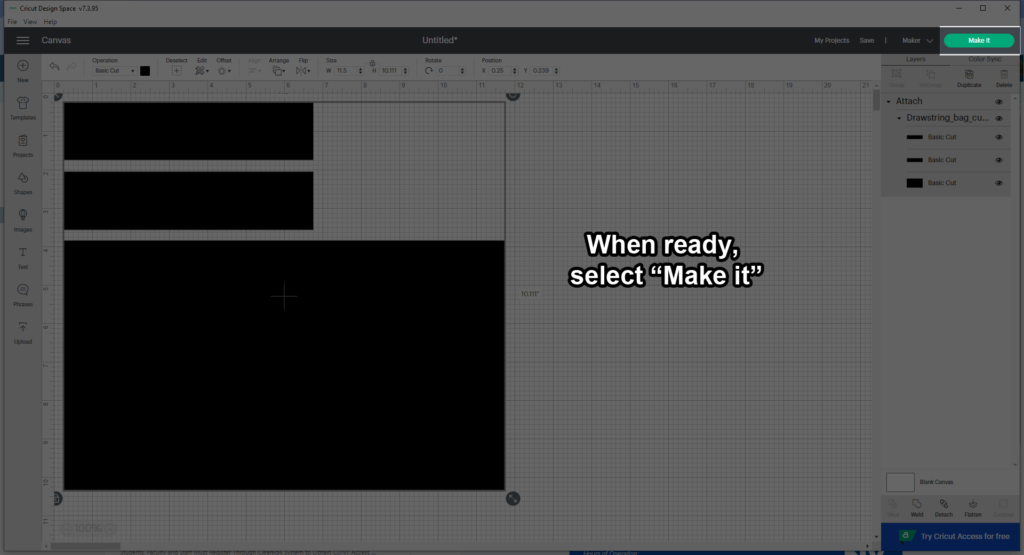
When you’re ready, select MAKE IT on the upper right.
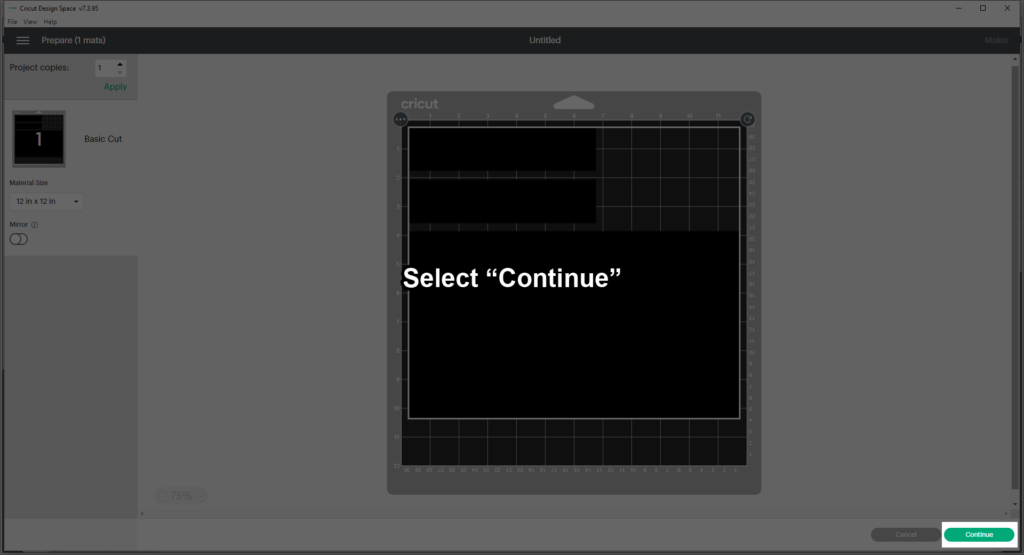
Here is preview of how it will cut out on the mat. Select CONTINUE on the lower right if you wish to continue or go back and fix it.
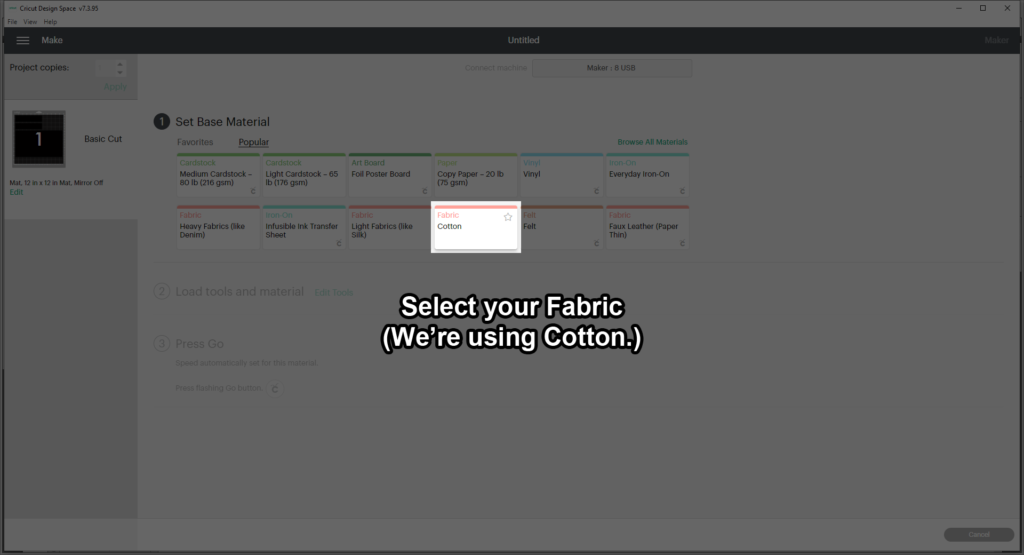
Select your material
If you haven’t already, please scroll back up and follow my instructions and load the Cricut now.
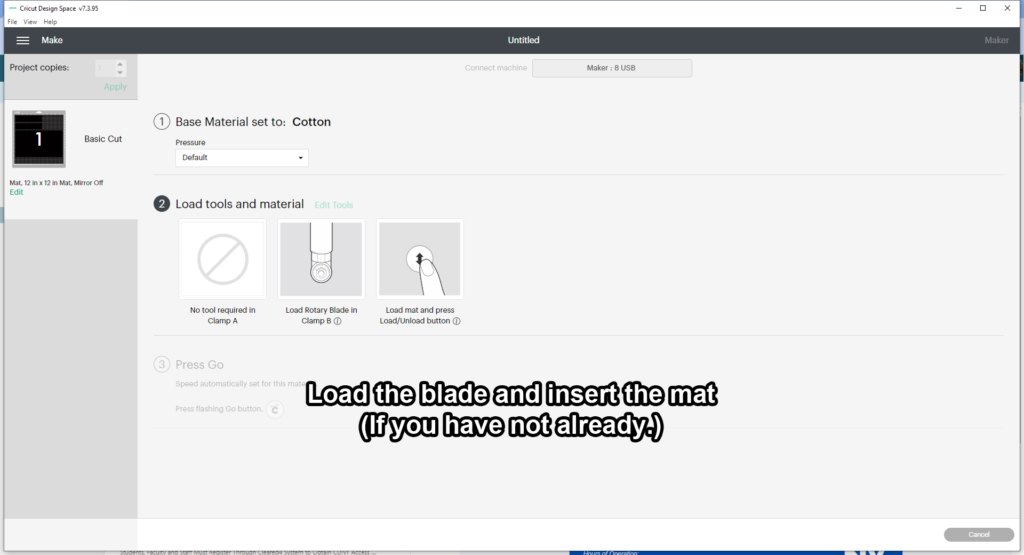
When it is properly loaded, the screen will prompt you to press the GO button on the Cricut– that is the blinking button on the Cricut Maker with the logo right of the Load button.
When your cut is complete, remove the fabric and whatever else is on the mat. This is the inside of you bag, you will need to cut an outside part too!
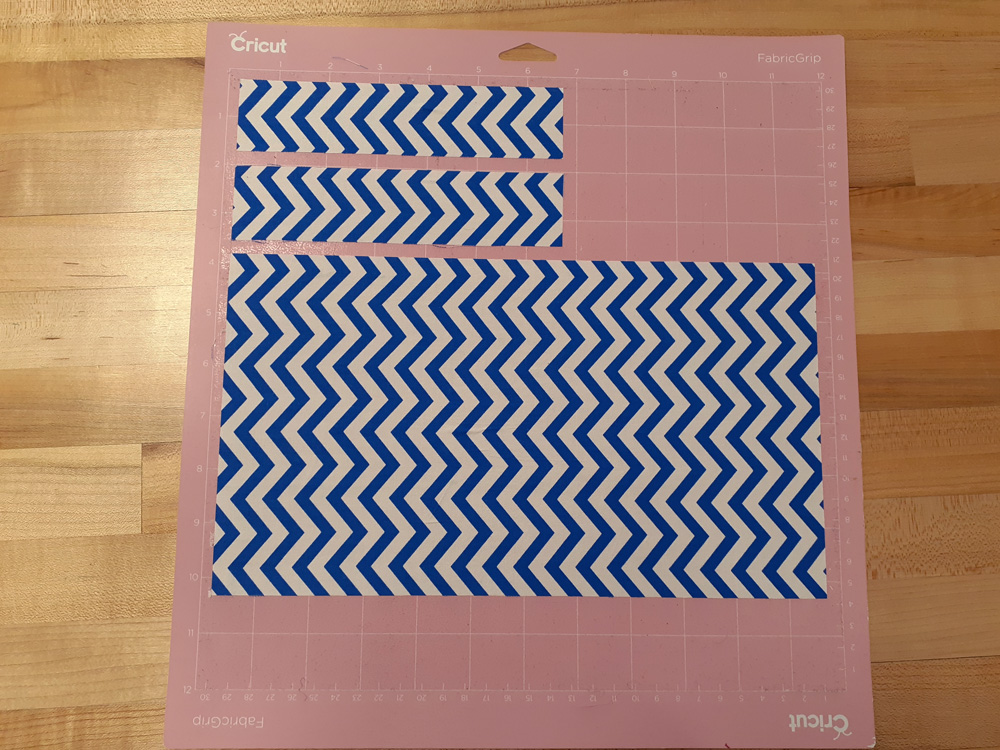
Go back to your canvas in Cricut Design Space, and Un-Attach the cuts. Remove the two smaller rectangles, leaving only the large one.
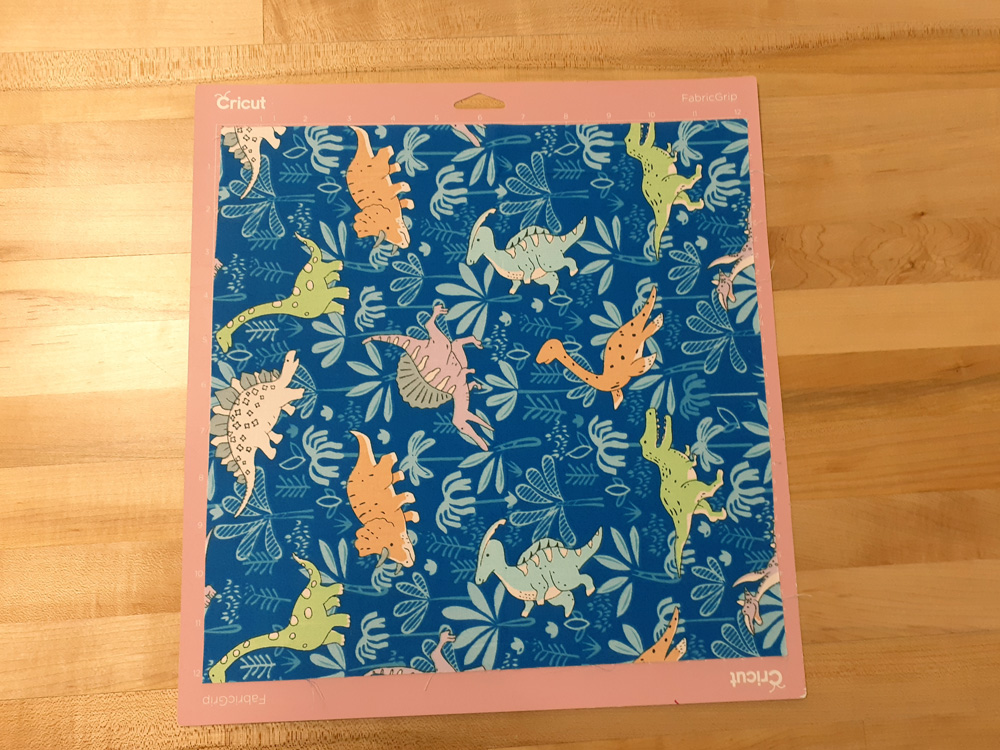
Repeat the steps above, just with a new square of fabric. For me, I also adjusted my rectangle on my mat so it can cut out a certain part of my pattern– I wanted the purple Spinosaurus in my final piece.
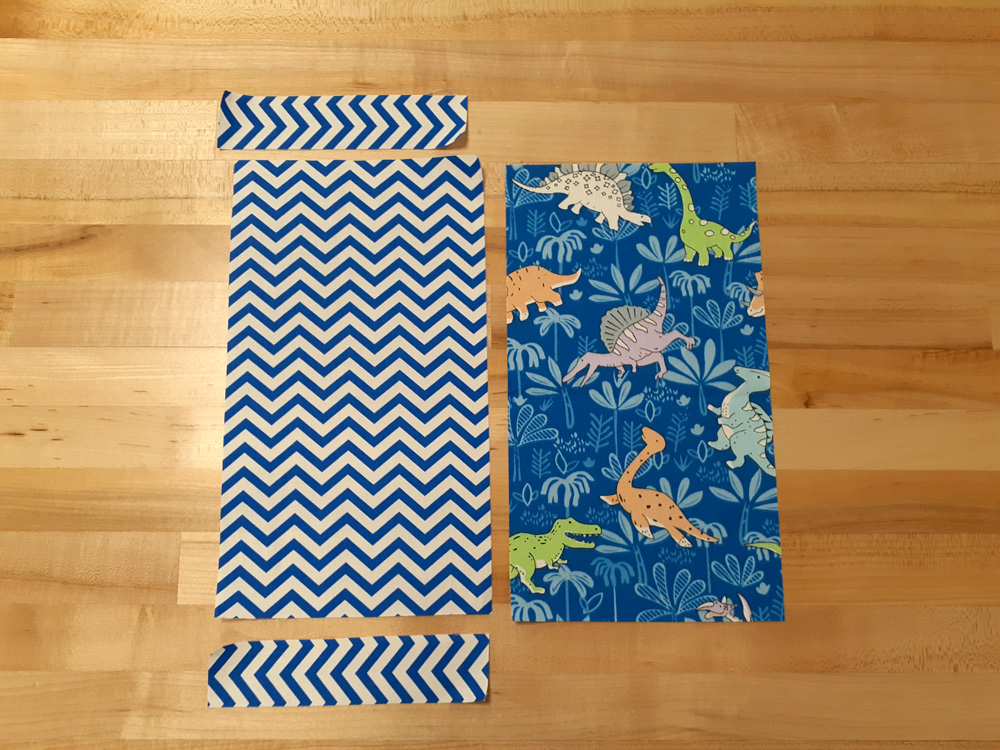
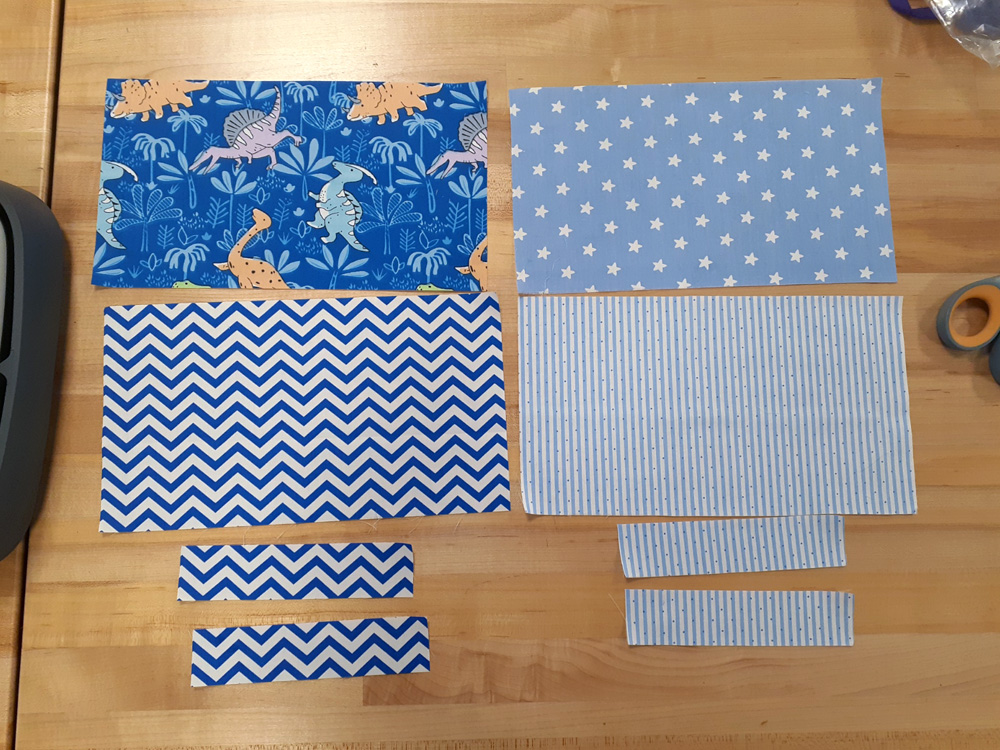
Remove it from the mat when complete and you should have the following: 2 large rectangles and 2 small rectangles. Whether they are the same pattern or not is up to you– for illustrative (and aesthetic) purposes I’m doing different ones.
No-Sew Drawstring Bag:
If you plan on using a sewing machine (or hand stitching–which I applaud your tenacity and patience in that) please scroll down to the next section.
First you will need to cut strips of the Heat n’ bond tape. In total you should have the following:
- 6 6.5 inch strips
- 2 11.5 inch strips
- 2 4.25 inches strips
These sizes are estimated, just based from the template. Also please don’t use your fabric scissors– you want keep those just for fabrics.
On the heat press mat (or ironing board) Take two of the 6.5 in strips and lie them to align with the smaller rectangles.
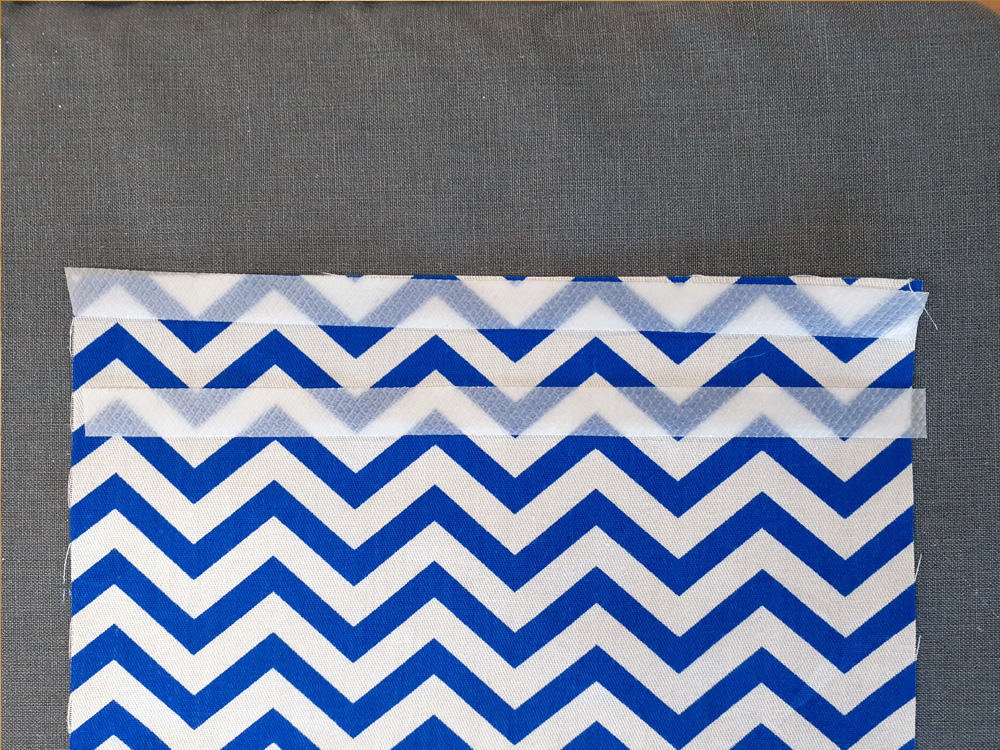
Place your fabric and try not to move it while the heat press or iron heats up.
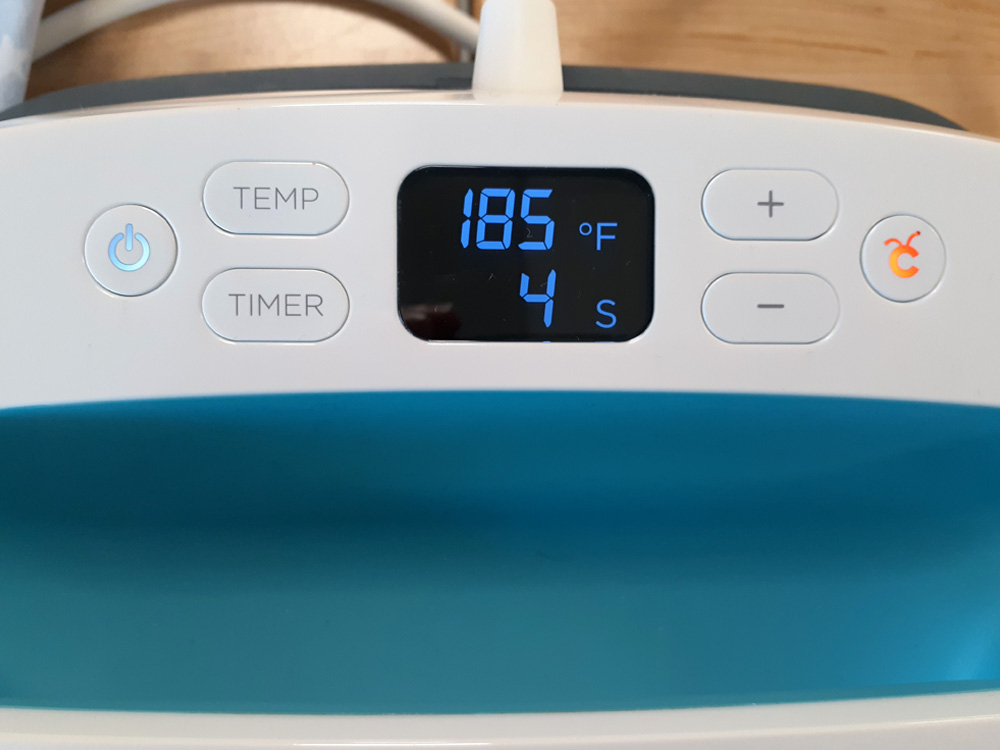
Turn on the heat press using the POWER button on the left side. When you turn it on, the top numbers will blink while you set up the TEMPERATURE. Use the +/- buttons to set your temperature to 300 DEGREES FARENHEIT. When you reach 300, hit TEMP.
Next the TIME will blink. Again, use the +/- buttons to set the time to 4 SECONDS. Hit the TIMER button to confirm. The press will now heat up.
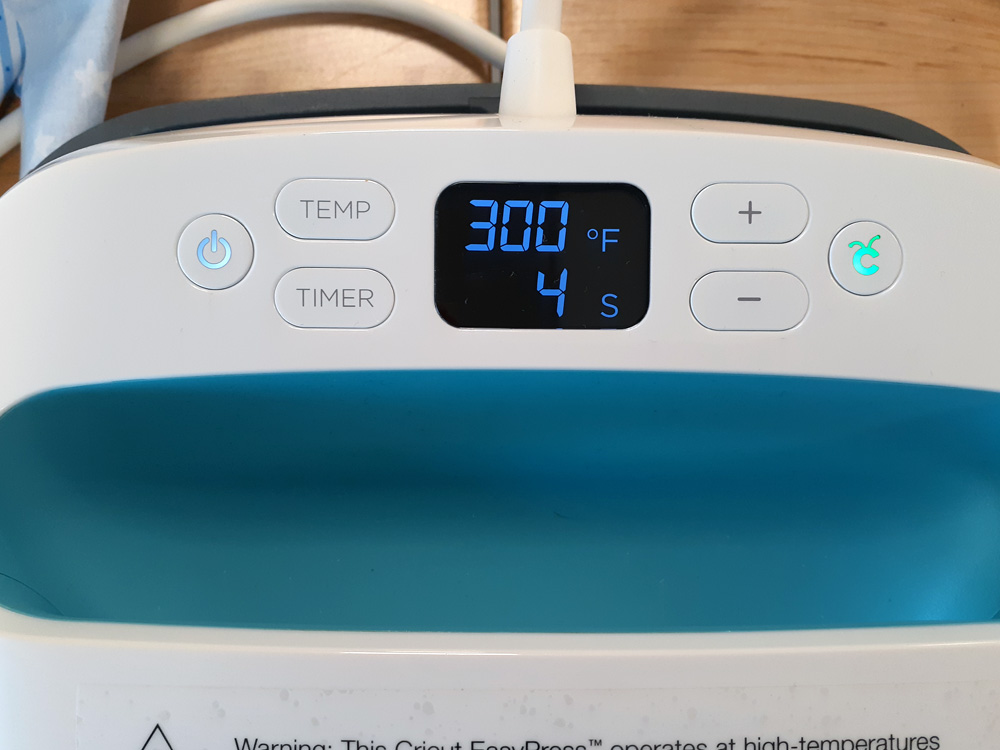
When it is ready to use, it will beep and the light on the right button will turn green. I will point out to handle it carefully at this point as it can burn you if you are not careful!
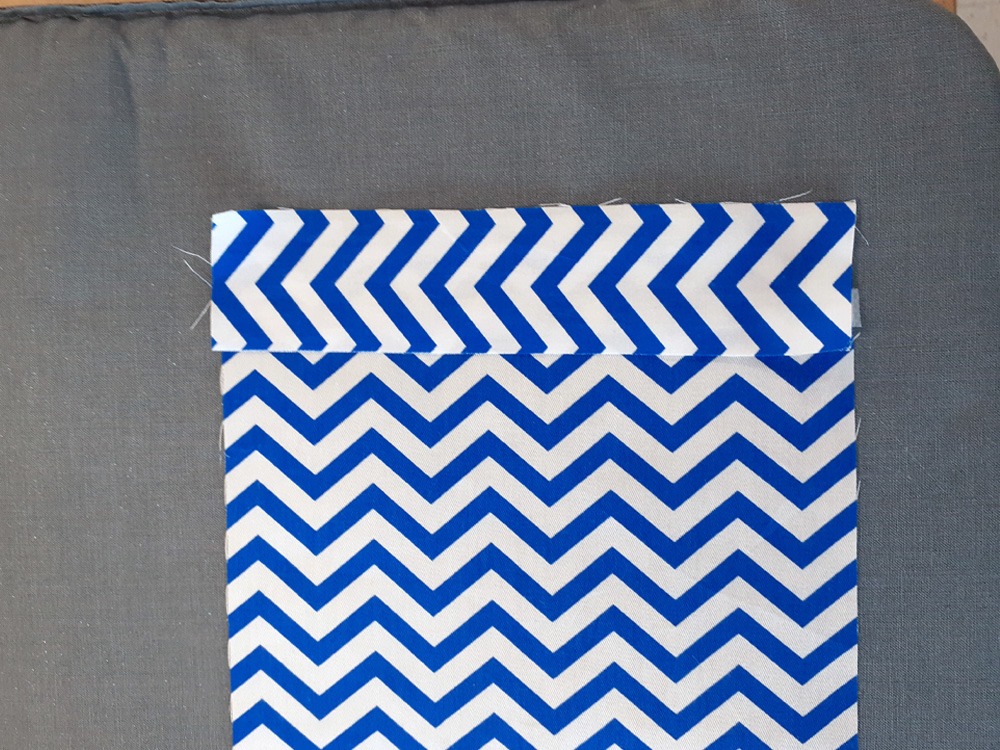
Place the press on top of your channel and press the GO button on the far right with the Cricut Logo. It will count down the four seconds and beep again when complete. Remove the press and return it to the silicone housing while you prepare to the next part.
Optional, you can take a pencil (or coffee stirrer in my case) and run it through the channel to make sure the channel is not blocked.
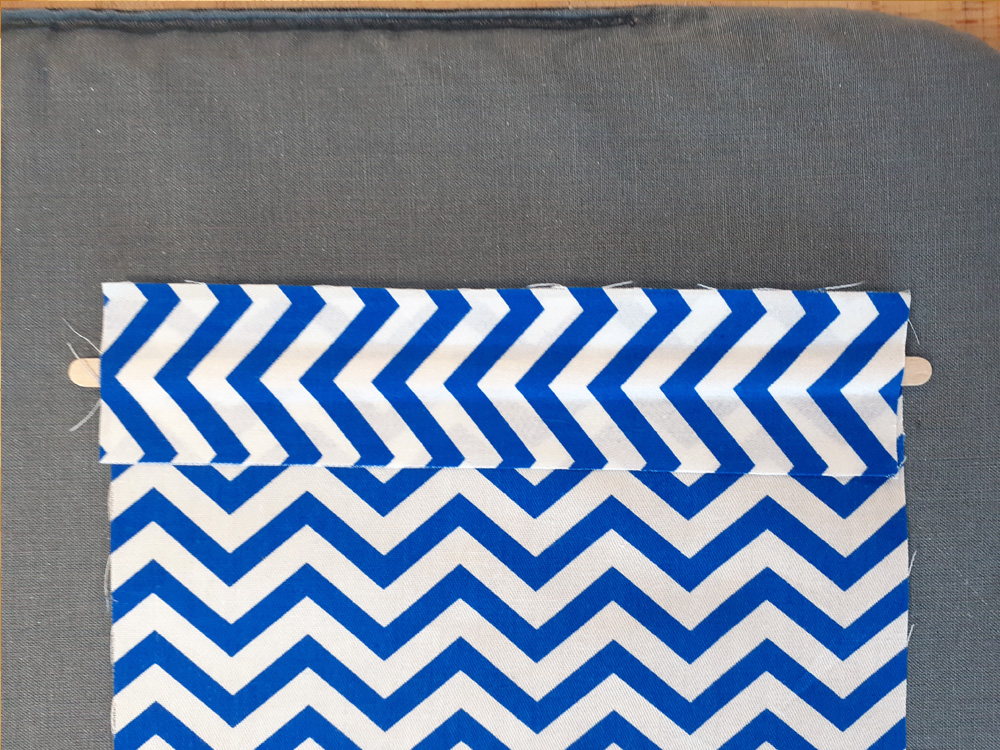
Repeat the process again for the second channel.
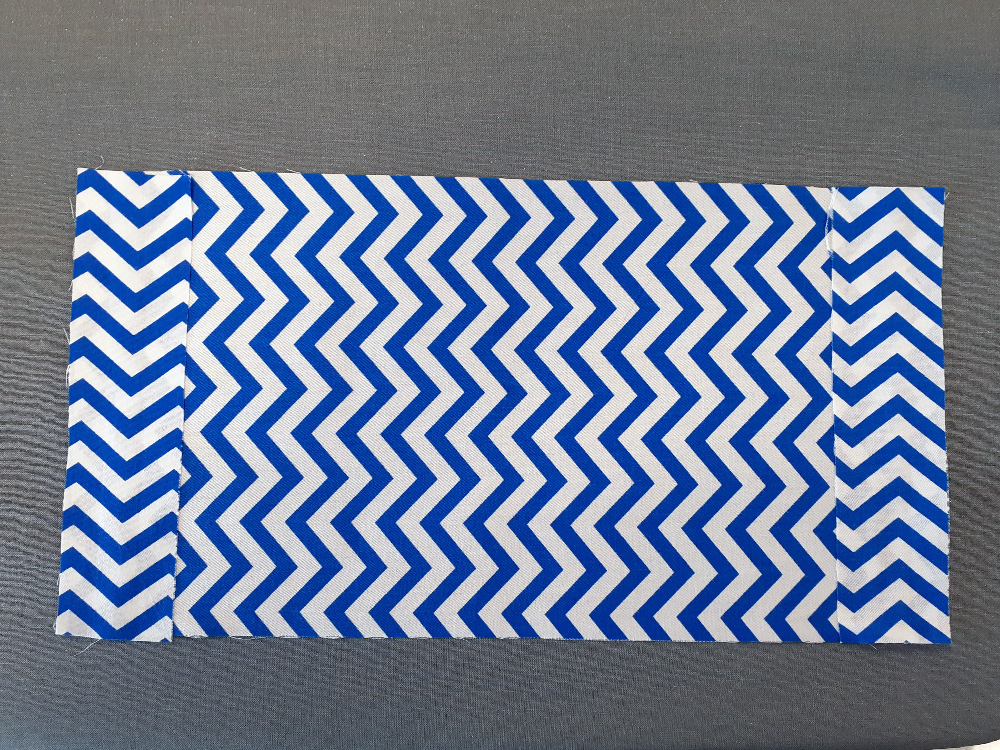
Take the last two 6.5 inch strips and the two 11.5 inch strips and align them to the edges of the outer layer.
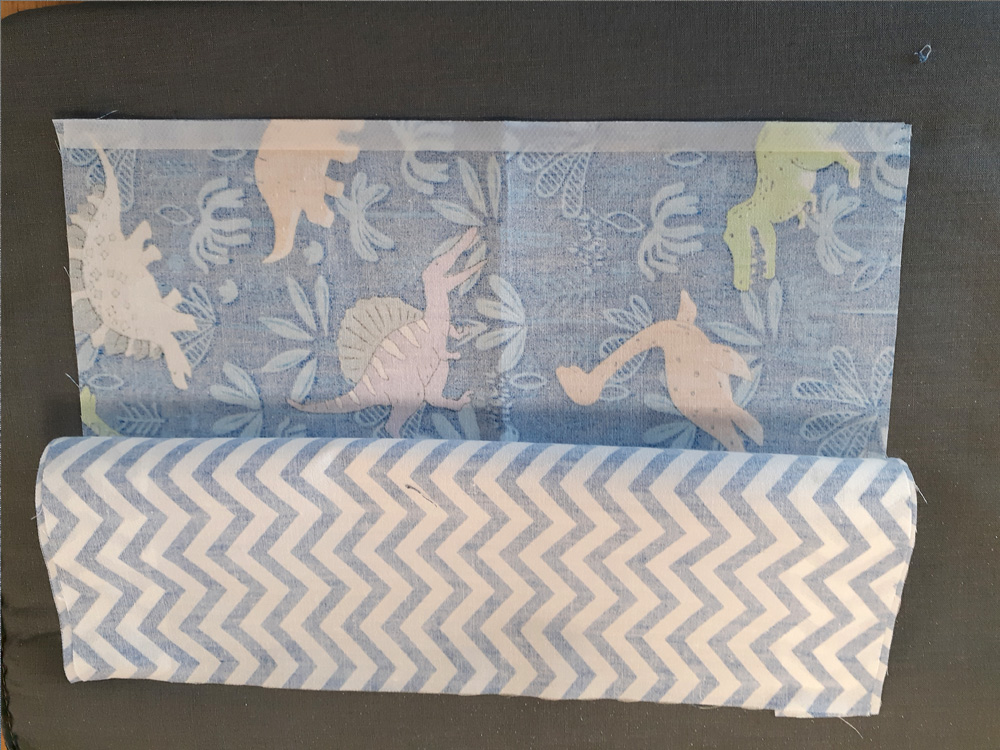
Finally, take the 4.25 inch strips and place them right under the channels on the OUTSIDE LAYER.
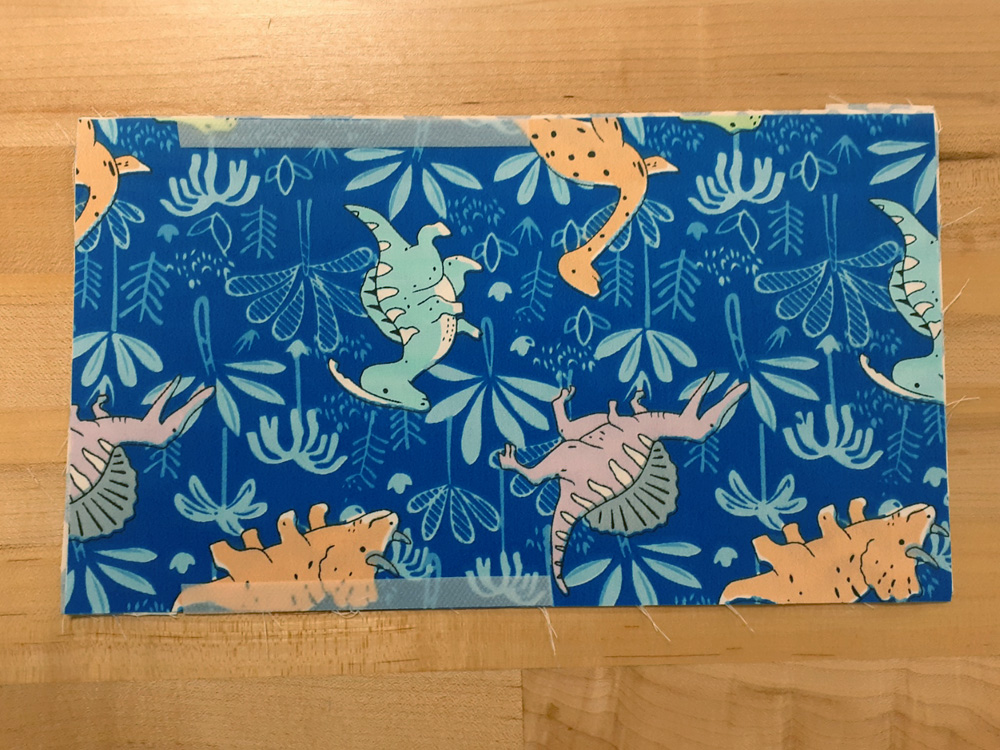
Carefully fold your bag in half. This will seal it and close your bag!
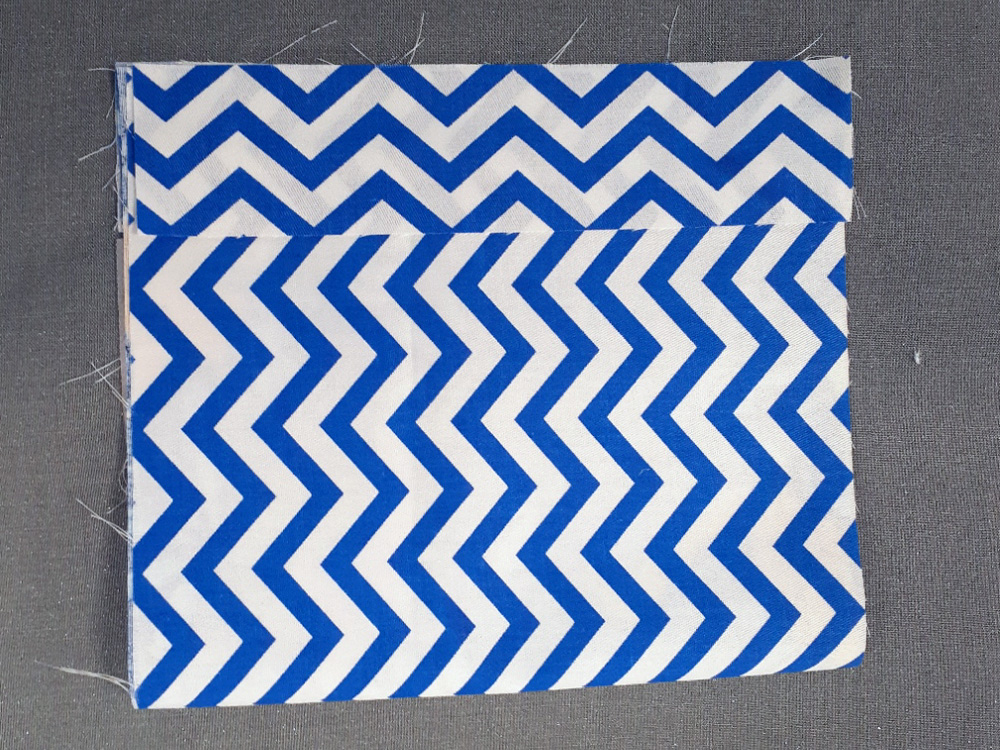
Once it has cooled off, thread the drawstring through your channels, you may need a help with whatever you used to open up the pressed channels.
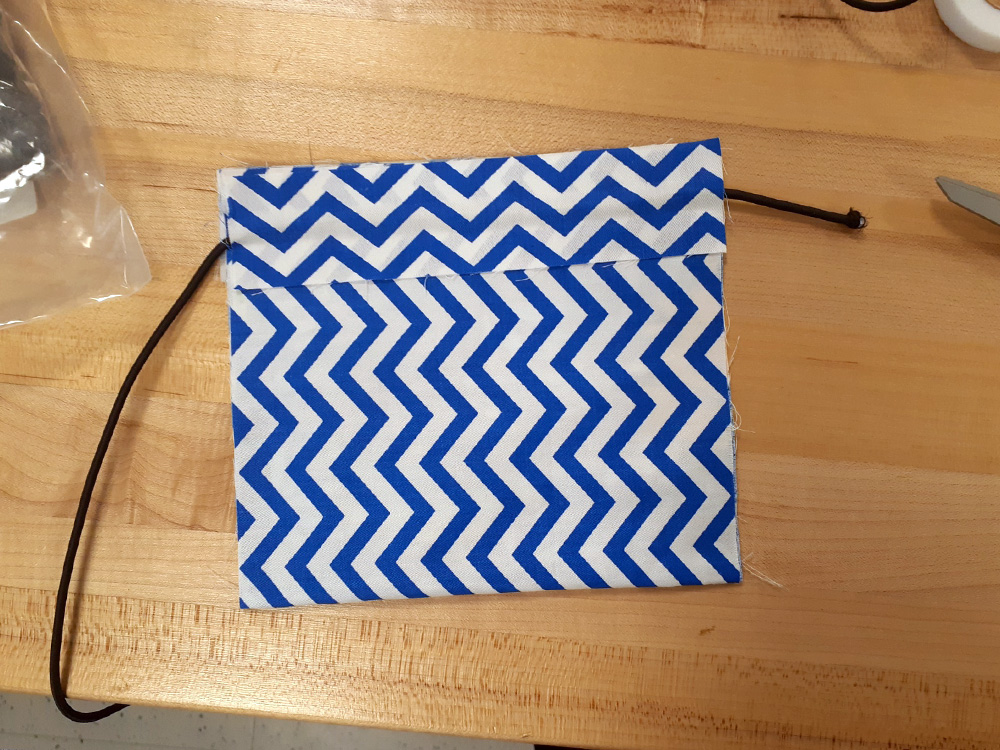
If you have things like clips or frogs, slide them in and tie the ends of your cord. Be very careful in flipping the outside back out– if the adhesive did not cool off in time it can split. (
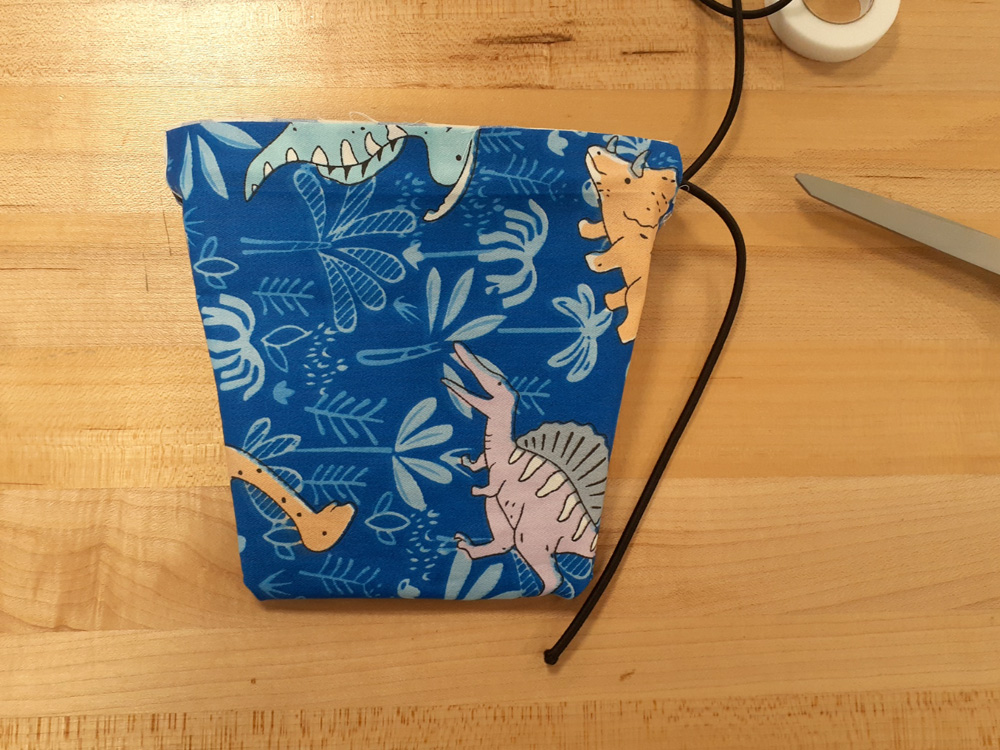
However, while not the cleanest edges, you can also put the adhesive strip on the inside like like below:
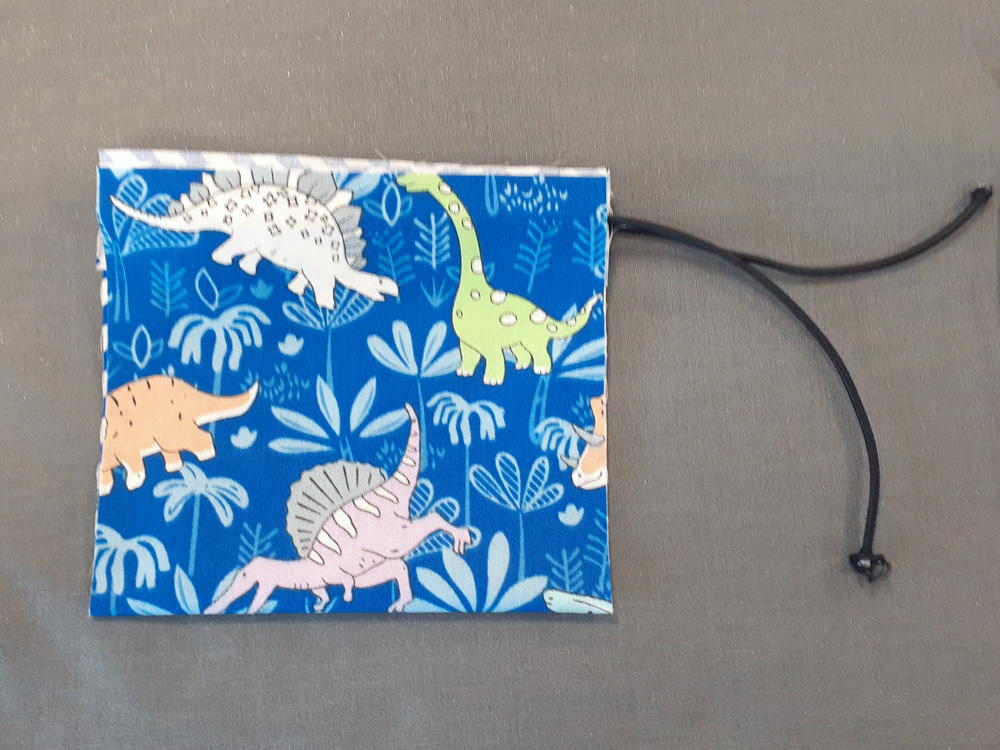
Sewed Drawstring Bag:
Set up your sewing machine– I will link a video for our Singer 3232s below.
Pin your bag together via the channel and sides like in the image below.
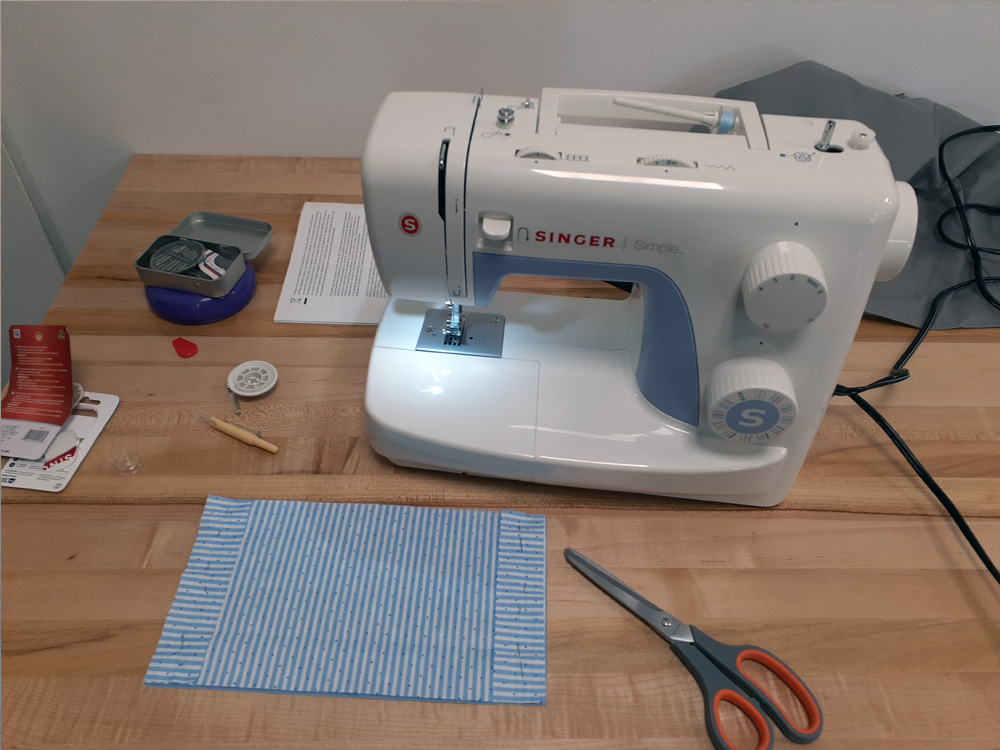
This version will make a reversible bag. If you wish to do a non-reversible look, you want to sew your outside panel to your inside panel with the the pattern side facing one another. (Your channel fabric will be sandwiched between the inside and outside panels.
Stitch as close as possible to the edges to create your channels.
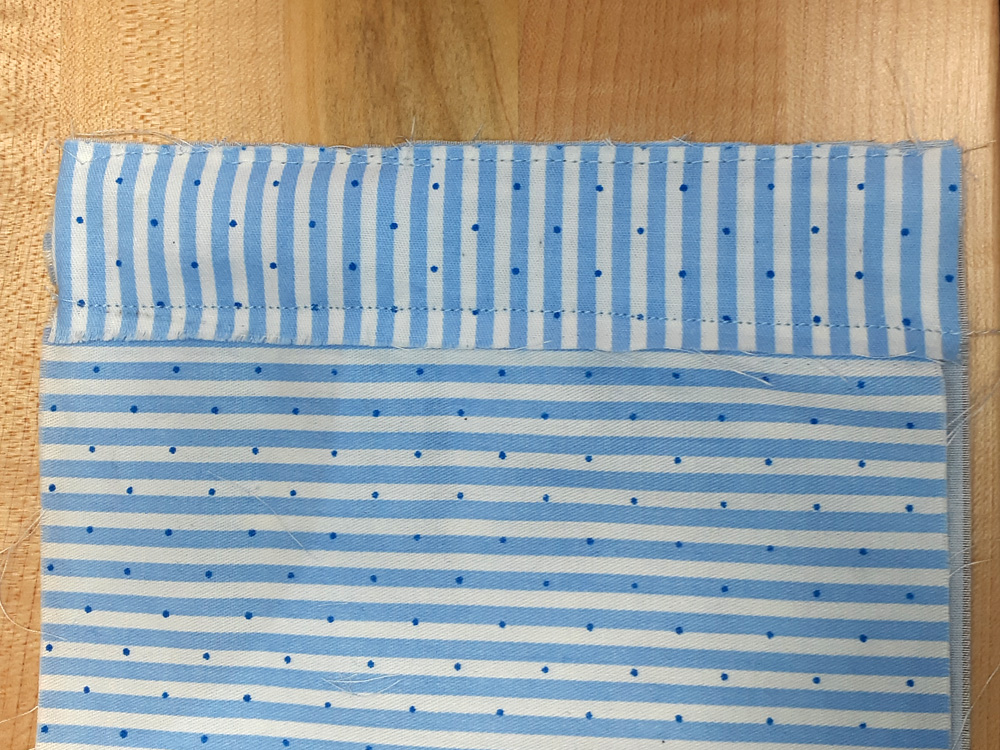
Repeat for the second channel.
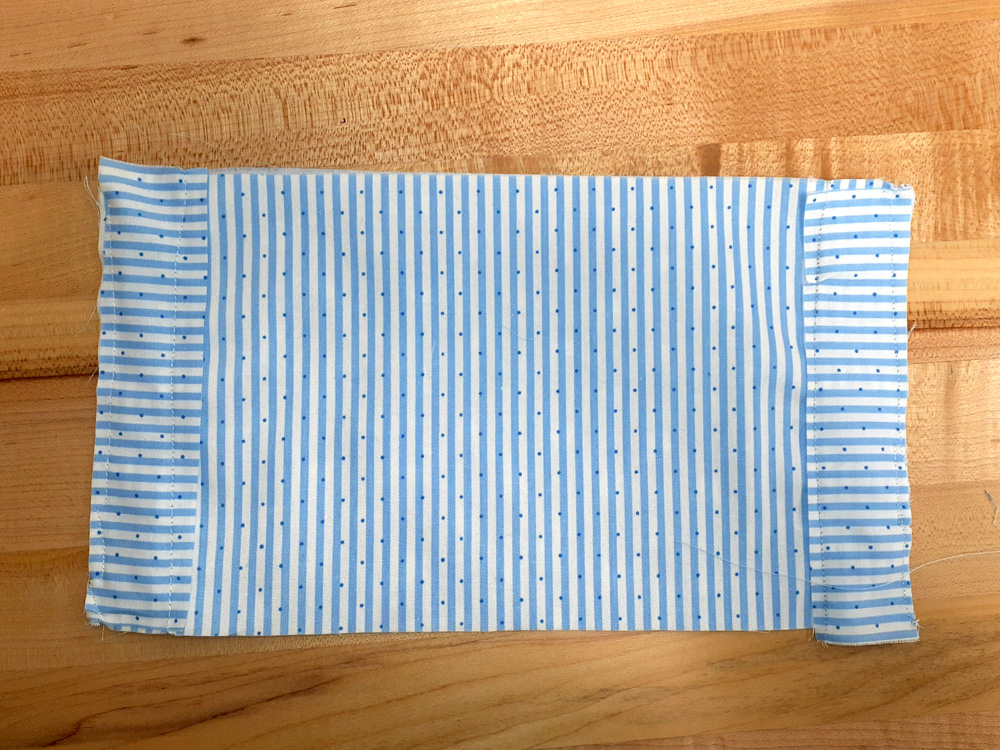
Next, fold this in half, you want the inside panel facing outside. Once you stitch it you will flip it inside out to hide the rough edges.
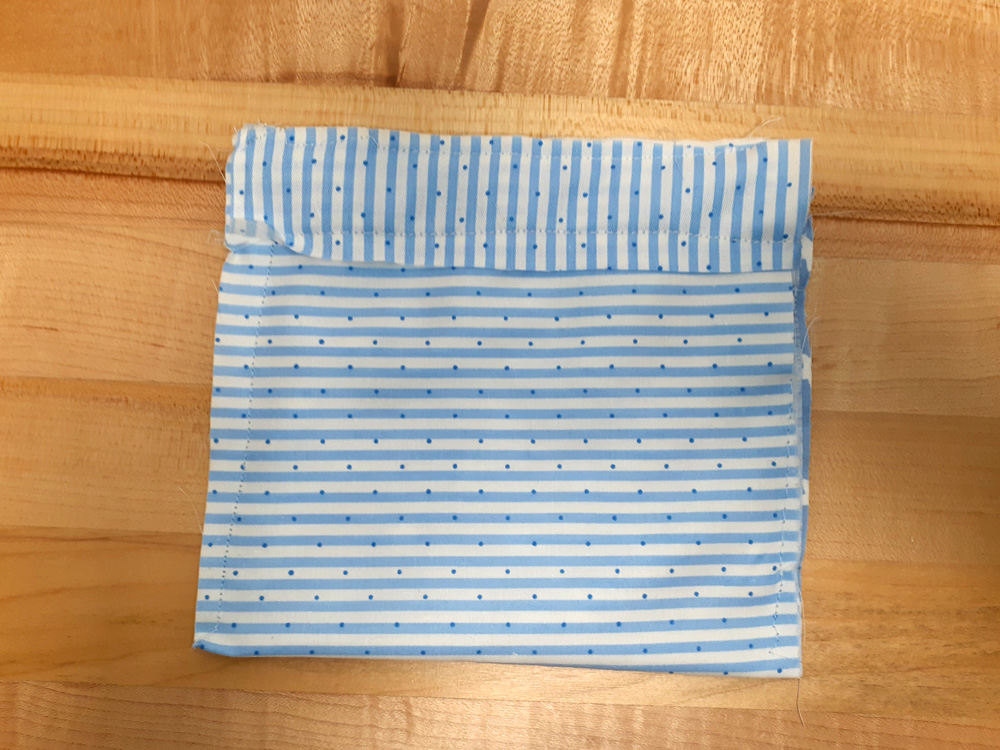
Thread your cord through the channels.
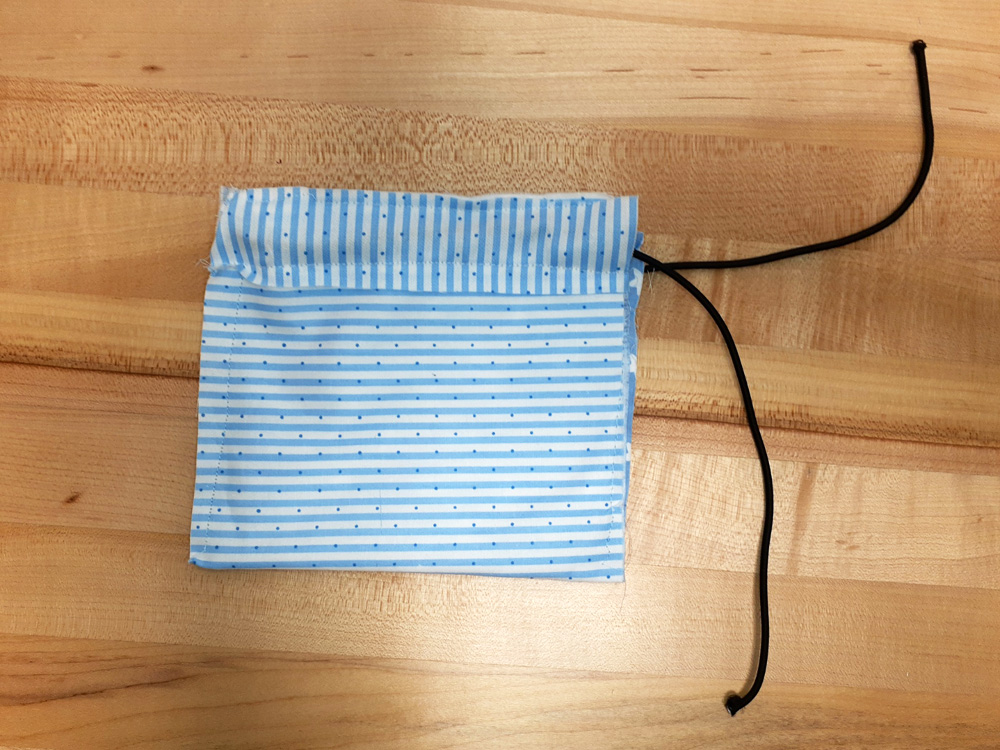
When the sides have been closed up, thread your cord, add your toggles or frogs and tie the ends of your cord to complete.
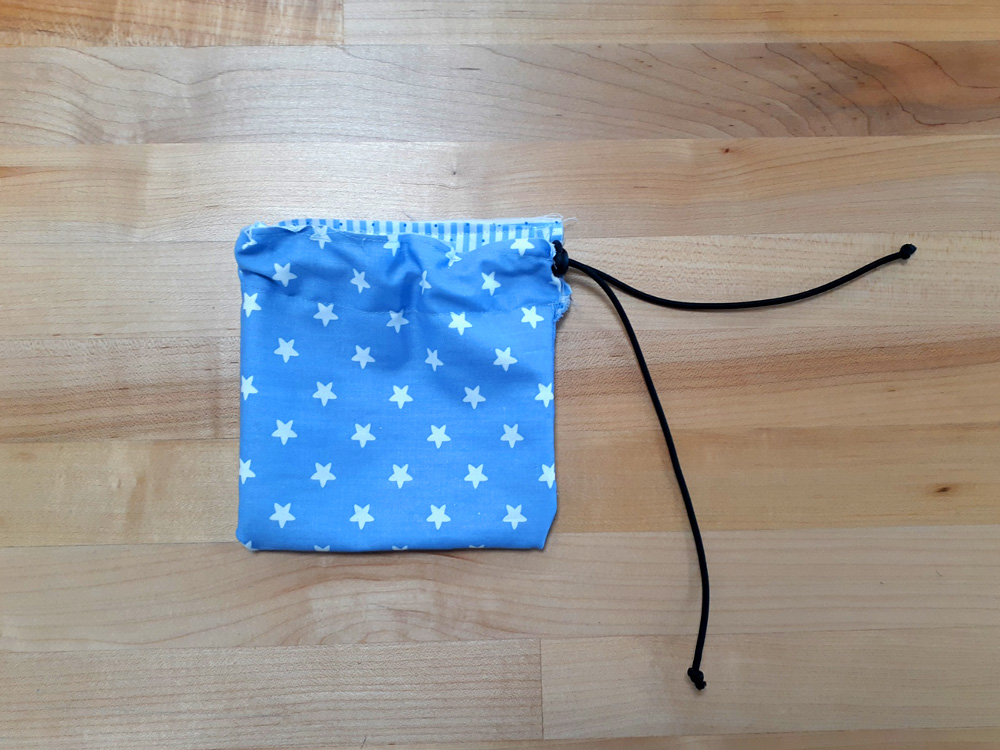
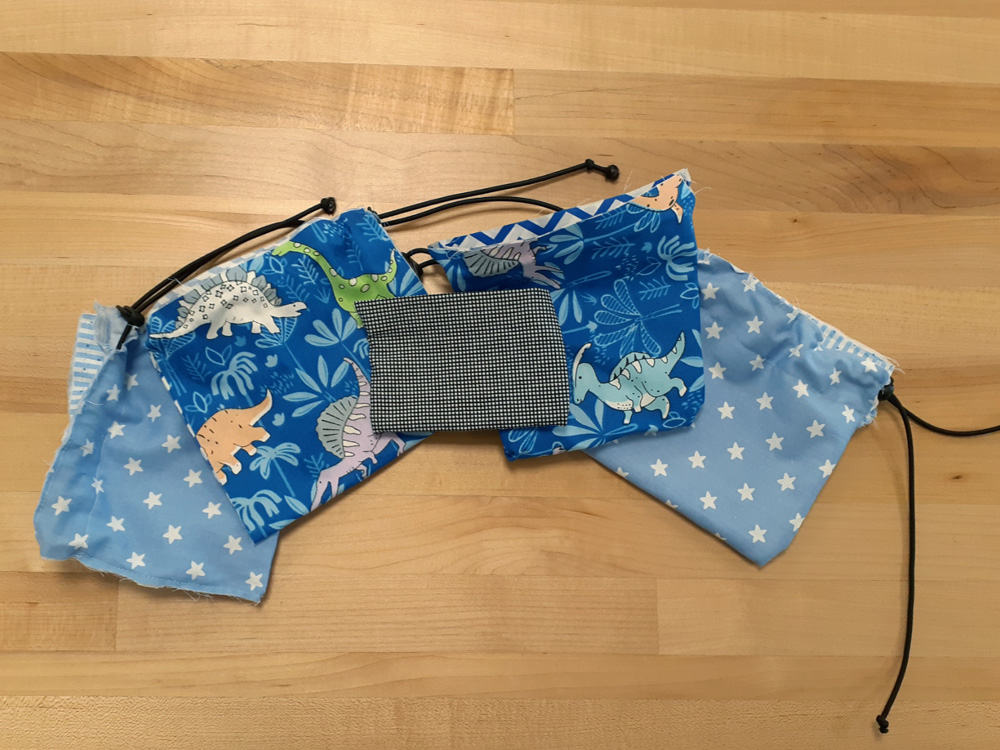
(I made some version before without the reversal stage and game off a lot rougher than the ones in the proper documentation.
For More Exploration:
- Singer: How to set up the Singer 3232 Sewing Machine
- The Spruce Crafts: How to make a more advanced version of the drawstring bag
- Happiest Camper: How to make an Envelope Clutch Purse
- See Kate Sew: 3 Types of Zipper Pouches using the Cricut
- See Kate Sew: 10 Ways to use the Cricut for Quilting
- National Sewing Center: Simple Non-Elastic Headband
- Thread and Needles Co.: Sewing a Wide Headband
- Craftsy: How to Sew and Elastic Headband
- Sew Can Do: How to Sew a Wired Headband
