
GIFs, or Graphics Interchange Format is an image type to allows for animation, particularly for digital use on the internet. Chances are you’ve seen a GIF around on your foray through the web. Here in this guide we’re going to show you how to create your own.
For starters, here’s a few applications of GIF making I’ve put together:
Here’s an old-school style sprite. Created using an Open Source sprite base and edited in Photoshop to look like me.
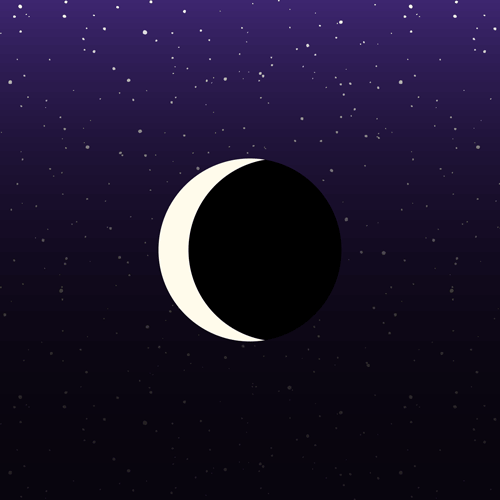
A simple moon phase animation done in under 12 frames created in Illustrator.
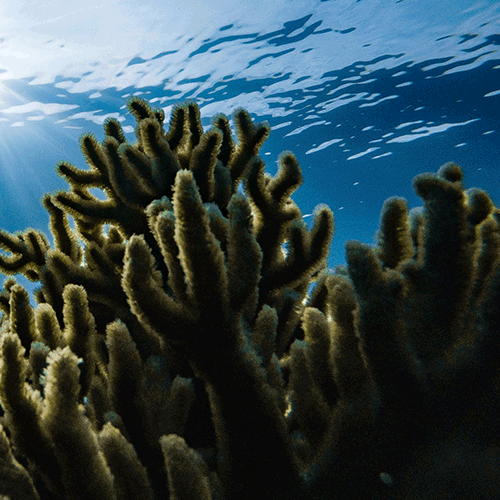
Here one using a stock image off Unsplash and an public domain image of Haikouichthys off Wikipedia that I made move by bumping across the artboard in each frame.

Here’s one where I hand drew the frames, and brought it in.
In short, creating a GIF in Photoshop can be done in two ways: importing individual frames (like all of the above) or through importing a premade video (more on that later below).
Animating by Individual Frames
This is basically animation at it’s oldest. Stop motion, studio style with traditional drawings. Nowadays you can can draw digitally and play around with settings to get what you need.
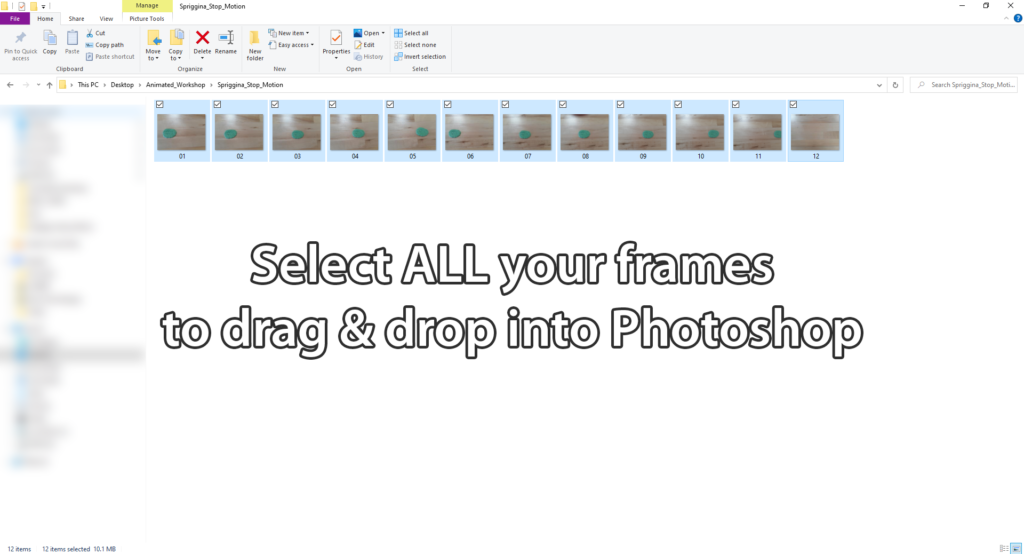
For this I created a little 12 frame stop motion of a little Dickinsonia (an early animal from the Ediacaran; of which I misidentified as Spriggina in my files but I digress.)
I moved the photos from my phone to my computer and labeled them numerically for my sanity later on.
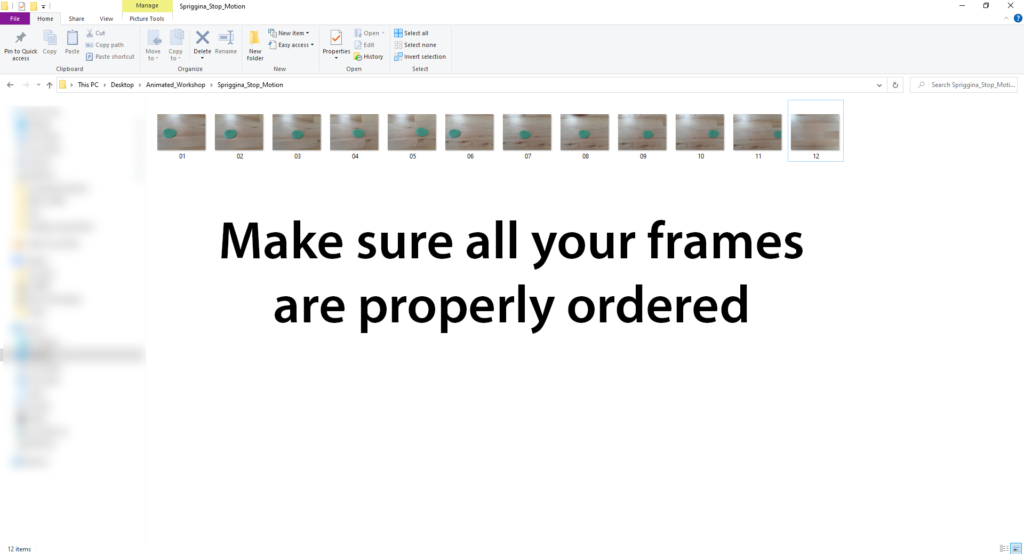
12 frames is a little low but if you have 48+ images you needed to add, trust me it makes sense to do this.
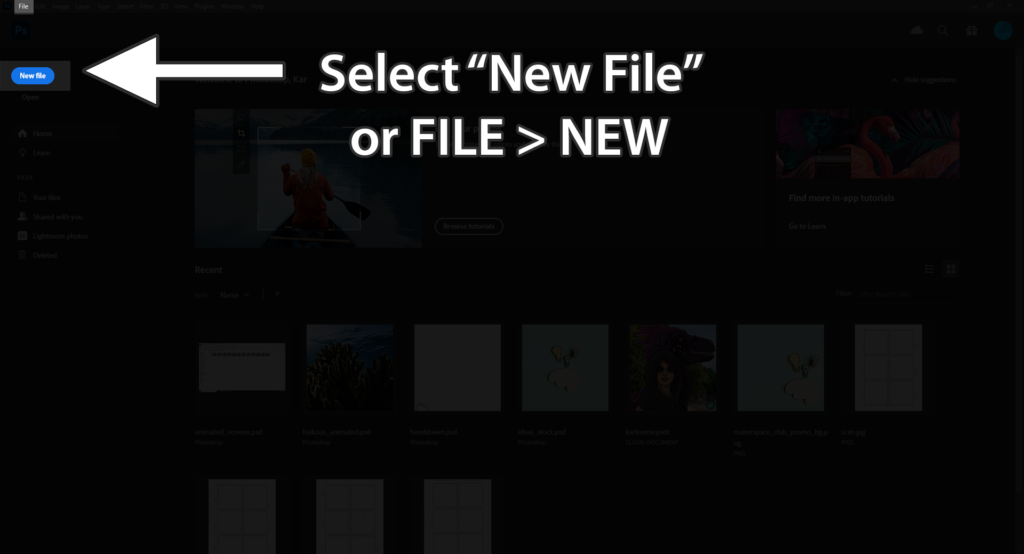
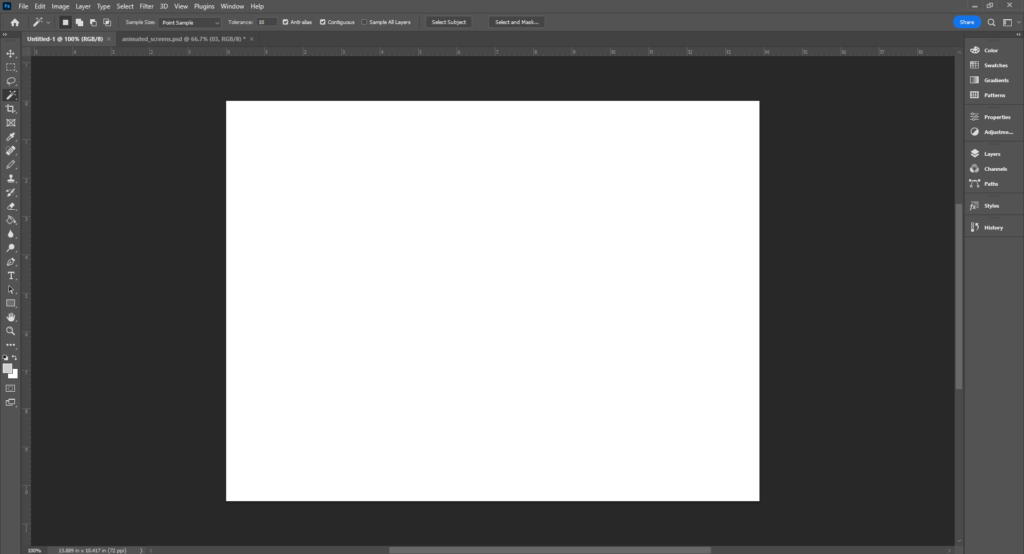
Open up Photoshop. And create a new file.
Set your dimensions to whatever you wish it to be, but make sure to keep it RGB color and 72 DPI. You can also keep it 300 if you wish, but if you’re using it on a website or whatnot, 72 DPI is perfectly fine.

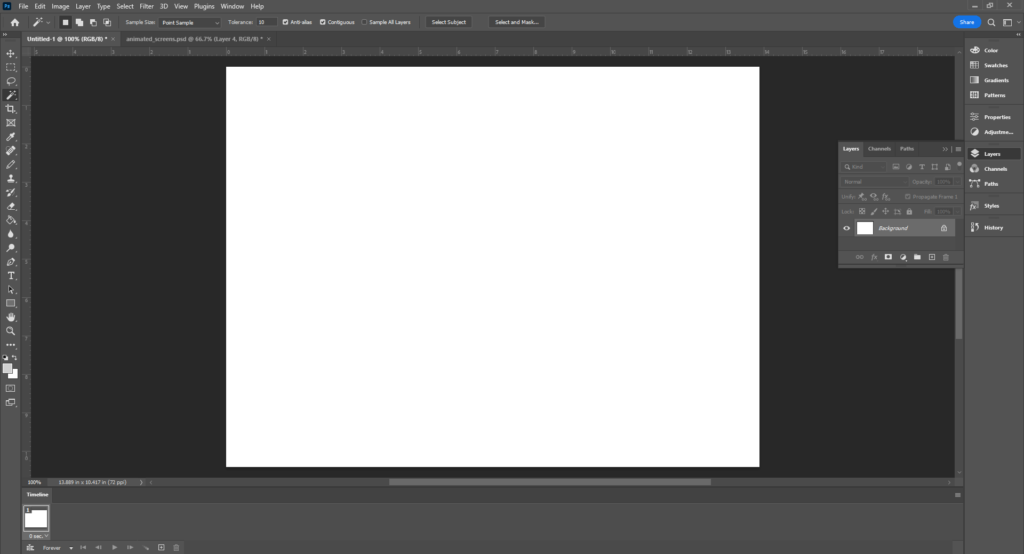
Now we’re going to need the Timeline panel. Go to WINDOW > TIMELINE to access it.

The panel will appear at the bottom of your artboard. When you’re ready, select Create Frame Animation.

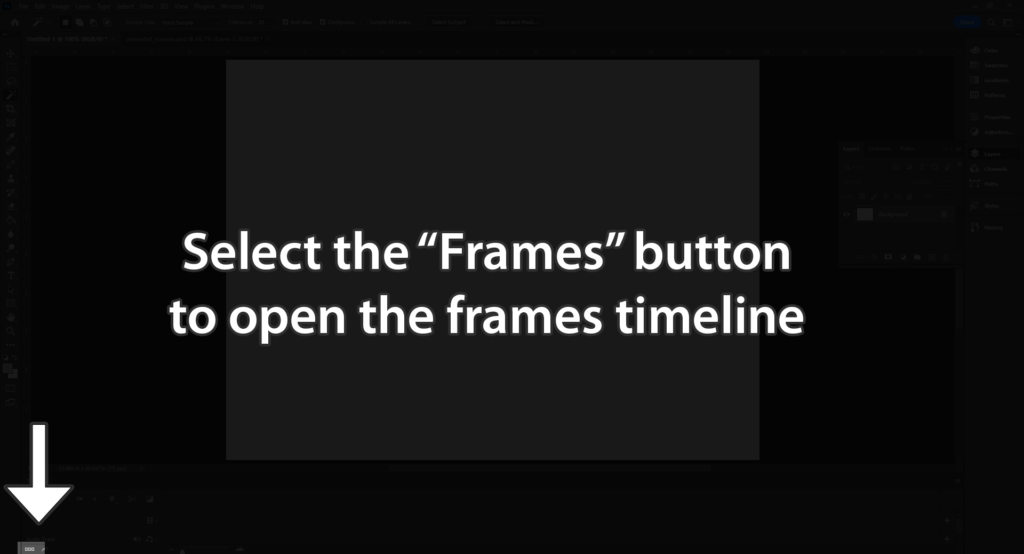
When you open it, it looks like a timeline, yeah? Don’t worry, there’s a simpler way to do things– but you are free to explore that later! Hit the Frames button (it looks like 3 Rectangular boxes) to open up the panel we want.
Now we’re getting somewhere! You’ll see it will have preview image and a timer, easy, right?
Now we need to move our files into the artboard. Select everything and drag & drop it into the arboard.
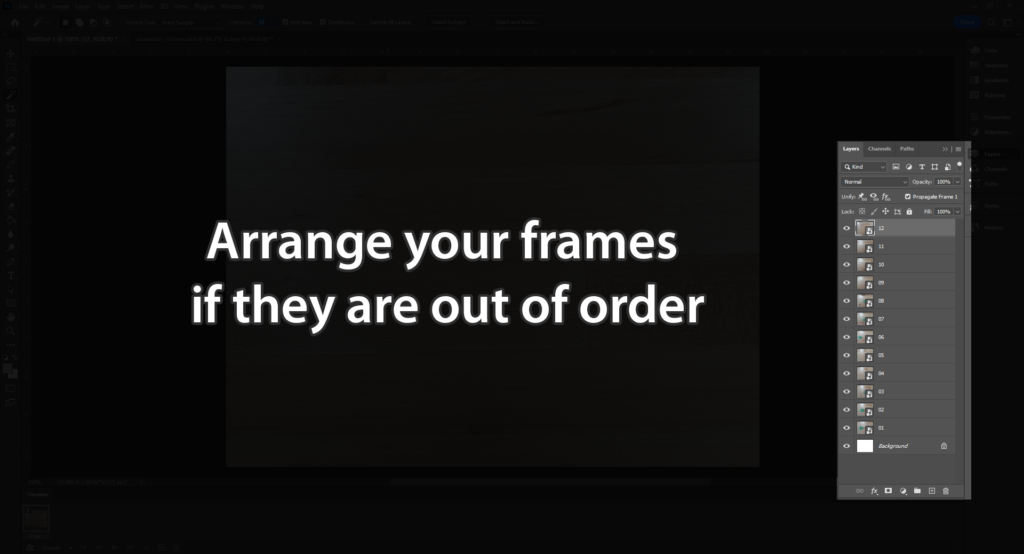
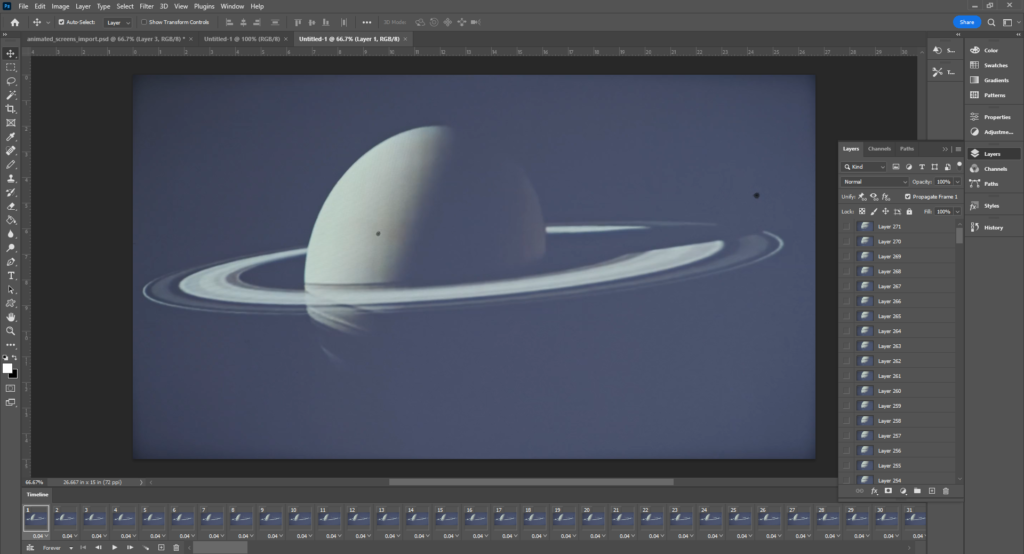
You may need to rearrange your layers to be in numerical order. You want your first frame on the bottom, and your last frame on the top.
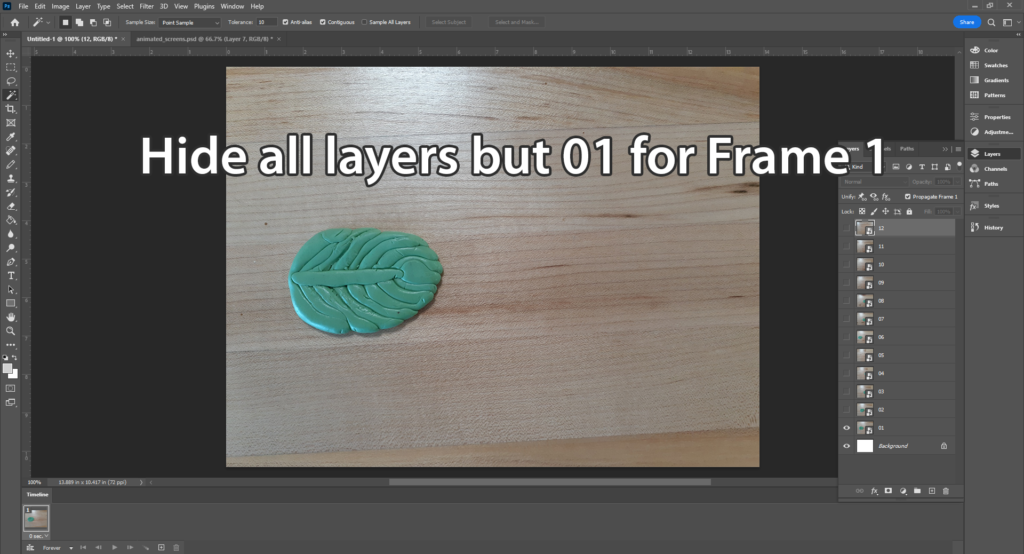
Next you’re going to hide all your layers save Layer 1. Each layer will be a frame of animation, so Frame 01 is Layer 1 and so forth– hence the numbering of images earlier!
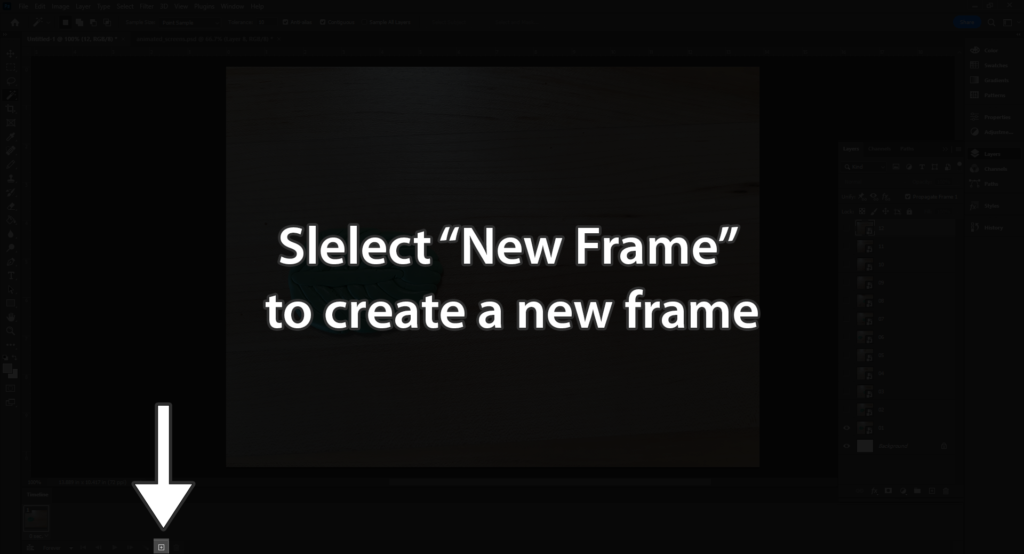
To make the next frame, hit the New Frame button. It looks like a little plus sign.
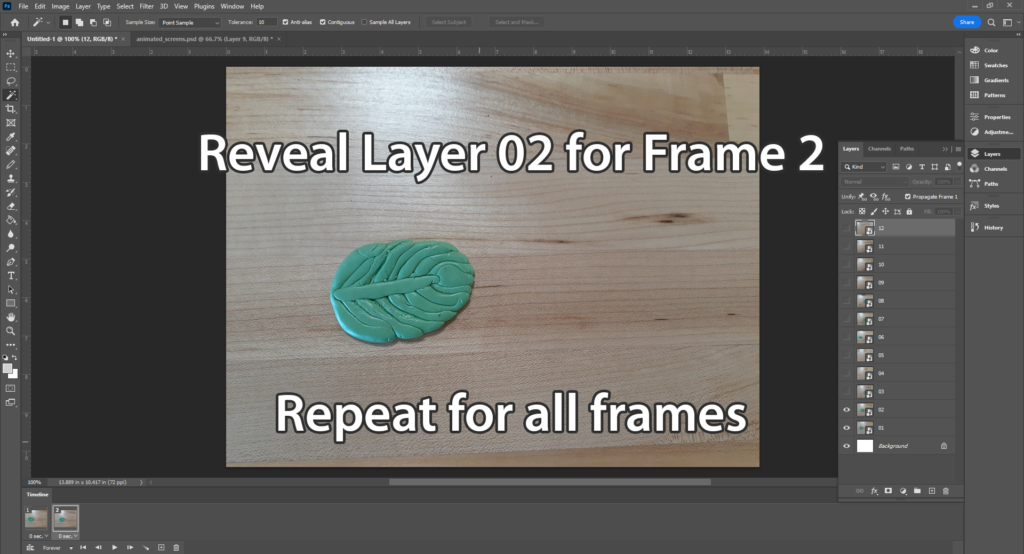
Now you have two frames on your timeline. Reveal you next layer. You’ll repeat this for each frame you have (sorry folks with more than 24 frames).
As you can see under the preview there are some panels. These control the timing of the animation and whether or not you want the animation to loop (Forever) or not (Just Once). That’s all up to you! Use the play and tracking buttons to run the animation to see it live while you tweak.
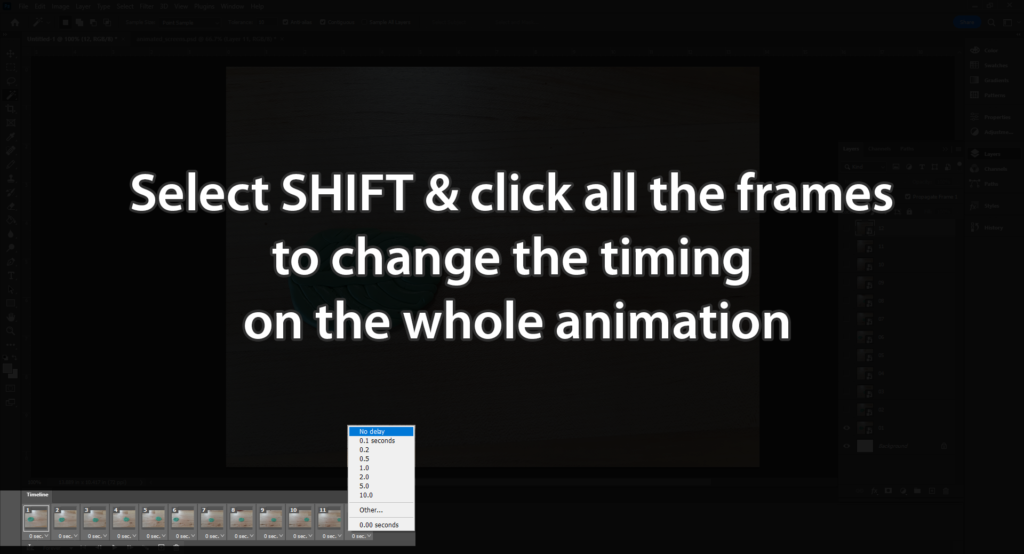
Is it going to fast or slow? Use the Timer to change the timing. If it has more than 24-48 frames having 0 seconds will have it run similar to a traditional second or two of animation, or “Animating on Ones”. Adding more time makes it hold the frame longer– which is great for simple 12 frames or less animations. Similar to “Animating on Twos”. (I’ll add more info regarding animation terms and basics below!)
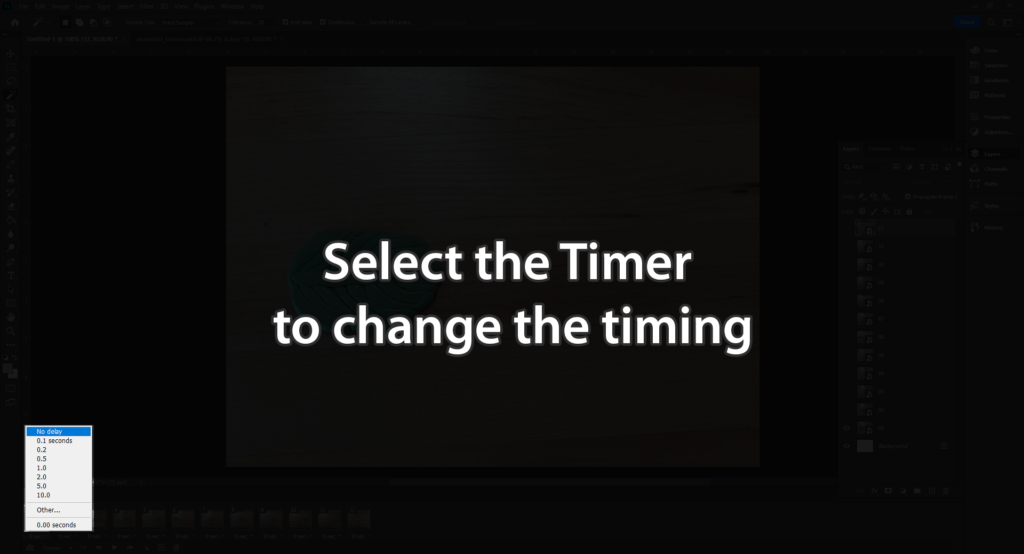
To change ALL of your frames, click them all holding SHIFT and then select the Timer panel. All you selected panels will have a lighter grey color around them.
For my animation I only needed 0.1 Seconds but everything is to your preference.
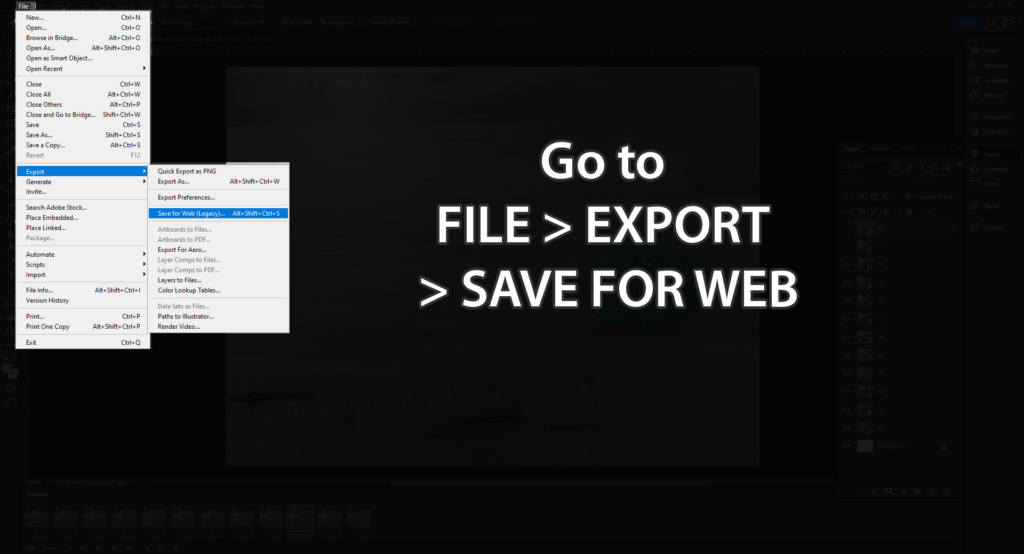
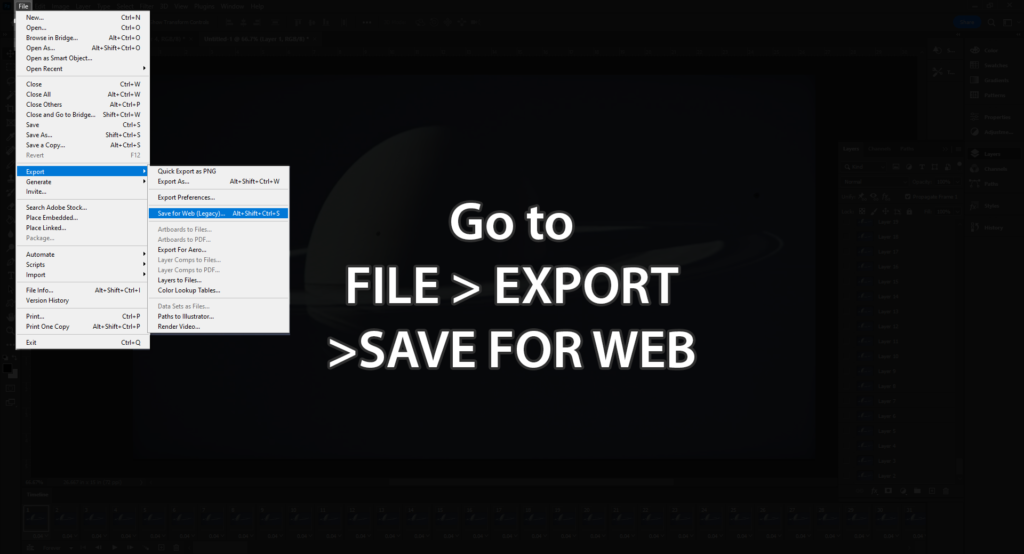
Once you’re satisfied you’re ready to export! Go to FILE > EXPORT > SAVE FOR WEB.
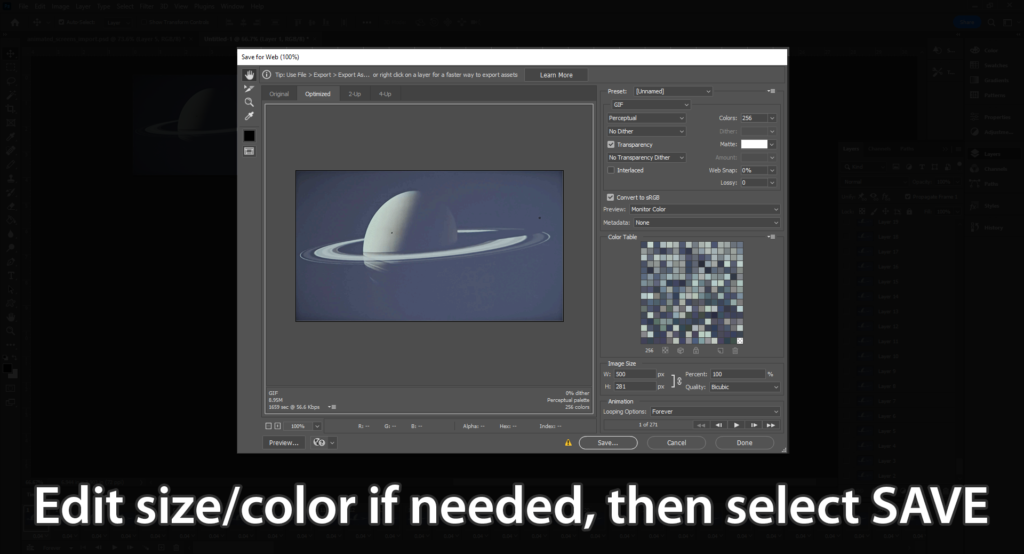
You’ll have a panel where you can tweak your image size and color as well, just in case you decide to design large and need to scale down.
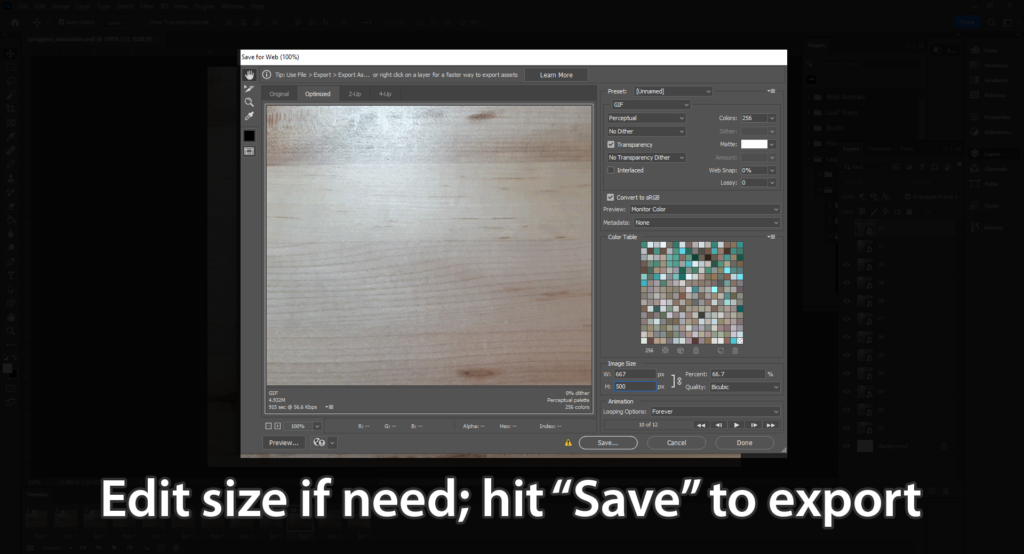
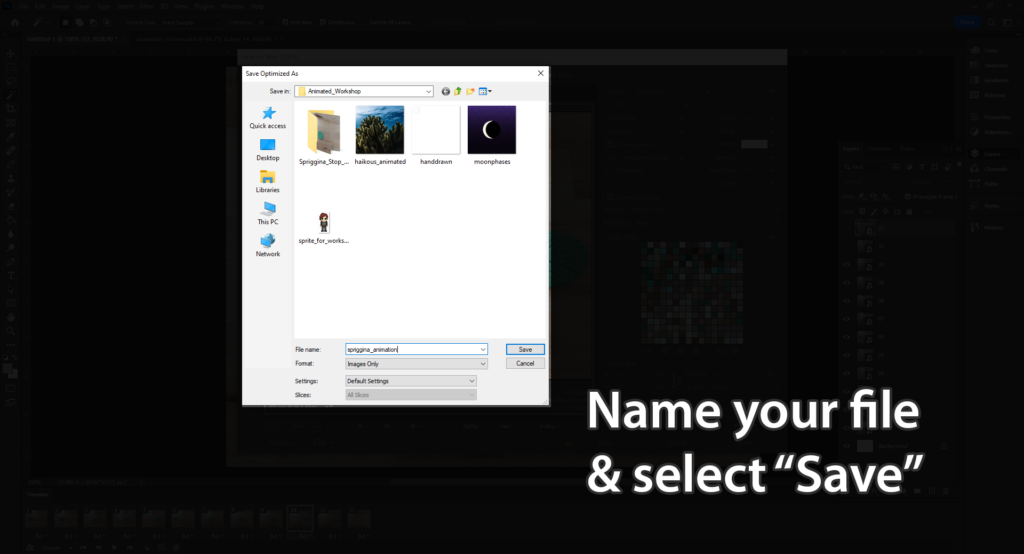
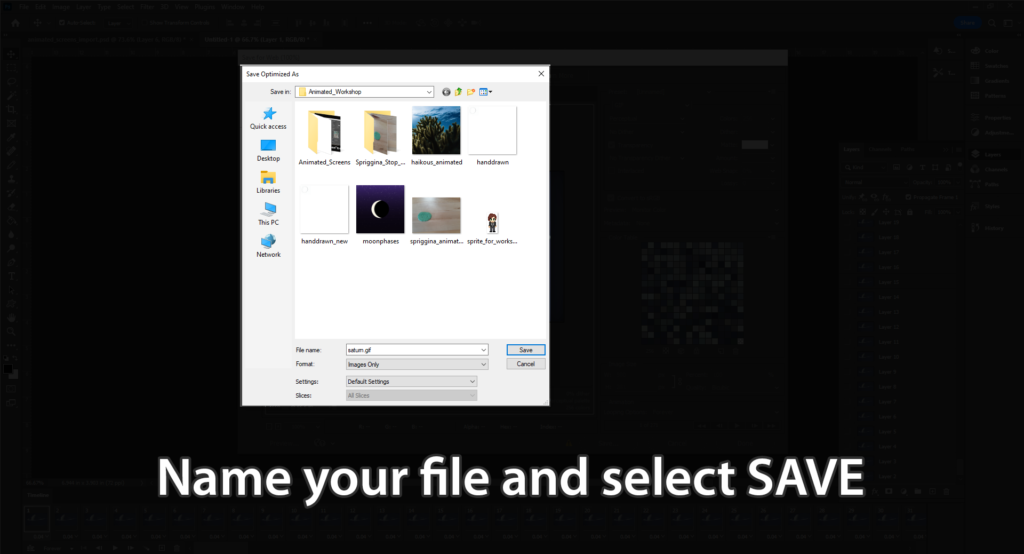
Name your file and save!
And now you have a GIF!

Importing Video Files into Photoshop
This method is how many reaction gifs and animated image sets are made (changes are if you’re on Tumblr, you’ve seen a capture of a game/show/movie and edited. This is how you do it.)
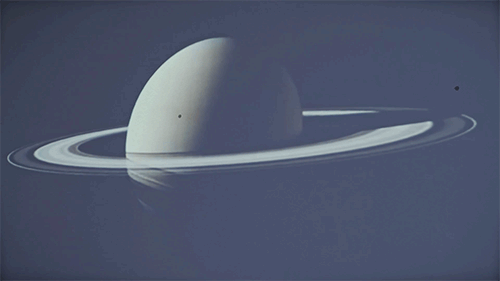
MP4, MOV, or AVI formats work. I took this free video off Pexels for the sake of the tutorial.
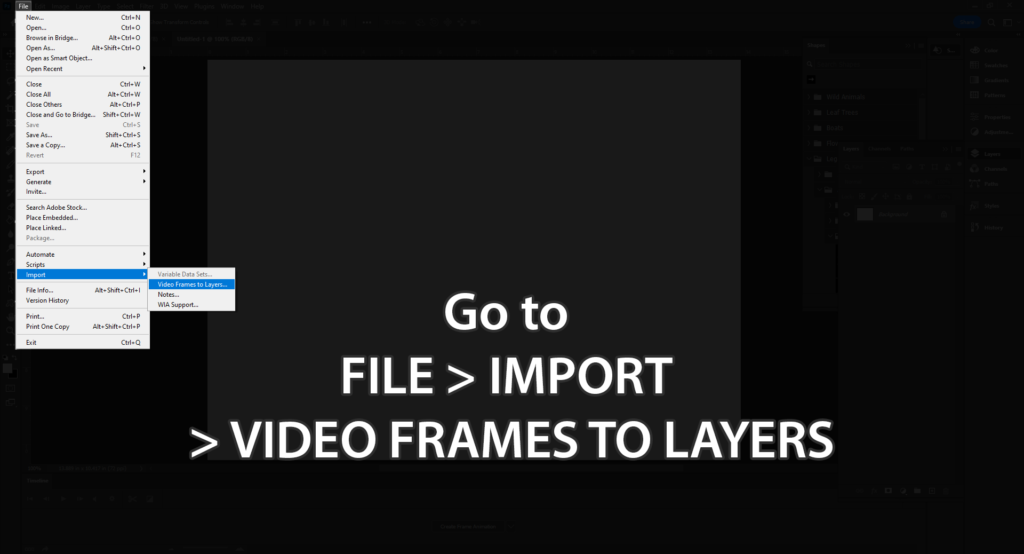
Go to FILE > IMPORT >IMPORT VIDEO AS FRAMES.
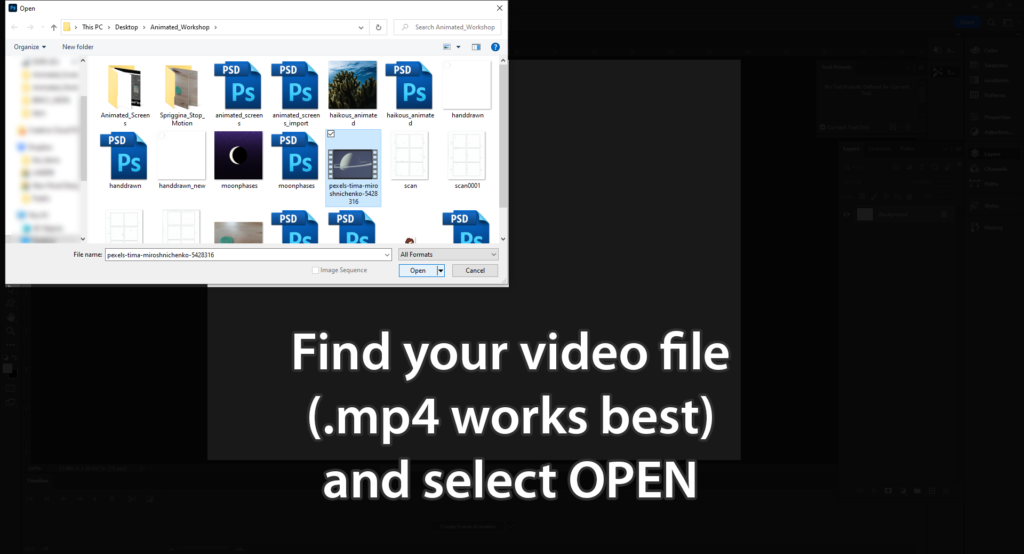
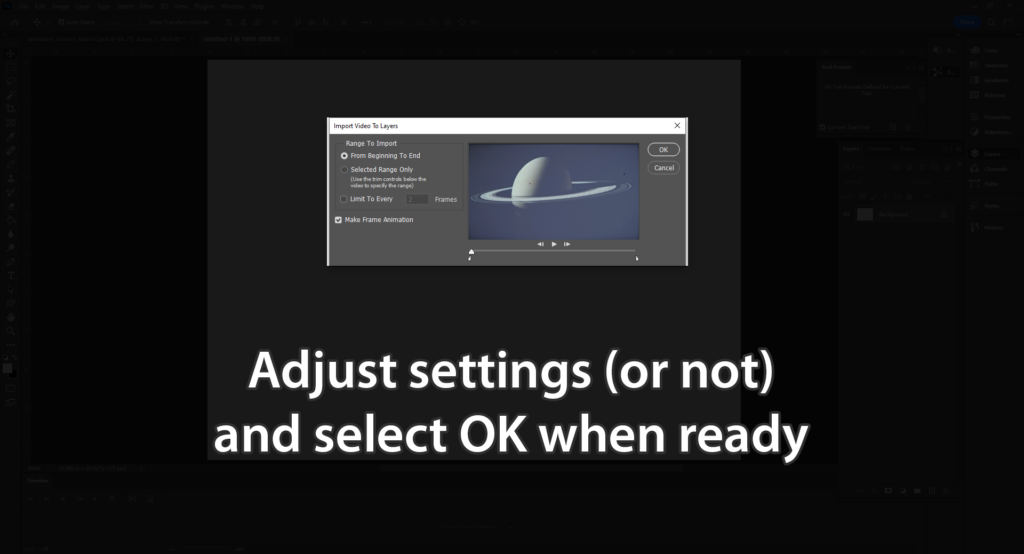
You might need to adjust the frames, or cut some out depending on the length, or if you know it’s short, you can import all frames. (This video was over 200 frames!)
Be patient as your file may need to load.
A file this size (1920 x 1080 px) is not feasible to save, you may need to resize it down, or expect a massive file size.
Please note if you’re adding overlays and whatnot, keep it ABOVE the frames, and edit on Frame 01 in the timeline. But it doesn’t hurt to run the animation to check just in case.
When you’re ready, go to FILE > EXPORT > SAVE FOR WEB to export.
Edit/resize things if need be then save.
And there we go!
For Further Exploration:
- Richard Williams’ Animator’s Survival Kit on Archive.org
- Rubber Onion: Animating on 1s, 2s, & 3s
- BMCC Makerspace: Animated Optical Illusions
- Fotodiox Inc: Stop Motion Tutorial on YouTube
- Michael Parks: Stop Motion Basics on YouTube
- Flow Studio: Animate Sprites on YouTube