Using vinegar as a mordant (a liquid used to help transfer pigment into materials) has been around since as early as the ancient Greeks, so this method was used up until the days of modern leather dyes and stains. (So if you’re looking for a little bit of authenticity for some historical-based pieces, this is the way to go!) It’s simple, and most of the time spent is waiting for the dye to ‘rust’ (more on that later).
The dye we’re making can only work on vegetable tanned leather. But you’re in luck, it is readily available! The end product will make a dye that will be able to dye the leather grey, or a rich blue-black depending on how man dips you chose. This also can keep and you can store away for future uses!
Before I start, I want to share: leather is expensive. There’s no way around it. If it’s “cheap”, it’s probably PVC or polyurethane, which cannot be laser cut or etched in the Makerspace. So it’s always smart to get at least a little extra to use as sacrificial pieces for testing. Some stuff on my supplies list like the mink oil and conditioning cloths can be reused, especially if you’re considering getting into leather crafting.
Supplies Needed:
- 2 Mason Jars (8 oz is great for really small projects or just trying this out, 16 oz. is a good if you’re dyeing small-medium size projects. I am using 32 Oz in this guide.)
- 1 Bottle White Vinegar or Apple Cider Vinegar (16 oz is best, more if you’re using a larger bottle
- Grade 0000 Steel Wool (Usually in the Paint Aisle with the scraping tools at any hardware store.)
- Cheesecloth
- Baking Soda
- Water
- Old containers (those rectangular plastic takeout trays work great.)
- A spoon or a skewer to stir with
- Vegetable Tanned leather (You can get an 8.5×11″ Sheet for $13.49 at Michael’s. My project I’m using these little tags, which are a 3-Pack for $5.69)
- Mink Oil (Or if you’re vegan, Macadamia Nut Oil works too!)
- Leather Conditioning cloth
- A Bar rag or dish towel (something you don’t mind getting rusted up and ruined)
- Gloves (Either reusable dish washing gloves or single use Nitrile gloves work!)
- OPTIONAL: Black Tea Bags
The Sciencey Bits:
The steel wool in the vinegar rusts and is eaten away by the acids in the vinegar, creating a chemical called ferric acetate, which is that rusty brown you’ll get at the end of the process. When in contact with something containing tannins it will turn the item black. As such, you won’t get smudging or residue like a stain because it’s an actual chemical process turning the leather grey/black.
You can use this on woods as a wood stain. Oak, cedar, and redwood are woods with high tannin concentration, and will stain dark. Basswood and Birch, the woods we use here in the makerspace, it stains a grey-brown color.

However unlike most other stains, with this you can etch after staining…although it’s better to have etched your piece before as the stain will darken your etched areas. (I may experiment to see how etching after staining works.)
Paper that has been soaked in tea and dried too, will turn grey or black in contact with the vinegaroon. It might make for some cool treasure maps. (The optional black tea bags I added above actually are used to make a tannin bath for your leather, which is said to help give it a richer black quicker, but I haven’t tried it.)
The Process:
In one of your jars, poke 1-2 holes in the lid. This will the jar you’ll make your dye in. The holes allow the gases to escape when the vinegar eats away at the steel wool.
Fill the jar with steel wool. I did about 2-2 1/2 steel wool pads in my 32 oz jar, but depending on the size of your mason jar you can add more/less. You can also shred them up a bit as well too!
Fill the jar with vinegar, about 3/4ths full if it’s a smaller jar. As I said, I had a 32 oz Jar with 16 ozs of vinegar, I used my whole bottle.
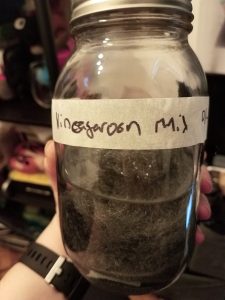
Now the waiting game. Stir it every day to help get the bubbles to rise and mix the rust. Some say by 3 days it should be done, I waited about 6 with mine. But you should start getting a rusty brown color on your surface and more of a rust than a vinegar smell near the end.
(Sidebar, people have noted it is a stinky process, but I made this in my bedroom in a house with 7 other housemates and no one mentioned any smell, and the only smell I got was very faint in the closet it was aging in. Still if you’re paranoid, feel free to freshen the air after making/ using it.)

If you’re not sure if it’s ready, take a sacrificial piece of leather to dip it into. Your first dip will give you a medium grey color, but after 2-3 dips or more you should get a rich black.

Once you’ve tested it, it’s time to move it into the storage jar for use! Cut a piece of the cheesecloth out that can be folded at least 2 to 4 times and put it on the mouth of the storage jar.
Fish out any remaining large pieces of wool and squeeze them out into the cheesecloth. I also recommend wearing your gloves now and wearing clothes you don’t mind getting stained. Without gloves, it will stain your hand a rusty brown and the vinegar will suck the moisture from your hands like crazy. It took about two rounds of hand washing and some moisturizing with lotion after I did it without gloves.
Pour the remaining liquid carefully through the cheesecloth. Squeeze out the cheesecloth before discarding. Cover it with the jar top without holes. Store away until use.
Using the Dye:
Pour some into a container enough to fully cover your leather piece. Make sure your leather is clean and dry (or fresh after soaking in the tea water bath).
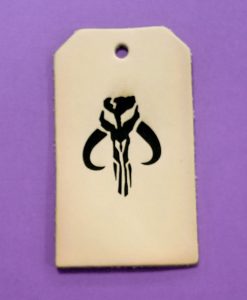
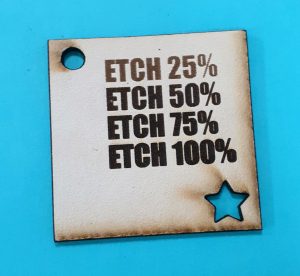
1 dip will give you a grey, 2 a more bluish-charcoal, and 3 or more will get the black.

.
As I said, the vinegar dries out skin, and leather, is, well, skin. So, we will need to neutralize it with a baking soda wash. I eyeballed my test bath, but always make sure there more water than baking soda. Mix it thoroughly in another container. Have it sit for under a minute. It will bubble, and it may even fizz.
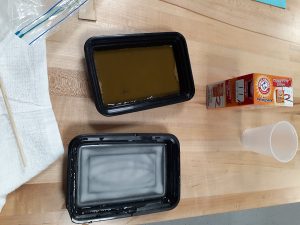
Let your leather dry.You can also laser etch the piece after dyeing the leather, but it doesn’t etch as deep, barely touching the surface. The ferric acetate does make it slightly more sparky but not enough for concern.
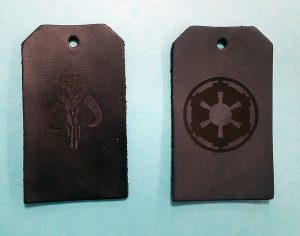
Then using the conditioning cloth, gently buff it with some mink oil. This should nourish the leather and keep it soft. I’ve found 6 coats on the books marks softened it up enough but wasn’t super pliable. Make sure to laser etch BEFORE applying the mink oil.
If using as a wood stain, you don’t need to give the wood a baking soda bath. Although you could go over it with some linseed oil or clear wood wax finish. It will smell like rust more than the the leather, but it should fade over time.
For Further Exploration:
