
In this project we will be creating an “engraved” printing plate using glue and aluminum foil. This is a good project for all ages! However, if you wish to explore traditional block printing and engraving rubber or linoleum, I will provide resources below.
History of Printing:
Block or Plate Printing is the oldest printing method in the world. With the oldest examples coming from China coming from before 220 CE, it was used to put design on cloth before paper. This involved carving wooden, lead, or bronze “blocks” with designs, with the ink rolled on it and pressed down and smoothed over with a barren or stone to apply the pressure and transfer print. This is also known as relief printing.
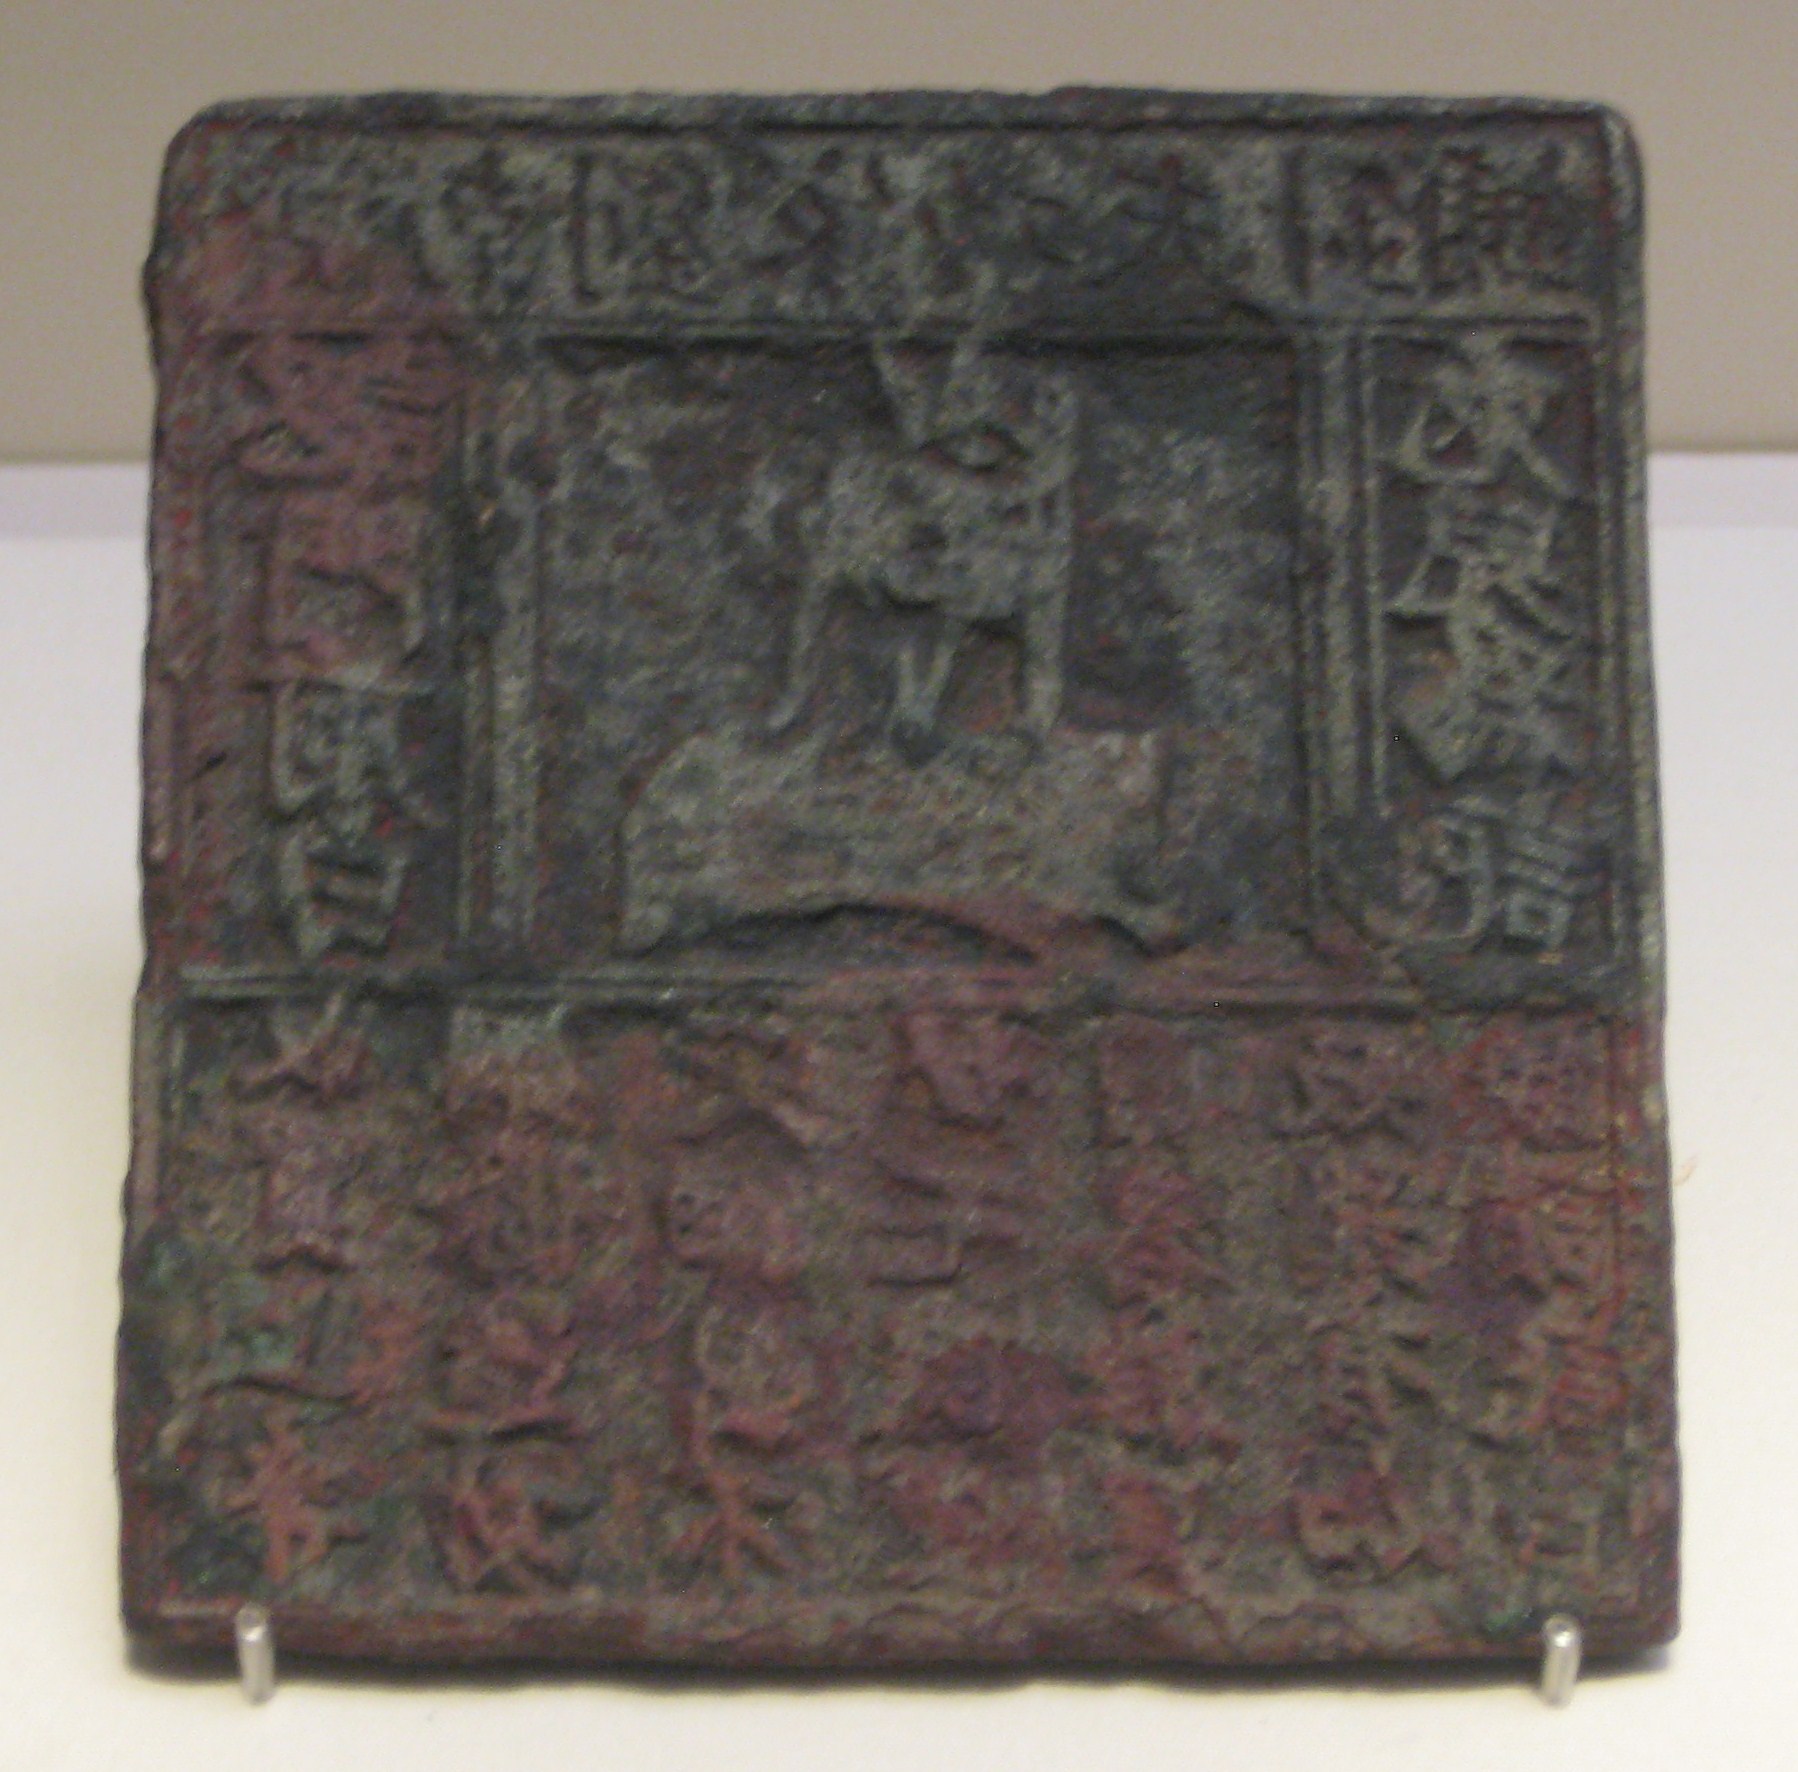
BabelStone, CC BY-SA 3.0, via Wikimedia Commons

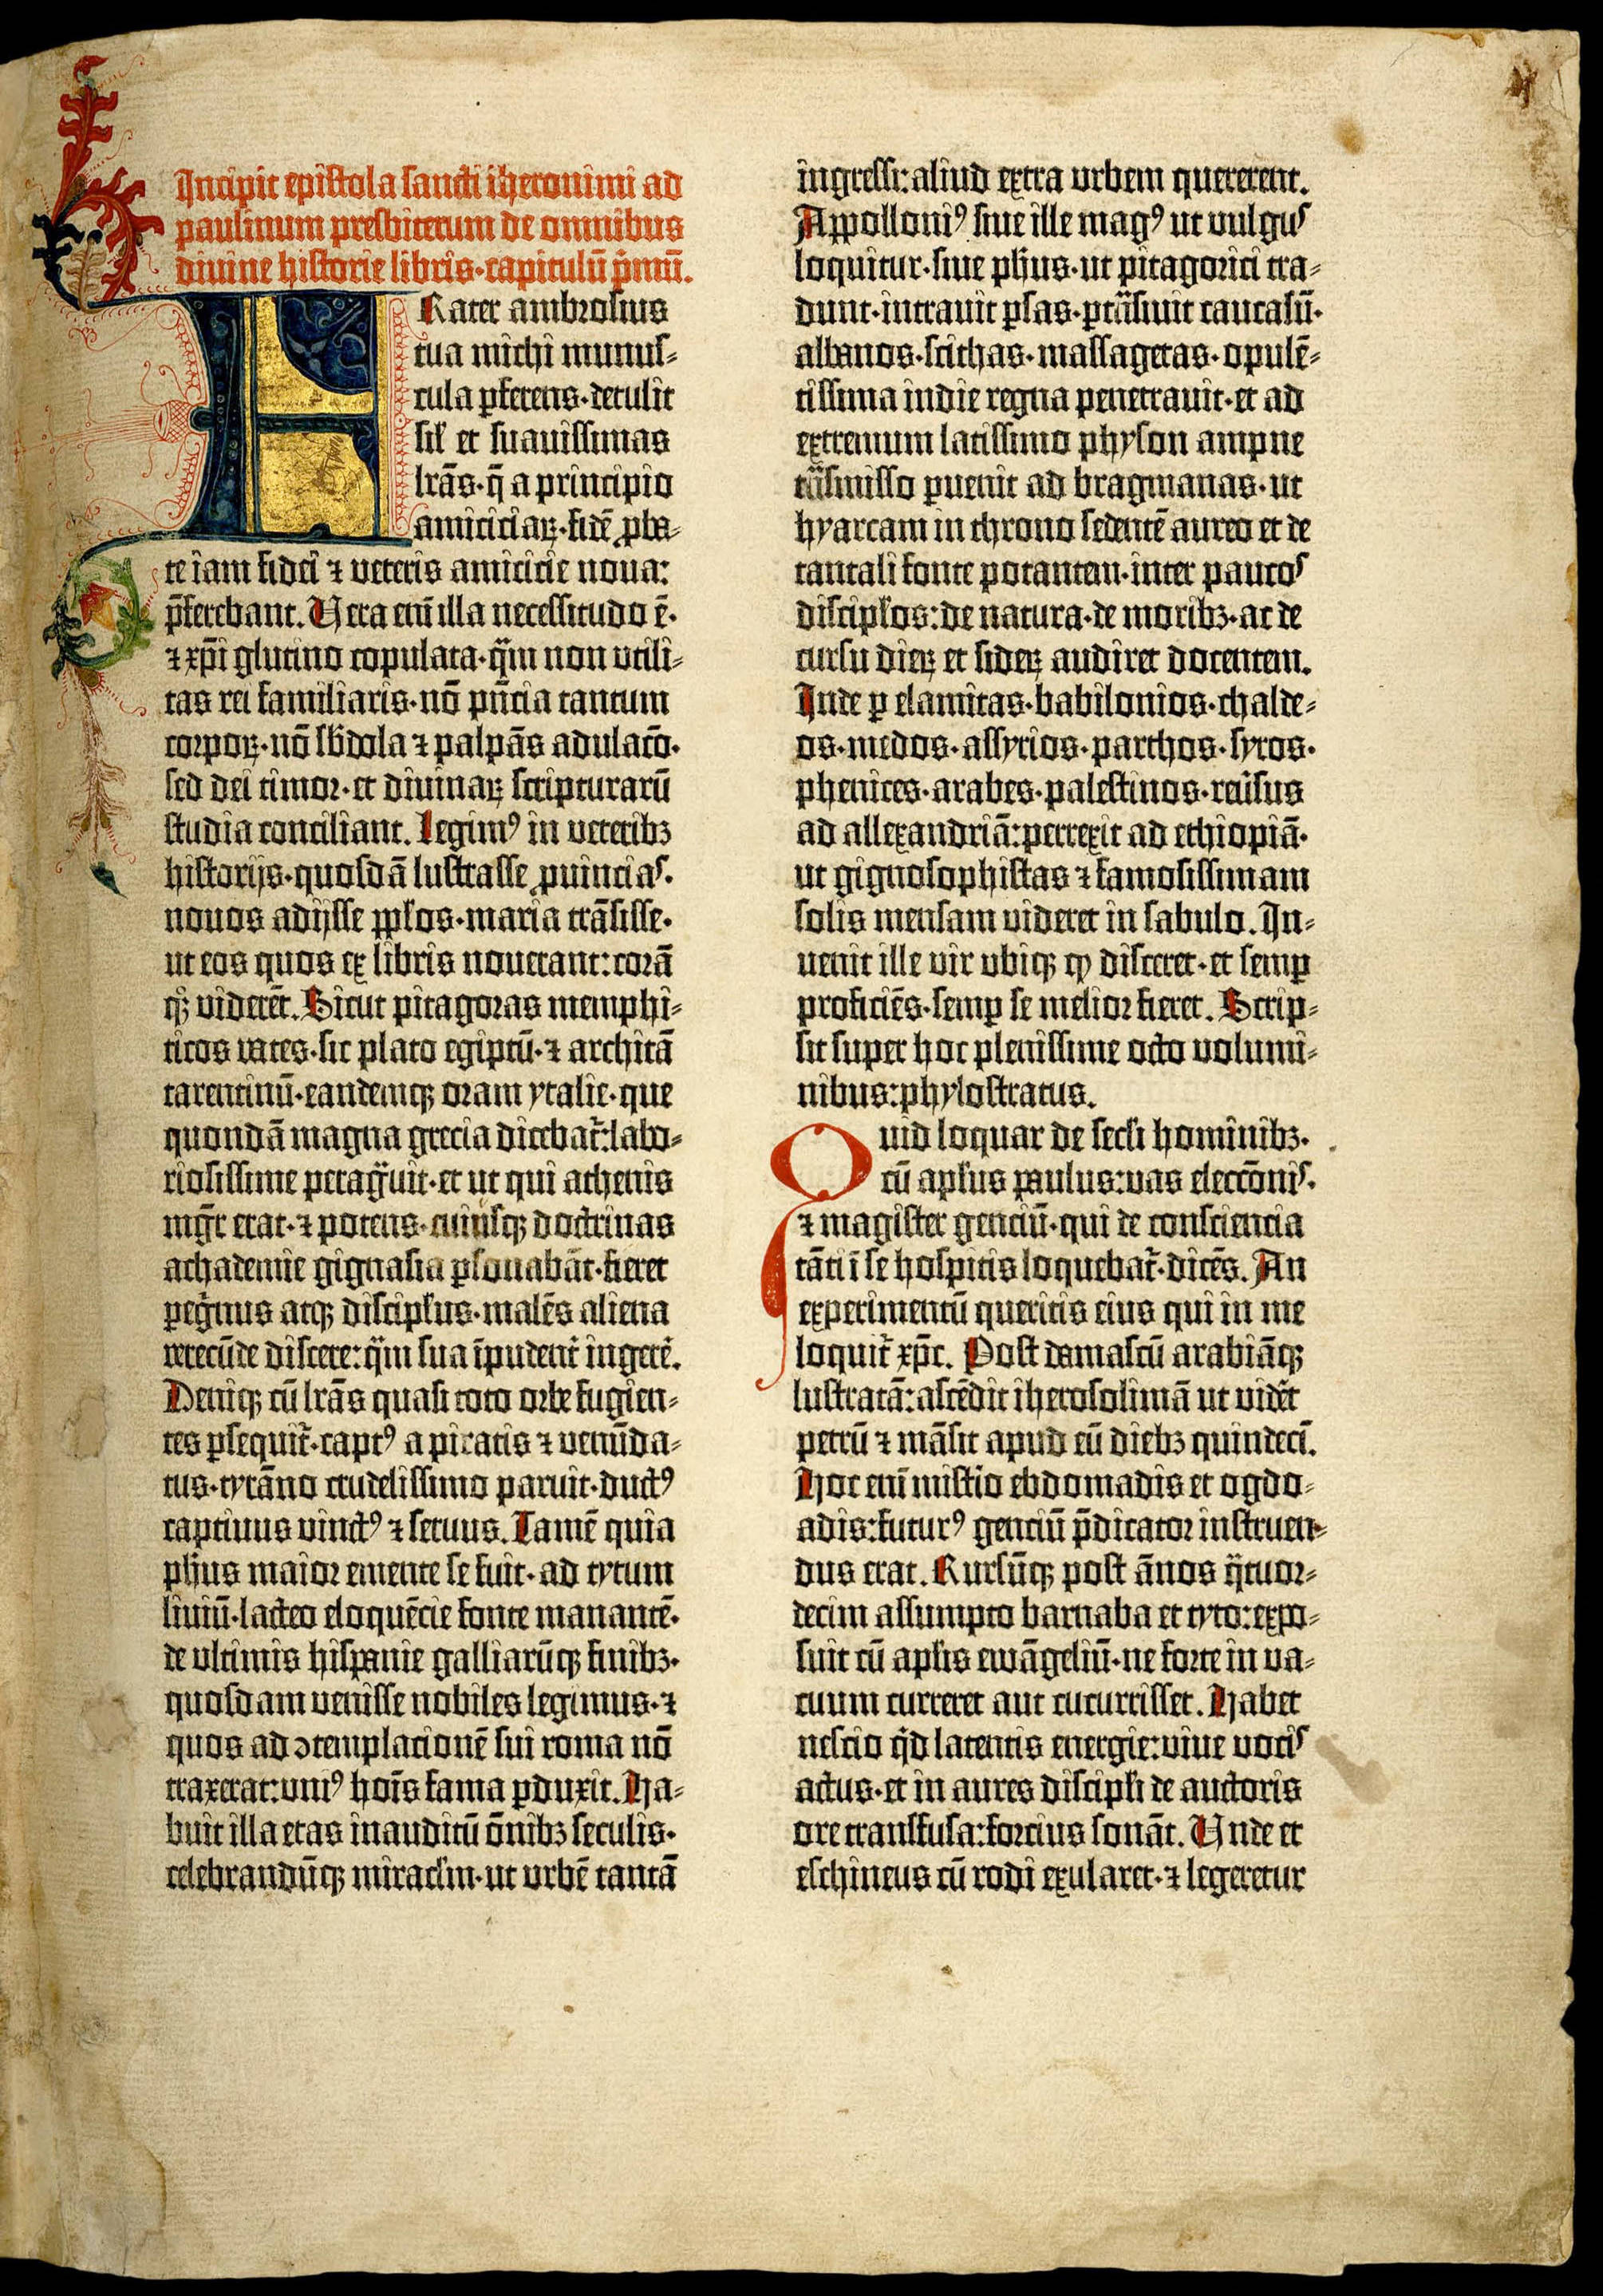
A page from the Diamond Sutra, printed circa. 868 CE. Currently located in the British Library, London.
According to the British Library, it is “the earliest complete survival of a dated printed book”.
Public domain, via Wikimedia Commons
The techniques from China were eventually passed along the Silk Road to Europe. The screw press was the earliest type of press, using wood blocks or plates of lead pressed not with a barren, but with the pressure created from twisting a large screw, followed by the printing press– invented by Johannes Gutenberg. The Gutenberg press was a more sophisticated printing press with a movable type (which also came to Europe via China). A Gutenberg press could also press 3600 pages a day!
Public domain, via Wikimedia Commons

Public domain, via Wikimedia Commons
Modern Block Printing sometimes still uses wood, but more often than not it is rubber or linoleum that is carved like wood to take the ink. Like the Gutenberg Press, you can cut out different parts of the block to move and change, or use several blocks to layer for more depth.
Here’s a video of Lili Arnold, a contemporary Block Print artist, using different cut out blocks to create her lotus print. Many of the tools she is using we will be using for this project as well.
Other Types of Printing:
Resistance Printing uses wax, paste, or string/rope and other techniques to create negative spaces for the dye to not absorb. Indonesian batik uses wax, Japanese tsutsugaki uses rice paste, while shibori uses thread and rope. American tie-dye tradition comes from shibori.

漱石の猫, CC BY-SA 4.0, via Wikimedia Commons

MartijnL, CC BY-SA 3.0 NL, via Wikimedia Commons
Screen Printing or serigraph printing uses a silk mesh screen and some sort of medium (emulsion usually, but wax and adhesive vinyl could be used to a similar effect) to create the negative space, the ink is spread over the template with a squeegee and the negative is removed after. Many tee shirts are printed in the screen printing process.
Lithography has some similarities to block printing, but instead of engraving, you draw directly onto the stone using special drawing tools and use water and grease or oil to control the pigments for the image. Because of this, lithographic copies are never entirely as exact as copies made with block printing.

We hope go go more in depth with these other techniques in the future in their own dedicated guides, but for now it’s worth knowing they exist.
What You Will Need:
- Pencil
- Liquid “School” Glue Dimensional Fabric Paint or Hot Glue
- Brush
- Container or small paint palette
- Cardboard
- Aluminum Foil
- Water Soluble Block Printing Ink or Watered Down Acrylic or Tempera Paint
- Soft Rubber Brayer or Foam Roller (depends on your medium)
- Block Print Baren or a Large Spoon or Large, Smooth Rock
- Larger Ink or Paint Tray
- Paper of choice (printer, kraft, etc)
- Newspapers
- Gloves
- A paper cutter or scissors (optional)
- A box cutter (optional)
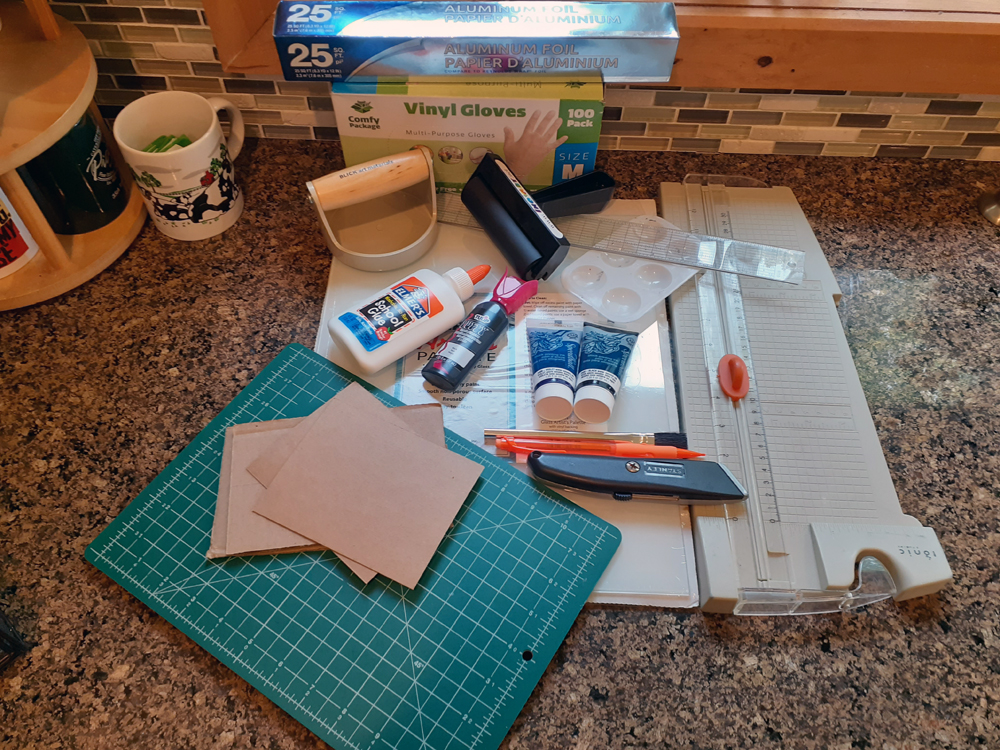
In this documentation, we will be using White 100 lb Cover Stock paper and Speedball Water Soluble Ink in Violet.
Creating Your Print:
Set up newspaper on the work surface to protect from the glue. Cut your cardboard down to the size you wish. You can keep it as large or as small as you wish. You can also cut your card stock to size now as well, or wait until after printing. (I was trying to figure out how many cards I could get from one sheet.)
Start off drawing your design on the cardboard. Be aware that unlike stencils, when you print it will be the reflection of your design, meaning it will be flipped. So when working with things like text, something you want particularly to face right in the print, it should be placed left on the cardboard, and likewise if you want something on the left, you need to place it on the right.
Here are some logo designs I made for a previously made monogram design guide as a an example:
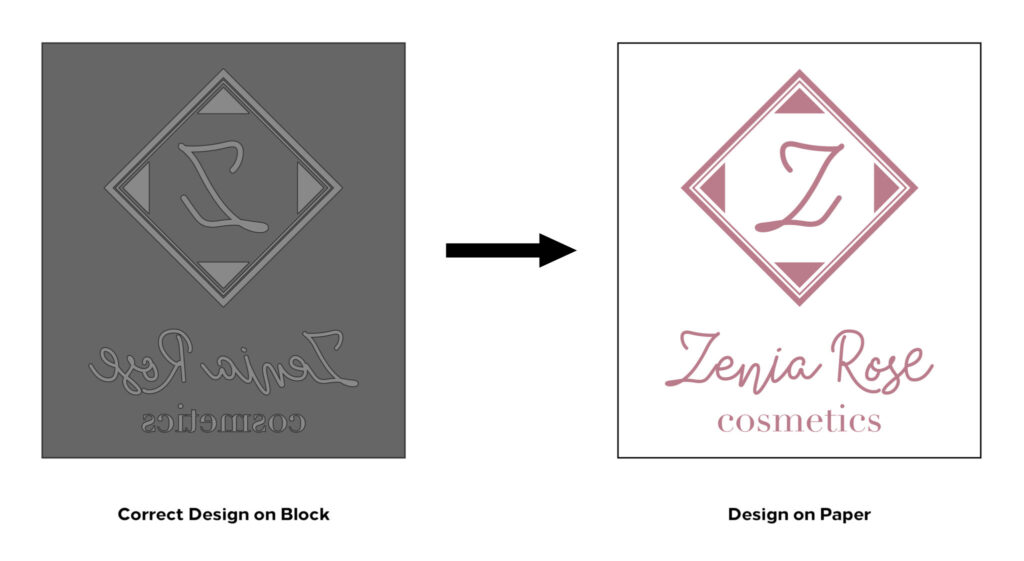
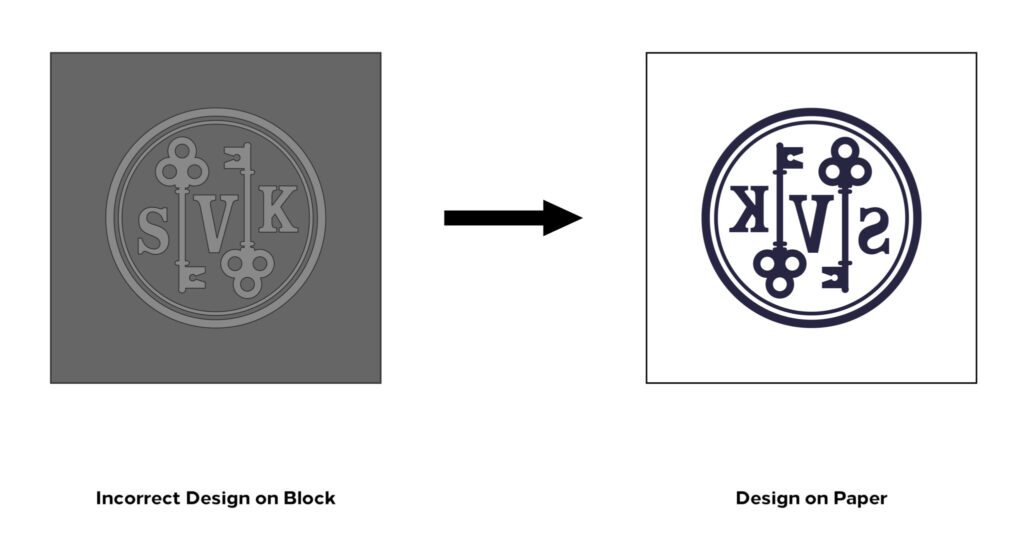
So keep that in mind when creating your design.
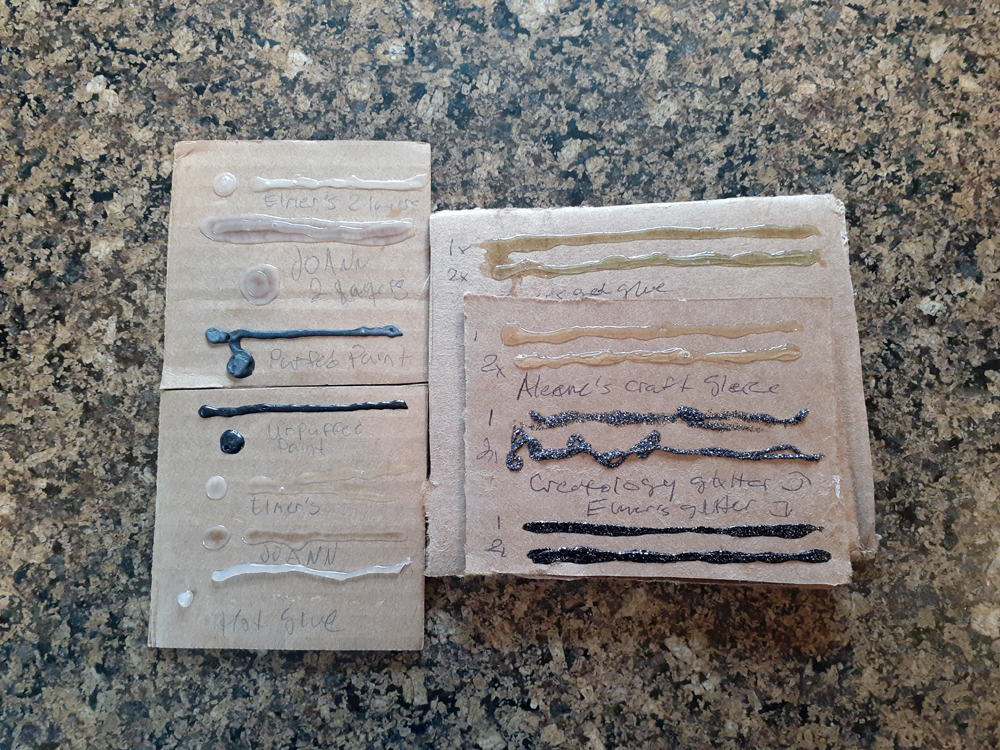
I tested out many mediums to get the best height with as little coats as possible. Elmer’s liquid, gel, and glitter glue, Jo-Ann’s generic brand glue, Tulip brand dimensional fabric paint, hot glue, Aleene’s Craft Glaze, and Creatology brand glitter glue. Hot glue would work best, but doesn’t have good control and could be a safety hazard for small children.
As such, I went forward with the three Elmer’s glues.
You can design it digitally and make a stencil, or freehand on the cardboard. For the sake of brevity, I will be designing my stamp freehand right on the cardboard. (The tracing paper transfer technique is better on rubber– it may not be as successful on cardboard.)
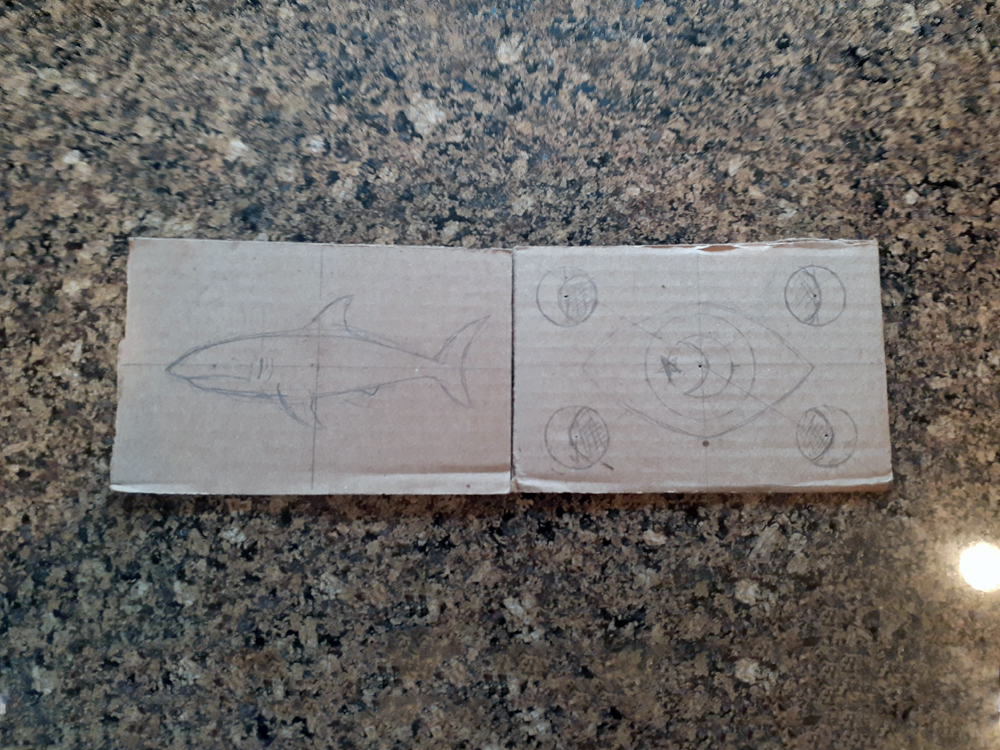
Next use your medium to draw over the pencil work. I recommend keeping details as simple as possible so the details aren’t lost once you move to glue.
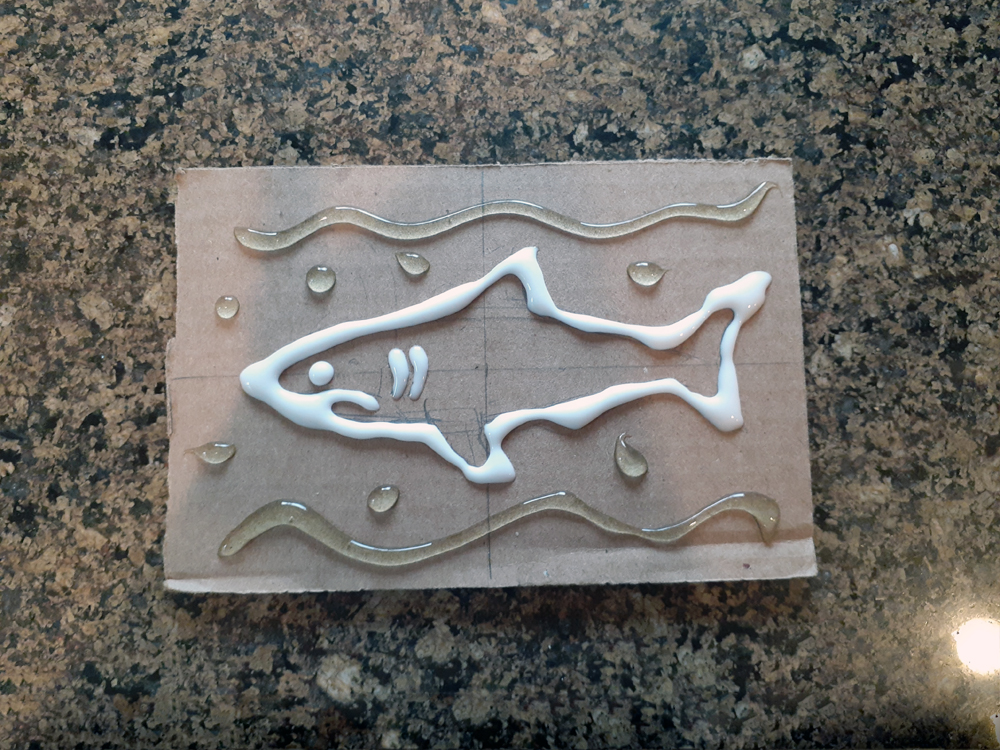
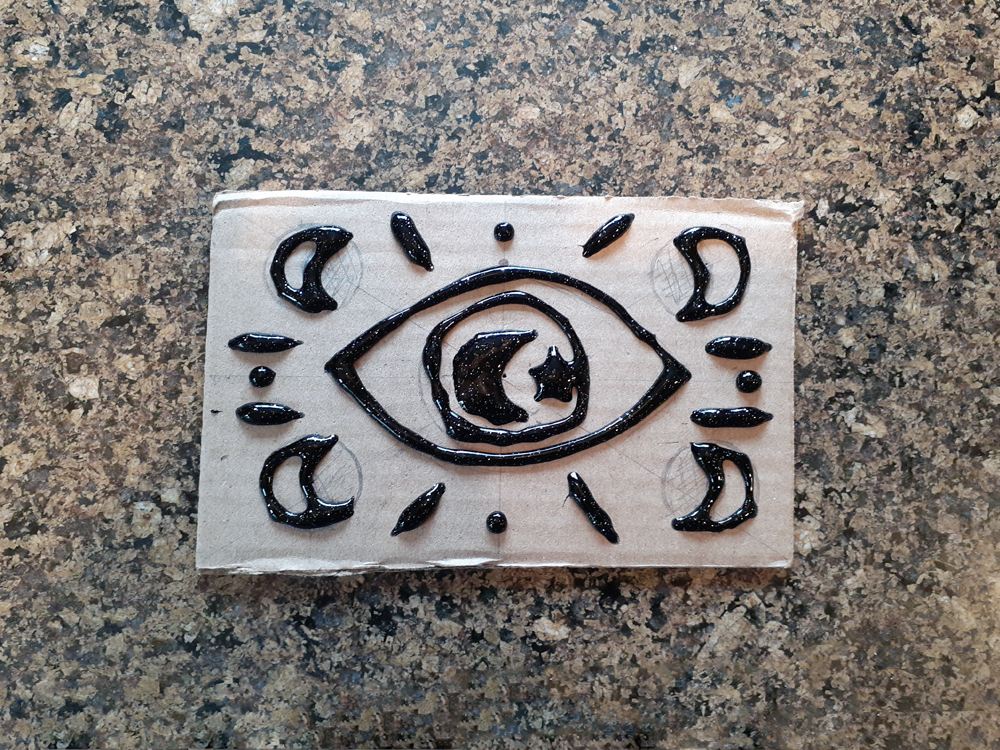
Full transparency– my stamps were made about 5 coats of Elmer’s White, Gel, and Glitter glue over several days. One coat will give a very low relief– so don’t be surprised if parts don’t show up. Even when building up it still was hit and miss.
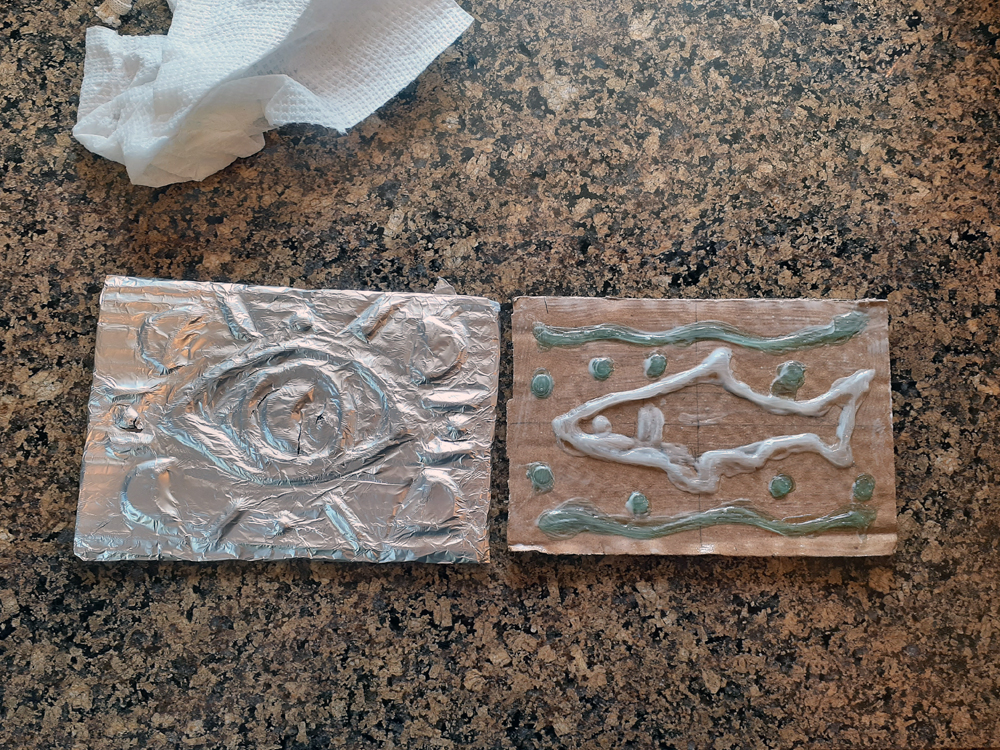
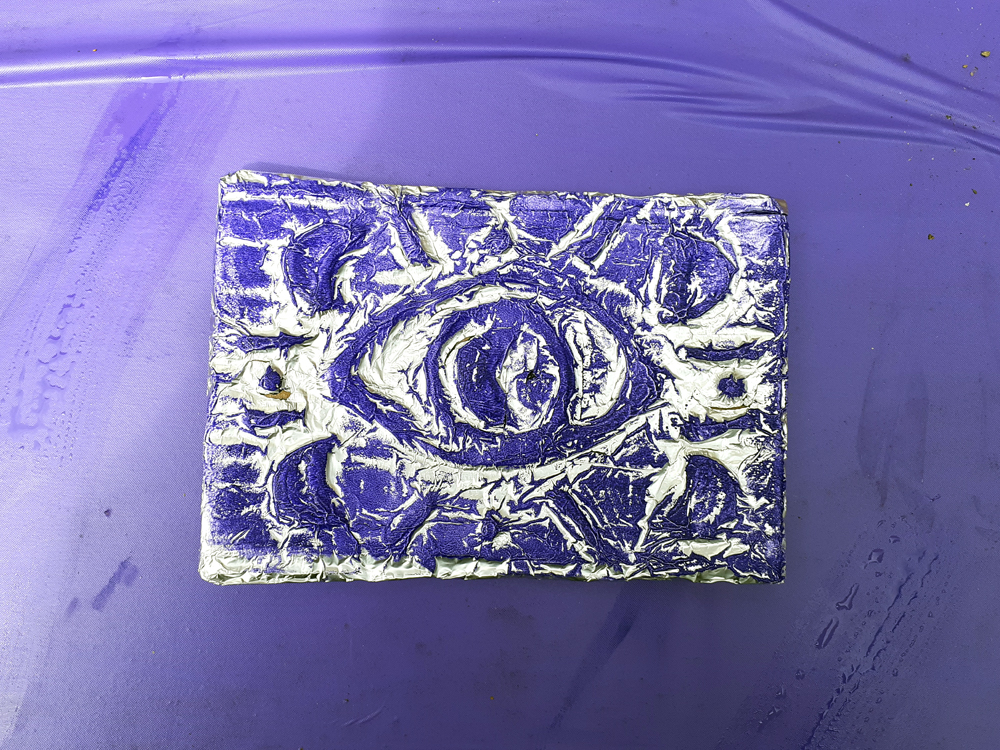
Regardless of the medium you chose, once it is dry, you can either leave a coat of glue and cover it in tinfoil or leave a coat of glue to dry over to seal it. Tinfoil would let you reuse you print, if that is something that interests you.
Let it dry for a few hours to a day to make sure all the glue is dried and safe to use.
When it’s ready to be used, pour some of your paint or ink into a paint tray or ink plate. Water soluble paint is meant for block printing, so it will work well. But if you’re on a budget or have it lying around? Watering down acrylic or tempera paint a bit can work.
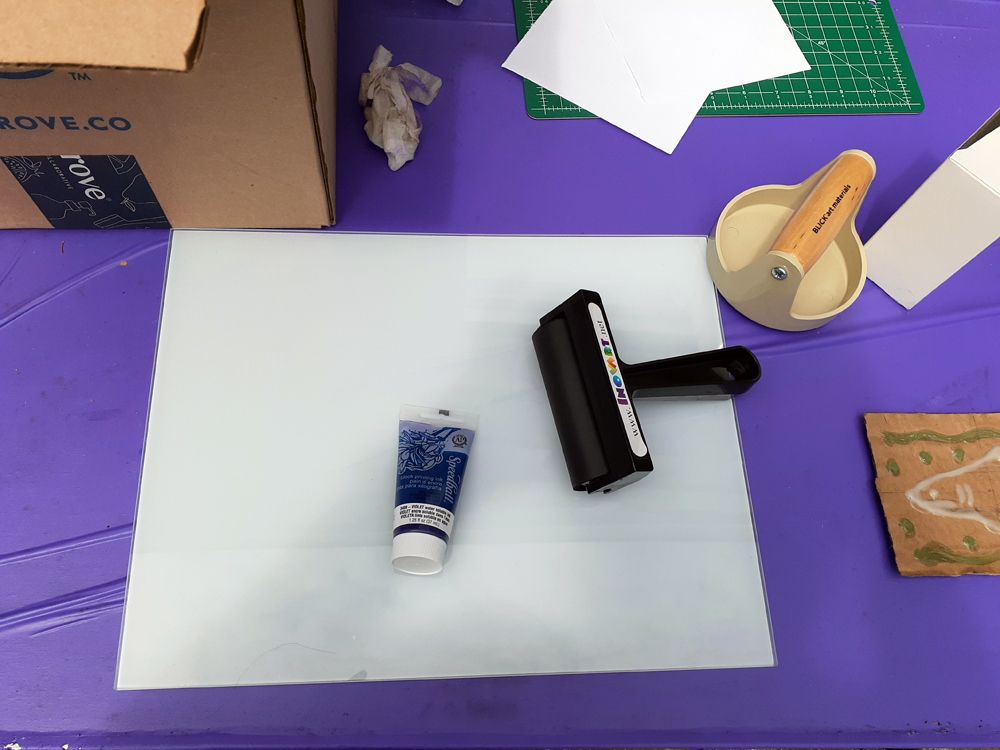
I am using my glass palette as an ink plate. (Glass is a good palette material as it cleans easily, doesn’t stain, and can be used with many mediums. And not to mention green!) You can also use an old glass picture frame (or one from the dollar store!)
Using your rubber brayer (it looks like a paint roller), roll it in the ink. You could use a foam roller but you might not get as much coverage as it absorbs the medium. Make sure the roller is coated with a good amount of ink.
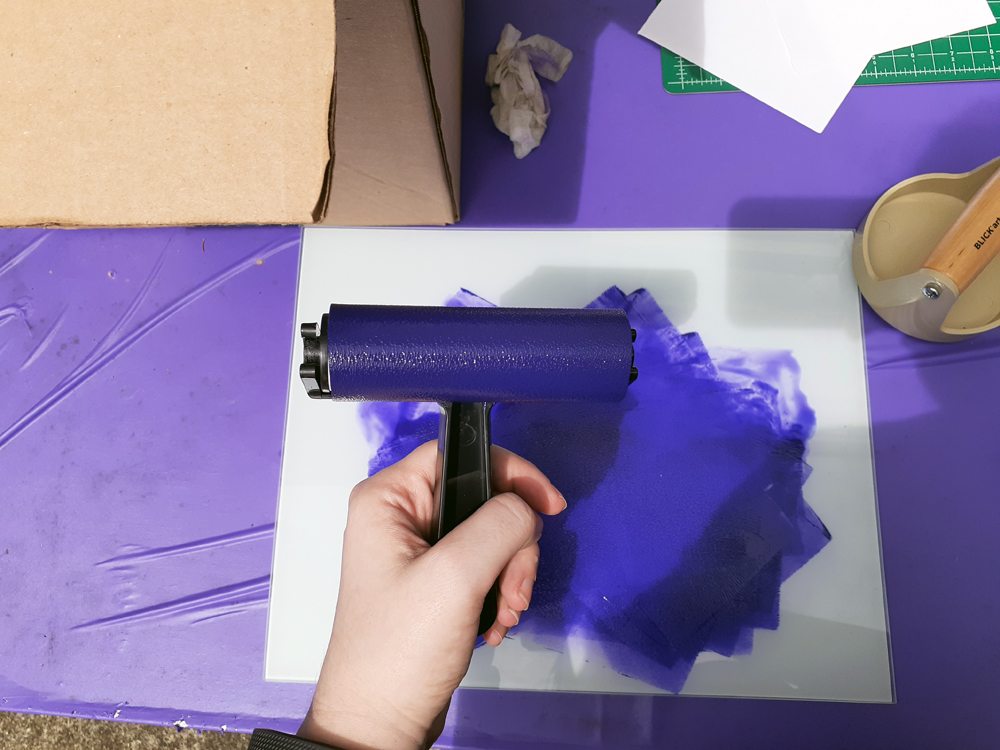
Roll the brayer over your block a few times to apply the ink. You might need to use it several times to make sure the ink is evenly distributed on all the raised parts
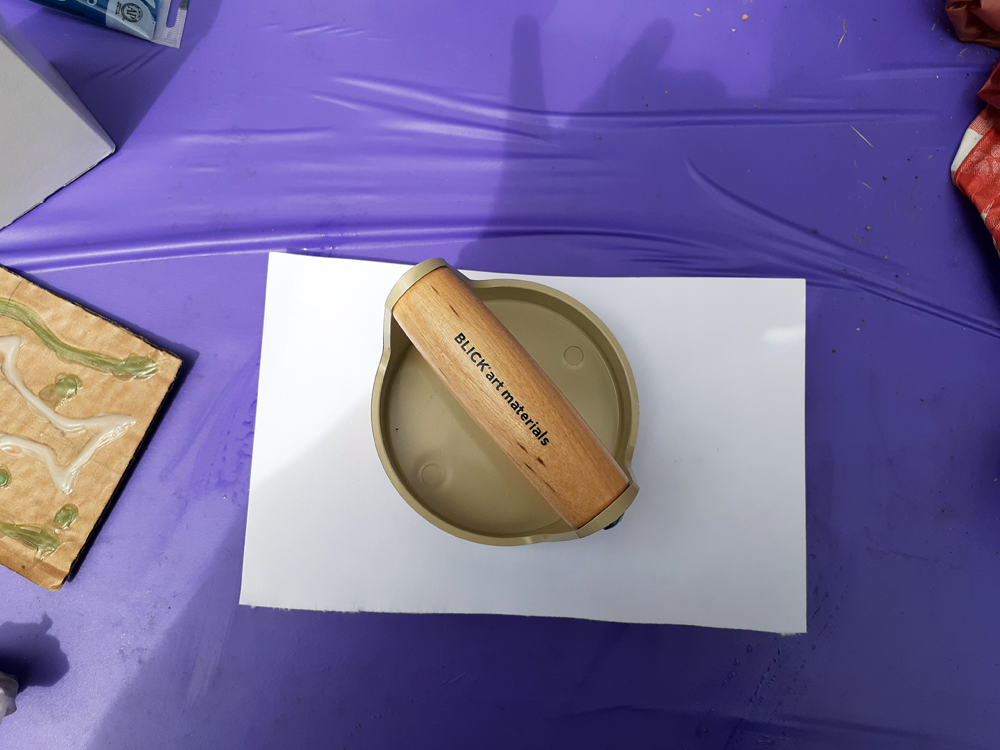
Place your paper on top of the block. Then, use the baren (a tool with a flat, round bottom and a handle) to apply the ink to the paper. You can also use a large flat spoon or even a rock– as long as it’s smooth, round, and fits your hand. With gentle but firm pressure, work the baren in a circular motion over the block.
When you feel like it is enough, gently pull the paper from the print.
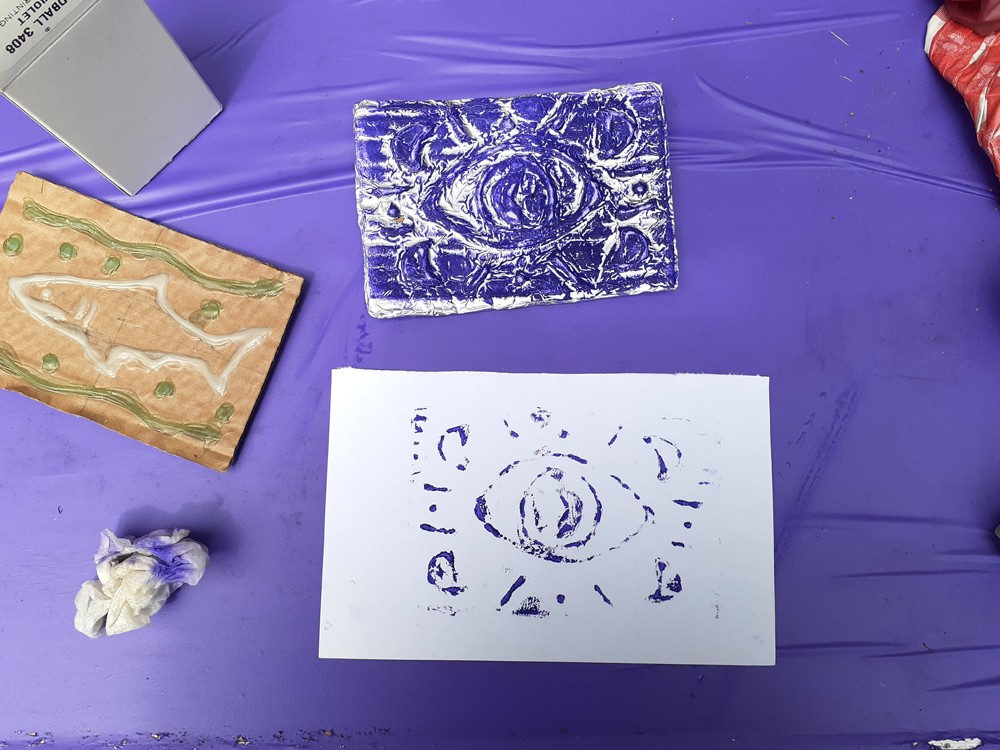
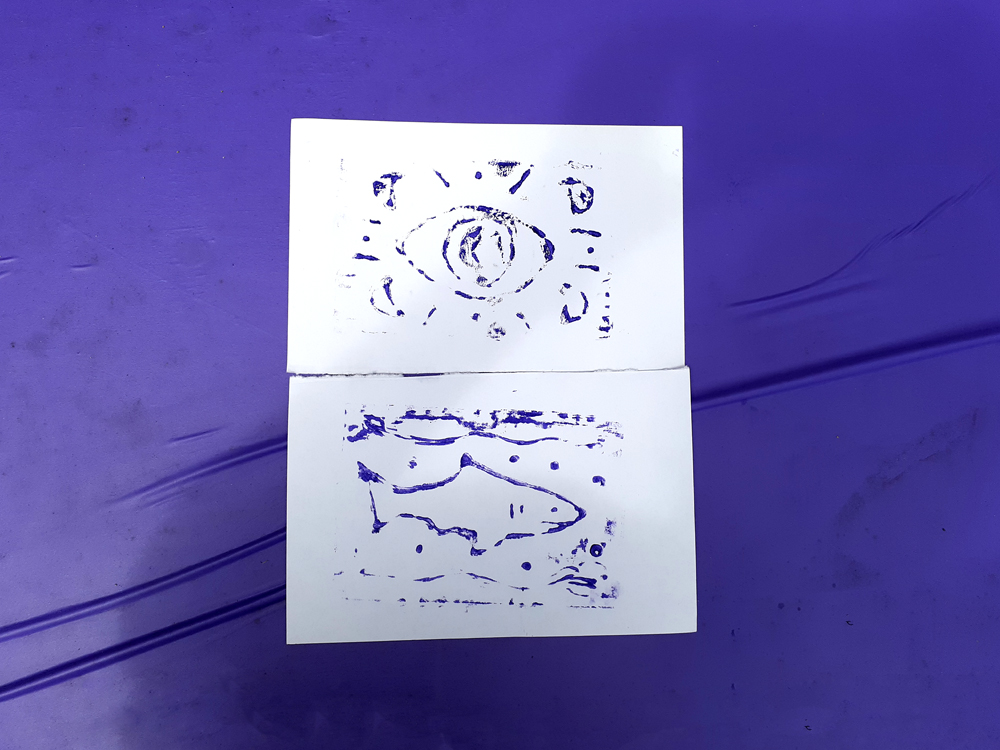
And there is your print!
For Further Exploration:
- BMCC Makerspace: Laser Etched Stamp Workshop
- BMCC Makerspace: Stencil Workshop
- Art For Small Hands: Glue & Aluminum Foil Prints
- CraftWhack: Glue Block Prints
- Boarding All Rows: A Guide to Block Printing
- Stitchin’ Post on YouTube: Block Printing Basics
- Justine Silva on YouTube: Block Printing 101
- Boarding All Rows: How to Make a Carved Rubber Stamp
- Think Make Share: Block Printing Basics
- Handprinted: How to Carve and Print a Simple Lino Block
- Handprinted on YouTube: Introduction to Linocut
- TutsPlus: Making a Wood Block Print