Here is the process to deploy your project to Netlify.
STEP 1: Create GitHub Repository
You should already have this, but you will need a GitHub repository with all of the Eleventy files
STEP 2: Ready Your Project
Install Eleventy in Your Project
You haven’t had to do this before because most of us installed 11ty as a global package. But netlify may not build it properly unless it is defined in the project dependencies. To do that
- Open Terminal
- Type: npm install @11ty/eleventy
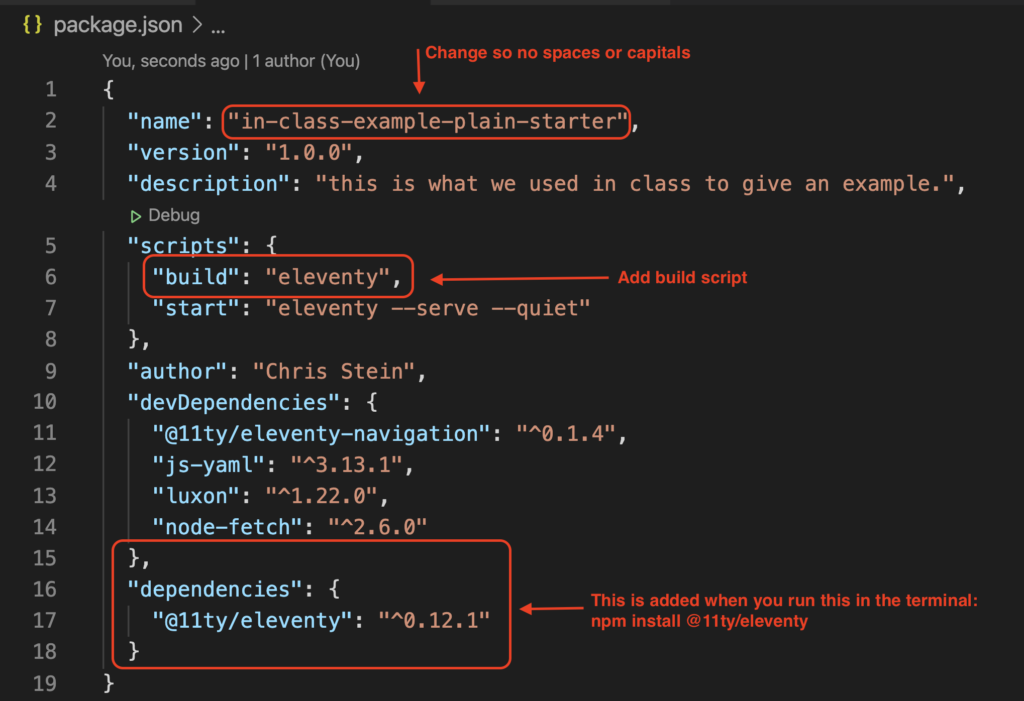
You should see it installing and then in package.json it should add some lines to show it in the dependencies
Add or change the following in the package.json file
- make sure name has
- no spaces
- no capitals
- Add the line below to your scripts
- “build”: “eleventy”,
Here is what your package.json should look like after the changes
STEP 3: Push Changes to GitHub
After you have made the changes they need to go on GitHub. To do that you will
ONE: Save the package.json file
TWO: Commit the changes
THREE: Make sure you’re on the main branch
If you did your work on the main branch, skip to FOUR. If you did the work on another branch then you will need to merge that branch into the main branch. First checkout the main branch
git checkout mainthen merge changes. replace your-branch-name with the actual branch.
git merge your-branch-nameFOUR: Push your changes to GitHub
git pushAfter this you should visit your site on GitHub in order to make sure the changes were pushed. If you can’t see the changes on the GitHub website then Netlify won’t see them either.
STEP 4: Netlify Setup
Here are the steps
- Go to netlify.com
- Click the Sign up link
- Click the GitHub Button to sign up with your GitHub account
- Follow the steps to authenicate GitHub and complete signup process
STEP 4: Create a New Netlify Site
- In the Team Overview or Sites page, Click the New Site from Git button.
- Click on GitHub button to select it as your provider
- Install Netlify on account if prompted
- You should now see a list of your repositories
- Choose the final project repository you want to deploy
- Enter the following settings
- Branch to deploy: main
- Build Command: npm run build
- Publish Directory: dist
- Click Deploy Site
- You should see a screen that shows the site being deployed. YOu can click the message to watch the build process
- Hopefully it will be successful. If not, watch the Long Video Walkthrough below where I make a number of mistakes and failed builds. If it is not successful the site will not be live.
There are other optional settings you can do in the Advanced Settings of the New Site form. Also, you can change the site name later after you create the site.
- Click on site (from Team Over view or Site page)
- Click on Site Settings
- Click Change Site Name
- Enter your new name. It will be in the form:
name-you-enter.netlify.app for the full main URL.
Long Video Walkthrough
This is a longer video walkthrough where I go through the process and make a number of mistakes and show some different ways your deployment can fail.
2 comments