Weeks #12, 13 & 14

Weeks #12, 13 & 14

Welcome Back!!

**Please check your BMCC e-mail as of 12/10 for the final semester wrap up and course completion information. The same content will be posted to this website shortly. Tonight, 12/9 is the last day of classes, Next Wednesday is our last meeting in Zoom for those who would like to present their completed work in Zoom – 5:30pm – 9pm – those not attending the 12/ 16 Zoom will have all completed work added to their personal folder in our google drive no later than 9pm Wednesday 12/9.

There have been a few updates to the assignments page, please review them when you can if you are not attending the live zoom class on 12/9.

Lets jump into some student progress and talk about our last project::

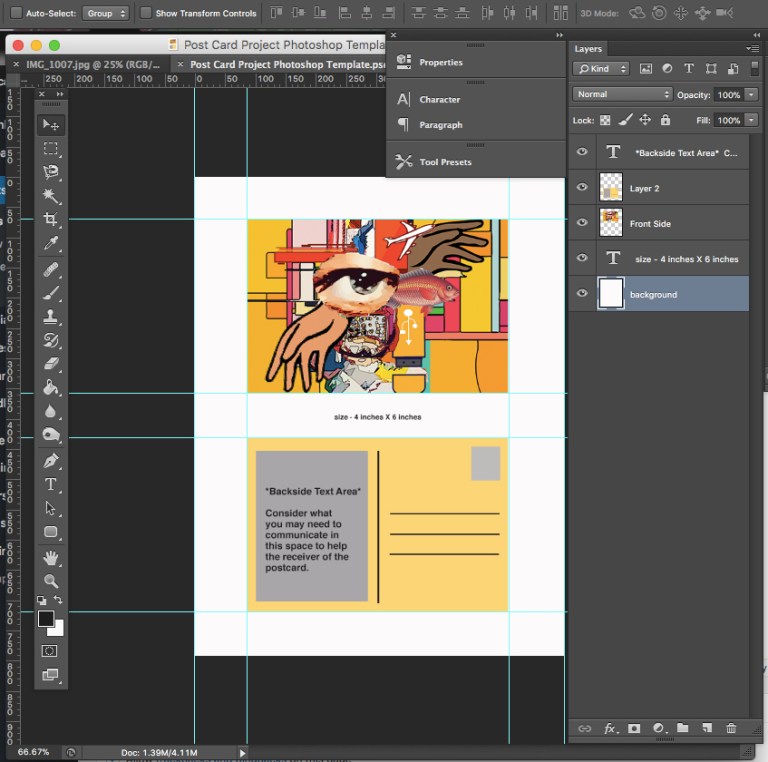
(*This tutorial below was covered in the live Zoom session on 12/9/20 and then posted here and on the assignment page – it includes the PDF portfolio layout demonstration)

https://us02web.zoom.us/rec/share/PrBfQIPqCjB66wrpXQ4Hi1bILE7FhMXv_tD7sTdleabP8N2fKoIo0MPcEg_wtL9Q.PZRcmvKEDUfFAu3U

Passcode: LI=1FA*U

(*This tutorial below was covered in the live Zoom session on 12/2/20 and then posted here and on the assignment page )

https://us02web.zoom.us/rec/share/ktwiJ-iaoI2ptXgpo8eQEZjET5onNAX-2Zuj18PU5h4RAt4bWqoY6kOr2PHD7jJv.kbY5kgSmrDDHu6-i

Passcode: 21+Fq4NP

Assignment #4 -(Parts 1 & 2)

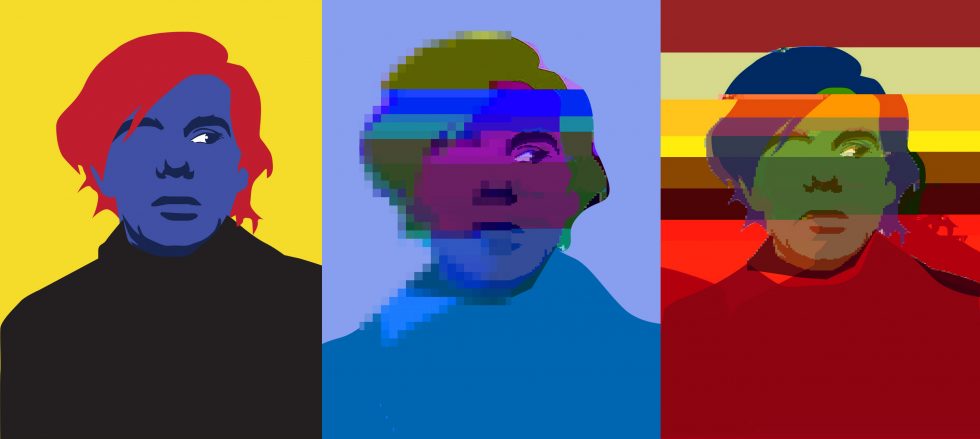
Vector Art Portrait Making, Poster Design & ZINE Making Collaboration!

We will bring together the applications of a vector art, portrait making, ZINE lay-out / composition, image manipulation, typography & collaboration.

Specifications:

Fictional Museum Exhibit Poster (examples will be shown during the Zoom classes – as well as a series of Illustrator vector demonstrations)

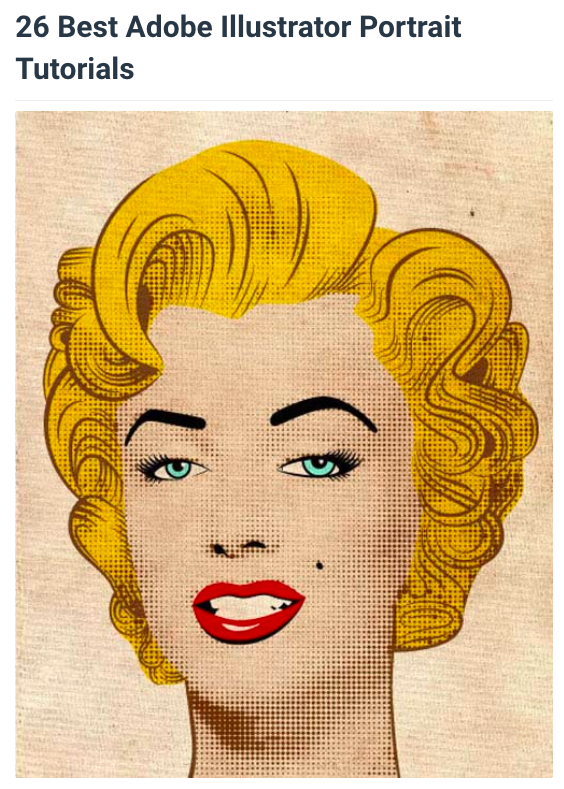
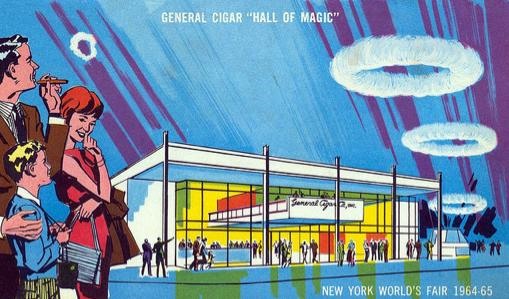
Suggestion :: Choose and work from the image and likeness of one or more of these styles/movements of art to create a poster using a SELF-Portrait

POP ART, SURREALISM, MEXICAN MURALISTS AFRO-FUTURISM, MANGA, POLITICAL ART, FAUVISM, GRAFFITI, AFRICAN MASKS, ANIME, VIDEO GAMES or (Another Style Not Listed Here or create a Hybrid using 2 or more styles)

Process: Research and Practice!

Art Movement Resources:

https://www.theartstory.org/section_movements.htm

https://mymodernmet.com/important-art-movements

Find and discover a series of images and references to work from. Your research should inspire you and activate you! Create a new project folder titled “Self-Portrait-Poster-Project” – save these images to your project folder. Create your self-portrait in the style of the Art or Design Movement that you chose for a Fictional Museum Exhibition.

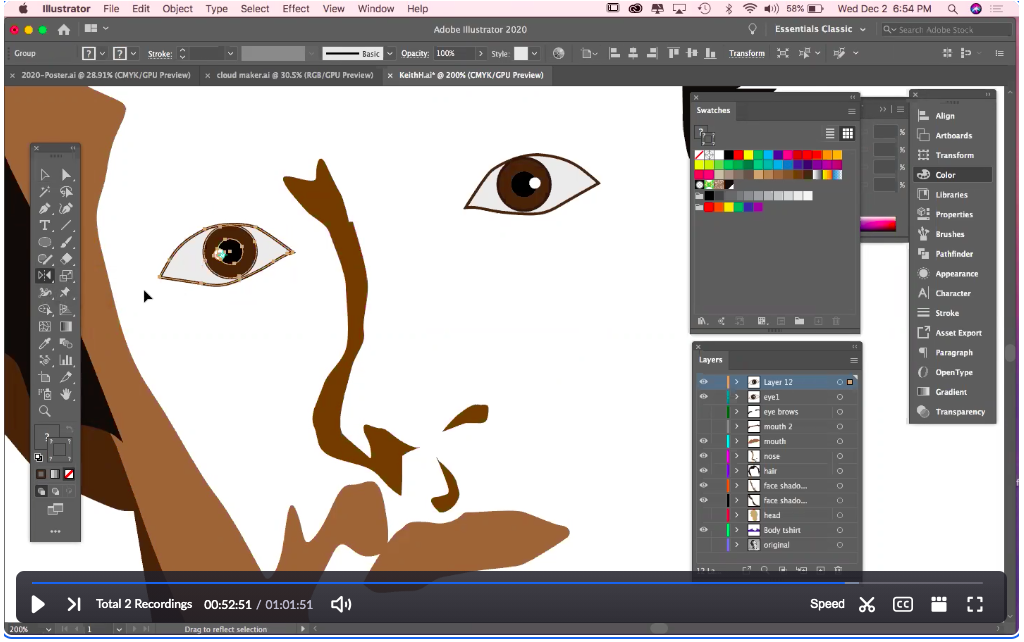
*Your self-portrait IS the artwork – for the poster campaign that you create for the exhibit. You must design the poster in 2 sizes – one landscape and one portrait orientation. I suggest 11 inches x 17 inches (or slightly smaller) Your self-portrait must first be drawn in Illustrator and can be brought into Photoshop later for manipulation, (like adding blended colors, additional imagery or effects.) After you illustrate your self-portrait, you’ll create the actual poster for the ex­hibit.

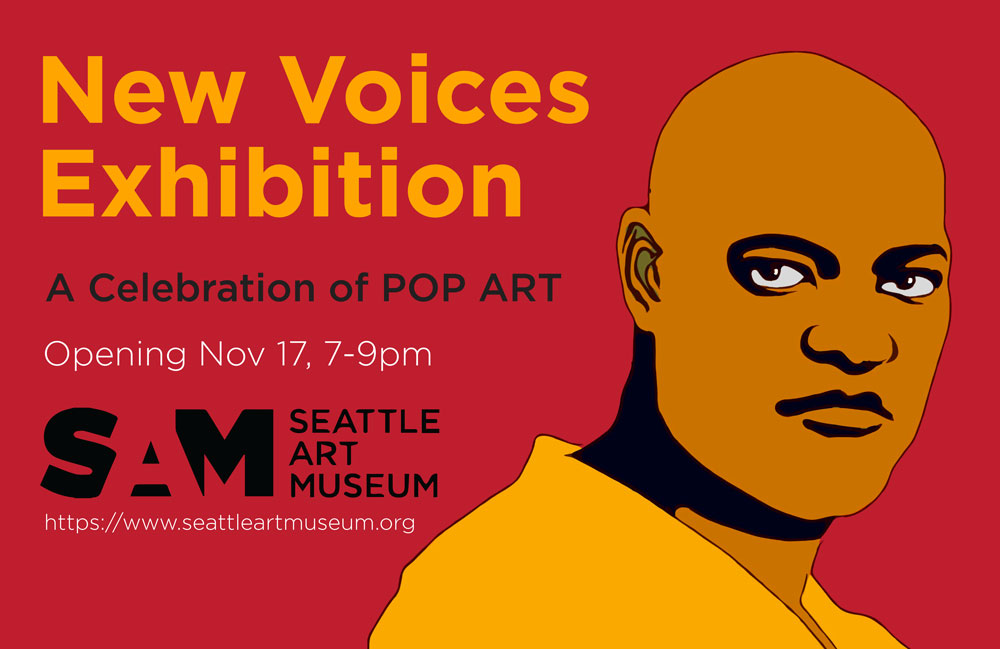
Specifications II: The museum having the exhibit you’ve chosen is: SAM, Seattle Art Museum. (or pick another museum that you want to work with)

Find out more about the institution at this website: https://www.seattleartmuseum.org/visit/seattle-art-museum

For the project please use the SAM logo as it is: (attached as a download link here) *feel free to re-render the logo on your own if you wish. (This does not mean change it) You may use any of the tools in Illustrator that we’ve learned or explored and also find and experiment with new ways to draw. You can work from a photo in Illustrator as demonstrated in class.

Do the Portrait First. Then compose the poster. :))

Minimum required copy/text for the poster is:

New Voices Exhibit

April 15th 2021 – May 30th 2021

Opening Reception, April 20th 7PM-9PM

https://www.seattleartmuseum.org

*(and the SAM logo of course)

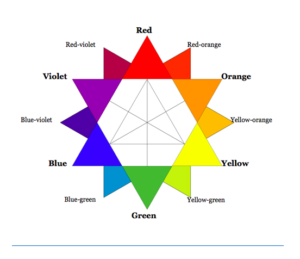
Fonts and colors – are entirely student choice. Students may ADD additional copy, but may not delete from the minimum above.

Submission guidelines:

When both parts of the assignment have been completed please save them as a .JPG file and as a PDF then add them to our class google drive shared folder here:: https://drive.google.com/drive/folders/1m8_39ko2CtWEyzQ9SXABM2RWfKTCsGii?usp=sharing

*Please make sure to create a folder for yourself with your first and last name and please name your files with your name – an Example file name looks like this:

Ryan_Seslow_Assignment#3-part1.Ai.

Ryan_Seslow_Assignment#3-part1.pdf

———— – – – – – – – – – – – – – – – – – – – – – – – – – – –

Research / Inspiration / Tutorial – Check out these links below:

Project #4 – Part 2 – (Extra Credit – Not Mandatory)

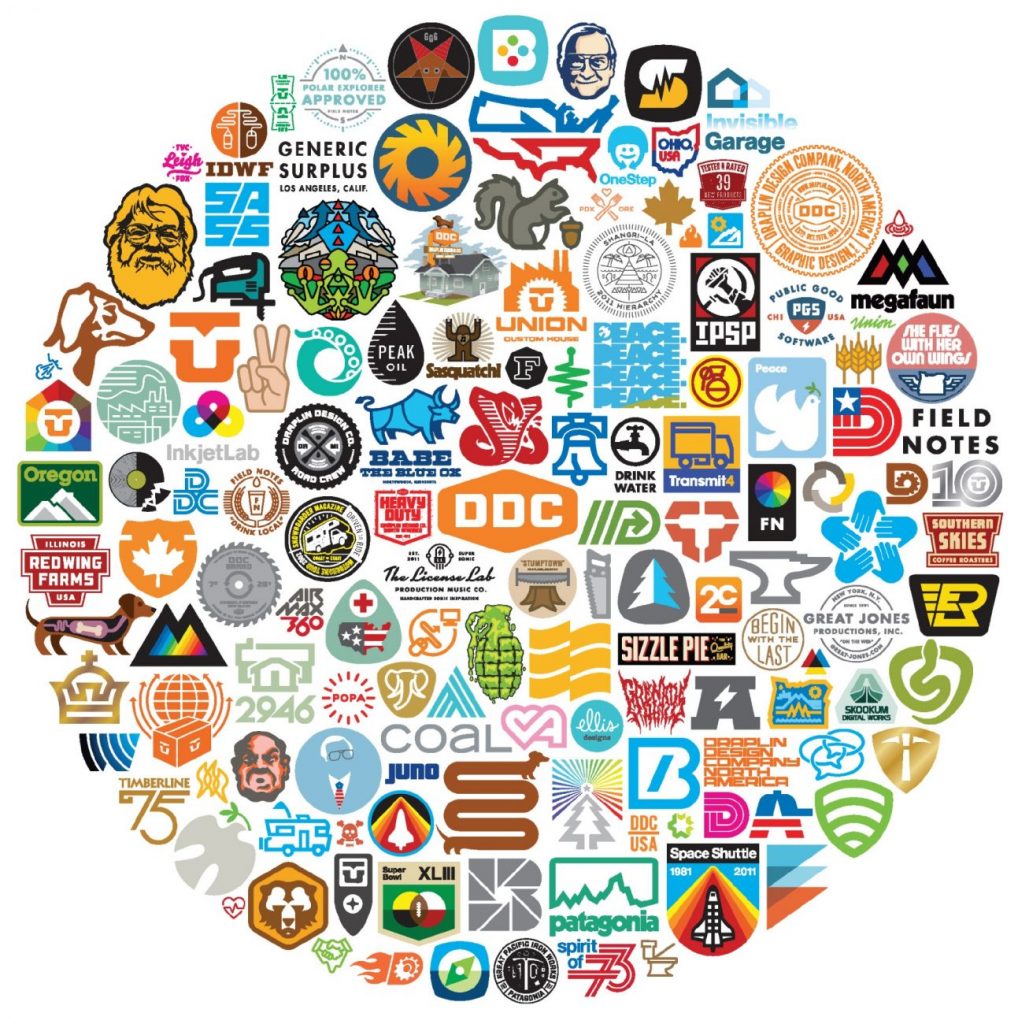
Aside from the production of both a horizontal and traditional vertical poster made in illustrator, students will push the boundaries and application / usage of their portrait imagery. What is the creative potential of the image? How can you push it further? We decided to make a collaborative class ZINE that will isolate and showcase the portrait work. (The image above is from a the lay out that we will go over in class, we will revisit this was we build the zine together as a class.) The ZINE will consist of 2 or more submissions by each student. I would love to see everyone submit at least 2 images: 1 traditional vector image created in illustrator, and 1 highly manipulated version of that image by exploring and hacking into some of the applications below. The isolated portraits should be sized at 8.5 X 11 Vertical. This makes it easy for use to plug the images into the ZINE lay out.

What are the potentials of web and mobile applications in our day and age when it comes to creating styles, textures and over all visual aesthetics? We will walk through a series of demonstrations, some examples are below, along with a slew of apps to play with.

Desktop / Web Browser Art Making Platforms:

Click Drag Click – clickdragclick.com

Imgur – imgur.com

Pixlr (photoshop alternative) – https://pixlr.com/editor/

Glitcher – http://akx.github.io/glitch2/

Image Glitch Tool – https://snorpey.github.io/jpg-glitch/

c64 – http://c64.superdefault.com/

Mosh – https://getmosh.io/

Glitchatron – http://www.errozero.co.uk/glitchatron/#

Giphy – giphy.com

Gfycat.com – gfycat.com

Inkscape – https://inkscape.org/en

Gimp – https://www.gimp.org

OS X – GIFKR

Trianglify Generator

Trianglify Generator 2 

Mobile Apps:

Glitche’ – glitche.com

Imaengine – Tons of filters, vector conversions, stills & video

Hyperspektiv – Tons of filters, stills and video

to.be camera – to.be/camera

Giphy Cam – https://giphy.com/apps

Instagram (I say this because you can layer multiple images, videos and transparent images in the IG Stories feature, then “save” your work even with out publishing it – http://Instagram.com

Platoverse App

VHS CAM – http://rarevision.com/vhscam

Assembly Design App – http://assemblyapp.co

ImgPlay – https://itunes.apple.com/us/app/imgplay-gif-maker/id989843523?mt=8

Imaengine – https://itunes.apple.com/us/app/imaengine-vector/id599309610?mt=8

Ultra-Pop

Ultra-Pop -Infinite

GifVid (simple tool to covert GIF to Video, Video to GIF on the phone)

Glitch Wizard

iColorama S rich featured image editor that maintains full resolution of images

Decim8 – Glitch

http://royb0t.net/tagged/iOSartApps

ImgPlay – Awesome GIF maker! Conversion to video, and video to gif.

Back Eraser – Great to remove background areas and make layers.

GIF Maker Create GIFs from a sequence of still images from your photo library.

Weeks #7 & 8 – Info & Resources

Welcome to MMA100 Weeks #7 &8!

Here is this week’s useful information and class resources:

*Did you miss Week #5&6’s Post? Go Here

Lets jump in tonight by looking at more student work! Share your screen and show us what you have completed, are currently working on, or need some class advice on how to make improvements and updates. Don’t forget to add your works in progress to our google drive (you have a folder there).

Its also time to start talking about Assignment #3 – Exciting! Welcome to Adobe Illustrator!

Discussion – Class exercise :: Adobe Illustrator. Creating shapes with the pen tool, the pathfinder and the shape builder tool. Working with layers, simplifying and reducing images. Working with color, locating color books and pantone colors.

Assignment #3 link to assignment sheet

Lab Tutorial – This week we will take a tour of Adobe Illustrator and practiced creating new documents and setting up our art boards for production. Tonight’s zoom class we be recorded and placed here after class.

Below is the screen recording from class on 10/21 – Jump in!

https://us02web.zoom.us/rec/share/Jz_nnH3FRJrDwu0MBcw0TQzIVmiWiWYpm27s8KyZVfDRVl8UtuBxg2sA_ZJMQq8b.BOtJMZ7v1j2i6Xn-

Passcode: T9q^6U%r

Below is the screen recording from class on 10/28 – Jump in!

https://us02web.zoom.us/rec/share/gFdr57w0ed7igEAUZN5kWHW2hU-1QsDsoTZ4MO13Nb-BdIle0I3zodRtRORdbQUU.h5EW9npY976jnqb7

Passcode: !PcB^#I7

————-

Color Theory!

Adobes awesome Color Wheel Simulator (must see)

GO HERE to Experiment

Let’s take an additional tour with Adobe Wizard – Terry White

10 Things Beginners Want To Know How To Do (subscribe to Terry’s Channel!)

Weekly Inspiration & Resources of Relevance:

An Introduction to Typography & Its History – Letterforms / Designing with Type

Examples of Typography in Poster Design 

Weeks # 5 & 6 – Info & Resources

Hey Hey, Welcome back to MMA100 Weeks #5 & 6!

Here is this week’s useful information and class resources: This post has been updated to extend through week#6. There are a number of additional things below that will be covered in Zoom on 10/7.

*Did you miss – Week #4.5 – Go here

Lets jump back in and start with some NYC Design History!! Behold, the NYC Transit Authority Graphics Standards Manual. Last week we started talking about and discussing the manual.. see below

Inspiration – The NYC Transit Authority Graphics Standard Manual – Leave a Comment!

The link above will you take you to a page with an active full PDF version of the manual. I would like for EVERYONE to leave a comment at the bottom of this page after exploring the manual and answering the questions in the post. We will complete this during our Zoom class on 10/7.

Link to the video above – https://www.youtube.com/watch?v=Qg03z1H6cfA

Imagine being offered the opportunity to visually solve, design and illustrate the entire NYC transit system!? What goes into this process and research? Do you know who is responsible for this? How much does the designer charge for a project of such scale? Lets dig in and discuss.

Last week we continued talking about Assignment #2  – The Post Card project ! Lets talk about some work in progress and the potentials of the project. Students will share their work via Zoom. Discussions about presentation methods, portfolios and why presentation is so important. Please navigate to the assignment #2 page to view the assignment with me.

**Video recording of class – 9/30 – tutorial for Assignment #2 – The tutorial covers working with the pen tool, creating your lay out / document set up, layers and composition.

https://us02web.zoom.us/rec/play/Rfz96XuAYMbuQZwrdFsYHdJXkU_C2hn0TN1EvkxeTeDsBzZLxbonwXlkI8i9A8cQe4H3pIujkz_URKZz.6JV9Hqz9MVn0gLX2?autoplay=true

Passcode: yX&pd9v#

Color Theory!

Adobe’s awesome Color Wheel Simulator (must see)

GO HERE to Experiment

Several up and coming assignments will surely benefit from the use of understanding Color Theory and the Adobe Color Wheel!

*Above – Color Theory Continued -> GREAT RESOURCE – Must Read

*Above – Color Theory Continued -II >https://99designs.com/blog/tips/the-7-step-guide-to-understanding-color-theory/


Let’s take an additional tour with Adobe Wizard – Terry White

10 Things Beginners Want To Know How To Do with Adobe Illustrator (subscribe to Terry’s Channel!)

Adobe has a great series of videos on their channel on YouTube: 

Check this series with a focus on Illustrator

https://www.youtube.com/c/AdobeCreativeCloud/search?query=illustrator

Designer Inspiration :: You need to know Paul Rand

Inspiration – The NYC Transit Authority Graphics Standard Manual

Dear Students,

Please click the link below to explore a great piece of both NYC and Graphic Design History.

Behold,  The NYC Transit Authority Graphics Standard Manual

https://daringfawnyball.files.wordpress.com/2013/02/nyctamanual.pdf

Designed by Massimo Vignelli and Bob Noorda, Unimark, 1970

I would love to hear your reactions and feedback in the comments section below! Each student will leave a comment this week.

**after you “post” your comment I will have to manually approve it – you may not see it show up right away.

Some Questions to ponder and react to:

  1. What is your general feedback on the manual? Do you like it? Dislike it? Please Explain. Do you find it to be well designed, illustrated and clear in its application?

2. The manual was published in 1970. Does it still hold up for today’s world?

3. What is missing or should be added for today’s world of NYC Transit?

4. What additional questions are you left with?

Week #4 – Info & Resources

Poster Designs by Paula Scher

Welcome back! Week #4, here we are!

Do you need a recap of Week #3? Go here!

**Here is the Recording from tonight’s Zoom class on 9/16 below

https://us02web.zoom.us/rec/share/xlokcglPUxcm_2H7usxkuYXqzlWZcpmWj6hUXuYYmPm1tnWBqlZNphsag1HJ7Oiw.piLPPZld-DUEHVxz

Passcode: &Qbj=hZ5

Lets jump in and take a look at Assignment #1 parts 1 & 2 / your designs in progress during our Zoom session on 9/16 – I will encourage students to share their progress on screen so that we can engage in dialog about the works and how we can make improvements.

*Remember, you can always find a Zoom class recording for each Assignment tutorial under the Assignment page for that individual assignment, the process for Assignment #1 – parts 1 & 2 are on the Assignment #1 page

We will also spend some class time practicing a few class exercises with the Photoshop pen tool! (exciting!)

**I will be introducing Assignment #2 – AKA – “the Postcard Project” tonight as well.

We will get well versed working with the photoshop pen tool, electronic imaging, cutting out images and creating graphic assets. We will also be creating and working with various file types and bringing our ideas into photoshop to produce the finished designs.

Im a big fan of revisions! We will discuss using multiple art boards and the iteration process while in process.

*This Week’s Exercise – Cutting out Images in Photoshop / Making Graphic Assets: Cutting out images in various fragments is a task that all graphic designers will face on a regular basis. Learning various methods for cutting out images is a necessity. We will explore, experiment and share a few methods on how. 

Students will select and practice from images taken from a public domain, OER or creative commons sources on the Internet or they may use images that they have on their devices. Again, We have a huge selection of OER Resources on our class resources page here too

(This exercise/technique will be applied to the post card project – assignment #2 ).

Video Screening Tutorials: Cutting out images in Photoshop (Pen Tool examples)

These tutorials above will help get you started with our class exercise, but ultimately, you will need to master the pen tool in both photoshop and illustrator for the cleanest vector cut-outs. 

**Are you looking for a photoshop psd. file template example to create along with, format and submit your postcard? (Photoshop newbies can edit and change the layers as you need to) Those with experience should make the template themselves –   Click HERE

(Is there a specific tutorial that you learned from recently or over time? Share the URL link with a description of your experience in the comments section below)

Graphic Designer and inspiration of the week!

Paula Scher! (please get to know her work!)

Watch this great talk by Graphic Design icon Paula Scher!

Week #3 – Information / Resources

Logos by Milton Glaser

Welcome to MMA100 Week #3!

We’re BACK!

Here is this week’s useful information and class resources:

Need a recap of  Week #2 – Go Here

Last week covered a lot of information and we began to get acclimated with Adobe photoshop, our workspace and our first assignment, we also went over our class website. I shared a tutorials about our first assignment / project here in MMA 100. Did you find the video helpful (its under the Assignment #1 page)? How can I make them better? Leave your comments below.

Did you add or submit your work in progress of part 1 of Assignment #1 to our google drive folder? Remember, I would really like for you to keep your work in progress here as we can dialog about it together. Here is the g-drive link (create a folder with your first and last name) https://drive.google.com/drive/folders/1m8_39ko2CtWEyzQ9SXABM2RWfKTCsGii?usp=sharing

In our Zoom class discussion tonight we will start our class by reviewing the student work submission process / presenting our work in process.


https://us02web.zoom.us/rec/share/diiihoGsK-ncGNro1BBwsMk4Biild9VNr7xAMKw_Jq_-Jw0ud7xOnQxrJmQJ6Xp4.8rIYTyi0GnX1JEuB

Passcode: 6=BB&l*K

**Above is the Assignment Video Recording for Parts 1 & 2 from class on 9/9


Video Inspiration – with Milton Glaser:

Who is Milton Glaser? You certainly already know some of his work!

Explore his website here – https://www.miltonglaser.com/

Share what inspires you, or what stands out and catches your interest in the comments section below!

Week #2 – Information / Resources

Welcome to MMA100 Week #2!

We’re BACK!

Here is this week’s useful information and class resources:

Need a recap of  Week #1 – Go Here

**Update on accessing Adobe Software from home: 

Adobe Download
The good news is that Adobe is allowing all CUNY students to download Adobe onto their computers using their CUNYfirst login and use it through September 30. The note on the CUNY page (Click here to view) says that more information will follow.

Here is a PDF link with instructions on how to access Adobe CC from home-
https://cisweb.cuny.edu/covid19/Accessing-AdobeCreativeCloud-COVID19-Outbreak.pdf

Remote Access to BMCC Labs
Unfortunately this is still not operational. (They say it should be this week. I will let you know when it is.)

Borrowing Chromebooks from BMCC
Students can start the process themselves by emailing Student Affairs studentaffairs@bmcc.cuny.edu  with the request. If you need more info, let me know.

We will begin tonight class by recapping week #1’s introductions to the course as well as assignment #1 – our first assignment! The first assignment has 3 parts and I will be sharing a series of video tutorials during our Zoom time. I will give a demonstration on how to prepare your design layout, place and resize images, apply layers and also preparing your final designs for output on the web and in print.

Remember, each assignment has its own page with all of the specifications needed to work on, complete and submit the assignment. Assignment #1 can be found here.

* a Video tutorial from week #2’s Zoom class of assignment #1 – part 1 will be posted on the assignment #1 page**

Becoming familiar with terms and items like: “design briefs, project sheets and project specifications” are essential to the design industry. We will be come familiar with this process and following a simulation like experience 🙂

We will discuss the progress and submissions process of your finished assignments and how to send and share them via google drive. We will discuss the maintaining of your files and data and how to keep it safe and easy to access.

Assignment Submission guidelines:

When your assignment / assignments have been completed please add them to our class google drive shared folder here:  https://drive.google.com/drive/folders/1m8_39ko2CtWEyzQ9SXABM2RWfKTCsGii?usp=sharing

Please create a folder for yourself with your first and last name. And, please name your files with your name, assignment# & assignment status – here are a few Example file names – they may looks like this:

Ryan_Seslow_Assignment#2_progress.JPG 

Ryan_Seslow_Assignment#2_FInal.JPG

Tutorial – Getting further acquainted with Photoshop – (Terry White is one of my favorite Adobe evangelists!)

Designer Inspiration? Who’s who in the field?

There are so many great designers out there to follow these days! Each week, lets showcase one and talk about how their work functions.

50 Graphic Designers We all Should Know About 

Who is Aaron Draplin? Surely by now you have heard of Aaron Draplin?

Resources :: What are some of the trends in Graphic Design? Lets take a look at this video below from 2018 – do these things still hold up?.

———————————————————

Assignment #1 – Discussion continued – lets chat about vocabulary

The Elements & Principles of Design Vocabulary

(please note, there are several variations of these definitions that can be found across the web and through out the design world, its ok to mix and mingle variations from other sources to expand your knowledge)

The Elements & Principles of Design are the governing vocabulary that define, illustrate and communicate how Graphic Design functions all around us. These terms are of great value and importance and should be understood and applied by designers. 

The Elements of Design:

Color – typically known as hue. This word represents a specific color or light wavelength found in the color spectrum, ranging circularly from red to yellow, green, blue and back to red.

Line – is a line just a series of points? Or is it the best way to get from point “A” to point “B”? As a geometric conception, a line is a point in motion, with only one dimension – length. Line has both a position and a direction in space. The variables of line are: size, shape, position, direction, number, interval and density. Points create lines, lines create shapes or planes and volume.

Mass – Here, mass is interchangeable with volume. A mass is a solid body or a grouping of visual elements (line, color, texture, etc.) that compose a solid form. Volume is a three-dimensional form comprising length, width, and depth. Three-dimensional forms contain points (vertices), lines (edges), and planes (surfaces). A mass is the two-dimensional appearance of a three-dimensional form.

Movement – Also known as motion. This element portrays the act or process of changing place or direction, orientation, and/or position through the visual illustration of starting or stopping points, blurring of action, etc. This is not animation, although animation is an end product of movement, as well as other elements of design.

Space – A two-or three-dimensional element defined by other elements of design.

Texture – A technique used in two-dimensional design to replicate three-dimensional surfaces through various drawing and media techniques. On three-dimensional surfaces, it is experienced by touch or by visual experience.

Type – Also known as typography, and it is considered an element in graphic design. Although it consists of elements of design, it is – in itself – often an element in the form of visual communication.

Value – Another word for the lightness or darkness of an area. Brightness measured in relationship to a graded scale from white to black.

The Principles of Design:

The principles of design are applicable to all design disciplines including – but not exclusive to – architecture, art, graphics, fashion, industrial design, poetry, writing, and web design.

The principles of design are tools used to format the elements of design.

Balance – The elements of design converge to create a design or arrangement of parts that appear to be a whole with equilibrium.

Contrast – The “automatic principle.” Whenever an element is placed within a format, contrast is created in the various elements. Can be emphasized with contrast in size, shape, color,

Direction – Utilizing movement to create the visual illusion of displacement.

Economy – A principle operating on the “slim.” Especially important when dealing with clients, where their product or service is more important than the elaboration of design elements. Can also be considered “precise,” or “simplistic.” Or, it can be considered great design.

Emphasis – Also known as dominance. This condition exists when an element or elements within a visual format contain a hierarchy of visual importance.

Proportion – A two- or three-dimensional element defined by other elements of design.

Rhythm – A recurrence or repetition of one or more elements within a visual format, creating harmony.

Unity – Oneness, Harmony, The condition of completeness with the use of all visual elements within a format.

Week #1 – Welcome to MMA 100!

Welcome to MMA 100! Fall Semester 2020

Please be sure to bookmark our class website and make sure that you are properly able to access it. You can always refer to our website for the week to week calendar of classwork, video tutorials, live video class lectures, design resources, inspiration, assignments, deadlines, contact info and much more.

First and foremost, Class Introductions! Nice to Meet you! Lets connect, Im excited to get started 🙂

Who and What inspires you?

Lets us discuss the unique learning experience and platform we are about to engage in together. Lets talk about how our class will function this semester.

This course will be taught both synchronously and asynchronously for full accessibility and inclusion! Meaning, we will be using the Zoom video experience to conduct a synchronous class beginning at 5:30pm on Wednesdays (following the BMCC fall 2020 academic calendar). I will be recording and publishing the videos taken from class and posting them on this website in the week number that they co-exist with. The asynchronous method will be applied to the use and application of this website. Together we will craft and build a learning experience that helps each student both individually and as a contributer to the class as a whole.

Everything that we cover this semester will be posted and published to this website. You will be asked to visit frequently. At the bottom of each page and post there is a section for comments, please feel free to use it to ask questions.

Week 1Introductions & Discussion –

What is Graphic Design?
Design Solutions: Strategy, Concept, Design, Execution & Production
Exploring the Design Process: Thumbnails, Roughs & Comps.

Software skills – Adobe Photoshop and navigating around the Mac

Logos by Paul Rand

What is Graphic Design?

“Graphic design, also known as communication design, is the art and practice of planning and projecting ideas and experiences with visual and textual content. The form it takes can be physical or virtual and can include images, words, or graphics. The experience can take place in an instant or over a long period of time. The work can happen at any scale, from the design of a single postage stamp to a national postal signage system. It can be intended for a small number of people, such as a one-off or limited-edition book or exhibition design, or can be seen by millions, as with the interlinked digital and physical content of an international news organization. It can also be for any purpose, whether commercial, educational, cultural, or political.” Via – Juliette Cezzar

Assignments:

Lets talk about Assignment #1 and how each assignment/project will be worked on, discussed and submitted for the semester.

Each assignment has its own page on this website with all of the needed information and specifications to complete them. Each week I will also publish a blog post here on our class website that has context to the assignment. This will be images, videos, article, links and other content to help inspire and expose you to useful information in relationship to the assignment. The weekly blog posts will always share the link back to the assignments page.

Assignment Submission guidelines:

When your assignment / assignments have been completed please add them to our class google drive shared folder here:  https://drive.google.com/drive/folders/1m8_39ko2CtWEyzQ9SXABM2RWfKTCsGii?usp=sharing

Please create a folder for yourself with your first and last name. And, please name your files with your name, assignment# & assignment status – here are a few Example file names – they may looks like this:

Ryan_Seslow_Assignment#2_progress.JPG 

Ryan_Seslow_Assignment#2_FInal.JPG

You will also keep your work in progress in this folder. I will be adding comments and feedback to your work in process. We can have a dialog through the process this way with the google drive comments section of selected parts of an image. Its handy and very easy to use.

All of our individual class assignments can be found on the Assignments page here

*Watch this Video Definitionhttps://vimeo.com/10532686

Great explanation of Graphic Design, but what about the speed of the video??

Poster Design by Milton Glaser

The History of Graphic Design – We will be exploring and referencing Design history in our class. Lets explore these two references below over the course of this week.

Design History.org – http://www.designhistory.org

Key Moments in Graphic Design / Timeline – https://www.thoughtco.com/key-moments-in-graphic-design-history-1697527

Logo rough by Carolyn Davidson

Class Discussion: What is the Design Process?

How do designers create strategies? Move from research to sketch, roughs and comps? What do these terms mean?

Thumbnails – Simply put, thumbnails are small sketches. Projects always begin with thumbnail sketches. No matter how tempted you are to get working with the computer and its software right away, thumbnail sketch practice is essential in the design process. Each project should have thumbnail sketches. This practice will keep your idea muscles sharp!

Examples of Thumbnail Sketches

Roughs – Roughs are full scale renderings of your selected thumbnails. They are sized to the specific dimensions of your project. Roughs are about making the needed revisions and necessary decisions to meet the many challenges you may discover in the process.

Examples of Roughs & Comps – What is the visual difference between a rough and a comp?  Lets find examples together.

Comps –  (short for comprehensive) or a final comp, is the plan and official map that is ready for production. It is ready for publishing on the web, or print production with a printer or printing company. The comp is ready to  share with your client (or your professor 🙂 as it will fully communicate all aspects of your project and assignment.