
Assignment #3 – Illustrator, Shapes, Forms, Composition & Color
(See Example #1 Above & example #2 below)
Below is the screen recording from class on 10/21 – Jump in!

Passcode: T9q^6U%r
Below is the screen recording from class on 10/28 – Jump in!

Passcode: !PcB^#I7
(The tutorials above will help you!)
1. Open Adobe Illustrator and create a new document sized at 11″ X 17″ in CMYK color mode. We will be preparing the files for printing as well as displaying the final works on screen.
Lets work with rulers and guides! Consider, how will you set your guides to equally balance and format the graphics evenly? Will you use a grid? Do you have a preferred method for layout? Lets explore what this means in this project.
2. We will generate a new series of “subjective” graphic Icons following the layout and arrangement above. (Don’t re-create my example) make your own, but follow the balanced composition. We will define “subjective” in class.
3. Limit yourself to 6 values of 1 complimentary color scheme. Consider referring to the adobe color wheel for reference – (Located in the week #5&6 blog post)
4. Limit yourself to creating and composing your graphics with no more than 6 shapes created with the pen tool, pathfinder or the shape builder tool. Begin working without using a stroke around your shapes and then apply a stroke for contrast later. (The class video demonstration will share the process and post it here after 10/21)
5. Save your work as an Ai. file (adobe illustrator) for production as well as a .pdf – Print your work in .pdf format (if possible, not mandatory) we will also save a high resolution JPG file. (3 file formats)
6. Submission guidelines: When your assignment / assignments have been completed please add them to our class google drive shared folder here: https://drive.google.com/drive/folders/1m8_39ko2CtWEyzQ9SXABM2RWfKTCsGii?usp=sharing
*Please make sure to create a folder for yourself with your first and last name and please name your files with your name – an Example file name looks like this:
Ryan_Seslow_Assignment#3-part1.Ai.
Ryan_Seslow_Assignment#3-part1.pdf

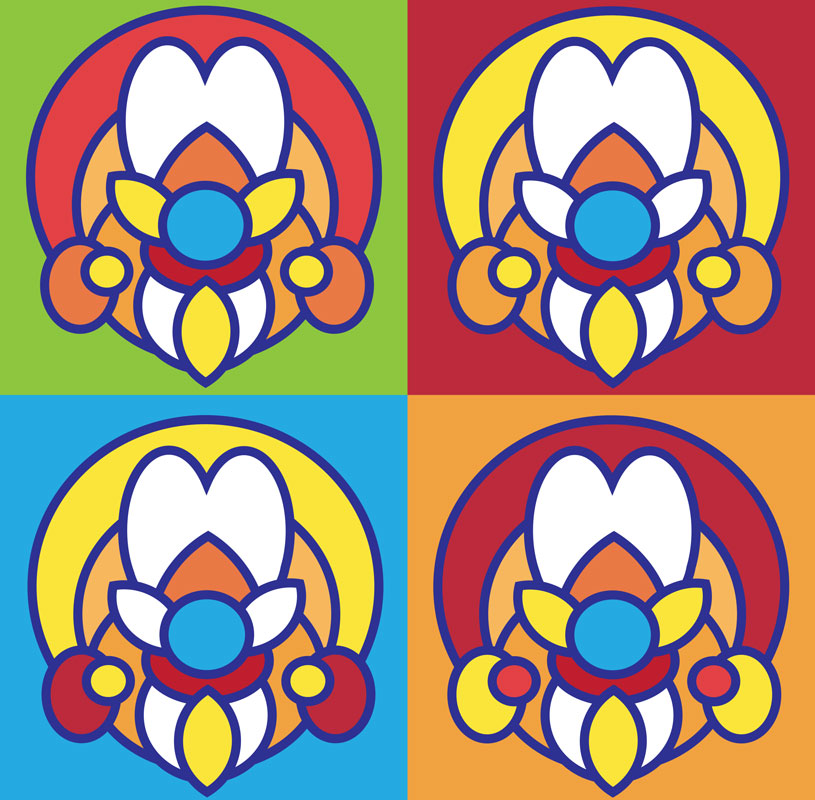
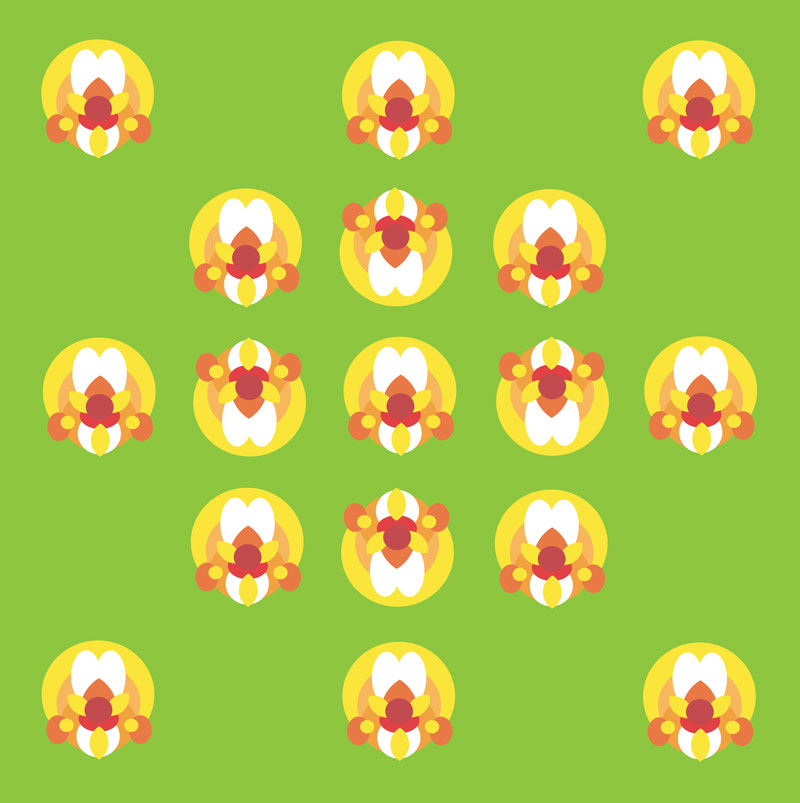
PART 2 – Each student will follow the images in the gallery below as a guide to further extend and develop their designs.
Size – Use a square shape for this series of designs. I suggest 8″x 8″
**Below is the video recording from class on 11/4 – this tutorial covers part 2 of Assignment #3

Passcode: Ye$ev#6*
Students will select and isolate their strongest single icon/graphic from the original layout in Part 1 of the assignment – 1 version will include a stroke and one with out(example below). Students will explore a 4-part color variation drawn from their selected color palette as well as 1-3 balanced patterns using their icons. (We will discuss the examples in class soon).


**Here is the video tutorial that explains Part 2 and shares the many potential “byproducts” the process may produce (recorded on 11/11/20)

Passcode: ti=C7b#M

Submission guidelines:
When your assignment / assignments have been completed please add them to our class google drive shared folder here: https://drive.google.com/drive/folders/1m8_39ko2CtWEyzQ9SXABM2RWfKTCsGii?usp=sharing
*Please make sure to create a folder for yourself with your first and last name and please name your files with your name – an Example file name looks like this:
Ryan_Seslow_Assignment#2.JPG