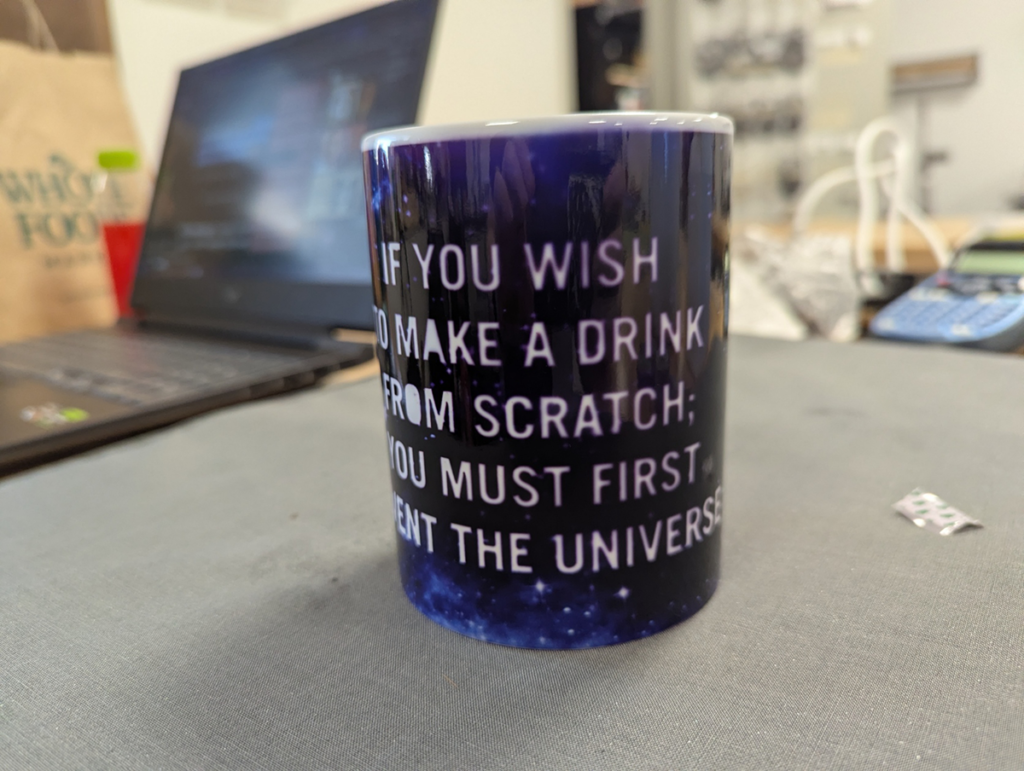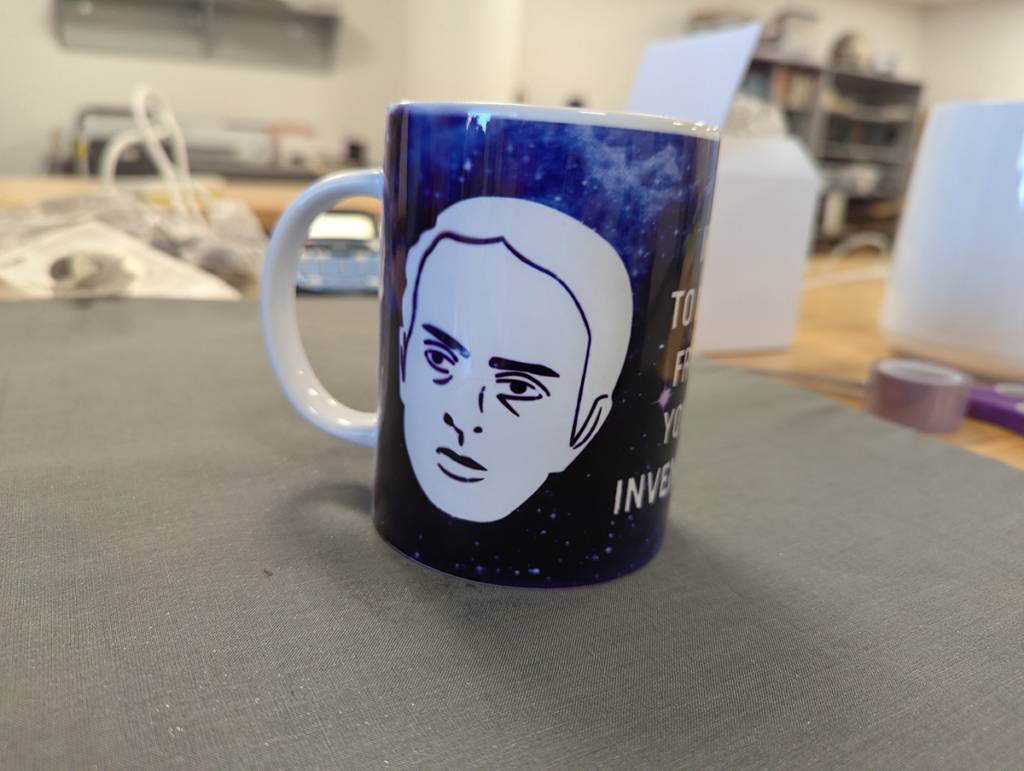
Mugs are a great piece of swag or gift, and with Cricut’s Infusible Ink Sheets and Pens, you can make a quicky create a creative and custom-made item.
In this tutorial I will cover several methods with the Infusible Ink products, which apply to the blank mug through a process where the turns the ink to a gas that binds to fibers or polymers. Because of that, it is recommended that the substrate (the fancy word for a blank item: mug, shirt, bag, et cetera) be white or a very light color. (Using a light color that isn’t white might affect colored inks so your milage may vary.
JUMP TO:
- Sublimation Ink Sheet (Cricut Template)
- Sublimation Ink Sheet (Blank Template)
- Sublimation Ink Pens
- Vinyl Decal
- Running the Press
- Further Exploration
What You Will Need:
- Sublimation Ink Sheets (I am using a generic brand I got off Amazon, Cricut has their own line too!)
- Or Cricut Sublimation Ink Pens and Printer Paper
- Or Adhesive vinyl and transfer sheet
- One Ceramic Mug
- If the Makerspace doesn’t have any on hand, any unused and clean blank white ceramic mug will do.
- You can search online for “Sublimation Mug” or Purchase from Cricut directly
- A Cricut Design Studio account
- You will need to register the Cricut Maker & Mug Press to your account before use.
- If you do not want to bother with the hassle, we have a Makerspace account in the lab, so you can also just use that. (Credentials are inside the lid of the Cricut Maker.)
- You may also email the lab manager the design and they will go over it with you.
- Tape or a lint roller
- Heat Resistant Tape
SUBLIMATION INK SHEETS
For the Cricut Mug Press, you may want to take advantage of the Cricut Design Studio with their premade templates. However, we have provided a template you can attempt to design on and refine in the design studio to your liking. You may also browse Cricut Design Studio for more template ideas if you wish.
- Cricut Design Space Mug Template
- Adobe Illustrator Template [15 oz | 11 oz]
- Inkscape Template [15 oz | 11 oz]
PRE-MADE CRICUT TEMPLATE:
When you open the template linked above, choose your size and edge. As we have 15 oz. mugs in the lab, we’re selecting the Large Straight Edge in the dropdown. Then select Customize.
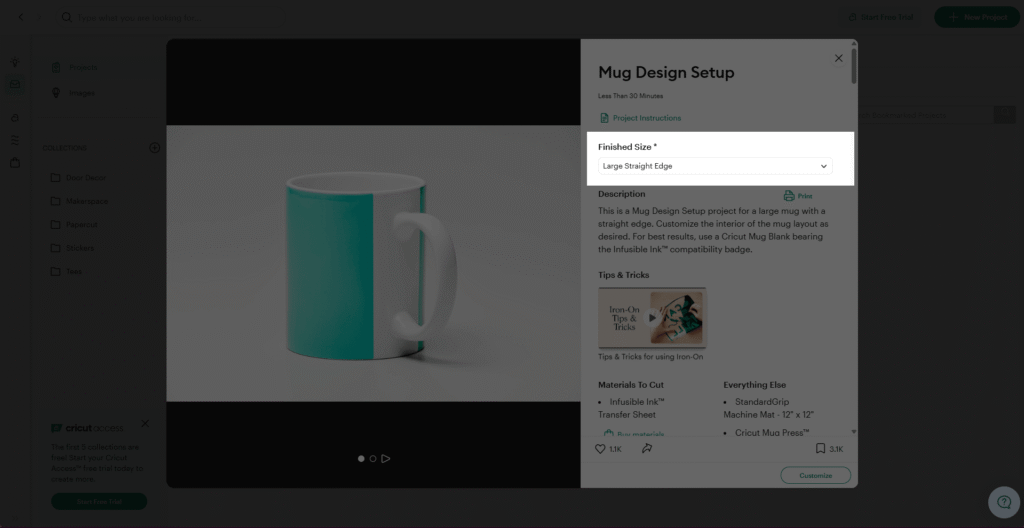
You’ll see there is a template to put your design on. The pink graphic on top shows you where the design will be relative to the mug. These will be removed once you’re ready to run the job. The teal will be what you will be applying to the mug to press, so be mindful of that!
To add your design, select the Upload option on the near bottom left of the canvas. If you previously uploaded a design you can just select it here. If you haven’t uploaded the image before– use the Upload Image button and follow the instructions.
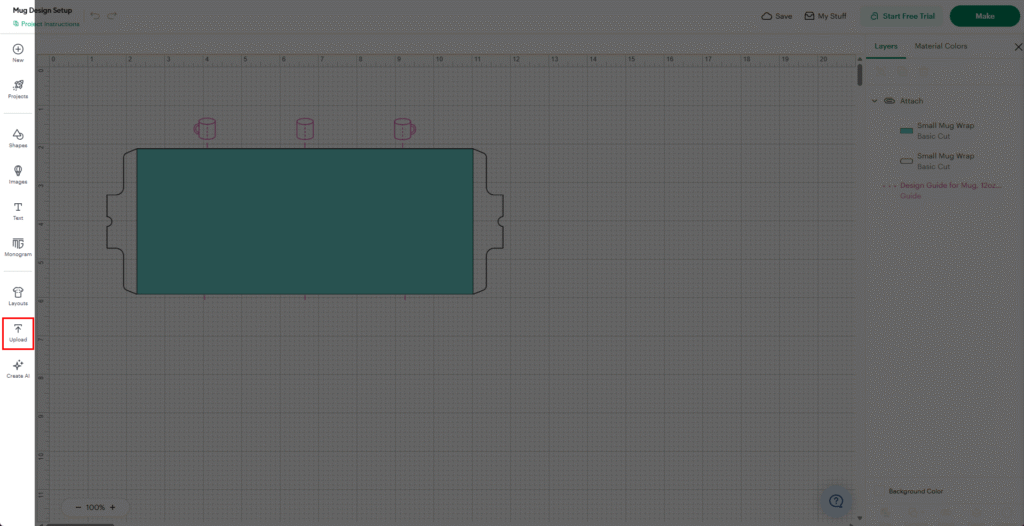
For this guide, I’m using a design I already made for our Stencil Workshop with text already in the Cricut Design Space, so design may vary.
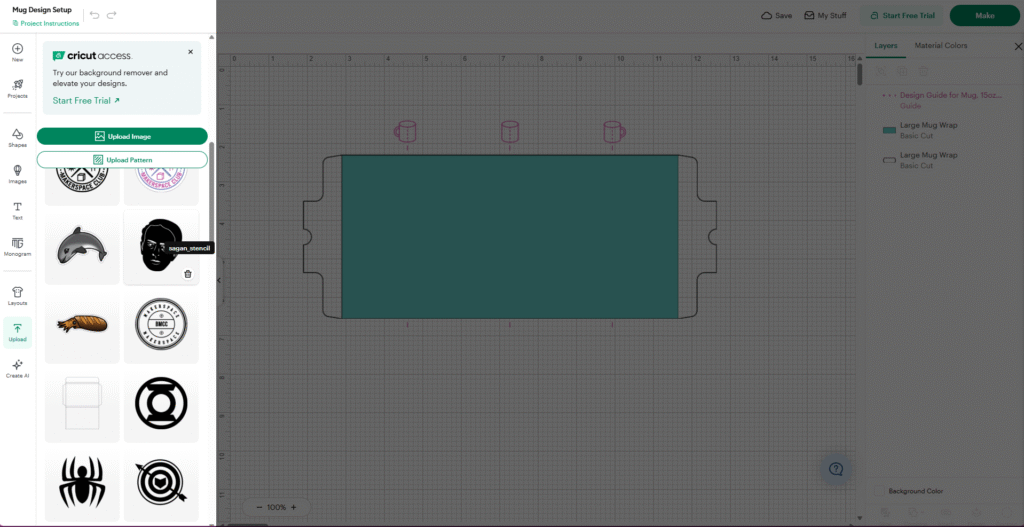
Resize as needed. If you wish to add text, you can do so here– or in the original design in Illustrator/Inkscape. With that, just be aware it will scale and may not come out to a desired size.
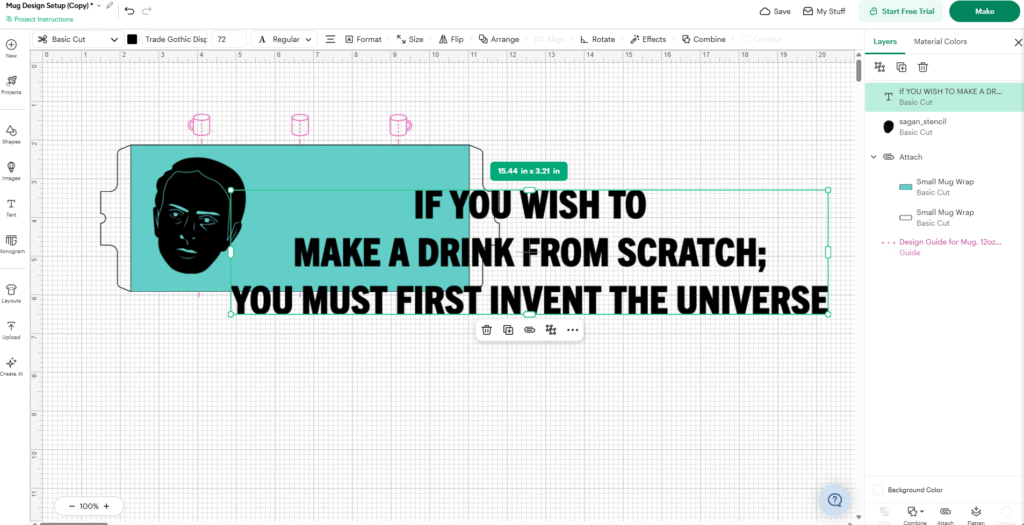
The font in Cricut Design Space I’m using is Trade Gothic LT.
For A mug wrap: select part of your design, select it and the teal shape, then select Slice on the bottom right menu. Delete the black and teal result made so your cut appears empty.
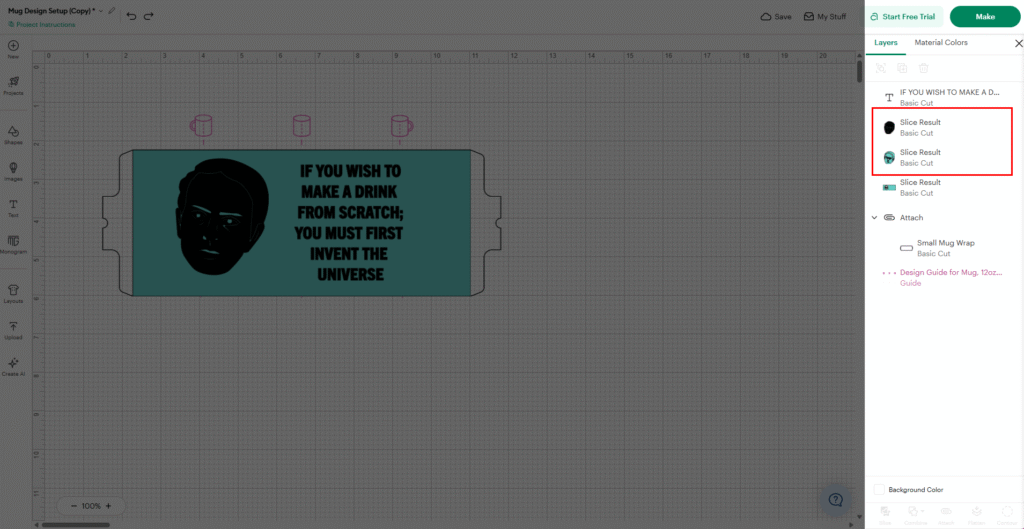
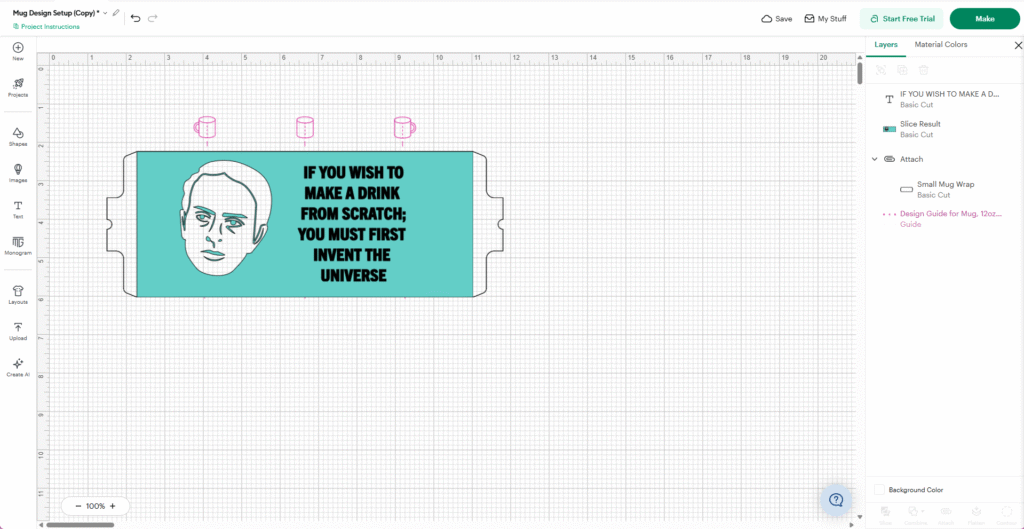
Repeat for each element in your design.
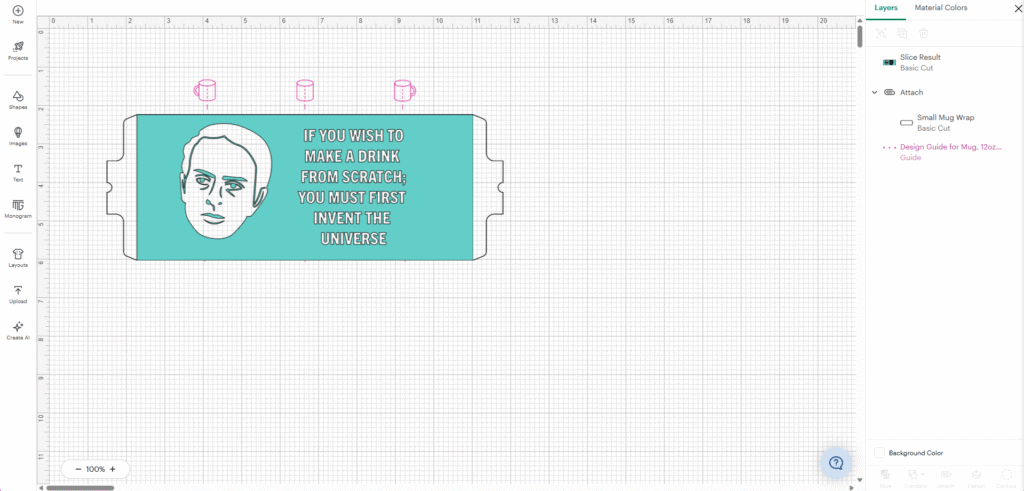
For a decal: position your design as you wish and delete the teal rectangle. This will mean you will be weeding out a lot of material once it’s cut!
When your design is finalized, select the components and the Small Mug Wrap option, and select Attach. Hide or delete the guide.
When ready to run the Cricut Maker, select Make and follow the OUTPUT GUIDE. For this you want to select/find the Infusible Ink Transfer Sheet option. Make sure any text is mirrored! (Select Mirror in the preview.) You want to put the ink sheet ink side up.
BLANK CANVAS:
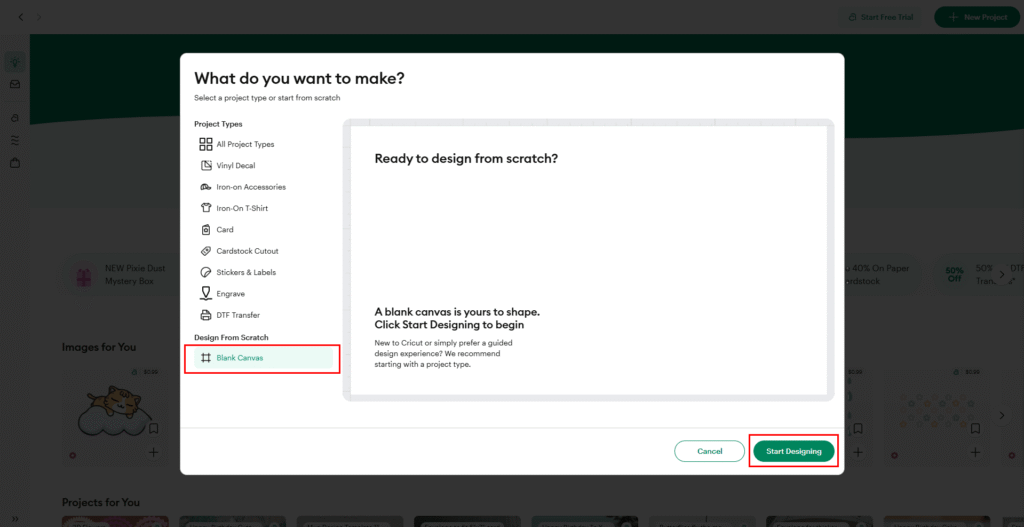
On the Home page, select New Design and choose the Blank Canvas option. Then select Start Designing to begin.
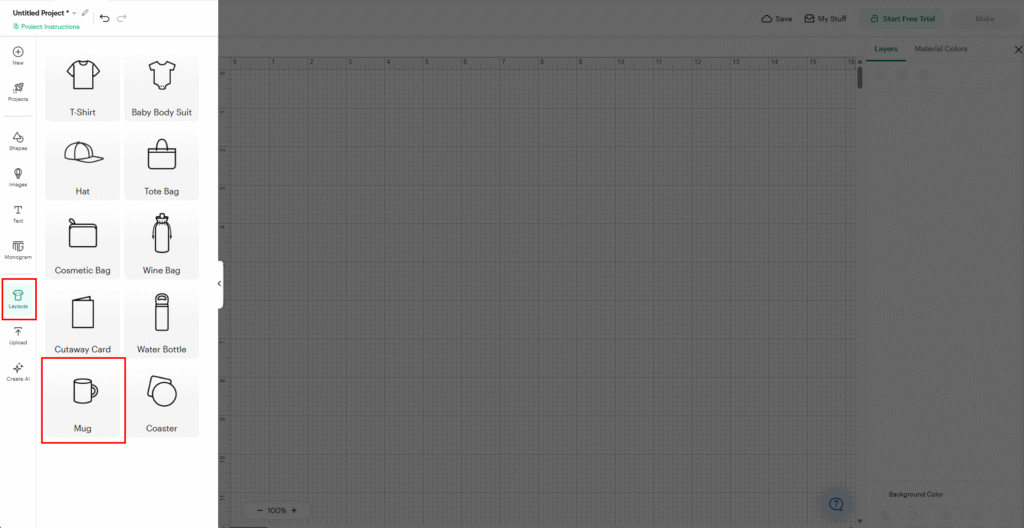
On the lower left select Layouts. Choose the Mug option. Choose the mug size option that fits best with your blank. (For this tutorial it’s the 15 oz mug.)
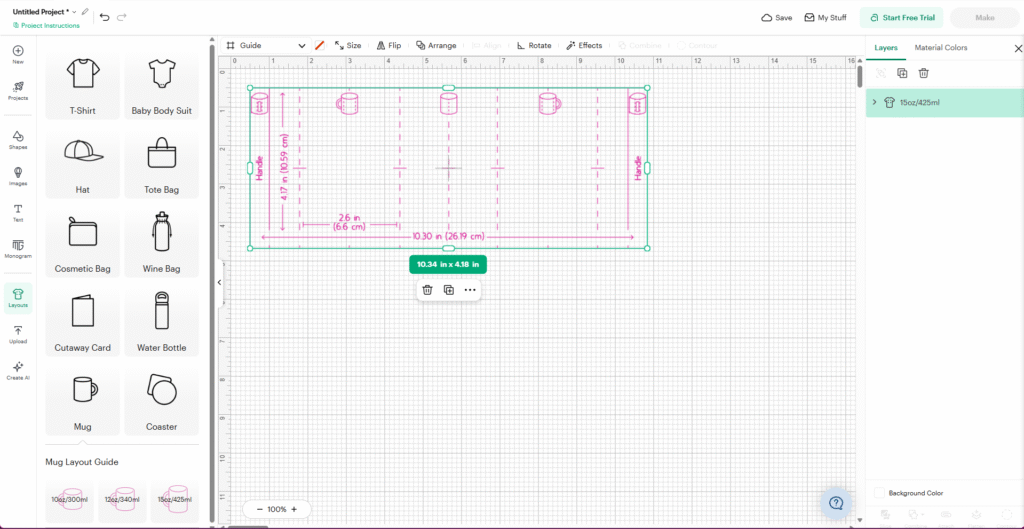
To add your design, select the Upload option on the near bottom left of the canvas. If you previously uploaded a design you can just select it here. If you haven’t uploaded the image before– use the Upload Image button and follow the instructions.
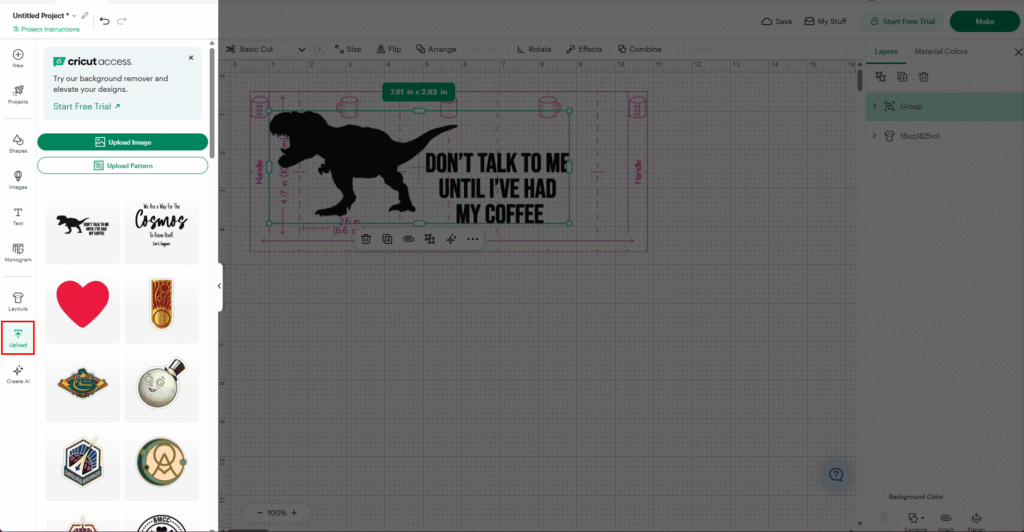
Resize as needed. If you wish to add text, you can do so here– or in the original design in Illustrator/Inkscape.With that, just be aware it will scale and may not come out to a desired size.
Use the Shapes option or upload the stencil SVG above to create the final cut. This will be what wraps around the mug in the end, depending on if you want full coverage or a decal; you’ll need to design accordingly.
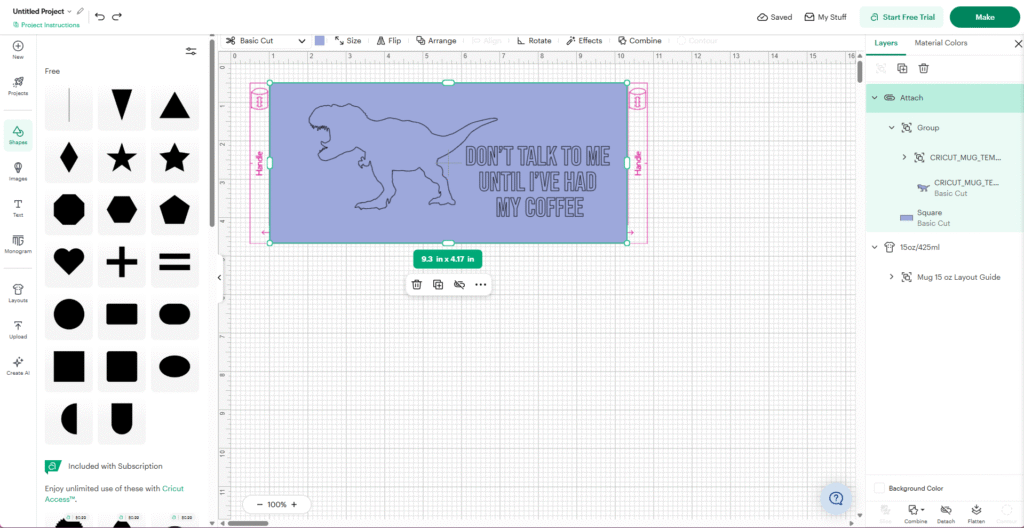
Decal: Create one rectangle. Mine is 9.3 by 4.17 inches
Mug Wrap: If it’s not already designed as a wrap, create 2 rectangles: one that is 9.3 by 4.17 inches and another at 6.79 x 417 inches. (My example was meant to be a decal, but you would make sure your design fits into the smaller rectangle.)
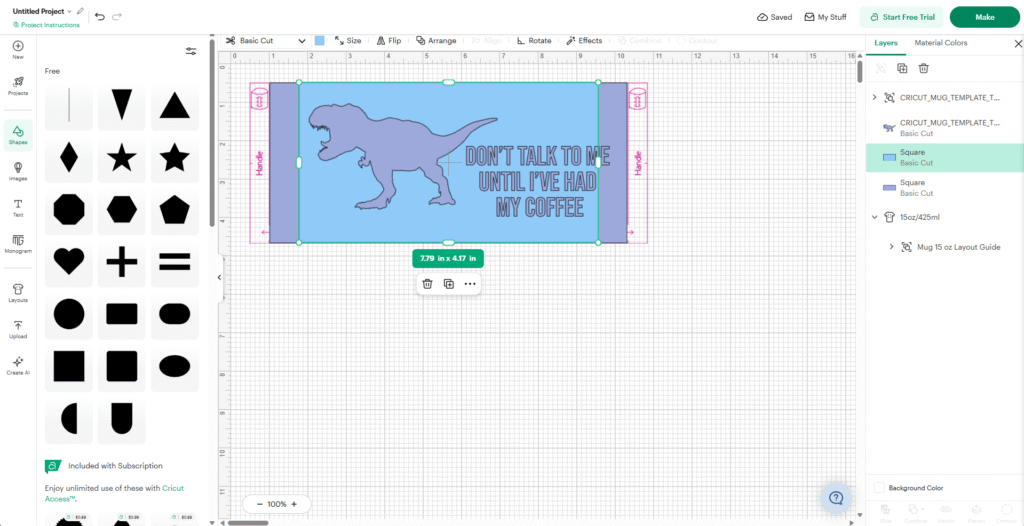
Select part of your design, select it and the smaller rectangle then select Slice on the bottom right menu. Delete the two results made so your cut appears empty. Repeat for each element in your design.
Once ready, select design and the large rectangle, and select Attach. Delete or hide the guide.
When ready to run the Cricut Maker, select Make and follow the OUTPUT GUIDE. For this you want to select/find the Infusible Ink Transfer Sheet option. Make sure any text is mirrored! (Select Mirror in the preview.) You want to put the ink sheet ink side up.
SUBLIMATION INK PENS
On a sheet of printer paper, draw your design, please try to keep it in a space no larger than 10.308 by 3.789 inches. Make sure you’re mirroring any text as you’re applying that ink directly to the mug.
Below are two options; a template to print and cut by hand and an SVG for cutting it out on paper on the Cricut.
If using the Cricut to pre-cut your sheets/or using the calligraphy option, import your design and template separately. Indicate what is a cut (the template) and what marker/color with each of your design elements using the dropdown menu. (Make sure you’re selecting the Infusible Ink color options!)
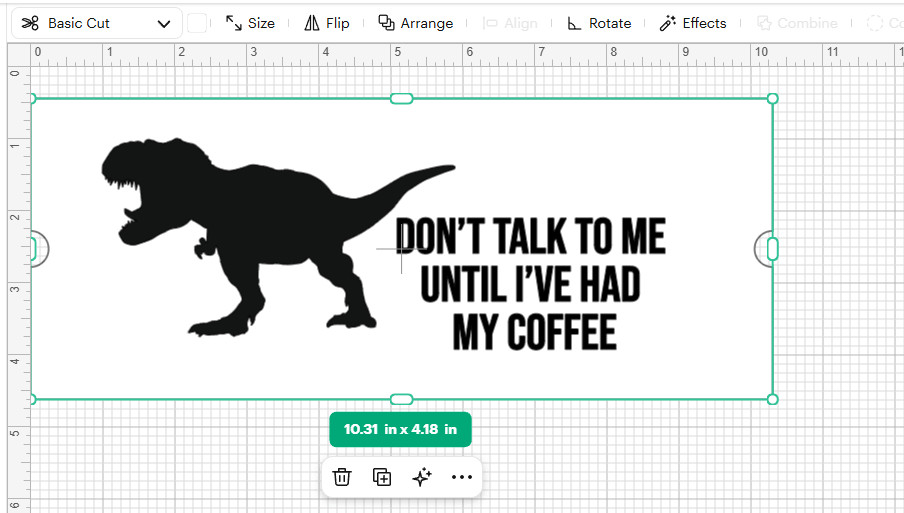
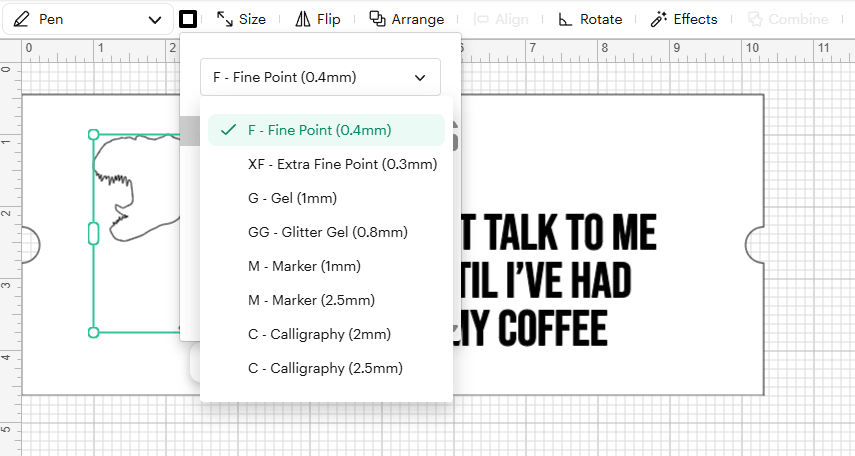
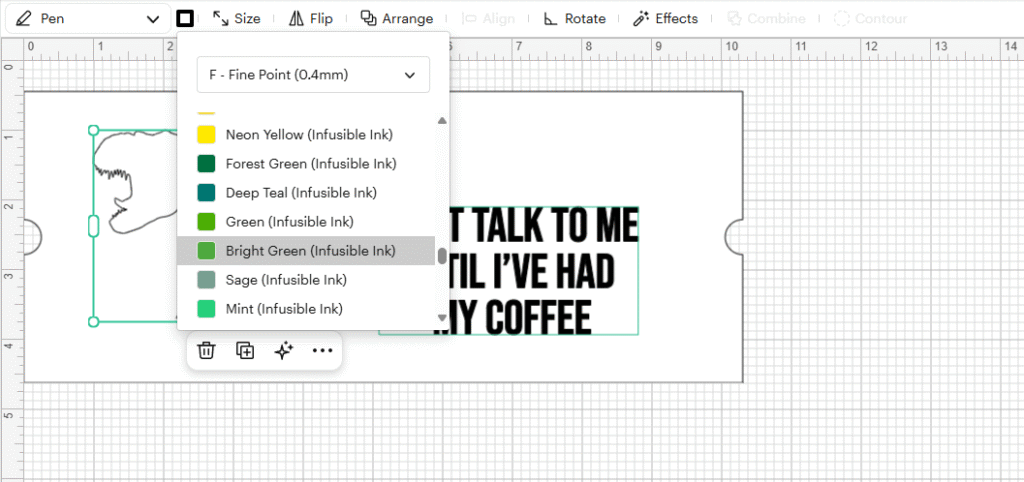
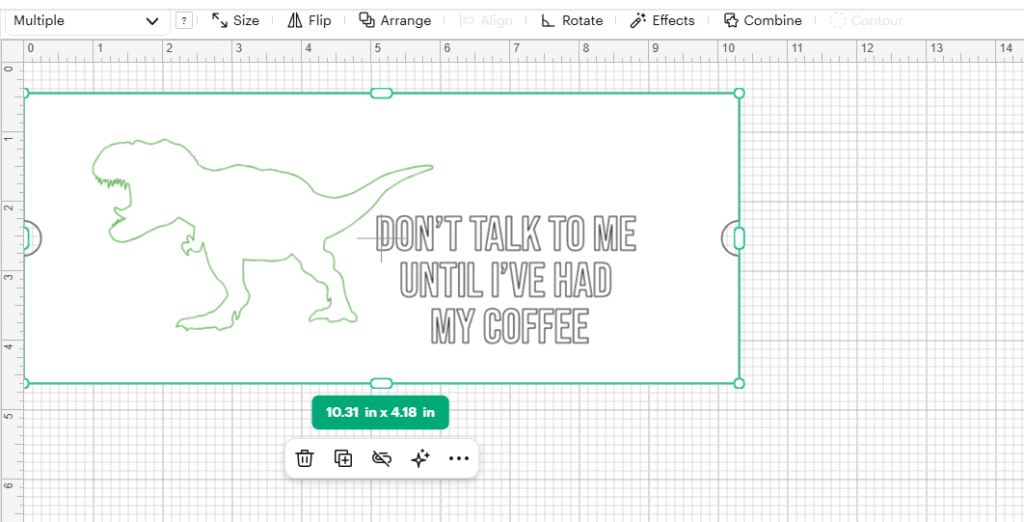
When done, select everything and select Attach.
When running the job, make sure all your text is mirrored, and select the Printer Paper / Copy Paper option.
Once you’re ready, run the lint roller over the mug to make sure it’s free of any hair or dust, and carefully tape the design to your mug with heat resistant tape.
VINYL DECAL:
THIS DESIGN DOES NEED THE HEAT PRESS!
In the Design Studio, select New Project on the upper right. Scroll down to Mug Decal, and select the 10 oz design. You may change your decal dimensions as you wish. I’m keeping it to 2.5 x 2.5 inches. Select Start Designing to begin.
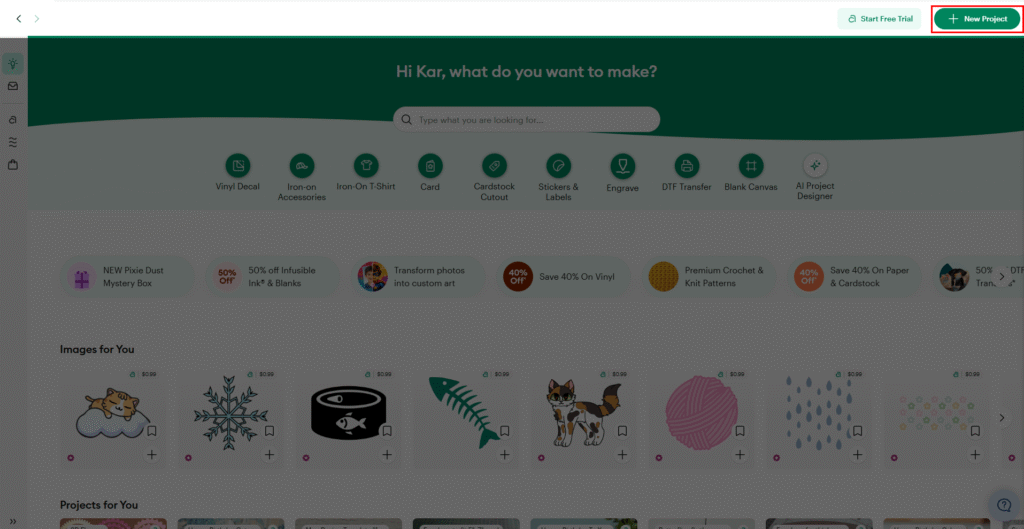
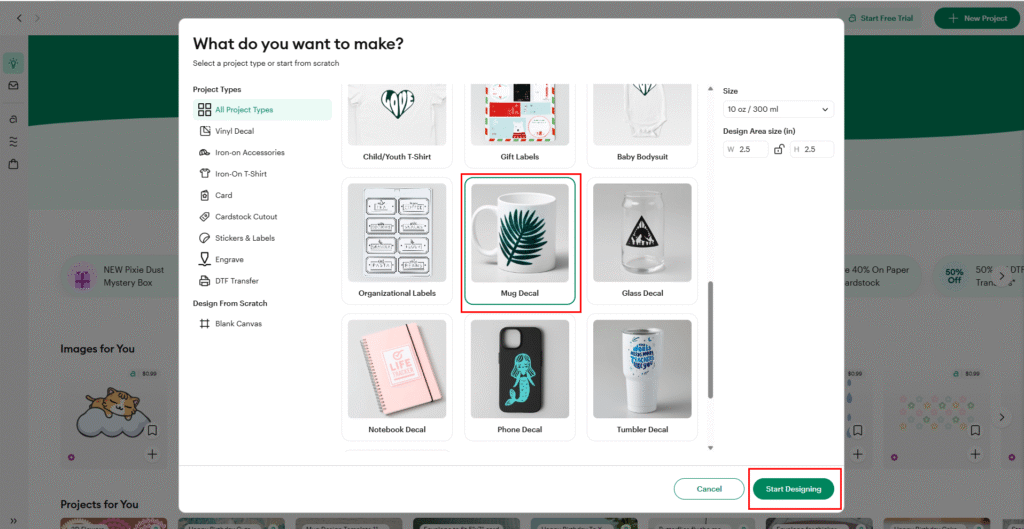
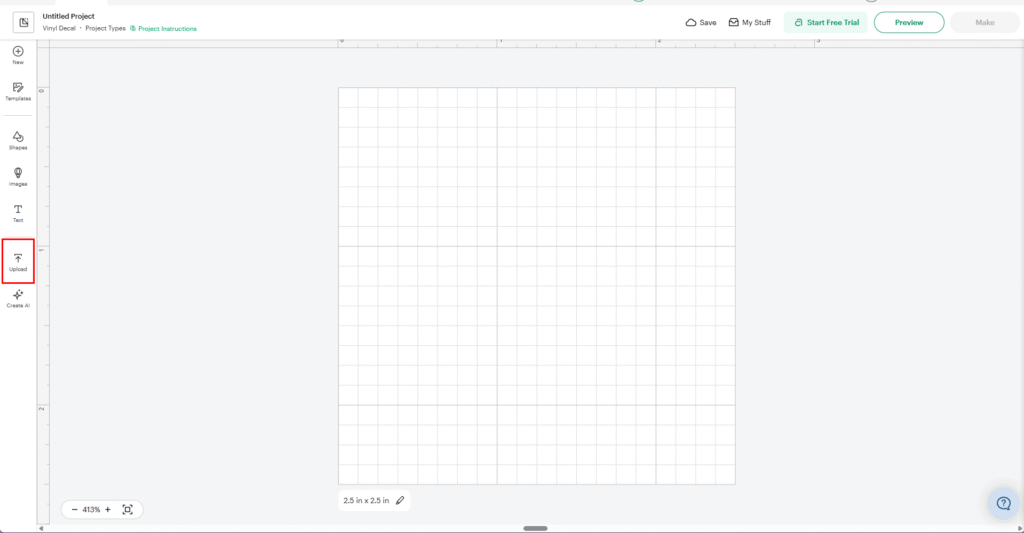
To add your design, select the Upload option on the near bottom left of the canvas. If you previously uploaded a design you can just select it here. If you haven’t uploaded the image before– use the Upload Image button and follow the instructions.
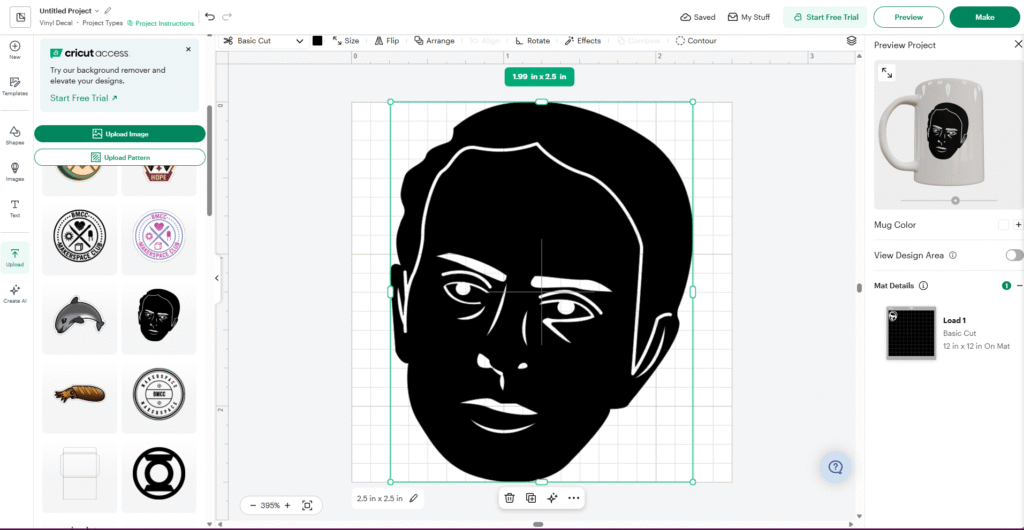
When Ready, follow the OUTPUT GUIDE to Cut it out. Make sure the material you’re using is selected for Vinyl (If you’re using a special kind like glitter or holographic, you may need to search for it). You do not need to mirror as you’re sticking it on as is, not transferring it. Make sure the vinyl is facing up on the mat.
Once cut, weed out your design, then apply the transfer sheet on top of the design. Flip over and remove the vinyl sheet. Before applying to the mug, make sure the mug is clean using tape or a lint roller and free of oils with a wipe of alcohol. Apply decal and remove any bubbles before removing the transfer sheet.
This doesn’t need the heat press so you’re ready to go! Be advised that the vinyl decal may chip and fall apart after many uses. If you wish to remove any failed or cracked decals, you may use nail polish remover and scrape the old design off and clean any traces of adhesives for it to be reused in a project again!
RUNNING THE PRESS:
Weed and trim as needed.
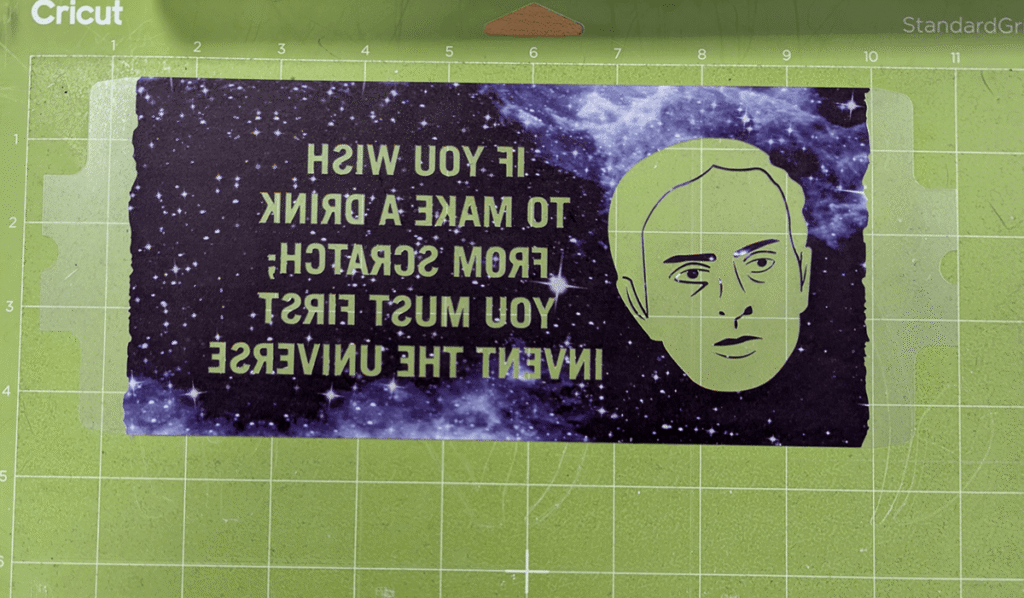
Clean the mug with tape or a lint roller to make sure no dust or hair is on the surface. With the handle pointing towards you, carefully position the design on the mug, pressing from the center/top to the handle. Make sure there are no bubbles. If it’s popping off, you may want to secure the edges with heat resistant tape.
Power button and wait until the light turns from orange to green.
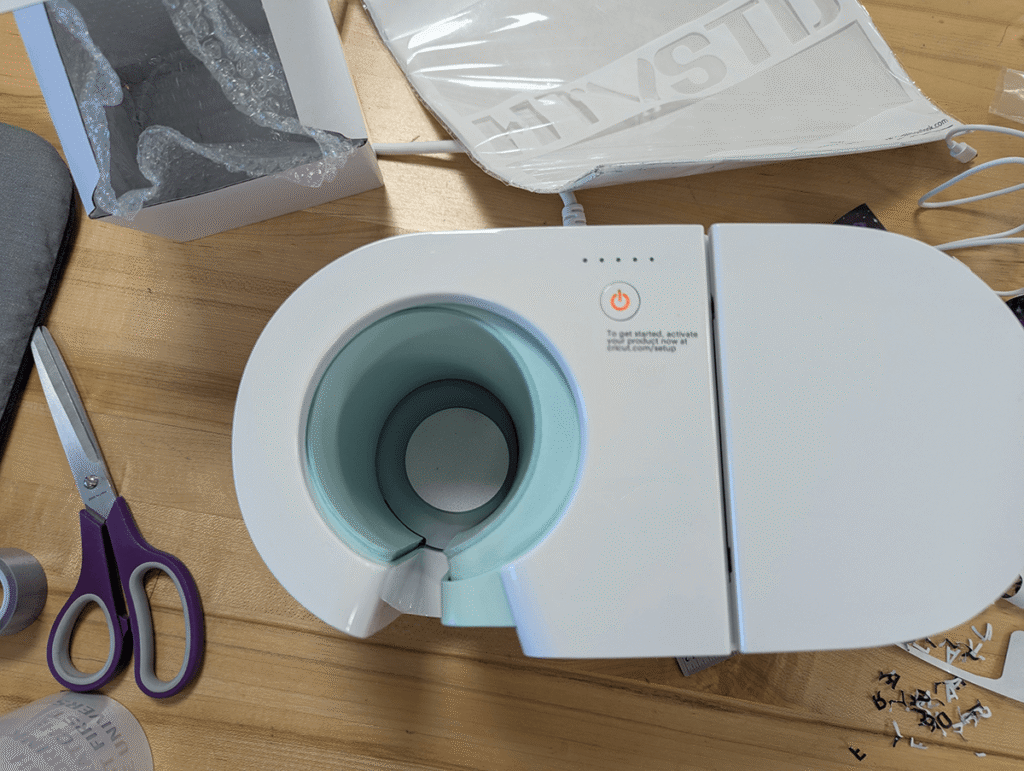
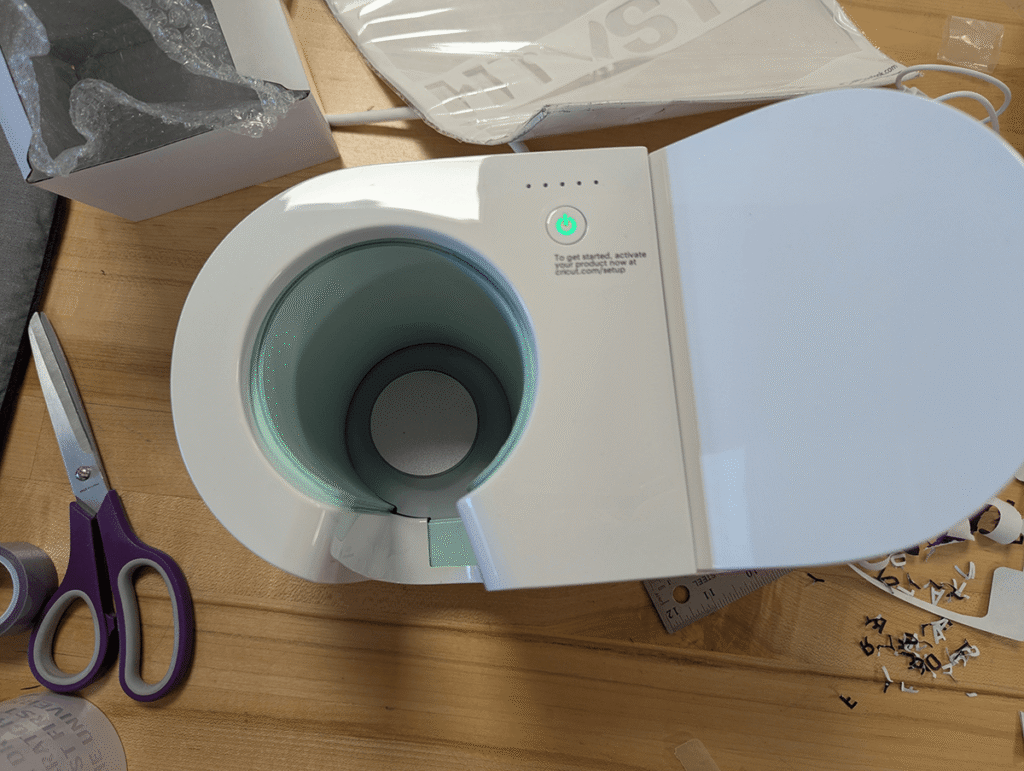
Place the mug into the chamber and adjust as needed to make sure the design is covered by the plates. Raise clamp to lock mug in, and press down to trigger the press.
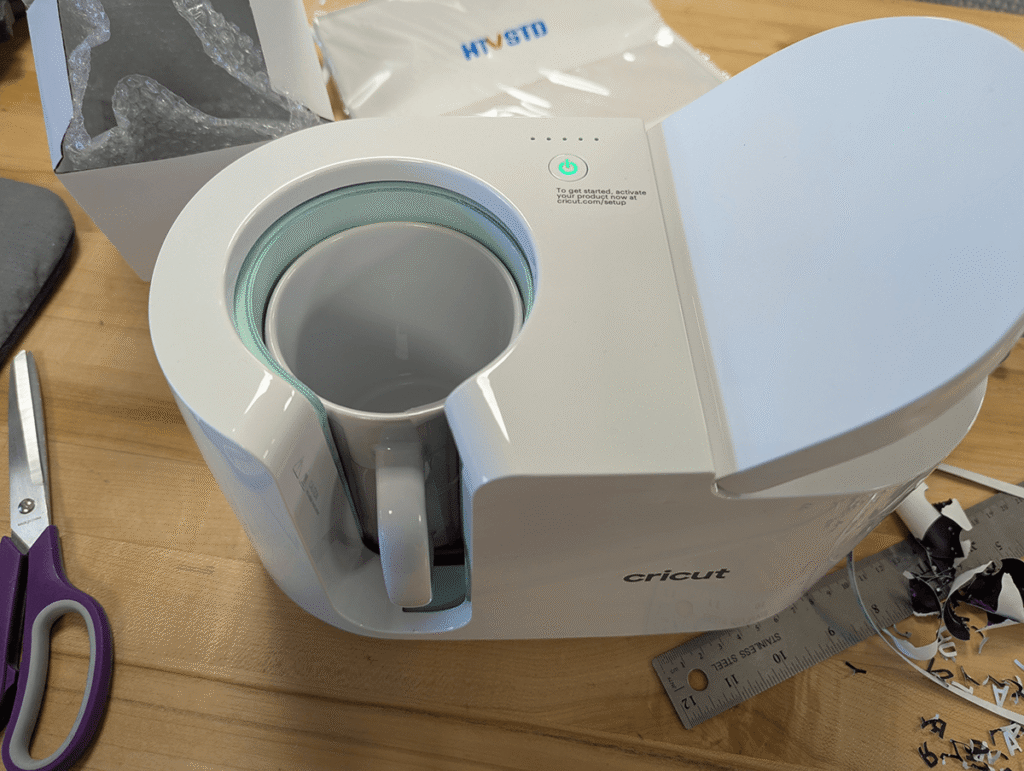
(For the 15 oz mug you may need to manually hold it.) It will beep when it is done. (It usually takes about 6 minutes, but room and material temperature might make it take longer– no longer than 8 minutes.)
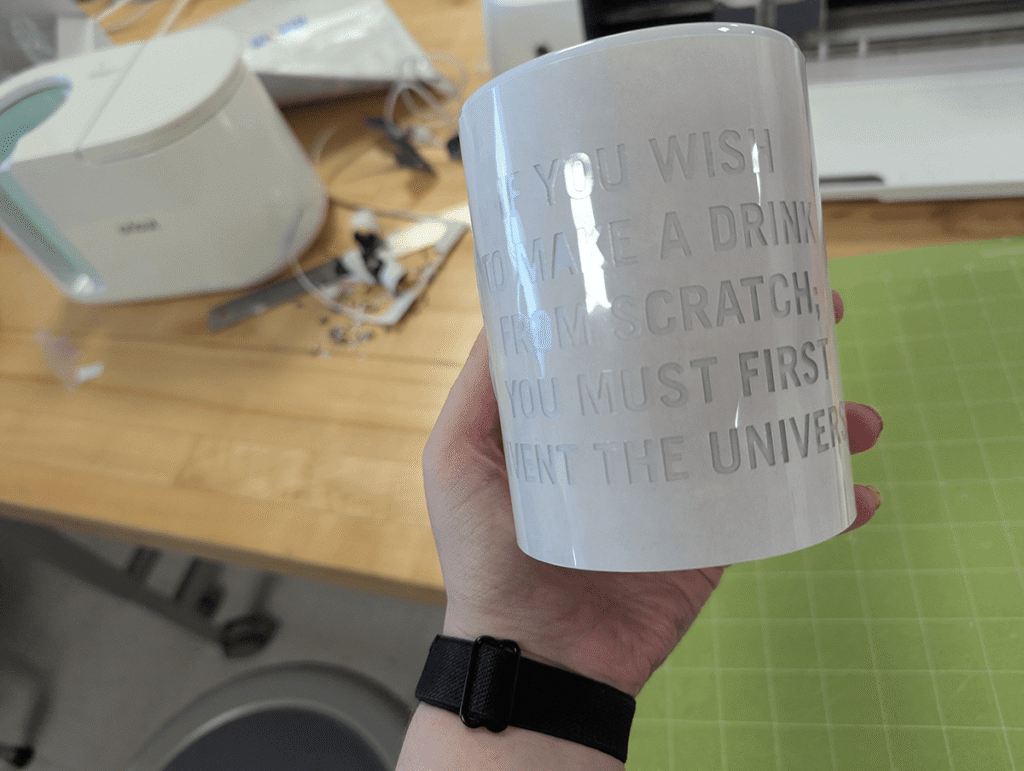
Remove by the handle and let cool for 20-30 minutes before removing the transfer sheet.