Students and other visitors to your site will be relying on the menu to find what they are looking for, so it is important to keep it up to date. After adding a page, post, or other content to your site, it is recommended that you immediately add it to your menu. To do so,
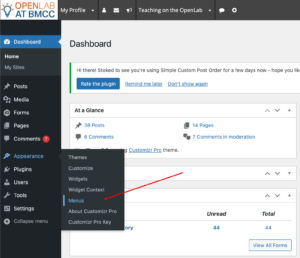
- Go to your site’s Dashboard.
- In the left-hand menu, click on Appearance -> Menus.
- To add a page, select your page from the Pages area of the Add menu items box on the left hand side, and then click Add to Menu. If you don’t see your page under the Most Recent tab, select the View All tab.

- To add other content, such as posts or custom links to external sites, click on the type of menu item you wish to add in the Add menu items area on the left.

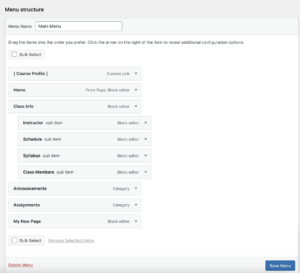
- Newly added menu items will appear at the bottom of the Menu Structure area. Drag them from the left side of the bar and place in the menu location where you would like them to appear. If you indent an item this makes it a sub-menu item beneath the item above it. Click Save Menu when you are finished, and go check your site to see if the menu works as you intended.