MEA 211 Final Project

Process

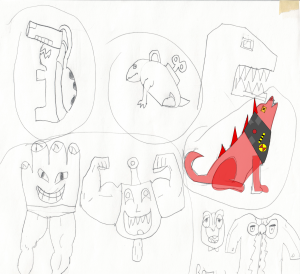
I began by following the anatomy of my husky D.D, by creating the body from the neck down I was able to create a robot wolf body that felt proportionate. Using simple blocks for the limbs and a large cylinder I was able to put elements of robotics into the design. The fur used for the wolf is actually an asteroid block that was included within a separate Tinkercad pack.

The head of the wolf was made separate from the body. The bottom of the wolf head has two holes, one meant for a peg to connect the body and wolf, the other to insert the Red LED that will be used for its tongue. The tongue LED will have a pulsating glow, the code for the glow is shown below.

Extra Trivia: The D.O.G on the back of the wolfs collar stands for Demi Organism Guardian

Arduino Code for Fading

int ledPin = 9; // LED connected to digital pin 9

void setup() {
// nothing happens in setup
}

void loop() {
// fade in from min to max in increments of 10 points:
for (int fadeValue = 0 ; fadeValue <= 255; fadeValue += 10) {
// sets the value (range from 0 to 255):
analogWrite(ledPin, fadeValue);
// wait for 50 milliseconds to see the dimming effect
delay(50);
}

// fade out from max to min in increments of 20 points:
for (int fadeValue = 255 ; fadeValue >= 0; fadeValue -= 20) {
// sets the value (range from 0 to 255):
analogWrite(ledPin, fadeValue);
// wait for 50 milliseconds to see the dimming effect
delay(50);
}
}


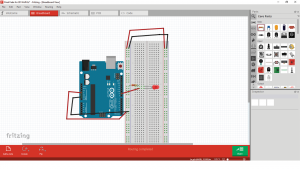
Fritzing Screenshot of the Fading LED 

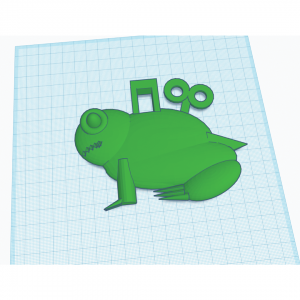
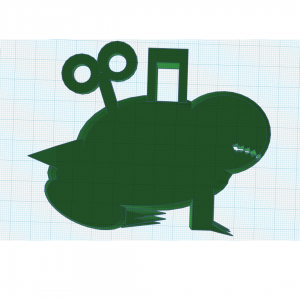
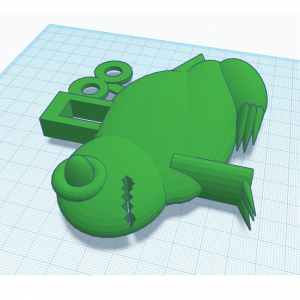
Tinkercad Screenshots of the 3D Robot Wolf


Final Project Proposal

Name of Project

Robo Wolf

Description of the Project

A 3D modeled Wolf that will utilize the Arduino LED lights to create a “glow” effect within the mouth of the wolf. The wolf will be mostly natural minus the chest/collar area which will be robotic in design.

Target Audience 

My target audience will most likely be canine lovers and possibly those interested in robots. I hope the glow effect attracts everyone though.

Technologies Used

My project will incorporate Arduino technology, Tinkercad, and a bit of Adobe Illustrate for sketches.

Step-by-step Plan

By using primitives and removal tools in Tinkercad, I’ll sculpt out the wolf head and from then on make a primitive body that I will cover in fur.  The body itself won’t be incredibly detailed, as It will be mostly cubes and cylinders covered in fur to give the appearance of a shaggy wolf pelt. There will be a hollowed-out hole within the mouth of the wolf, within the mouth will be a red LED light that will glow in intervals. The placement of this LED will make it appear to be the tongue of the robot.


Raziel Ortiz 3D Modeling and Printing

What difficulties if any did you have in creating your model?   

The merge feature in Tinkercad threw me for a loop, mostly concerning the deletion of certain areas of the frog. Creating the toes were also a bit of an annoyance as the base of the cones I used stretched in a strange way and had to be deleted with the removal tool.

Is this your first time using a 3D modeling program?

I’ve used Maya and C4D before this class, while not as versatile as C4D, Tinkercad is very useful for bringing out objects and working with primitive shapes.

How did you change your character from the earlier versions?

The character now has a bigger eyeball and a thick outline for an eyelid. The rounded handle on the back of the frog became a hollowed-out rectangle and the face of the frog is more rounded down.

Raziel Ortiz Description Of King Henry II

Shield of Henry II of France


The shield is two feet tall and about a foot and a half wide. The shield is heart-shaped and bears various designs on the outer face. The designs depict wartime struggles, it also features fine details and masterful use of etching

There is no credit for who designed the shield. But the design is very similar to the works of Etienne Delaune. There doesn’t seem to be any duplicates of the shield making it one of a kind.

As a shield, it’s main use is to block attacks from enemies on the battlefield, the designs on the shield represent the artistry of the French kingdom at the time.

The shield weighs seven pounds and appears to be made of steel. The finer details of the shield use gold and silver within them. By the shape of the object and its weight, I would assume it to be either a decorative shield or an actual shield.

On closer inspection of the shield, there doesn’t seem to be any scratch marks or dents. Meaning that the King had it repaired every time he blocked an attack, or it never saw use on the battlefield. I would speculate that it was the latter and that the King would wear his armor and gear up with the shield to boost morale in times of conflict, but never actually fight in combat.

My revised shield sketch retains the design of the original shield, as there is much space for the original designs to be placed. I’ve allowed the crying face to be the main focus of the shield and have put a reflective surface on the face of the shield. The design of the crying face and the reflective surface work against enemies in combat and the smaller and more versatile shape of the shield allows it to be used without it being cumbersome.  

Raziel Paper Models

I made my Wind-Up Frog/Clockwork Frog after doodling for a good bit, I had trouble trying to figure something out but combining technology and animals seemed to be the best path forward for me.

What was the most challenging part of this section of the assignment? How did you solve it? How did you conceptualize your model? Was it difficult making the adjustment to 3D space?

The hardest part for transitioning to 3D was trying to figure out where the turnkey and handle should go for the frog. It took me about ten minutes of drawing and deleting to figure out where they properly belonged. Aside from that adjusting to the 3D space wasn’t as difficult as I thought it would be.

What was the most challenging part of this section of the assignment? How did you solve it? How was this different than creating the paper model?

Trying to design a cardboard model was very intimidating and took me a bit to plan for. The good thing was that designing a cardboard model felt very similar to creating a paper model, but it has one clear advantage in that glue and tape are something you think about before you design. I could make certain parts that I know wouldn’t properly fold but I could attach. The hardest part was trying to plan around that and still make the most of my space.