Let’s jump into some student work and talk about our progress! I really appreciate the skills that we are learning together by sharing and discussing our work in progress each week. It takes practice and also vulnerability, it gets easier with time/ regular practice and also helps us build a language around our work process. Do you see a difference in contrast to the beginning of the semester? Let’s share.
(There will be 2 Parts to this assignment – the assignment #4 page is now active)
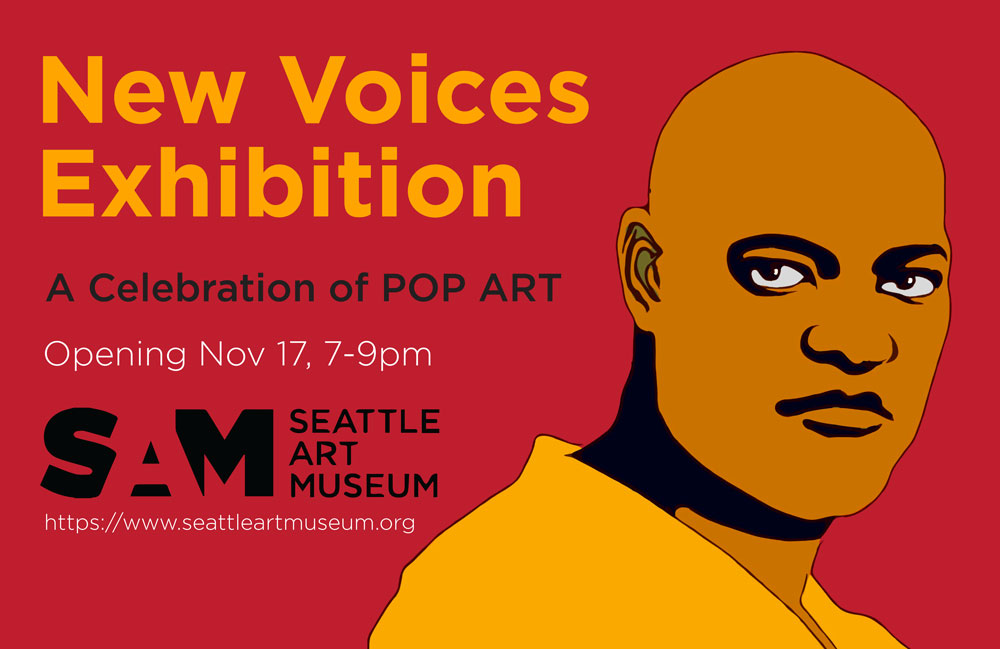
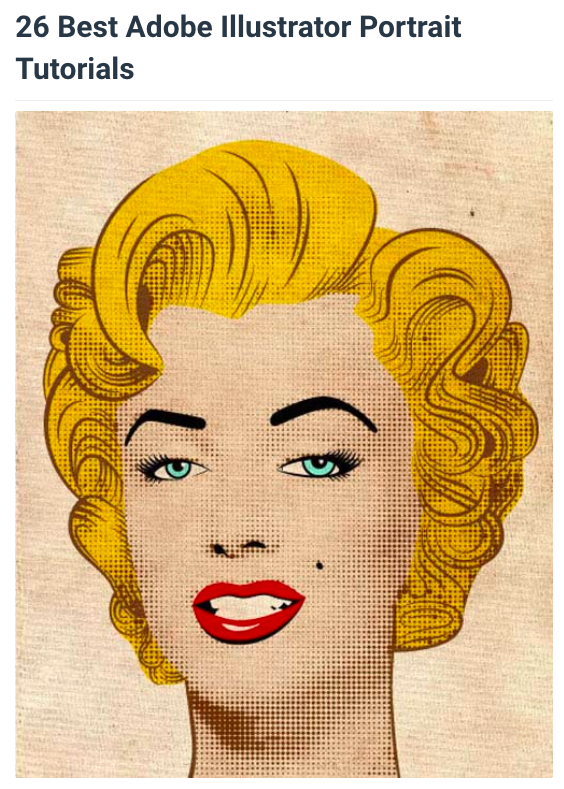
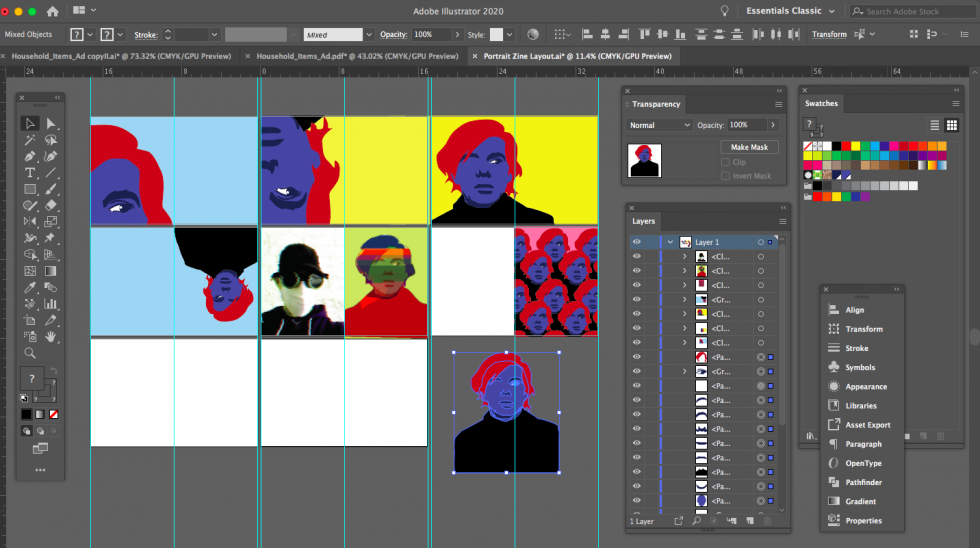
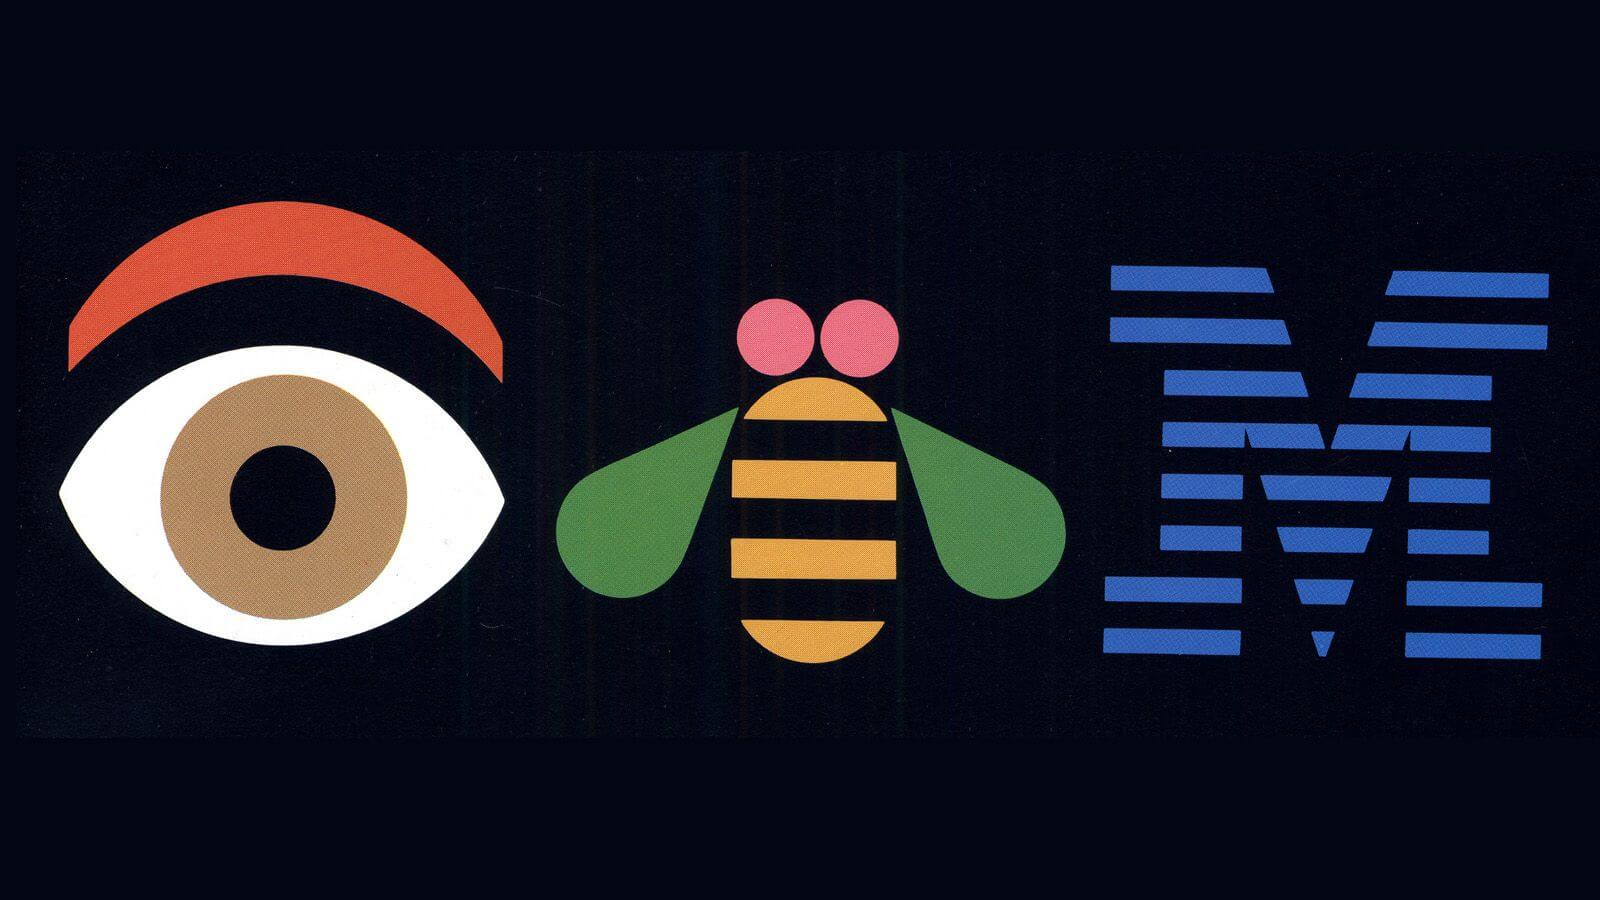
Vector Art Portrait Making, Poster Design
We will bring together the applications of a vector art, portrait making, lay-out / composition, image manipulation & typography.
Specifications:
Fictional Museum Exhibit Poster (examples will be shown during the Zoom classes – as well as a series of Illustrator vector demonstrations)
Suggestion :: Choose and work from the image and likeness of one or more of these styles/movements of art to create a poster using a SELF-Portrait
POP ART, SURREALISM, MEXICAN MURALISTS AFRO-FUTURISM, MANGA, POLITICAL ART, FAUVISM, GRAFFITI, AFRICAN MASKS, ANIME, VIDEO GAMES or (Another Style Not Listed Here or create a Hybrid using 2 or more styles)
Aside from the production of both a horizontal and traditional vertical poster made in illustrator, students will push the boundaries and application / usage of their portrait imagery. What is the creative potential of the image? How can you push it further?
What are the potentials of web and mobile applications in our day and age when it comes to creating styles, textures and over all visual aesthetics? We will walk through a series of demonstrations, some examples are below, along with a slew of apps to play with.
***Reminder – we will not meet in Zoom on 11/24 – e-mail reminders were sent out on 11/22***
This post has been updated to reflect week’s 8-11 – covering all 3 parts of assignment #3. Additions have been added to this post each week through the Thanksgiving Break.
Here is this week’s useful information and class resources:
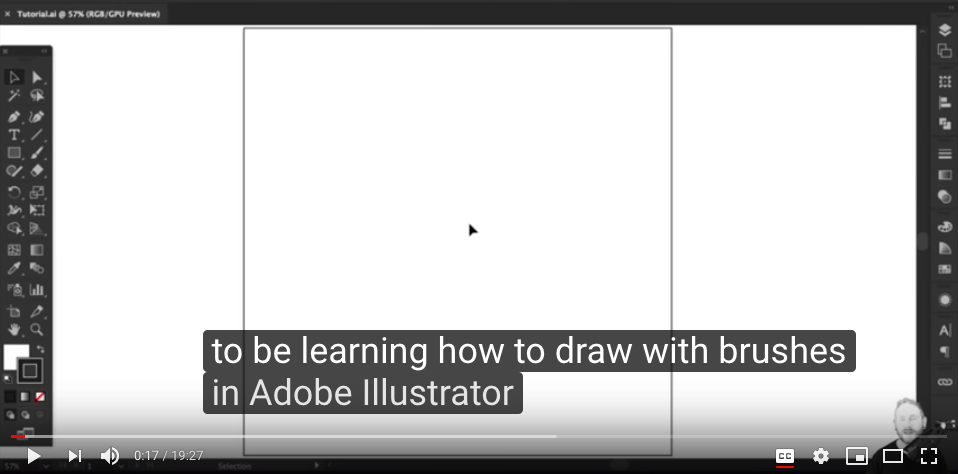
Assignment #3 – is in full effect, we are becoming versed in Adobe Illustrator – and will continue to do so. Exciting! The welcome into the Adobe Illustrator world continues through week 11! (I so love Illustrator!)
Lets jump in tonight by looking at more student work in progress!
If you wish, share your screen and show us what you are currently working on, or need some class advice on how to make improvements and updates.
***Don’t forget to add your works in progress to our shared google drive (you have a folder there).
Discussion – Class exercises :: Adobe Illustrator. Creating shapes with the pen tool, the pathfinder tools and the shape builder tool. Simplifying and reducing shapes and forms, working with color, locating color books, pantone colors and more.
We will begin making patterns and experimenting with composition, as well as building “things” with the basic forms that we make. What are the potentials of working with your forms?
*The class tutorial on 11/17 will place an emphasis on digital art making techniques with illustrator. The techniques will support part 3 of assignment #3 (and beyond)
Lab Tutorial – This week we will take another tour of Adobe Illustrator and practice creating new documents and setting up our art boards for production. Tonight’s zoom class we be recorded and placed here after class, as well as on the assignment #3 page.
————-
Color Theory!
Adobes awesome Color Wheel Simulator (must see) – If you sign into your Adobe ID on the site you can use the web application and save your discoveries directly to your adobe Library – this will allow you to apply those things into the adobe software that you are working with. (illustrator for this project)
Here is this week’s useful information and class resources: Please keep in mind, there is a lot to see here below, take your time through out each week to explore what is below, if you have any questions or reactions please add them to the comments section. The comments section is helpful for extending our in class dialogs and gaining clarity by organizing your thoughts in a written format.
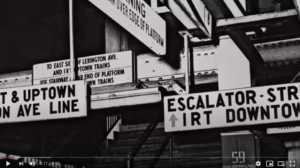
The link above will you take you to a page with an active full PDF version of the manual. I would like for EVERYONE to please leave a comment at the bottom of this page after exploring the manual and answering the questions below (you can work on this outside of class over this week or next)
Designed by Massimo Vignelli and Bob Noorda, Unimark, 1970
I would love to hear your reactions and feedback in the comments section below!
**after you “post” your comment I will have to manually approve it – you may not see it show up right away. No need to post the comment twice 🙂
Some Questions to ponder and react to:
What is your general feedback on the manual? Do you like it? Dislike it? Please Explain. Do you find it to be well designed, illustrated and clear in its application?
2. The manual was published in 1970. Does it still hold up for today’s world? Why or Why not?
3. What is missing or should be added for today’s world to help and expand the NYC Transit System?
Imagine being offered the opportunity to visually solve, design and illustrate the entire NYC transit system!? What goes into this process and research? Do you know who is responsible for this? How much does the designer charge for a project of such scale? Lets dig in and discuss.
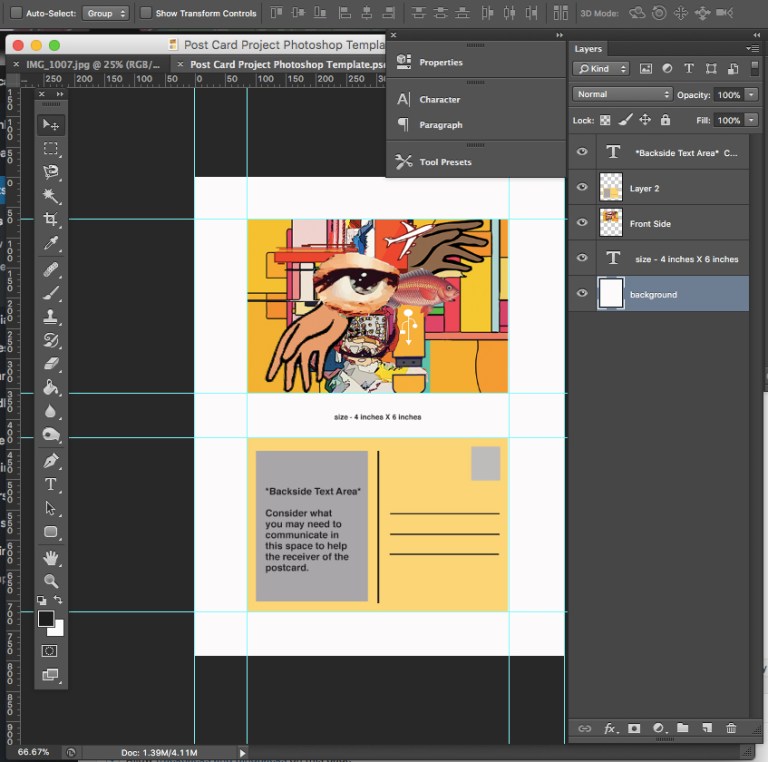
Last week we continued talking about Assignment #2 – The Post Card project ! Lets look at student work and talk about your progress and the potentials of the project. There is a lot of room for image manipulation and creating aesthetics with your work. Students will share their work via Zoom. Discussions about presentation methods and why presentation is so important. Please navigate to the assignment #2 page to view the assignment details with me again.
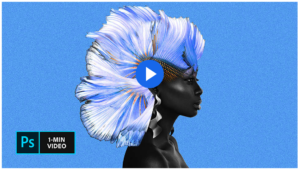
Tonight’s Video tutorial will cover some image manipulation techniques and applications.
Photoshop Video Tutorials –
Creating Layer Masks / Photo Composites – The video below is great example – click here or the image below to view it.
2. Double Expose Technique – Click here or the image below to get started
The Elements of Design – A Video Description: Enjoy! See the Elements in action in this great video.
This post will reflect a 2-week time frame for weeks #4 (9/29) & #5 (10/6) as we delve into assignment #2 – The Post-Card Adventure Series! First things first though, lets see how everyone is doing.
Lets jump in and take a look at some student work in progress during our Zoom session on 9/29 & 10/6 – I will always encourage students to share their progress on screen so that we can engage in dialog about the works and how we can make improvements and iterations. Learning how to discuss your work in progress takes practice. Learning how to discuss the works of others also takes practice and develops a “troubleshooting / solution focused mindset”. If you choose to opt out of sharing your work in class, please save your work in progress files to your Google drive folder and let me know when things have been placed there (rseslow@bmcc.cuny.edu)
*Remember, you can always find a Zoom class recording for each Assignment tutorial under the Assignment page for that individual assignment, the process for Assignment #1 – parts 1 & 2 are on the Assignment #1 page
I will be introducing Assignment #2 – AKA – “the Postcard Project” on 9/29 & 10/6. A Zoom class video recording for Assignment 2’s tutorial will be placed under the Assignment #2 page for that individual assignment along with the assignment specifications.
We will get well versed working with the photoshop pen tool, electronic imaging, cutting out images and creating graphic assets. We will also be creating and working with various file types and bringing our ideas into photoshop to produce the finished designs.
Im a big fan of iterations and revisions! We will discuss using multiple art boards and the iteration process while our work flow is in process.
*This Week’s Exercise – Cutting out Images in Photoshop / Making Graphic Assets: Cutting out images in various fragments is a task that all graphic designers will face on a regular basis. Learning various methods for cutting out images is a necessity. We will explore, experiment and share a few methods on how.
Practice practice! As practice this week while working on the postcard project – you may wish to find 3-5 images that you would like to cut out / extract from existing images, look for various curves and edges that are both attractive and challenging.
**Video recording of tonight’s class – 9/29 will be placed here for the tutorial on Assignment #2
Video Tutorial #1 – Pen Tool & Lay-Out – from 9/29
(This exercise/technique will be applied to the post card project – assignment #2 ).
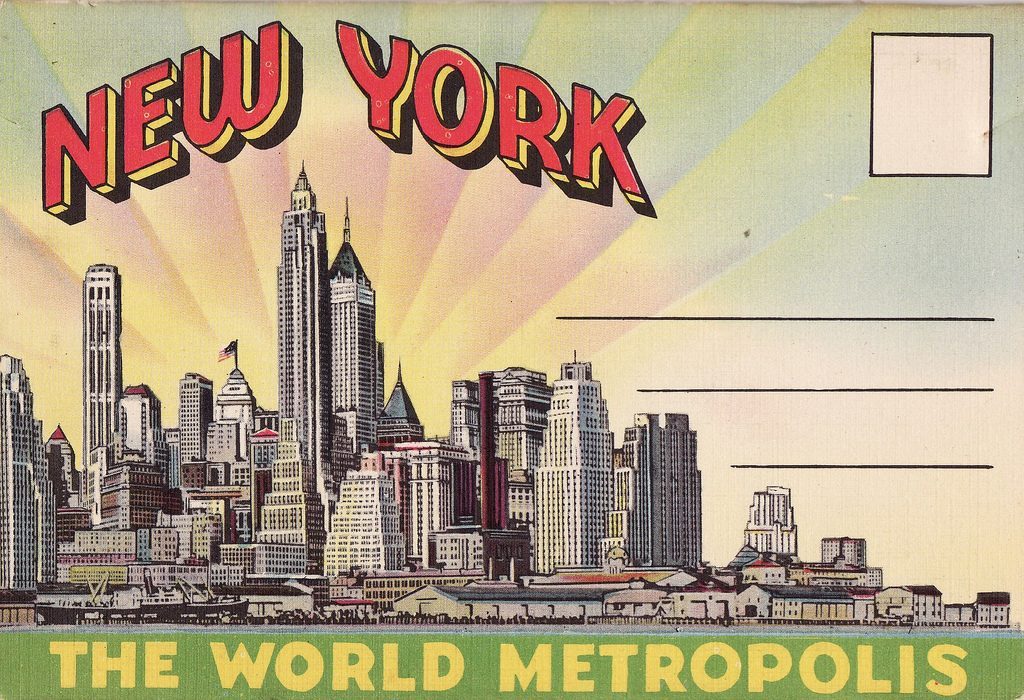
A vintage postcard example from New York!
Video Screening Tutorials: Cutting out images in Photoshop (Pen Tool examples)
These tutorials above will help get you started with our class exercise, but ultimately, you will need to master the pen tool in both photoshop and illustrator for the cleanest vector cut-outs.
**Are you looking for a photoshop psd. file template example to create along with, format and submit your postcard? (Photoshop newbies can edit and change the layers as you need to) Those with experience should make the template themselves – Click HERE
(Is there a specific tutorial that you learned from recently or over time? Share the URL link with a description of your experience in the comments section below)
Graphic Designer and inspiration of the week!
Paula Scher! (please get to know her work!)
Watch this great talk by Graphic Design icon Paula Scher!
OK! So, the last time that we met here in zoom, we covered a lot of information and we began to get acclimated with Adobe photoshop, our Photoshop workspace and our first assignment, we also went over our class website structure again. I shared (and recorded) a video tutorial about our first assignment / project here in MMA 100. Did you find the video helpful (its placed on the Assignment #1 page).
Did you add or submit your work in progress of part 1 of Assignment #1 to our google drive folder? Remember, I would really like for you to keep your work in progress there as we can dialog about it together outside of our class time on zoom. The google-drive link is located on our blackboard course page (in the google drive folder, create a folder with your first and last name).
I would also like for you to e-mail me when complete each project or assignment. You can add the files to your folder in g-drive and then send me an e-mail to let me know – rseslow@bmcc.cuny.edu – I will then, leave a few comments on your work.
In our Zoom class discussion tonight on 9/22 we will start our class by reviewing the student works in progress by presenting our work loosely. Lets talk about why this is necessary and important.
Design Resources to Explore:
I love everything they do. See for yourself below!
*** In the comments section below, add a few links and or statements about what is currently inspiring you, or what stands out and catches your interest this week! (not just with our class but in life in general!)
**Advanced note – There are no classes on Wednesday 9/8 & Wednesday 9/15 – CUNY classes are not in session. We do not meet in Zoom on those dates. The CUNY BMCC academic calendar can be found here
***Here is tonight’s class photoshop demonstration with Assignment #1 (Tutorial) placed below:
The Borough of Manhattan Community College (BMCC) has a limited number of devices available to lend to students who do not have a personal device at home. For fall 2021, the process for a student to pick up a device has changed. No appointments are necessary and students don’t need to be referred to Student Affairs. Students can pick up devices on Mondays and Thursdays from 10 a.m. to 1 p.m. at 199 Chambers Street. Students will make a left after entering the building and will not go through the turnstiles. They must bring a photo ID and wear a mask. We are closed on holidays.
Students can borrow an iPad or Chromebook, while supplies last. We also have a limited number of internet hotspots for students who do not have access to reliable internet at home.
We will begin tonight’s class by recapping week #1’s introductions to the course as well as jumping into assignment #1 – our first assignment! The first assignment has 3 parts and I will be sharing a series of tutorials during our Zoom time. I will give a demonstration on how to prepare your design layout, place and resize images, apply layers and also preparing your final designs for output on the web and in print.
Remember, each assignment will have its own page with all of the specifications needed to work on, complete and submit the assignment. Assignment #1 can be found here.
** a Video tutorial from week #2’s Zoom class of assignment #1 – part 1 will also be posted on the assignment #1 page after our class**
Becoming familiar with terms and items like: “design briefs, project sheets and project specifications” are essential to the design industry. We will be come familiar with this process and following a simulation like experience 🙂
We will discuss the progress and submissions process of your finished assignments and how to send and share them via google drive. We will discuss the maintaining of your files and data and how to keep it safe and easy to access.
Assignment Submission guidelines:
When your assignment / assignments have been completed please add them to our class google drive shared folder (link is on blackboard).
Please create a folder for yourself with your first and last name. And, please name your files with your name, assignment# & assignment status – here are a few Example file names – they may looks like this:
Ryan_Seslow_Assignment#2_progress.JPG
Ryan_Seslow_Assignment#2_FInal.JPG
Tutorials – Getting further acquainted with Photoshop – (Terry White is one of my favorite Adobe evangelists!)
Inspiration / Resources: Graphic Design Trends from 2020 –
What kind of design do you like? What inspires you and makes you want to learn more? Do you resonate with the “trends” in the examples below? Share your thoughts and links in the comments section below!
::Vocabulary::
The Elements of Design:
Color – typically known as hue. This word represents a specific color or light wavelength found in the color spectrum, ranging circularly from red to yellow, green, blue and back to red.
Line – is a line just a series of points? Or is it the best way to get from point “A” to point “B”? As a geometric conception, a line is a point in motion, with only one dimension – length. Line has both a position and a direction in space. The variables of line are: size, shape, position, direction, number, interval and density. Points create lines, lines create shapes or planes and volume.
Mass – Here, mass is interchangeable with volume. A mass is a solid body or a grouping of visual elements (line, color, texture, etc.) that compose a solid form. Volume is a three-dimensional form comprising length, width, and depth. Three-dimensional forms contain points (vertices), lines (edges), and planes (surfaces). A mass is the two-dimensional appearance of a three-dimensional form.
Movement – Also known as motion. This element portrays the act or process of changing place or direction, orientation, and/or position through the visual illustration of starting or stopping points, blurring of action, etc. This is not animation, although animation is an end product of movement, as well as other elements of design.
Space – A two-or three-dimensional element defined by other elements of design.
Texture – A technique used in two-dimensional design to replicate three-dimensional surfaces through various drawing and media techniques. On three-dimensional surfaces, it is experienced by touch or by visual experience.
Type – Also known as typography, and it is considered an element in graphic design. Although it consists of elements of design, it is – in itself – often an element in the form of visual communication.
Value – Another word for the lightness or darkness of an area. Brightness measured in relationship to a graded scale from white to black.
The Principles of Design:
The principles of design are applicable to all design disciplines including – but not exclusive to – architecture, art, graphics, fashion, industrial design, poetry, writing, and web design.
The principles of design are tools used to format the elements of design.
Balance – The elements of design converge to create a design or arrangement of parts that appear to be a whole with equilibrium.
Contrast – The “automatic principle.” Whenever an element is placed within a format, contrast is created in the various elements. Can be emphasized with contrast in size, shape, color,
Direction – Utilizing movement to create the visual illusion of displacement.
Economy – A principle operating on the “slim.” Especially important when dealing with clients, where their product or service is more important than the elaboration of design elements. Can also be considered “precise,” or “simplistic.” Or, it can be considered great design.
Emphasis – Also known as dominance. This condition exists when an element or elements within a visual format contain a hierarchy of visual importance.
Proportion – A two- or three-dimensional element defined by other elements of design.
Rhythm – A recurrence or repetition of one or more elements within a visual format, creating harmony.
Unity – Oneness, Harmony, The condition of completeness with the use of all visual elements within a format.
The Borough of Manhattan Community College (BMCC) has a limited number of devices available to lend to students who do not have a personal device at home. For fall 2021, the process for a student to pick up a device has changed. No appointments are necessary and students don’t need to be referred to Student Affairs. Students can pick up devices on Mondays and Thursdays from 10 a.m. to 1 p.m. at 199 Chambers Street. Students will make a left after entering the building and will not go through the turnstiles. They must bring a photo ID and wear a mask. We are closed on holidays.
Students can borrow an iPad or Chromebook, while supplies last. We also have a limited number of internet hotspots for students who do not have access to reliable internet at home.