Here are the steps to convert a project that doesn’t use Sass to use Sass.
Step 0: Make sure you can compile Sass
If you haven’t already figured out a way to compile (technically transpile) Sass into CSS then you need to do that. The simplest way is to use an application. We will use Scout-App since it’s free and open source: http://scout-app.io/ This should be installed on our computers in class or you can download and install in Documents. If you’re having trouble view this post on Installing Scout.
For other options see the Sass install page: https://sass-lang.com/install
Step 1: Create the Sass folder
You will need a separate folder for your Sass. This is both to keep things clear and because all of the Sass compilers work better with this setup.
- Create a folder named sass
- Move ALL of your files from your css folder into your new sass folder
We do this because from now on the CSS files will be written from the Sass files. You will only edit Sass files and the CSS files will be automatically created.
Step 2: Change all .css endings to .scss
This converts the files from CSS type to Sass type. It’s OK that you haven’t actually changed the CSS yet. SCSS allows normal CSS so there is nothing wrong with this.
Step 3: Convert all files except main file to partials
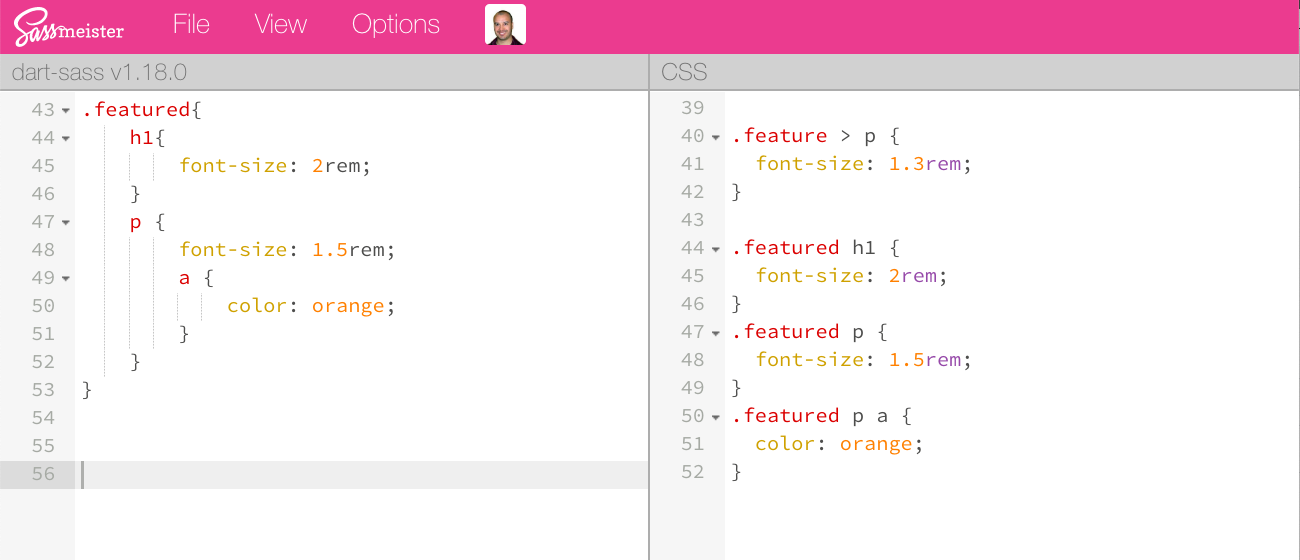
In Sass Partials are files that are not output directly into the CSS folder but instead imported into other files. This is a bit easier to understand as you see it rather than in words. Watch the video recap at the end of this post if you’re confused.
Here is what the folder should look like:

Step 4: Add @import statements to the main scss file.
@import statements are how you include partials into other sass files. The format is you write @import the in single quotes ‘ ‘ you write the name of the partial WITHOUT the _ and WITHOUT the .scss part of the name. So importing _normalize.scss woud be: @import ‘normalize’;
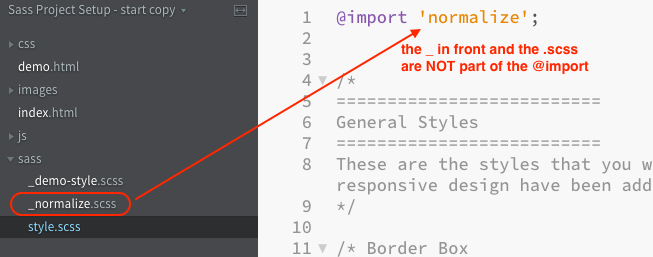
Remember the semicolon at the end.
Step 5: Change HTML to only point to the main css file.
Becaues all of the other files are now partials you only need one link element that points to the main .css file. It should still point to the css folder and have the .css filename. This file will be created later.
Step 6: Start the Sass Processor
Whether you are using the app (like we will in class) or you’re trying another method at home, start it now.
Step 7: Check to make sure there are no errors.
When the Sass processor converts Sass to CSS it will stop if there are any errors in your CSS. Make sure to fix them all or you won’t have a CSS file to use.
Step 8: Remember to start the Sass Processor every time you’re working on your Project.
So with also Git and GitHub in the workflow you will do this workflow:
- Open editor (Brackets etc)
- Open Browser
- Start Scout or your Sass processor
- Pull files from GitHub (to make sure you’re up to date
- Do you work and save as you go, checking the Sass processor to make sure you don’t have any errors.
- When you’ve completed a part of the work then make a Commit in Git.
- Keep doing Steps 5 and 6 as you work.
- When you’re all done for the day
- Do a final commit of anything outstanding.
- Push your files to GitHub so you have a backup there.


One thought on “Converting and Existing Project to Sass”