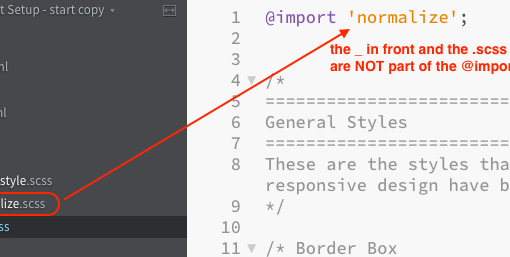
As you may have noticed, writing CSS can get long and repetitive. As you start to add styles for layout, type, page sections, media and more the .css file gets longer and longer and harder to modify.
To help manage this and add some flexibility to CSS people created CSS preprocessors. These add special syntax to CSS that give you additional power and flexibility. This special syntax is then complied to normal CSS so that browsers can understand it. The basic process is:
- Write and create files using special Sass syntax. These files are .scss or .sass
- Compile the Sass syntax into normal CSS. This creates a new .css file
- Use the .css file in your web pages.
1. Writing in Sass Syntax
The first thing to know is that there are two types of Sass files: .scss and .sass. With the .scss type you write in regular CSS syntax and then add some special Sass Syntax. When writing in .sass syntax you don’t use curly braces {} or semi-colons ; but you do have to put everything on a separate line and use indendation.
The second thing is that when you write for .scss file types, you can write normal CSS. Because of this we will alwys use .scss files. This allows us to use CSS we have already written or CSS Snippets other people have written without needing to convert them to Sass syntax.
Sass adds a number of options to writing CSS. In this introduction, we will only look at two of the most useful: variables and nesting. We will also look at comments in Sass.
To practice we will use Sassmeister: https://sassmeister.com This site is a good way to practice because it shows both the Sass and the CSS it will compile into.
Sass Variables
Varaibles in Sass are like variables in a programming language (like JavaScript). They consist of a name and a value. The first step is to set the variable by writing the name and giving it a value. In Sass this looks just like setting a CSS property except that a) it doesn’t have to be done inside of a selector and b) there is a dollar sign ($) in front of the variable name:

After you declare the variable and set the value. You can then use the $variable where you would normally put the value for a property:

To practice, copy the CSS below and paste it into the left side window in Sassmeister
$font-stack:    Helvetica, sans-serif;
$primary-color: #333;
$background-color: #fff;

body {
  font: 100% $font-stack;
  color: $primary-color;
  background-color: $background-color;
}
Nesting
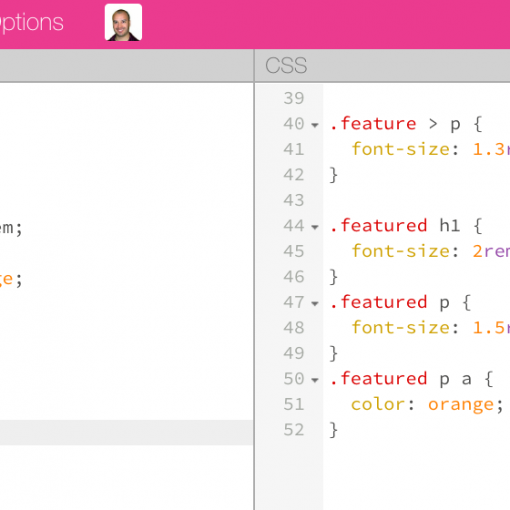
Normally when writing CSS you use the Descendent Selector to select elements that are inside of other elements. This means you have to write two or more elements with a space inbetween:
.featured h1{
font-size: 2rem;
}
.featured p{
font-size: 1.5rem;
}
.featured p a{
color: orange;
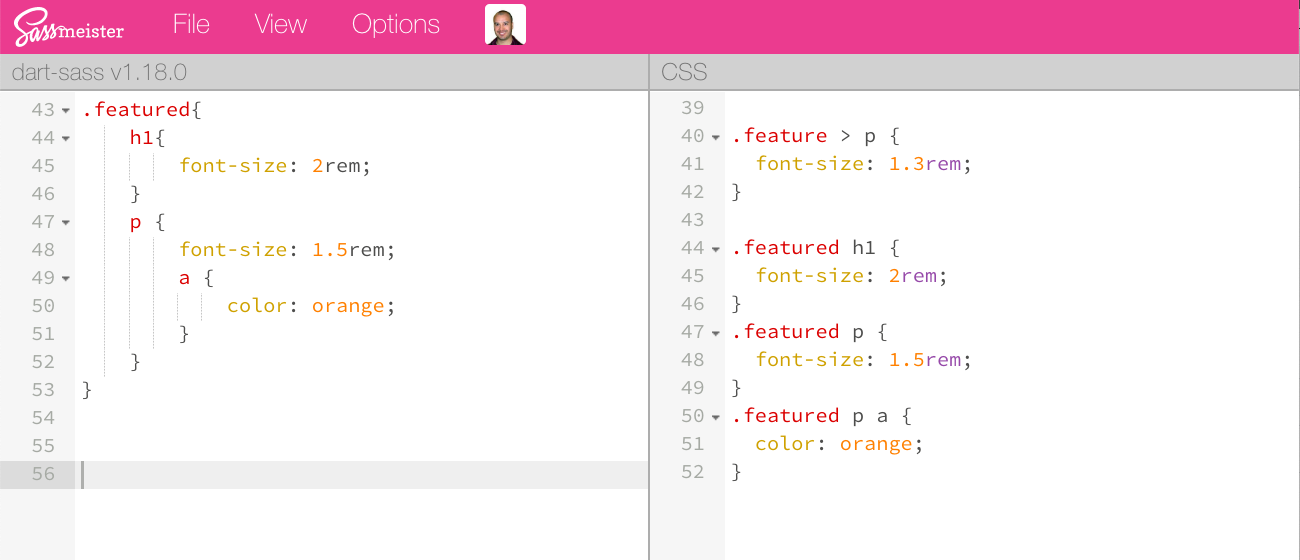
}In Sass you can nest CSS selectors inside of each other and the descendent selectors will be written for you. The above could be written:
.featured{
    h1{
        font-size: 2rem;
    }
    p {
        font-size: 1.5rem;
        a {
            color: orange;
        }
    }
}
Nesting is commonly used to do things like create styles for a particular section only or a particular page only (add a class to the body element to do that).
Comments
You can write comments as normal in Sass: /* comment goes here */. But you can also just put two backslashes at the beginning of a comment: // comment goes here .
Sass comments go from where there start to the end of the current line (no multiline) and they are not part of the compiled .css file
CodePen Example
In this example, we will see how variables and nesting is used and practice changing the colors using a color palette. The palette used in this example is from Colour Lovers. It doesn’t exist but you can use that site or another or your own colors to modify this pen.
See the Pen Simple Sass Colors by Christopher Stein (@profstein) on CodePen.
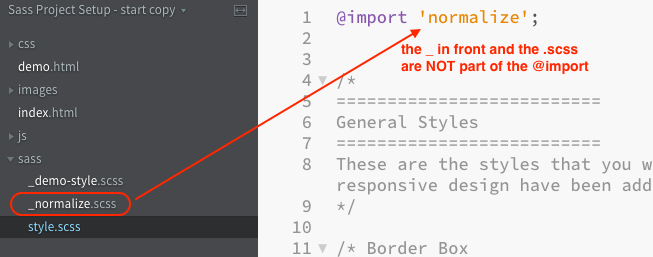
2. Creating and Compiling Sass files
In order to do this properly, we will need to set up our project files to accommodate Sass. We will go over this diagram:
You can practice by using these starter files and converting them to use Sass.
Resources
- Main Web Site: https://sass-lang.com/
- Documentation: https://sass-lang.com/documentation
- Getting started guide: https://sass-lang.com/guide
- Sassmeister: https://www.sassmeister.com/
- Scout App (Sass compiler): https://scout-app.io/
- Sass on CSS Tricks: https://css-tricks.com/?s=sass

One thought on “Sass Introduction”