There are times when you need to save or send an entire folder of files. Also, sometimes you need to make a file smaller in file size. Compressing or zipping the file is a way to be able to do both.
In this class you may be asked to submit an assignment that is a folder with HTML, CSS and image files by submitting a compressed file. The instructions for Windows and macOS follow.
Windows Instructions
Creating a Compressed/Zipped File
- Locate the file or folder that you want to zip.
- Press and hold, or right-click, the file or folder, select (or point to) Send to, and then select Compressed (zipped) folder.
A new zipped folder with the same name is created in the same location. To rename it, press and hold (or right-click) the folder, select Rename, and then type the new name.
Opening (Extracting) Compressed Files on Windows
If you double click a compressed file in Windows it will open and show you what is inside. But, you can’t save or work with files properly like that. In order to use files in a compressed folder you must extract them.
- Right-click on the compressed file
- Select Extract All..
- All of the compressed files will be recreated in the same location as the compressed file, in the same structure they were when they were compressed.
macOS instructions:
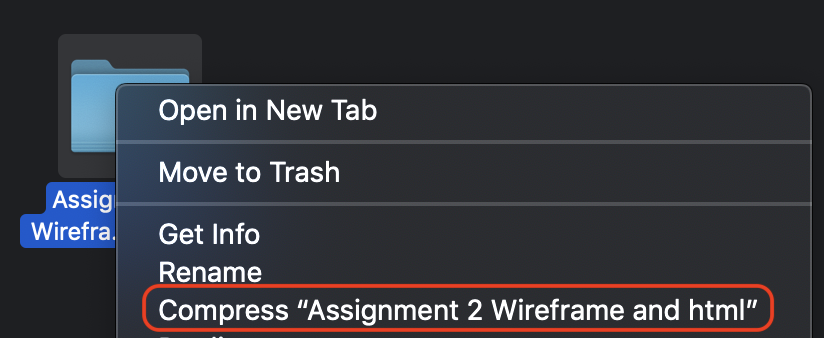
- Locate the file or folder that you want to compress.
- Right-click the file or folder and then select Compress “folder name” where folder name will be the name of your folder.

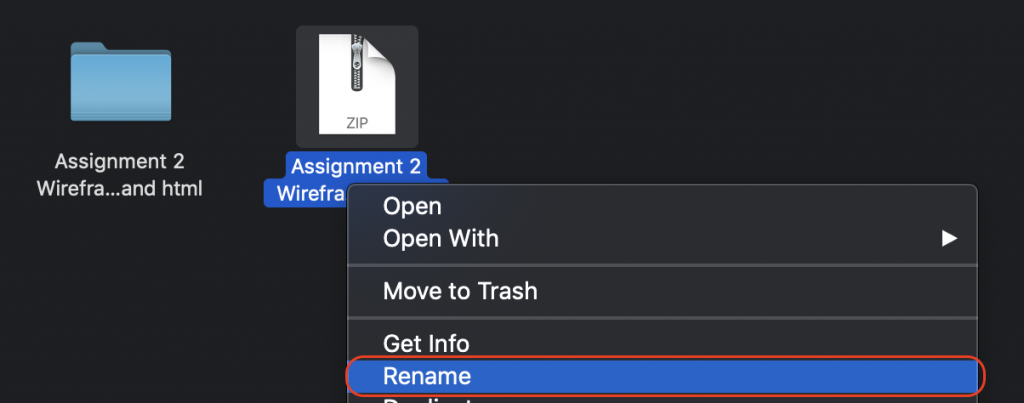
A new compressed folder with the same name is created in the same location. To rename it, right-click the folder, select Rename, and then type the new name.

Opening Compressed Files on macOS
macOS is pretty straightforward.
- Double click on the compressed file
- All of the compressed files will be recreated in the same location as the compressed file, in the same structure they were when they were compressed.
