Making a movie requires an understanding of the principles and terminology of cinematography, like camera angles, editing, composition, and movement of the camera and characters. This is also known as Film Grammar, and like actual spoken grammar, it is a language used to tell stories in a visual way. Each scene, shot, and frame is considered and crafted using this language. In this lesson we explore the basic Film Grammar used in cinematography and how Pixar approaches its use in storytelling. You will also use these principles to plan shots for your own film.
Introduction to Film Grammar
Activity 1: Major vs Minor Beats
Part A: Pick a scene or sequence from one of your three favorite movies and do the following:
- What is the major beat in the story that it depicts?
- Break this major beat down into a bullet point list of minor beats.
Remember, each minor beat represents one event or idea (this happens, this happens, this happens…).
Part B: Pick two major beats from your own story spine and break them down into a bullet point list of minor beats.
Go to your Google Drive folder and create a Google Doc to write your ideas and responses.
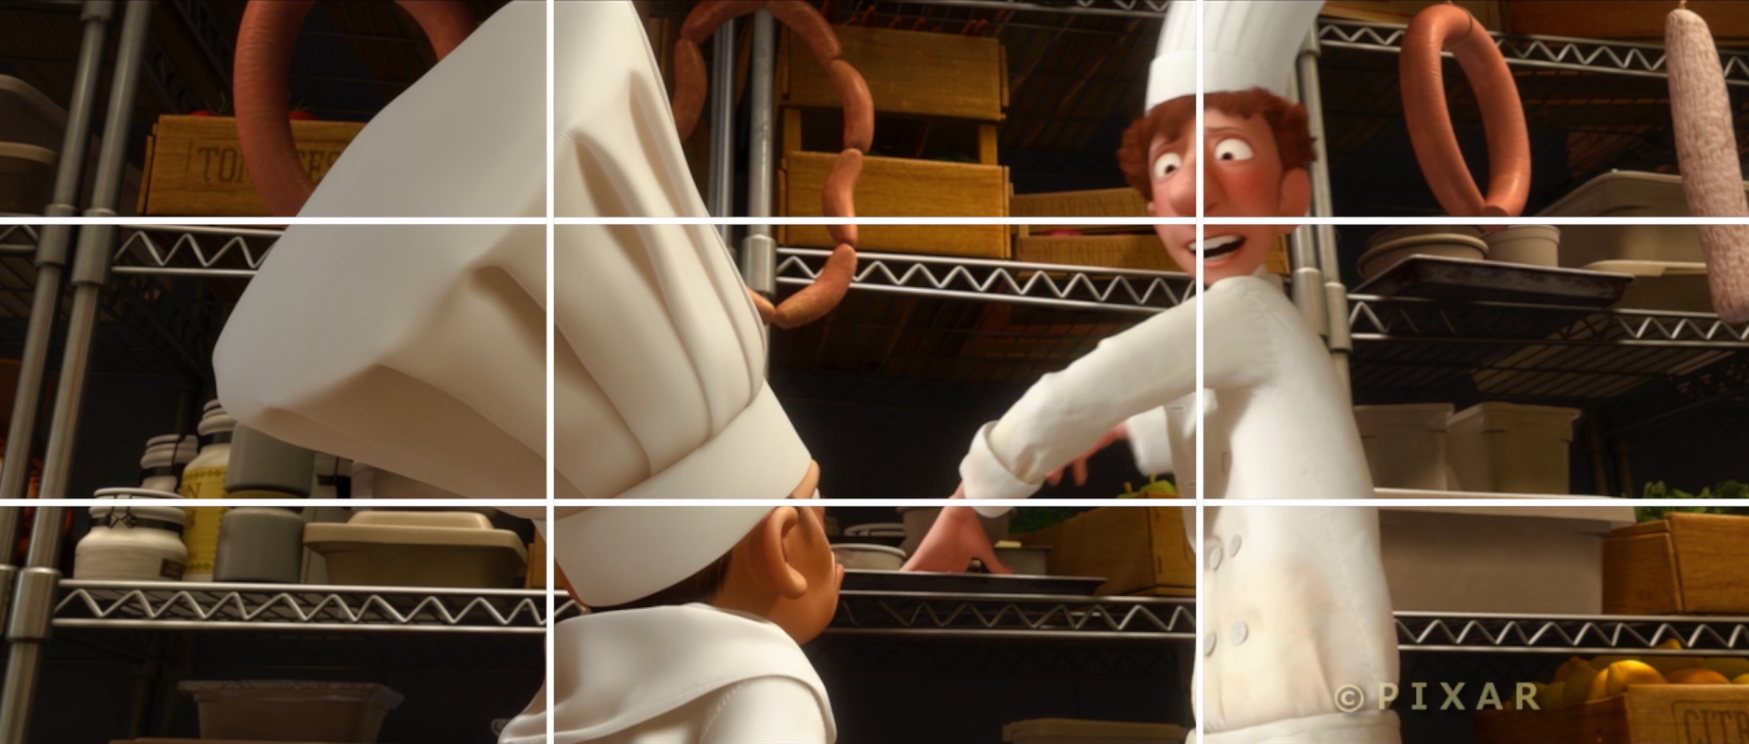
Basic Shot Types
Activity 2: Basic shot types
Part A: Pick a scene or sequence from one of your favorite movies, review it, and answer the following questions:
- Can you find a moment where changing shot types (wide shot, medium shot, close-up) help emphasis a story point?
- How does the staging and framing heighten the emotional impact of the scene?
- Can you find a shot where the rule of thirds is followed?
Part B: Return to the minor beats you identified in your story from the previous exercise. For each beat choose a shot type which would work well (wide, medium, close) and then do the following:
- Sketch the frame for each of these three shots from the camera’s point of view. Remember to consider what you want the audience to know, and what you want them to feel.
- Consider using either “centering” or “rule of thirds” to place your subjects within the frame.
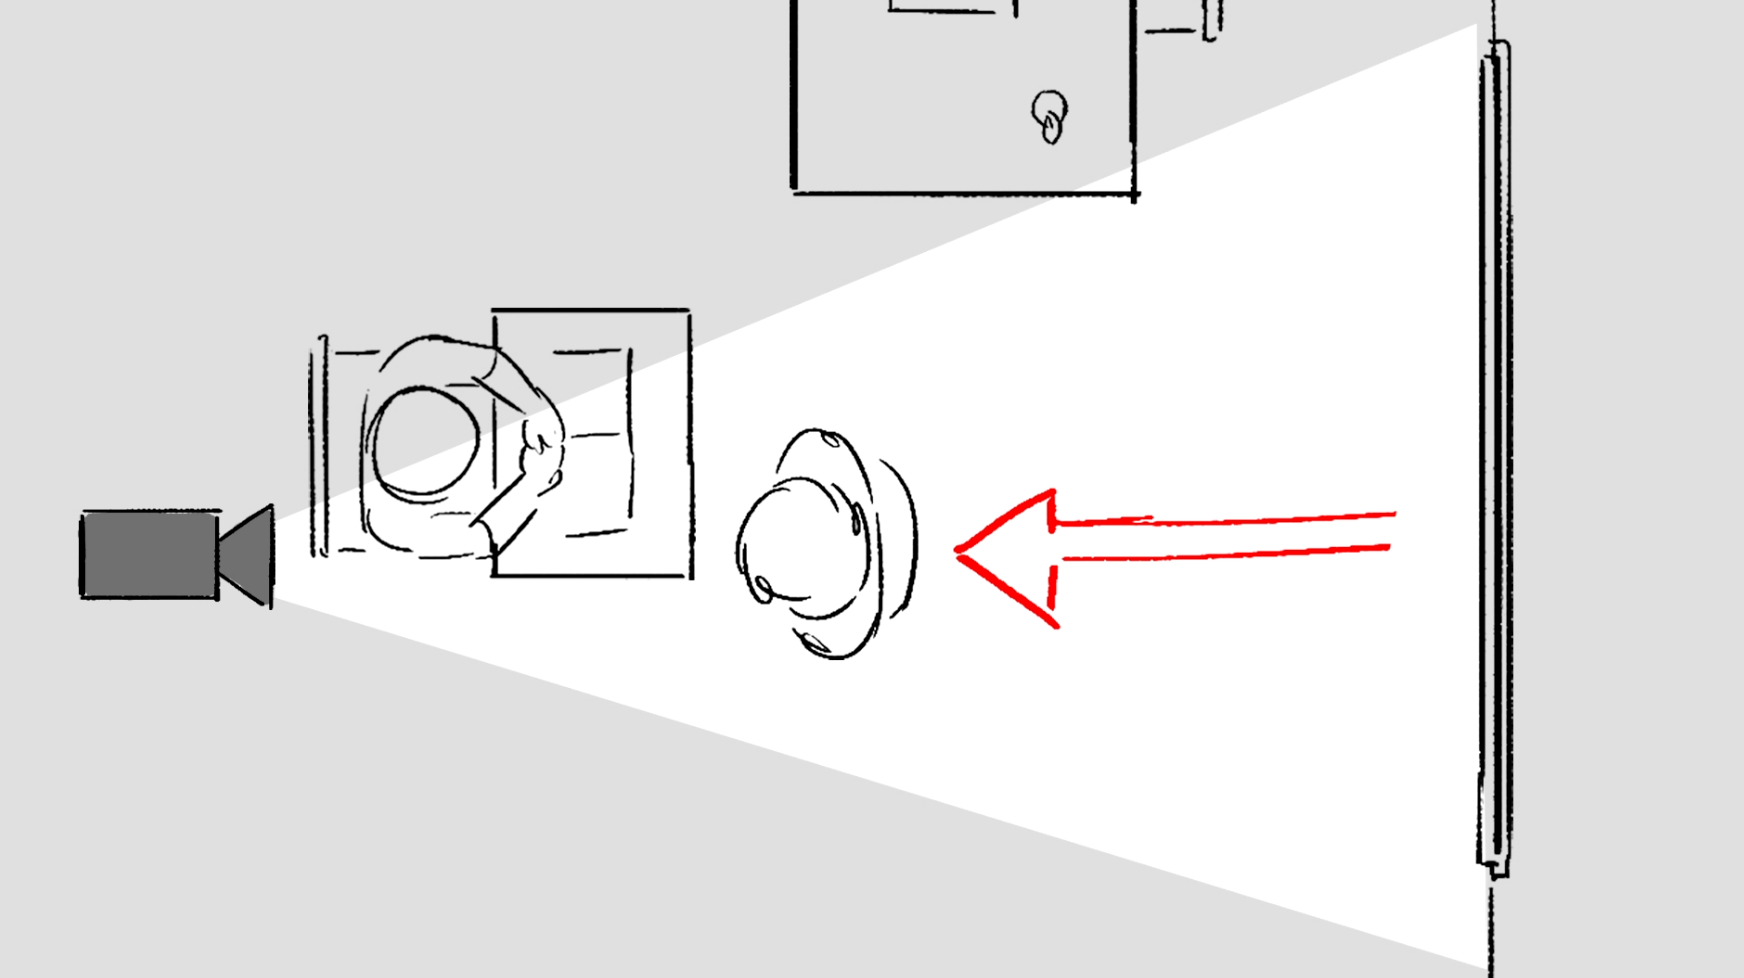
- To help you visualize the staging, imagine looking down on each of the three shot types. Put the camera and character(s) where you imagine they need to be in order to create the shot type. Add any notes, lines, or details that would indicate direction for camera or character.
Go to your Google Drive folder and create a Google Doc to write your ideas and responses. Feel free to use any means for your sketches, Photoshop, pen and paper, whatever you’re more comfortable with. To add pen and paper sketches to your Google Doc take a picture with your phone or use Adobe Scan and place into the document.
Extreme Shots
Activity 3: Extreme & Angles

Part A: Choose a scene from one of your favorite films which contains an extreme shot or angle.
- What kind of extreme shots or angles are used?
- How do these shots help the story?
- What emotional effect do they have?
- When looking at framing of these shots, can you identify where aspects of Visual Language (line, shape, space, movement, tone and color) are used to create emphasis and lead the viewer’s eye?
Part B: Return to the minor beats from your own story you identified in the previous exercises.
- Identify at least one minor beat where you think an extreme shot or angle might work well.
- Why did you choose this shot from a story perspective?
- How do you think the shot will help emphasis the emotional impact of that moment?
Go to your Google Drive folder and create a Google Doc to write your ideas and responses.
Dynamics shots
Activity 4: Dynamic Shots
Part A: Find a scene from one of your 3 favorite movies that creates drama by using dynamic shots.
- What kind of dynamic shots are used in this scene?
- How do these shots improve the storytelling?
- Do these shots affect the emotional impact of the scene?
Part B: Identify a moment in your own story where you might want to use dynamic shots.
- What kind of camera movement would be most effective? Why?
- What effect will this have on the your story?
- What effect will this have on the emotional impact of the scene?
Go to your Google Drive folder and create a Google Doc to write your ideas and responses.
Storyboarding
Activity 5: Storyboarding
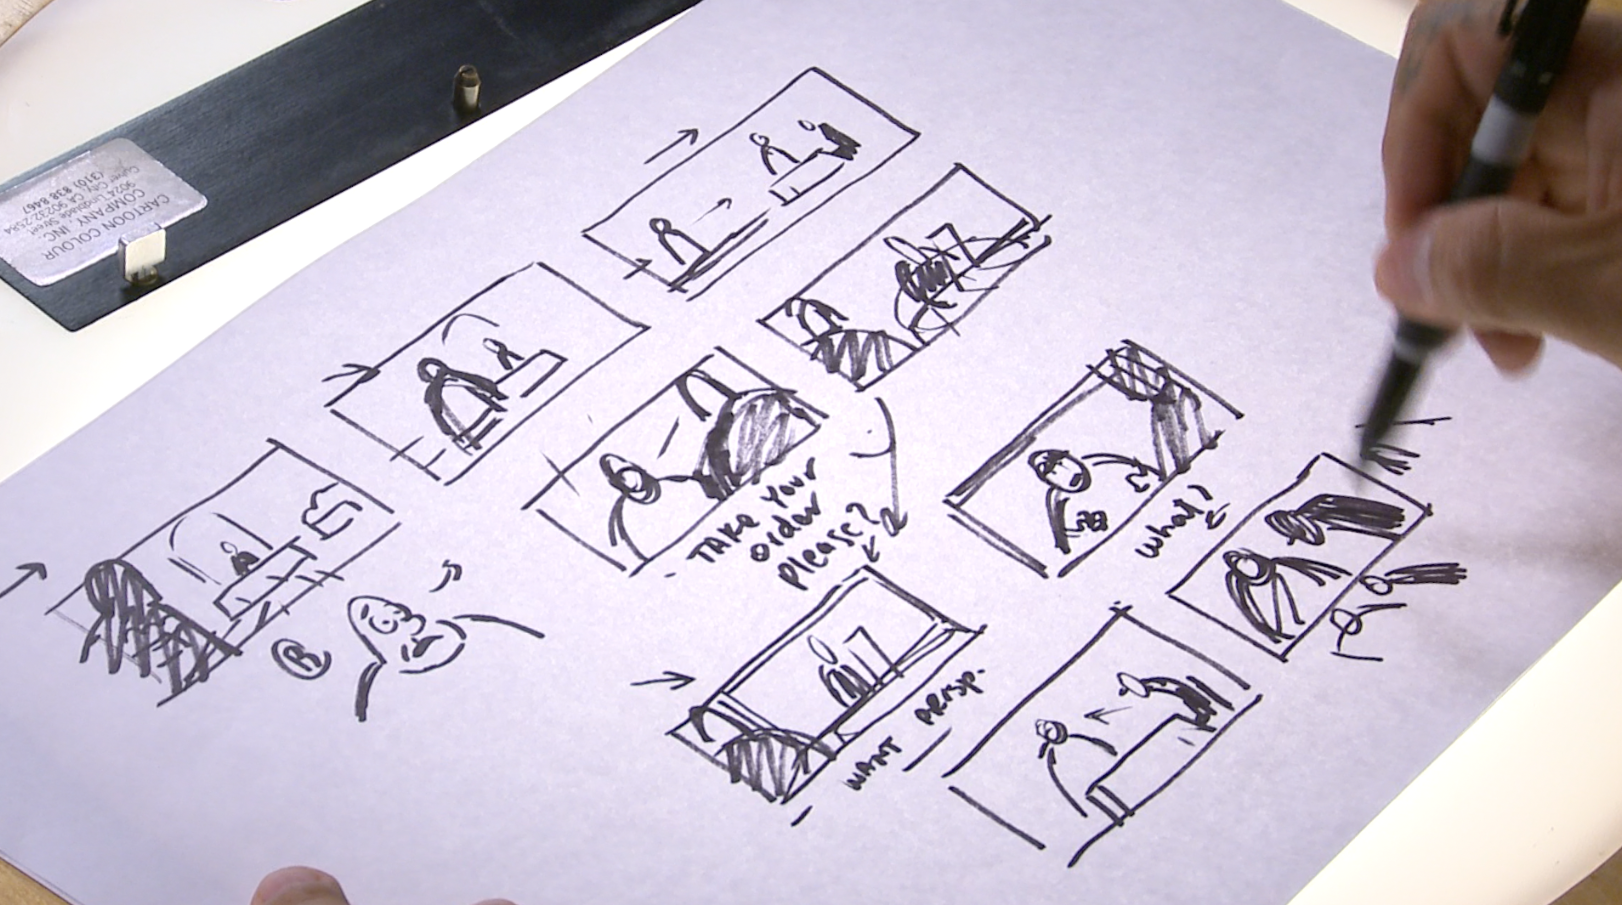
Part A: Finally, it’s time to apply what you’ve learned and practiced to the story idea you’re developing. For this exercise you should set aside at least an hour where you can really focus on your storyboarding.
- Choose a scene from your story and break it down into minor beats. Each beat should represent one or two shots.
Part B: As seen in the previous video work through visualizing the staging, framing, and motion used to communicate each idea in the scene using simplified drawings.
- For the first iterations, go ahead and make lots of mistakes so you get them out of the way as you continue to rework and refine your scenes.
- Go ahead and add descriptive words that would help others understand and follow your vision.
- Use lines, arrows, frames within frames, directional lines, etc. that would visually indicate direction, shot types, or anything else needed to convey your ideas.
- You can find plenty of blank storyboard templates online, or you can draw your own. You can also use index cards, which are easier to pin up and move around when you want to show it to someone else.
Good luck and have fun!
Go to your Google Drive folder and create a Google Doc to write your ideas and responses. Feel free to use any means for your sketches, Photoshop, pen and paper, whatever you’re more comfortable with. To add pen and paper sketches to your Google Doc take a picture with your phone or use Adobe Scan and place into the document.
Advice on Film Grammar
Glossary: Film Grammar
Here’s a list of definitions introduced during this lesson.
- Camera Motion: how the camera moves in relation to the characters and the action
- Center Framing: putting your main subjects right in the middle to establish a feeling of stability or neutrality
- Close Up Shots: camera shot that is very close to punctuate an emotional moment or story point
- Dolly: dynamic shot where the camera moves parallel to the ground, as if moving on tracks
- Down Shot: shot by placing your camera above the subject and pointing downward
- Dutch Angle: shot by tilting the camera to get a diagonal view of the scene
- Dynamic Shots: shots taken with a moving camera
- Extreme Close Up Shots: shot framed very tightly around the subject to feel intense emotion
- Extreme Wide Shots: used to show how big a world is, create a sense of scale or make details difficult to see
- Framing: the part of the scene you see through the camera’s lens and from what perspective
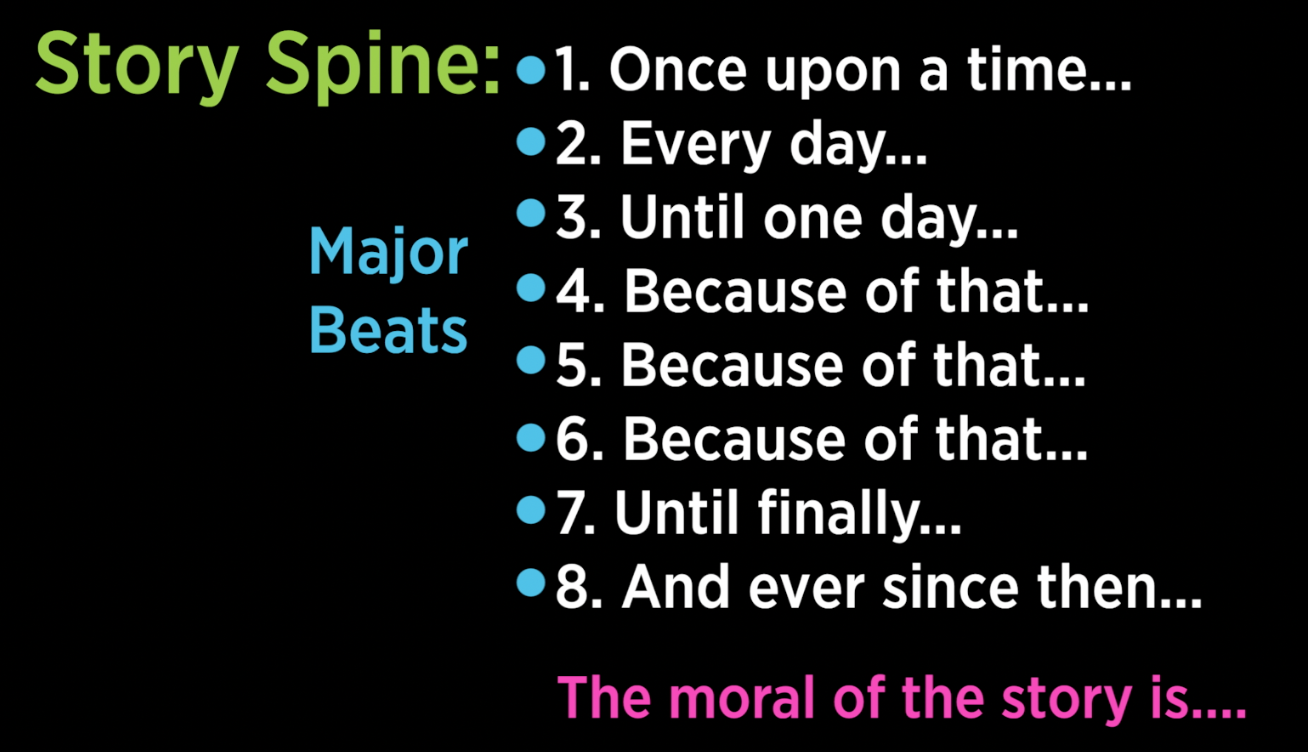
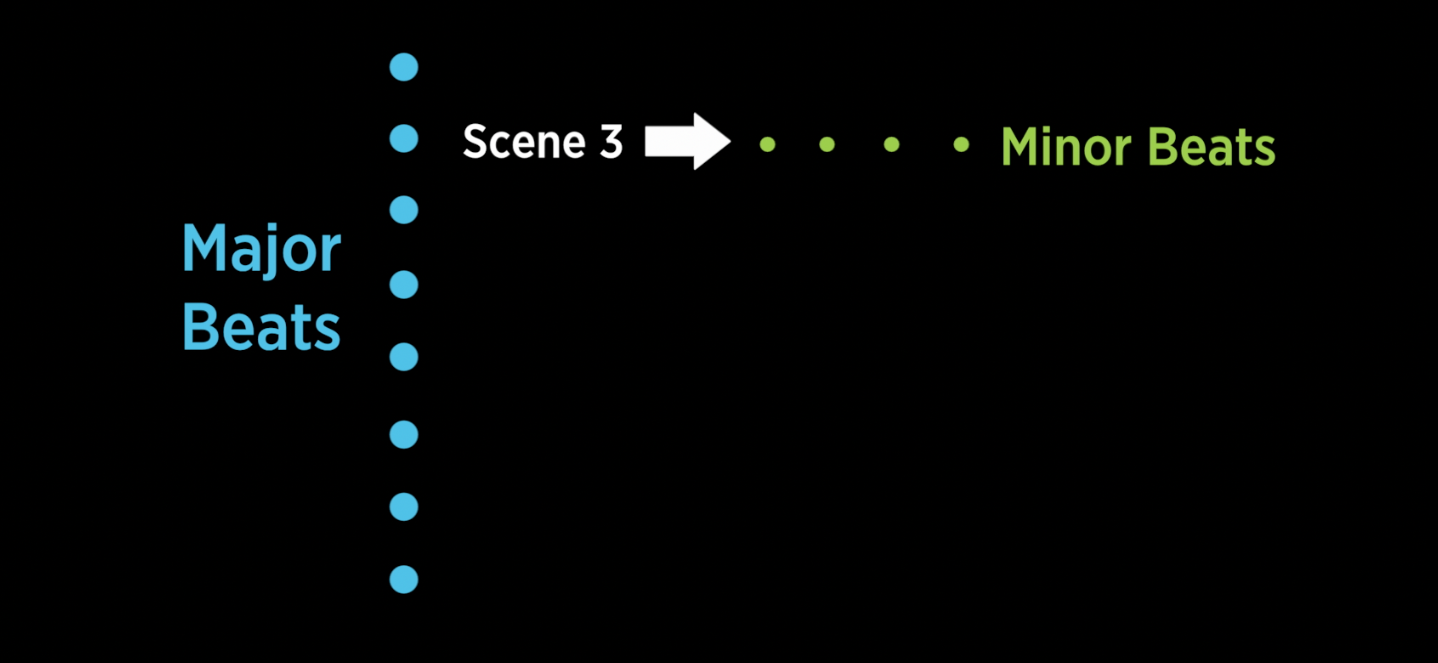
- Major Beats: key moments in the story
- Medium Shots: camera shot that is personal and close enough to establish emotion and conversation
- Minor Beats: smaller ideas that collectively make up each scene
- Pan: dynamic shot where the camera rotates either horizontally or vertically to reveal addition information
- Rule of Thirds: framing technique used by dividing frame into equal thirds and placing the subject at one of the four intersection points
- Scene: the part of the story that takes place at a particular time and location where our character learns something new to carry them forward in the story
- Sequences: collection of scenes that make up a major beat
- Shots: a visual representation of a character’s action in time
- Staging: the positions of the characters in the scene and where the action occurs
- Static Shots: shots taken using a fixed position and direction throughout the entire shot
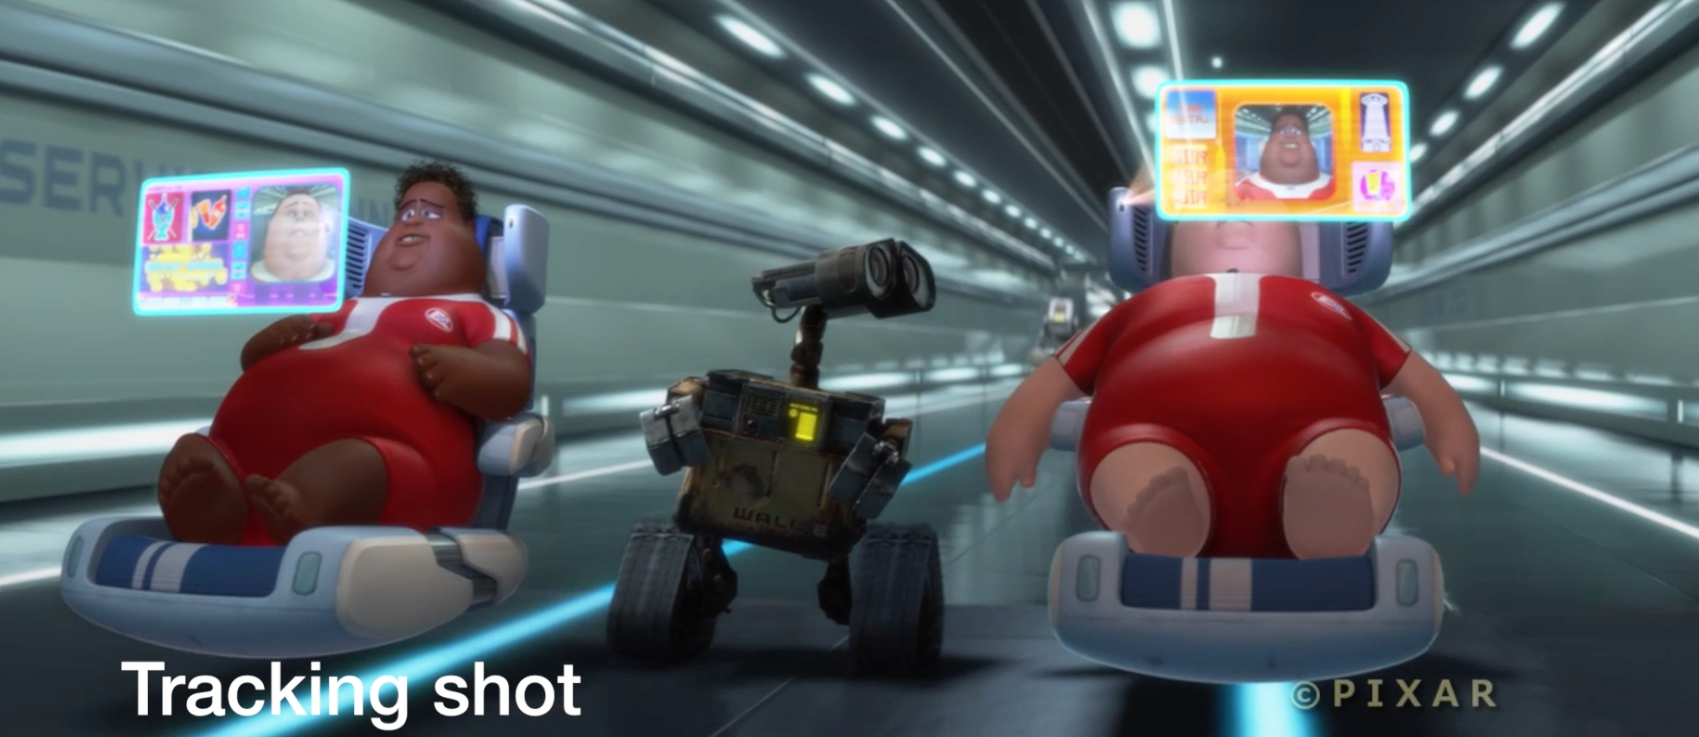
- Tracking Shot: dynamic shot where the camera follows a particular subject as it moves within the environment
- Up Shot: shot by placing your camera down low and pointing it upward
- Wide Shots: camera shot staged by placing the camera far away from your characters to give a broad perspective and understanding of a new location; also called “establishing shots”
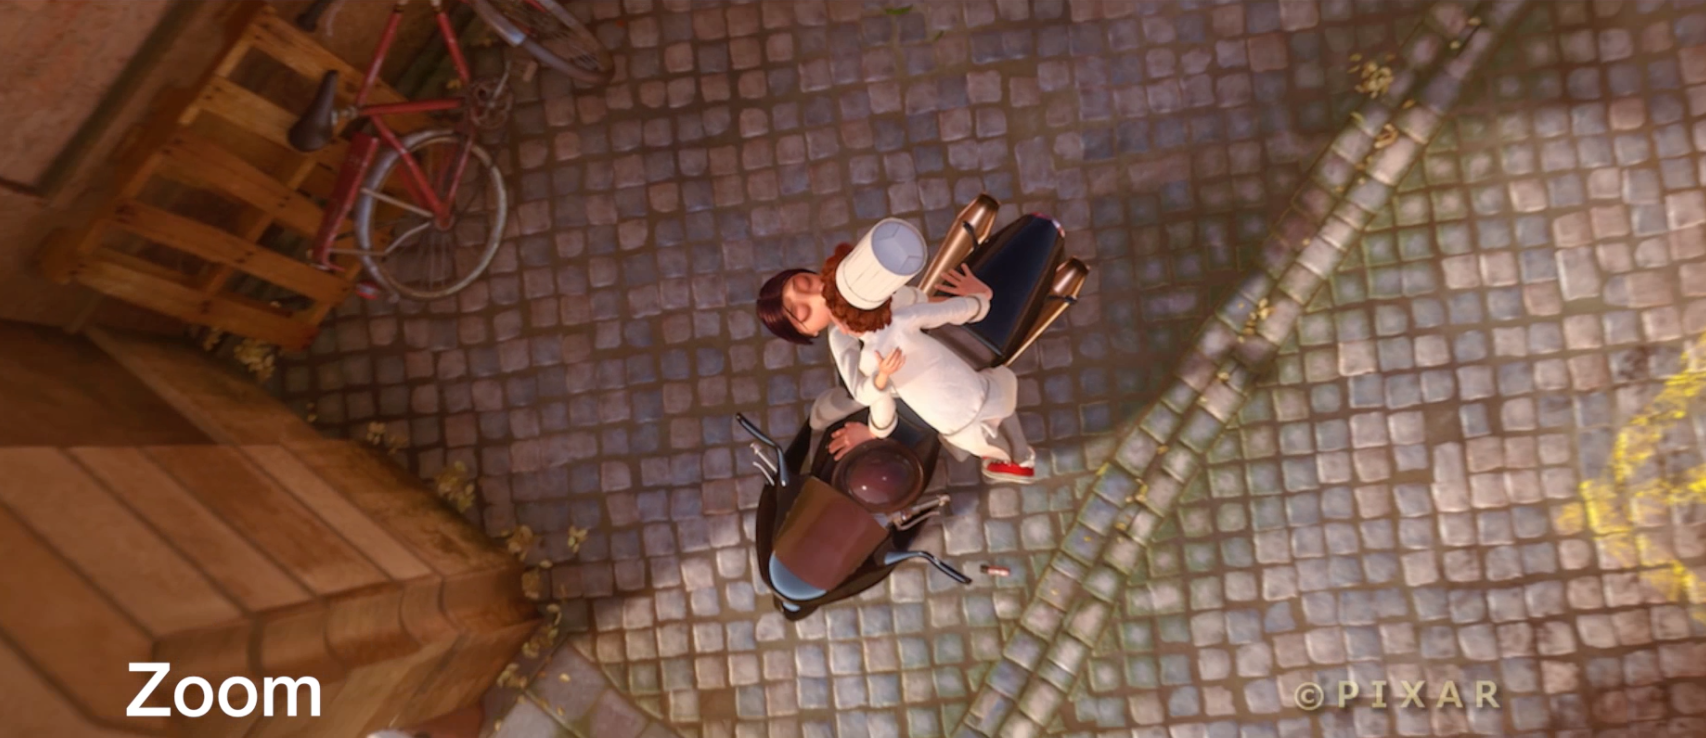
- Zoom: dynamic shot where you push into or pull back from the action within a frame
* Effective communication among peers is extremely important, and using the correct terminology will help you get your ideas across more effectively. Create a Google Doc in your Google Drive and name it The Art of Storytelling Glossary. Each week copy and paste the new glossary terms into that document and focus on learning those terms the way they’re used in the animation industry.
Adding our character and rendering
Due June 28th by 11:59 pm
When you complete this module’s activities, upload your docs and Cinema 4D files using the link below:
https://www.dropbox.com/request/I3OZdD0lfpyEm7NjSPxk
All Khan Academy content is available for free at www.khanacademy.org