While telling almost any story involves words, characters and structure, making a film involves another aspect of storytelling that Pixar thinks a lot about: visual language. Visual language refers to how imagery is used to convey story ideas or meanings. Perspective, color, and shape can all be used to support a story by guiding the audience to see and feel certain things. In this lesson we introduce you to some basic principles of visual language, and you’ll get to apply those principles to your own stories.
Introduction to Visual Language
Activity 1: Lines
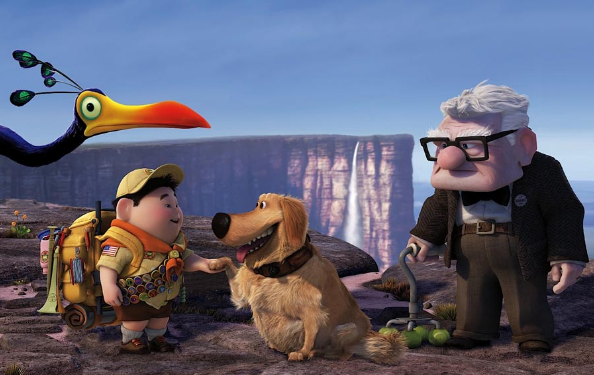
Part A: How is line used to convey meaning and emotion within the frame below? Can you identify the primary direction of lines that direct your eyes to different parts of the frame?
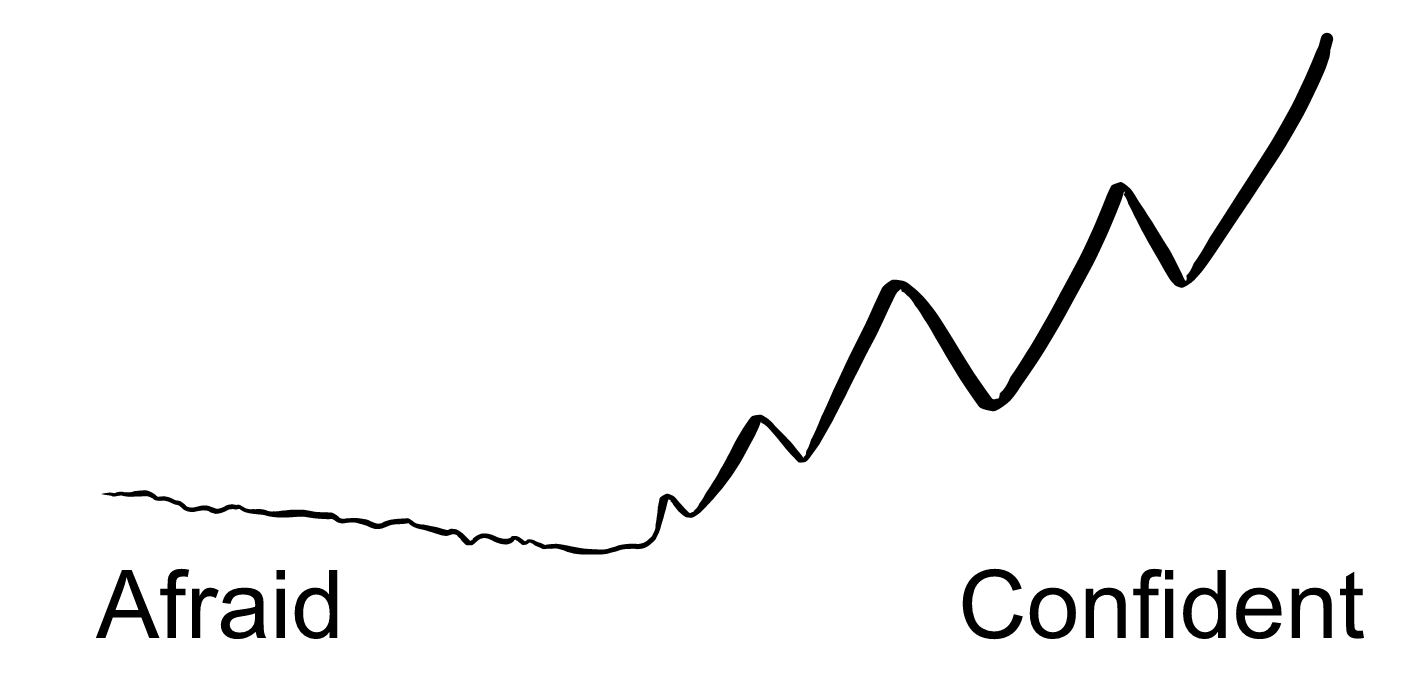
Part B: On a blank sheet of paper write down two different feelings that you’ve had recently (one at the bottom left, and the other at the bottom right). Visually represent the feeling on the left as a line traveling across the paper to the right. Then transform the line as it starts to take on characteristics of the feeling on the right. For example:
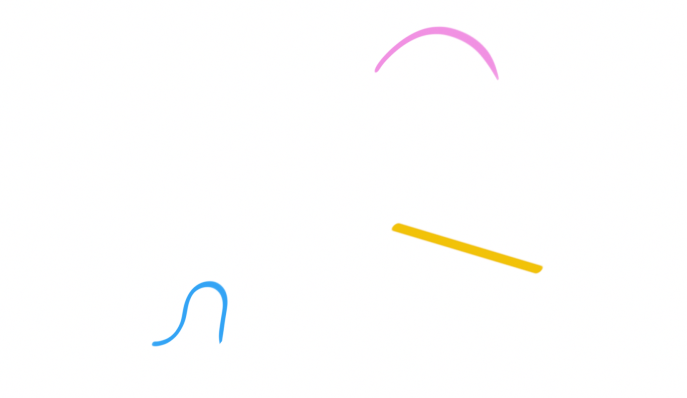
Part C: Create a character with just one line and give it a name and short description. Try creating additional characters using multiple lines.
Go to your Google Drive folder and create a Google Doc to write your ideas and responses.
Shape
Activity 2: Shape
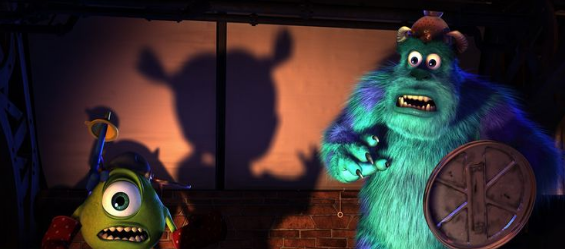
Part A: Study the above image for a few minutes.
- Can you locate the main shapes in this image?
- How does shape influence where you look and what meaning and emotion is conveyed?
Part B: Find a frame from one of your three favorite films. Notice how shapes are used.
- What are the unique characteristics that help establish the mood and story?
- On a piece of paper, draw the composition using the simple shapes. Feel free to overlay each frame and trace on top of it with a highlighter.
Part C: For your own story, identify the main shape for your main character(s).
- What does the shape of the character imply?
- Does their shape change over time?
- Put this character in a scene from your story and try sketching out the composition using simple shapes.
Go to your Google Drive folder and create a Google Doc to write your ideas and responses.
Space
Activity 3: Space
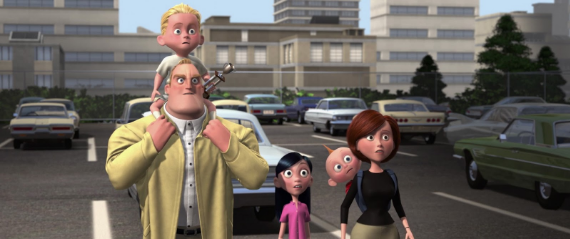
Part A: Study the above image for a few moments and then answer the following questions:
- How is the illusion of depth achieved?
- Are there any objects that show size differences?
- Can you see how shapes and lines contribute to the depth of this scene?
Part B: Try the following:
- On a piece of paper, draw a horizontal line and place an “x” somewhere on it. This will be your vanishing point.
- Now, draw squares of different sizes, some above, below, to the left and right of the vanishing point.
- Using a ruler, connect the corners closest to the vanishing point with straight lines and see if you can establish a sense of depth.
Here is a partially finished example as a reference:
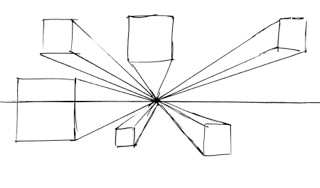
Part C: Try creating an image from your original story that displays the illusion of depth using positioning, weight, location, and size of lines or objects.
Go to your Google Drive folder and create a Google Doc to write your ideas and responses.
Motion
Activity 4: Movement
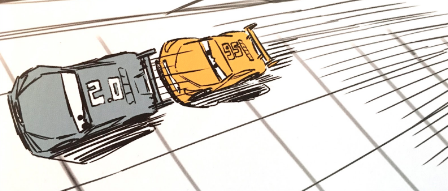

Part A: What kind of movement (motion lines or line of action) is implied in the above images? Compare the role lines play in achieving a sense of movement in both.
Part B:
- On a piece of paper, try drawing motion lines that indicate the speed or direction of a simple shape (for example, a bouncing ball).
- Find a frame from one of your three favorite films which shows movement. On a sheet of paper, swiftly sketch the line(s) of action or motion lines that provide the sense of movement in the image.
Part C:
- Draw a character from your story performing different movements. Use line of action to guide each pose.
- Combine line of action in a character with motion lines to create a scene with lots of movement from your story. Don’t be shy with your use of lines and shapes!
Go to your Google Drive folder and create a Google Doc to write your ideas and responses.
Tone
Activity 5: Tone
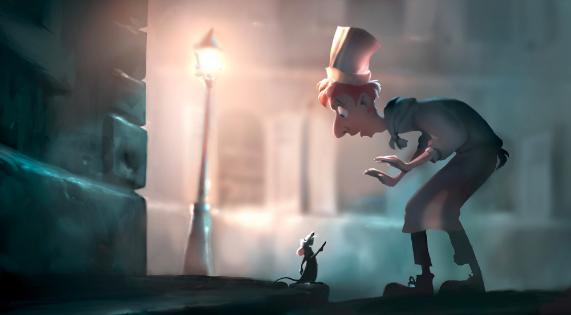
Part A: In the above image, how is tone used to help create emphasis and direct the viewer’s eye?
- What mood is conveyed?
- What kind of contrast is used (low, higher, highest?)
Part B: Draw a row of 7 boxes. At one end, make the box as dark as possible. At the other end, leave the box empty. Fill in the rest of the boxes so that they gradually go from dark to light. You can do this with a pencil, pen, marker, paintbrush or anything else!

Part C: On the sheet of paper you drew your movement lines, try adding shading to show different values of light and dark. Try to create emphasis and help direct your viewer’s eye to the most important element of your scene.
Go to your Google Drive folder and create a Google Doc to write your ideas and responses.
Color
Activity 6: Color
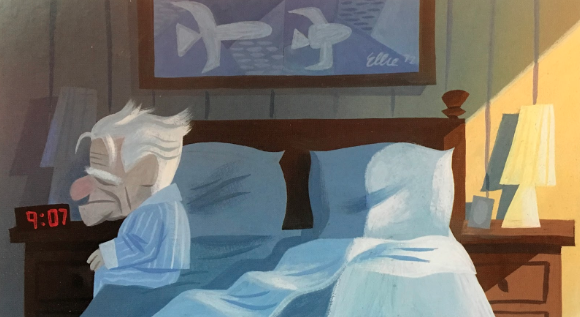
Part A: In the above image, how is color used to help create emphasis and direct the viewer’s eye? What mood or emotion is conveyed? What kind of colors are used (similar, contrasting, complementary?)
Part B: Looking at the frame from one of your favorite films, notice how color influences the emotional impact of the scene.
- With color pencils, pastels, crayons or markers on paper, create a version of this frame using different colors.
- How does this change the meaning of the scene?
Part C: Return to your story spine from the previous lesson. For each beat, compose an image that directs the viewer’s eye, conveys meaning, expresses emotion, and supports your story point. This is where your understanding of visual language can start to shine through!
Go to your Google Drive folder and create a Google Doc to write your ideas and responses.
Advice on Visual Language
Glossary: Visual Language
Here’s a list of definitions introduced during this lesson.
- Beat Boards: are meant to capture beats and convey critical story points
- Color: used to create mood or emotion and to direct the eye by emphasizing different parts of the image
- Complementary Colors: colors that are opposite each other on the color wheel
- Composition: the organization of visual elements in a space
- Concept Art: captures key moments from your film, but the art is usually more polished, done in full color, and meant to express how light and color will be used in each sequence in a film
- Contrast: the difference between neighboring light and dark values
- Contrasting Colors: colors that are furthest apart on the color wheel
- Line: marks that span a distance between two points or the path of a moving point and have thickness, direction, and length
- Linear Perspective: the illusion of space or depth by positioning lines or objects and adjusting weight and size
- Lines of Action: an imaginary line that runs down the spine of a character which indicates the force and movement in that movement; used to imply movement by guiding the pose of the character or object
- Motion Lines: extend from an object along its pathway of motion to make it appear like it’s moving
- Shape: a two-dimensional , enclosed area that makes up the form of an object
- Silhouette: a filled in outline of an object or character
- Speed Lines: a simple way to indicate movement in storyboarding
- Story Boards: quick drawings representing a frame of the film that are put together and played in sequence to visualize the film before animation begins
- Tension Point: point where dark and light values meet and create this energy where the eye is drawn
- Tone: also known as shading; adjustments in lightness and darkness of all the elements in your scene that lead your audience’s eye and create a specific mood
- Vanishing Point: the point on the horizon at which receding parallel lines appear to converge or disappear
- Visually Similar Colors: colors close to one another on the color wheel
* Effective communication among peers is extremely important, and using the correct terminology will help you get your ideas across more effectively. Create a Google Doc in your Google Drive and name it The Art of Storytelling Glossary. Each week copy and paste the new glossary terms into that document and focus on learning those terms the way they’re used in the animation industry.
Modeling a rolling background
Due June 21st by 11:59 pm
When you complete this module’s activities, upload your docs and Cinema 4D files using the link below:
https://www.dropbox.com/request/fwLU1wnXZch6srNf6MBW
All Khan Academy content is available for free at www.khanacademy.org