Final Project – Desk Monitor Stand


Using TinkerCad 3D Modeling, I wanted to create something that was easy to put together, but also super functional. With the monitor stand you’ll be able to look at your computer monitor or your laptop monitor at eye level. This eases the strain that you would put on your eyes, neck, and back. Given that so many are working from home, I thought this would make a great addition to my home office set up.

Using the shelf is great, because you can place your laptop on the desk itself with the shelf over, or you can place it on the shelf leaving the ground space empty for mouse and external keyboard storage. With a large opening at the back, you’ll be able to hide cables that would otherwise make your setup look cluttered. The material would be wood or corkboard, each piece would either a circular cut out or a circular stick sticking out. This is used to ensure the piece will hold the pieces together. You can also use a wood glue to keep it stable for many years to come allowing for continued use.

Monitor Stand

A description of your project. What will it do?

The monitor stand is exactly what it is, it’s meant to raise your monitor up to eye level to prevent slouching. It will be better for individuals with bad backs or neck pain.

What will it look like?

I imagine this to be made from a wood/cork board for appearance and easy assembly. The length would be 15 inches long with a depth of 8 inches and a height of 5 inches.

Who is the target audience for your project?

The audience will be individuals who have a second monitor who works from home or in the office and need the additional raised support.

What technologies does your project incorporate?

Technologies will include Tinkercad using a laser printer. It will also include a light source on the shelf.

Describe your step-by-step plan for the completion of this project. Obviously, some plan is theoretical now since we don’t have access to the equipment. How do you think you would have done it if you did have access?

First step is create the top board on which the monitor will stand. This portion has the most points for assembly. Second will be the legs of the for the board which includes 2 longer legs, followed by 2 smaller legs at the back with a large gap for space for cords. 3rd will be shelf within the unit that will serve as a space for either paper or additional storage. You can also store up to a 13-inch laptop underneath to enable a cleaner workspace on the desktop.


Include sketches and diagrams.

the Top

Museum Assignment, the Pink Flamingo

What is the name of the object?

Pink Flamingo

Describe what the object looks like. Who designed it?

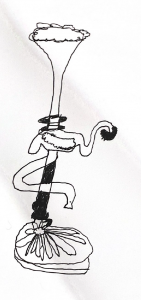
Given its grand look, it might something you see in Marie Antoinette holding while she sips away the French fortunes on Dom or Bollinger. The object is a goblet, but if you look closely, you might see a flower, with a small flamingo using it to lean against, perhaps even hide among the flowers to camouflage itself.

Is it one of a kind or a limited edition?

One of a kind.

Is the manufacturer listed?

No, it was designed and made by

The designer is Fritz Dreisbach

What is this object supposed to do?

The object is meant to be a decoration. However, if need be, you could potentially use this to hold liquids and serve it.

Is the function of the object clear from how it looks?

In terms of its function, I believe it’s clear because it’s a goblet, but goblets can be used for more than one purpose depending on the user rather than the artist.

Do you think this object functions successfully at what it is supposed to do? Why do you think that?

I think this item does function well. Although it’s meant to be something to preserve, I think the designer did a nice job of creating something that had multiple uses.


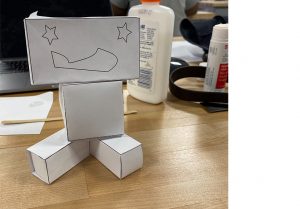
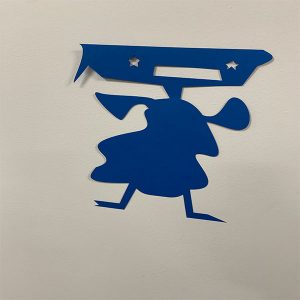
Silhouette to Cardboard

This project was a bit difficult because I wasn’t able to see the final version not being in our lab during the current pandemic.

Moving the original sketch to the paper version was really great and the easiest part of the project.

When I moved to Vinyl I encountered some measuring issues but was able to correct over time with more paper versions to come out with a better balance in the final cut of Vinyl. Our school Closed, so I couldn’t put the vinyl portion together. 


I didn’t make it to Cardboard because the makerspace lab ended up closing with our school.