Planning a character for animation is different than sketching for illustration or other static purposes. A character that looks great on paper may not be easy or fun to animate. A good understanding of Adobe Animate’s tools and workflow can help a lot when designing for animation. This tutorial will show you how to translate a simple character into layers and how to use nested symbols/loops and tweens to animate it.
You can watch the finished example below and download the .fla file here:
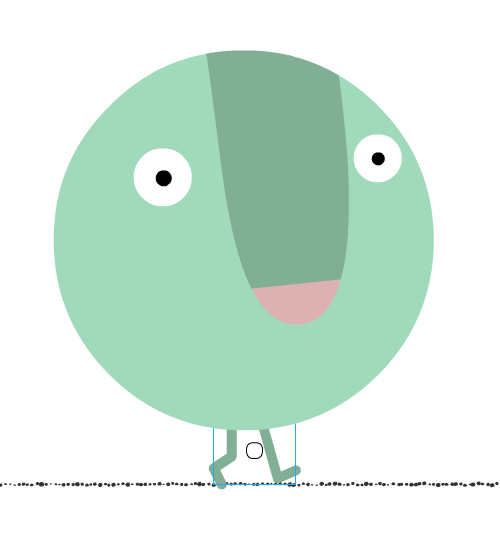
We will use this simple sketch as an example:

Create a new project
Launch Adobe Animate and create a new document with the following settings:
- Width: 1920px | Height: 1080px
- Ruler units: Pixels
- 24 fps
- Background color: White
Save and name your document by going to File > Save As…
Dividing the elements into separate layers
We want to place each element of our animation that will move independently on a separate layer. In this case, we’ll create 3 layers:
- ground
- legs
- head
The order of the layers is important (although it can always be changed later): the head should be over the legs and the legs over the ground.
Let’s also add some frames for us to play with:
- Select frame 120 for each of the layer (hold Shift)and insert frames (F5)

Defining the ground
Let’s define the ground our character is going to walk on:
- Go to frame 1 and select the ground layer
- Select the line tool, set the Stroke to the color of your choice and click and drag from the left to THE right side of the stage (around 3/4 down). You can change the weight, style and color of the stroke by selecting it and changing the Fill and Stroke options in the Properties window.
- Lock the layer

Drawing the head
In this case, the head is a simple ellipse:
- Select frame 1 on the head layer.
- Select the ellipse tool. Set its Stroke to none and its Fill to the color of your choice.
- Hold Shift and click and drag to create your head (anywhere on the stage will do for now).

Adding static details
Since the nose will not change or move independently from the head, we will draw it on the same layer:
- Make sure you are still on frame 1 of the head layer
- Select the Pen tool. Set its Stroke to a noticeable color (i.e: red) and its Fill to none. Don’t worry about clashing colors – we are just outlining the shape of the nose and will eventually get rid of the stroke.
- Draw the outline of your nose.
- Select the Bucket tool. Set the Stroke to noneand the Fill to the color you want the nose to be. Click inside the nose shape to Fill it.
- Select the outline and hit the deletekey to remove it.

You can use this technique to add more details and shadows. Once you are done drawing the head, all the shapes comprising it can be merged into a Symbol. This will also allow us to tween the position of the head on the Stage later on (since only Symbols can be tweened):
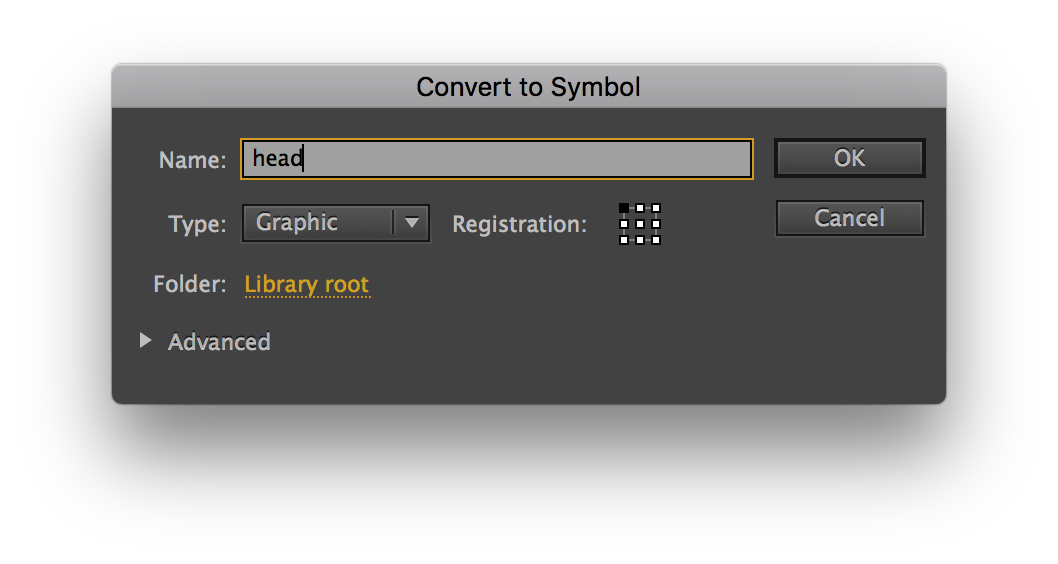
- Select all the elements you’ve drawn on the head layer and go to Modify > Convert to Symbol.
- Name the Symbol “head” and set its type to Graphic.

Creating the eyes
While the eyes are part of the head (they will move along with it as the character travels along the Stage), we want them to blink in a looping fashion. To do so, we will draw and animate them within the head Symbol (this is sometimes referred to as a “nesting” Symbols):
- Double click on the head Symbol. Notice that we’ve left the main Timeline: Look at the name of the Timeline on the top left of the stage and the number of frames (1 vs. 120).

- Rename the Layer_1 “head”
- Create 2 new layers: one called “eyes” and one called “pupils”

- Select frame 1 on the eyes layer.
- Select the Ellipse tool. Set its Stroke to noneand its Fill to white. Click and drag to draw your eyes.
- Select frame 1 on the pupils layer.
- Select the Ellipse tool. Set its Stroke to noneand its Fill to black. Click and drag to draw your pupils.

- Let’s add some frames to all the layers: Select frame 25 (the approximate length of my blinking loop) on all three and click F5.
Making the eyes blink
We’re now ready to make the eyes blink. They’ll stay wide open for a couple of frames, close quickly and completely, and then re-open :
- Select frame 7 on the eyes and pupils layers and add a Keyframe (F6)
- Select the Free Transform tool (Q) and squash the eyes layer a bit. (The pupils shape don’t change when eyes close.) It’s a good idea to turn on the Onion Skin tool to see what the previous stage of the animation was like (click on the icon at the bottom of the Timeline or Ship + Option + O)

- Select frame 9 on the eyes and pupils layers and add a Keyframe (F6)
- Select the Free Transform tool and squash the eyes further (until they’re almost closed).
- We have to fix the pupils: Go to frame 7 and re-center them on the eyes with your Move tool. Do the same for frame 9.
- We’ll copy the last Keyframe to the point where the character starts reopening its eyes: Hold the altkey on Keyframe 9 of both the eyes and pupils layer and click and drag them to frame 14.
- We want the eyes to be completely closed between frame 9 and 14: We’ll select all the frames on both the pupils and eyes layers and insert Blank Keyframes (F7)
- Let’s draw closed eyelids on these frames:
- Go to frame 10 of the eyes layer. Select the pen tool. Set the Stroke to your desired color and the Fill to noneand draw 2 arcs to define the eyelids.
- Copy this frame over to frames 11, 12 and 13 (alt+ click and drag)
- Let’s finish the loop:
- Copy frame 7 of the pupilsand eyeslayers to frame 15
- Copy frame 1 of the pupilsand eyeslayers to frame 16
- Copy frame 7 of the pupilsand eyeslayers to frame 15

- Now let’s preview our blinking eyes loop:
- Turn off the Onion Skin
- Turn on the Loop icon (to the left of the Onion Skin) and make sure the highlighted portion of the Timeline includes all the frames before pressing Play.

- Now if we go back to Scene 1 (by clicking on its name at the top of the Window), when we press Play we can see that the blink cycle repeats itself over and over again until the main Timeline is over. (Make sure to turn the Loop icon off before previewing the main Timeline.
Walk Cycle
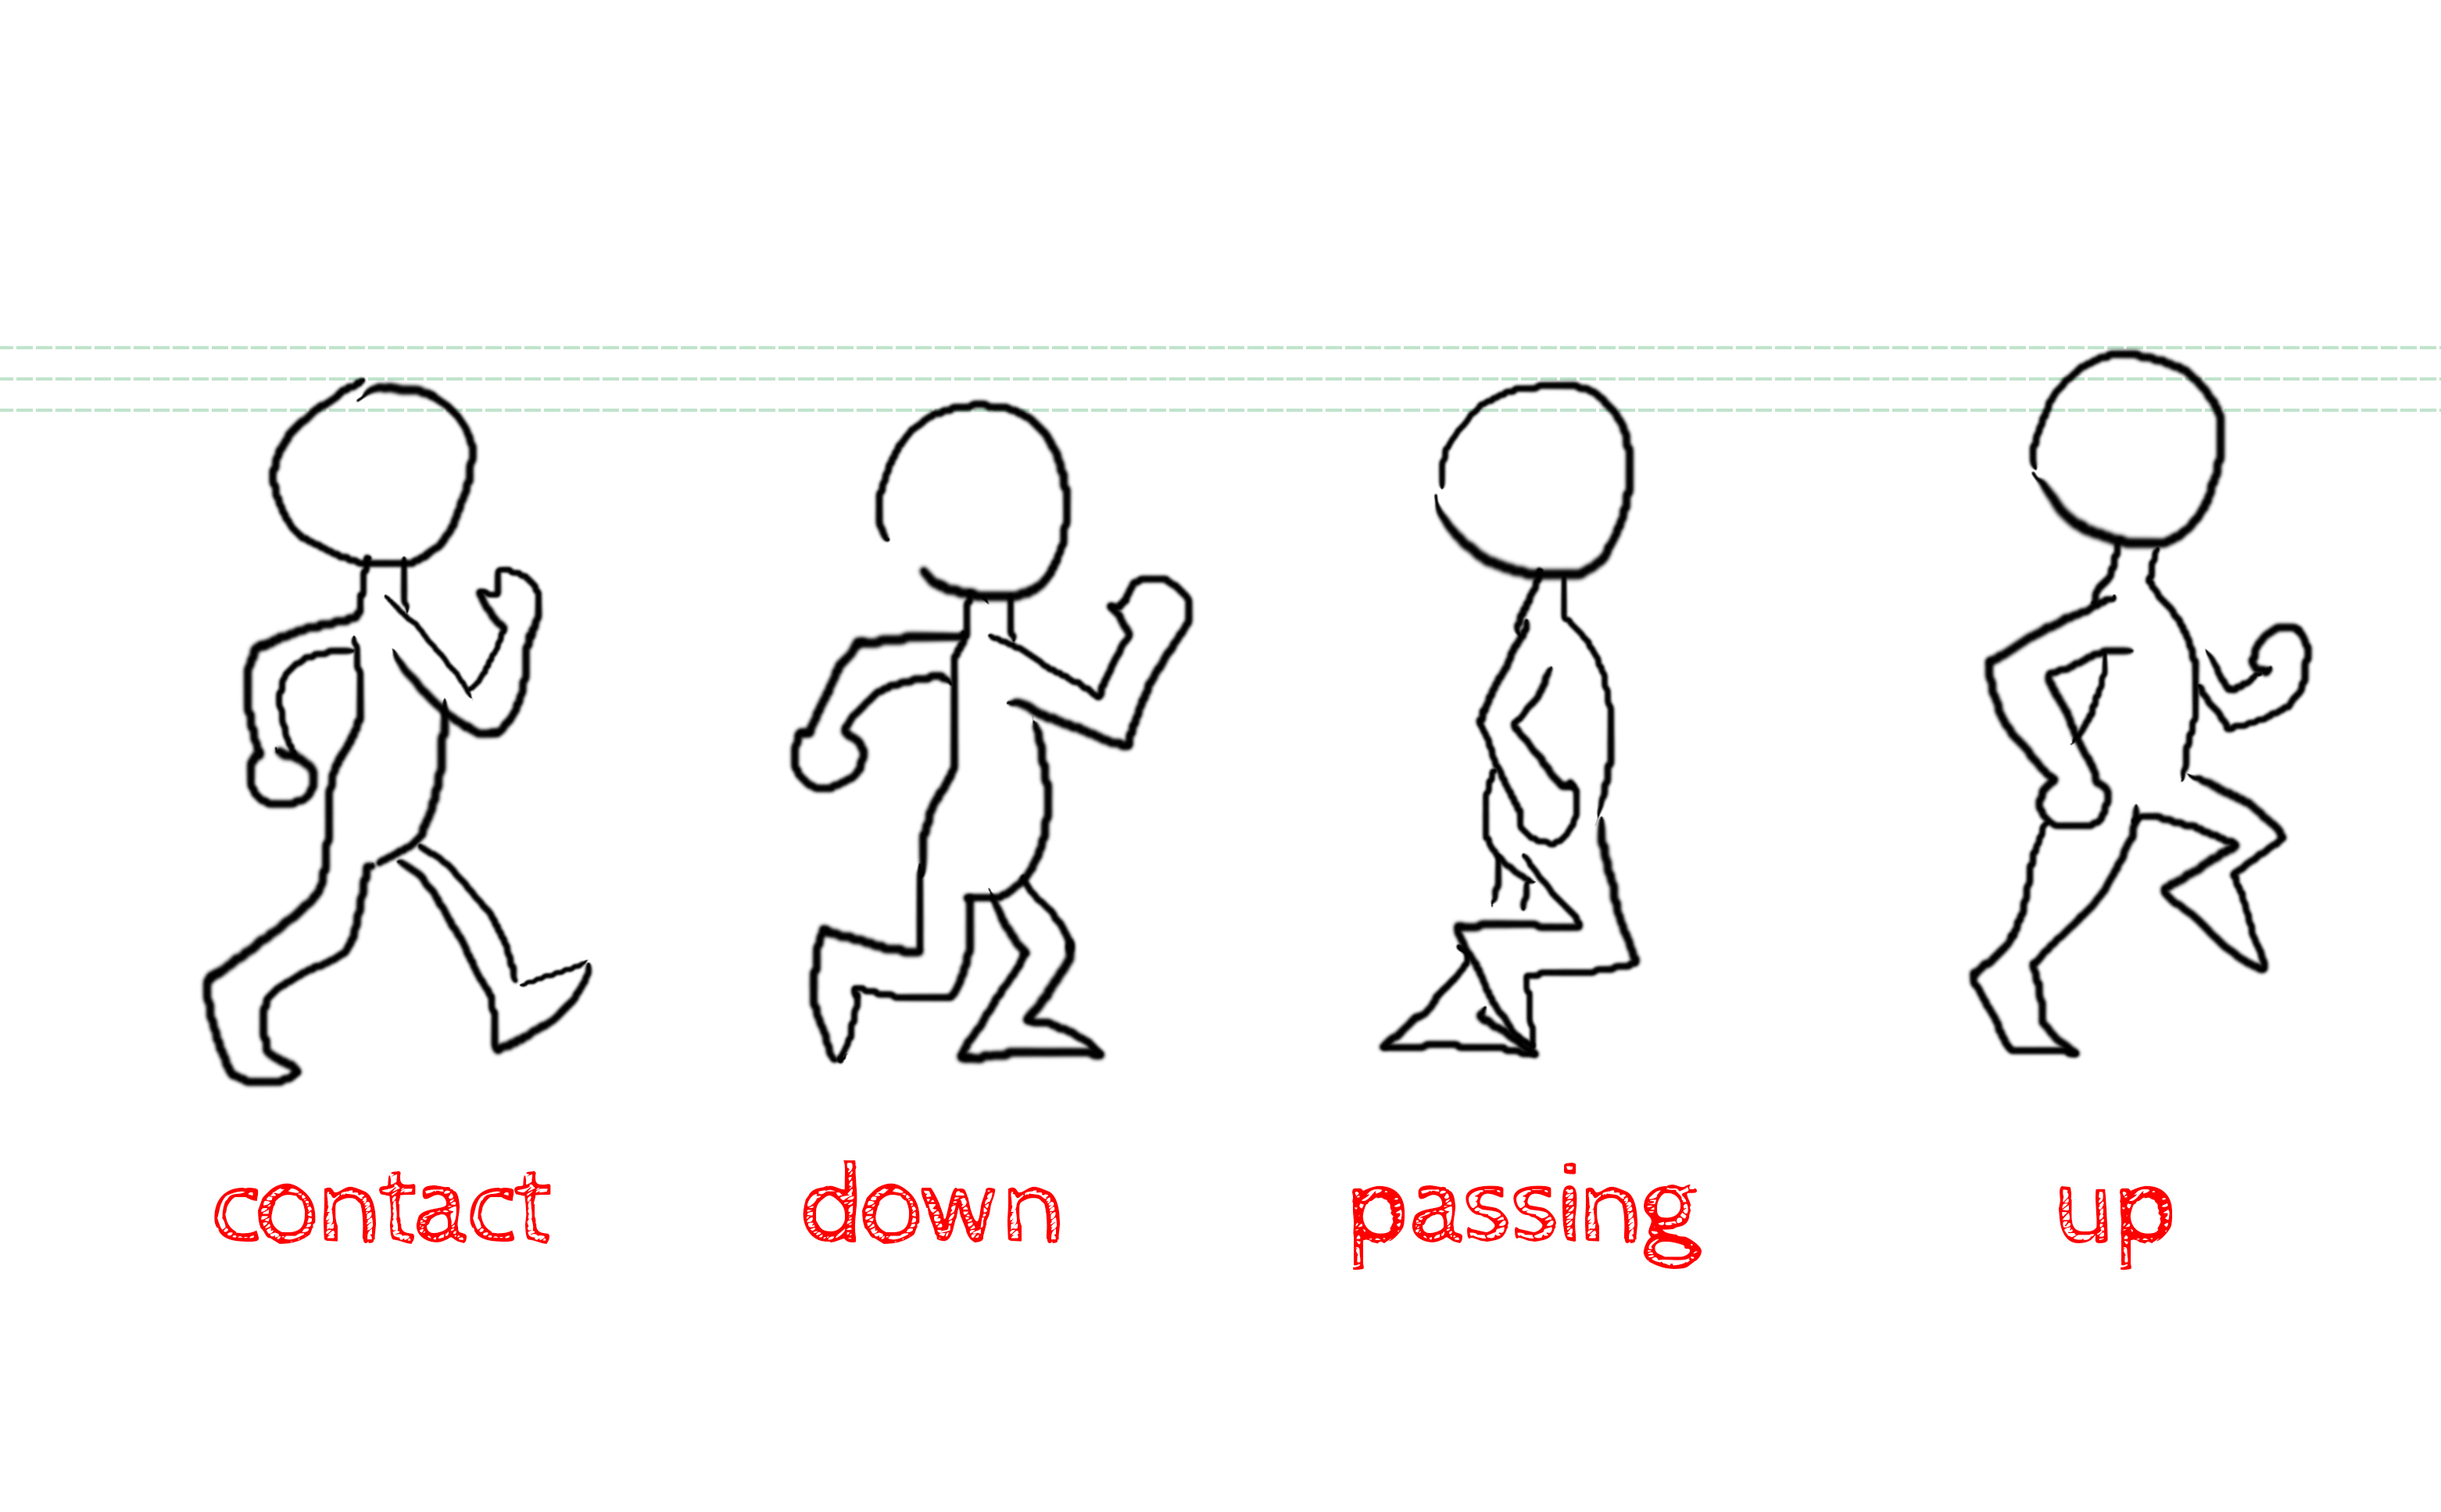
Let’s now tackle the walk cycle. Animating a walking character can be challenging at first. It’s a good idea to use a reference image breaking down the different steps of a walk cycle. I’ve included a simplified one below, but a Google search will result in plenty of other images (including four-legged creatures, and different “moods” – i.e: excited, confident, sad etc.)

Positioning the character
First, let’s go to frame 1 and position the head element where we want it to be relative to the ground. In this case, I want my character to have rather short legs, so I’ll place the rest of his body fairly close to the ground.
Creating the “legs” Symbol
We already have a layer called legs, but it is currently empty. Let’s draw the initial position of the walk cycle there and turn it into a Symbol with its own Timeline:
- Lock the ground and head layers.
- Go to frame 1 of the legs layer
- Select the Line tool. Set the Stroke color to what you wish to use for the legs and the Stroke Weight to something visible and that suits the character’s design.
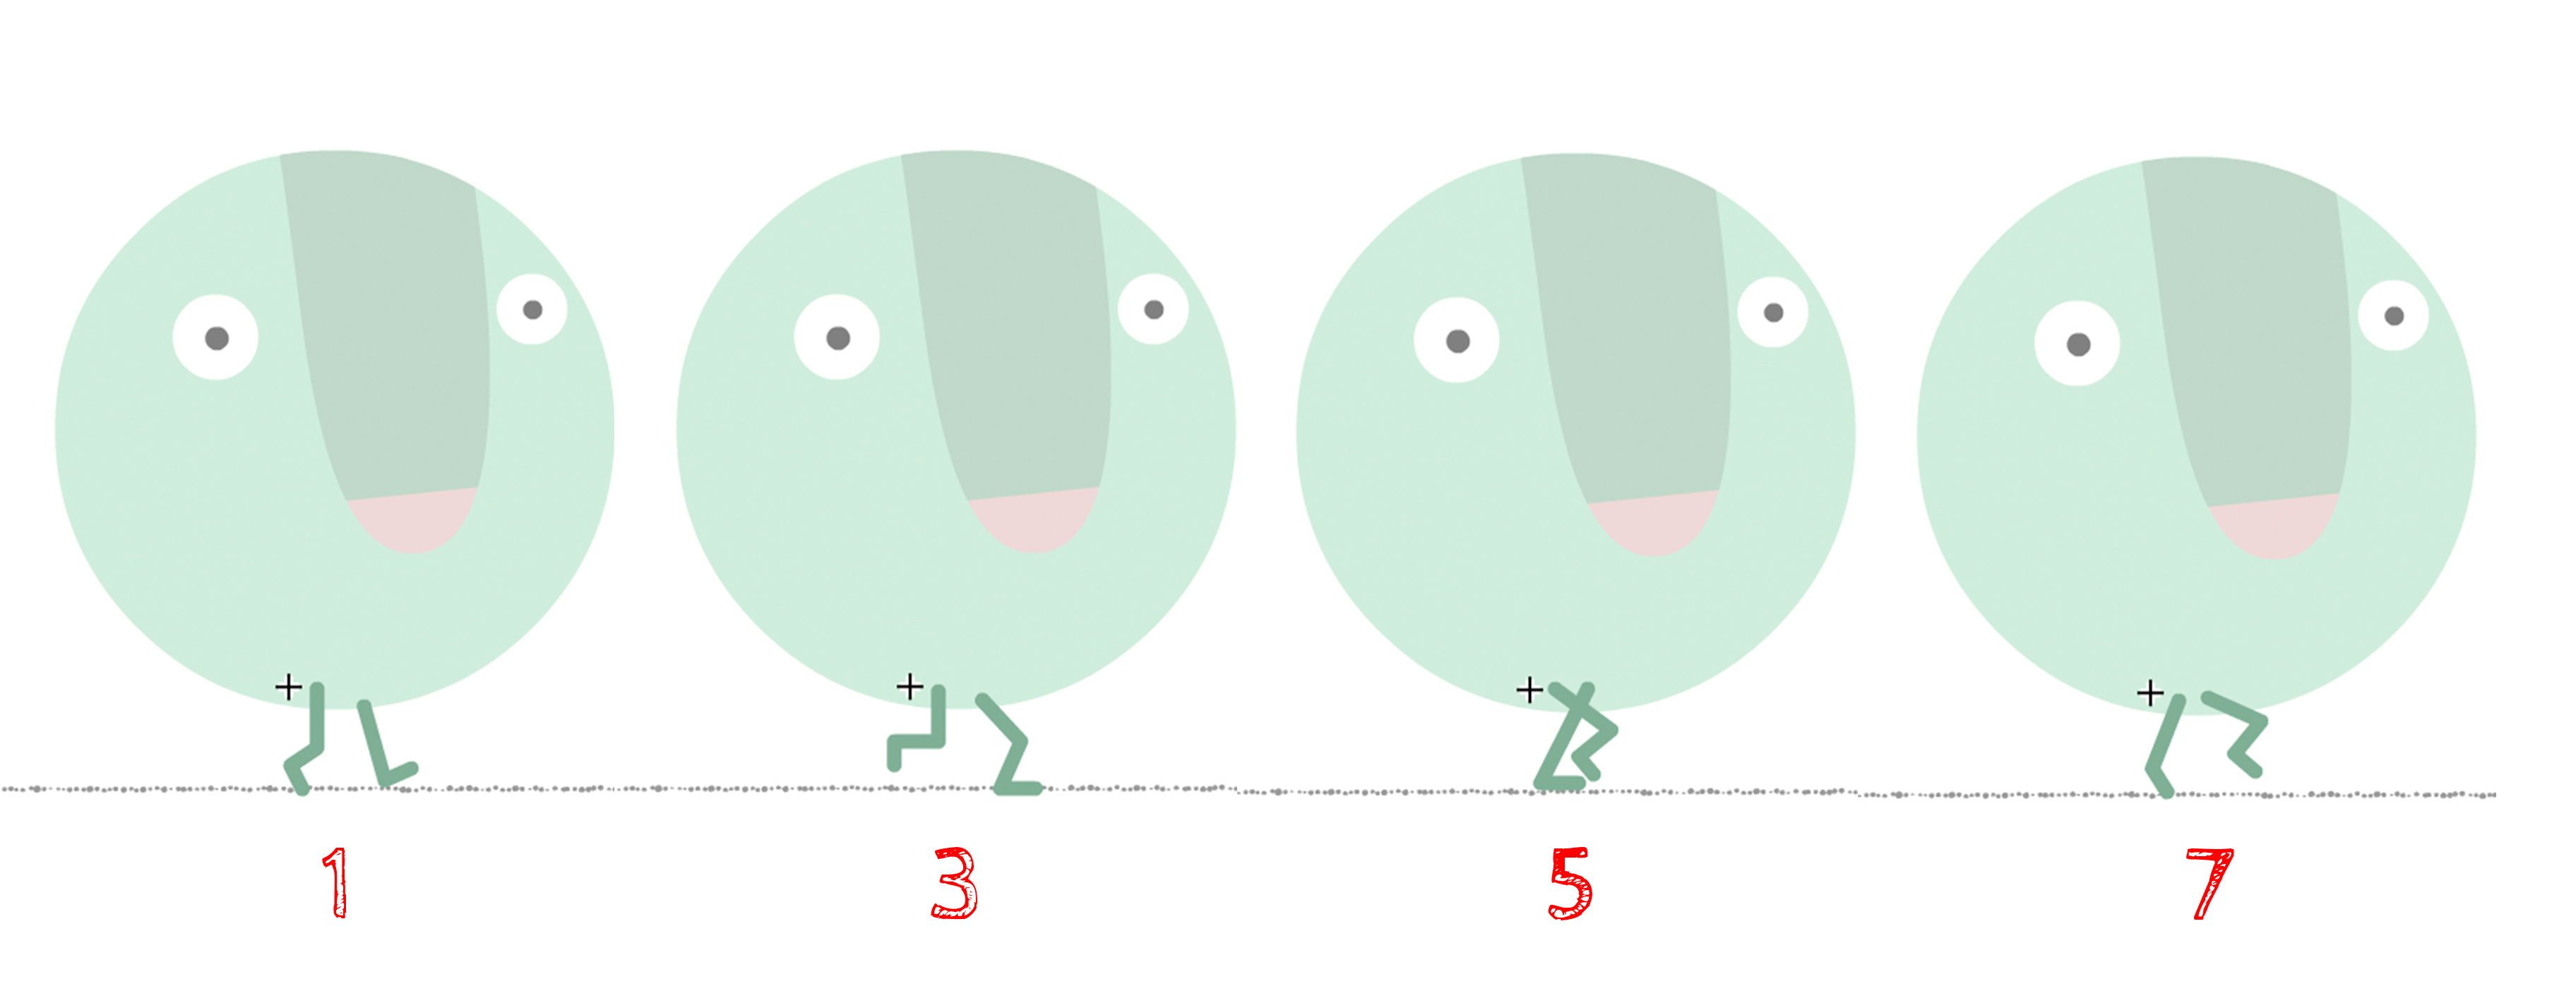
- Draw the first position from the reference image – in this case, the contact pose – wherein both feet touch the ground.
- Select everything you’ve just drawn on the legs layer. Go to Modify > Convert to Symbol. Name it “legs” and set its Type to Graphic.

Creating the walk cycle
Just like the blink cycle was on the head Timeline, the walk cycle will be created within the legs Timeline. We will use a slightly different technique to draw the different position though – we’ll redraw each one from scratch (rather than using the Free Transform tool):
- Double-click on the legs to enter the Symbol’s Timeline.
- Rename “Layer_1” “walkCycle”
- Go to frame 3 and insert a Blank Keyframe (F7)
- Turn on the Onion Skin tool
- Select your Line tool and draw the second position from the reference
- Repeat for each pose of your reference, spacing each new Keyframe 2 frames away from the previous one.
- Add a regular Frame (F5) After the last Keyframe so that the loop runs smoothly.


- Now let’s preview our walk cycle loop:
- Turn off the Onion Skin
- Turn on the Loop icon (to the left of the Onion Skin) and make sure the highlighted portion of the Timeline includes all the frames before pressing Play.
- We can always adjust the timing by adding or removing Frames between Keyframes.
- Now if we go back to Scene 1 (by clicking on its name at the top of the Window), when we press Play we can see that the walk AND blink cycles repeat themsleves over and over again until the main Timeline is over. (Make sure to turn the Loop icon off before previewing the main Timeline).
Moving the head and legs across the Stage
Now that our walk cycle is ready, we can use a Classic Tween to move the head and legs layers across the screen :
- Select frame 1 of the head and legs layer (unlock them if necessary).
- Position both elements where you want the character to be at the beginning of the animation. You can hold Shiftto constrain the movement to a single axis.

- Select the last frame of your animation (in this example, 120) of the head and legs layers and add a Keyframe (F6).
- Position the two layers where you want them to be at the end of your animation.

- Select a frame between the two sets of Keyframes on both layer. Right-click and select Create Classic Tween

- Preview your animation and add/remove frames to adjust the timing if necessary.
Bouncing the head
If you look closely at the walk cycle reference image (see above), you will notice that the head of the character is lower on certain poses. We can make our animation a little more dynamic by bobbing the head of our character up and down as it moves forward:
- In the main Timeline, find the first frame with the “down” pose (wherein both knees are bent). Select that frame on the head layer and add a Keyframe (F6).
- Move the head down a few pixels with the down arrow key.
- Find the first frame with the “up” pose (wherein both legs are at there most upward position). Select that frame on the head layer and add a Keyframe (F6).
- Move the head back up to its original position.
- Repeat for every “up” and “down” pose along the main Timeline.

- Preview your animation