
This post covers how to get your site in the web using Netlify’s servers.
Terminology
Some words you might not know
- Netlify: Netlify is a hosting platform specializing in hosting projects build with workflows like ours (static site generator and GitHub).
- They have a generous free pricing tier that is great for the kind of personal projects we’re doing in class.
- Deploy: This is the process of moving your files from your local dev environment (your computer and GitHub Repository) to a web site everyone in the world can see.
Video Walkthrough
This is a screencast of me going through the steps below: Screencast of Deploy to Netlify
Steps to Deploy to Netlify
- Before you start make sure:
- Setup your GitHub repository through Classroom
- AND Accepted Membership in our Organization (more info on above link).
- Have pushed your latest changes to GitHub (no changes showing as uncommitted in Codespace or local dev environment).
- Sign up for Netlify using your GitHub account
- See the Signup Post for more details
- After you complete your info it should ask you to Deploy your first project. Click on Import from Git

- If you don’t see that and are on the Netlify start Page Click the “New site from Git” button
- Select “Github” as your Git provider
- Authorize Netlify on Github (you should be taken there automatically)
- Select your Eleventy repository
- Change to the Stein-BMCC organization. If you didn’t accept membership before on GitHub then this won’t be visible
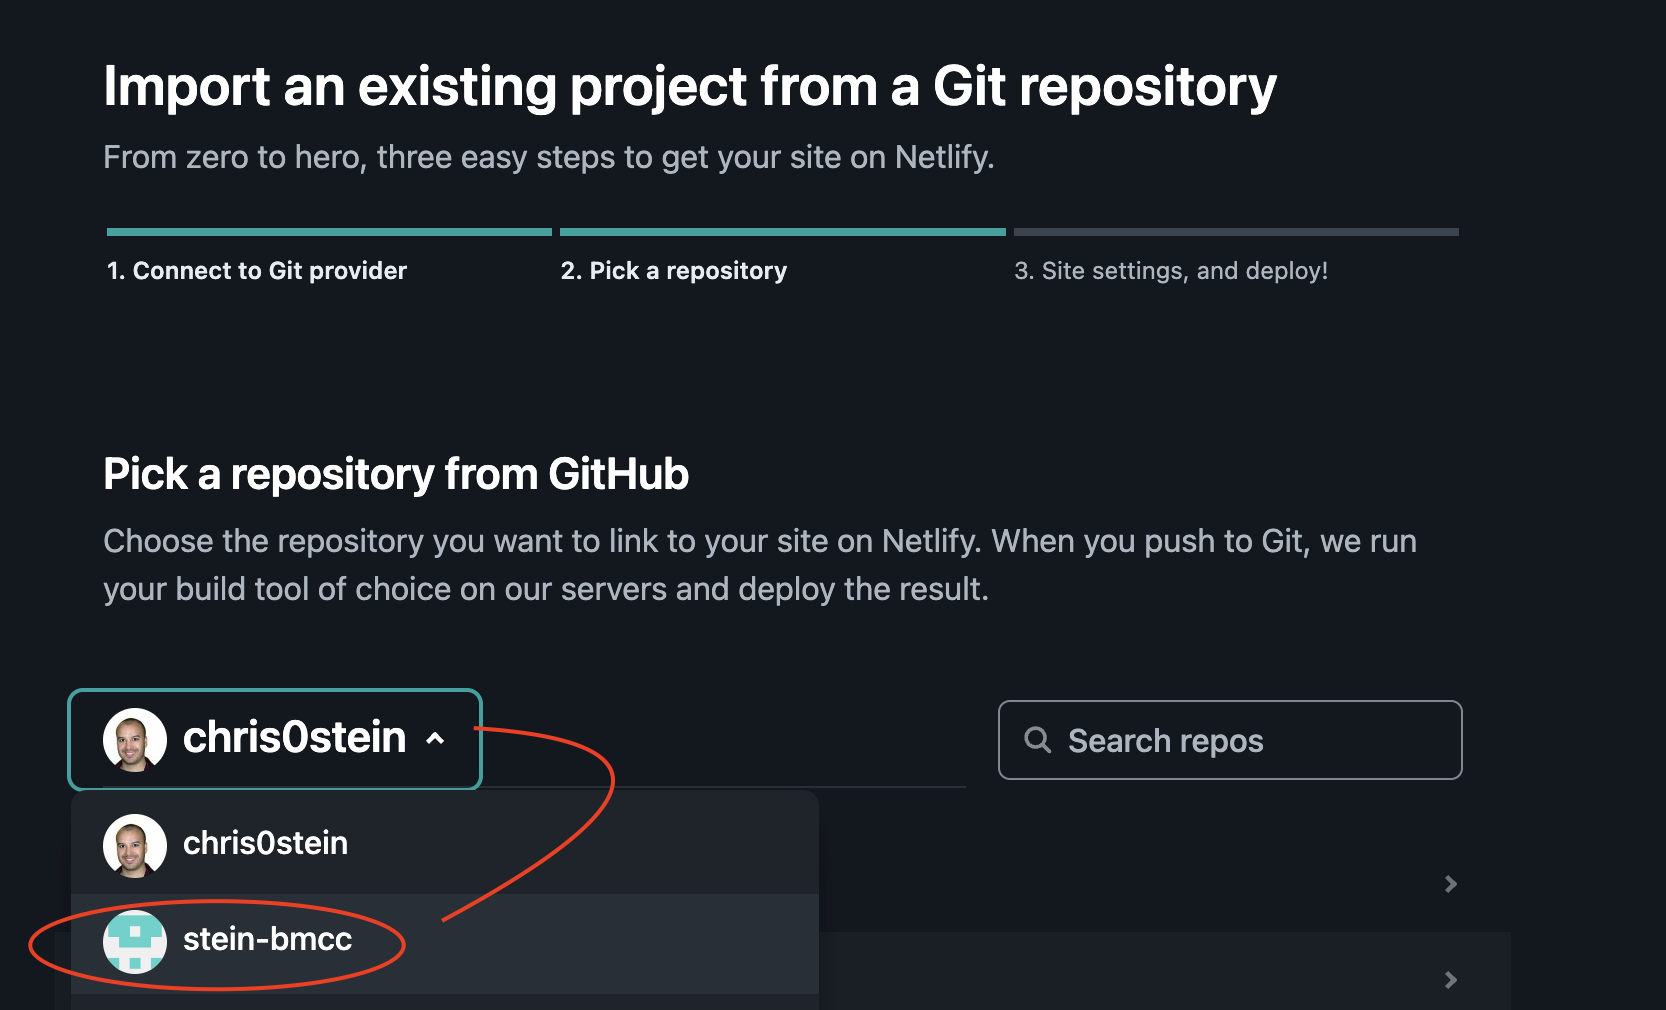
- Type in your GitHub username in the Search Repos box and press return/enter key
- Select your eleventy-personal-site (note you won’t see this if you didn’t start the site in GitHub Classroom.
- Change the Publish Directory to Dist. Settings should look as follows:
- Branch to deploy: main
- Base Directory: leave this blank
- Build Command: npm run build
- Publish directory: dist
- Click the “Deploy site” button

It will go to a new screen and show that your site deploy is in process. When it’s done you will see a check mark next to step 1 on that screen.
If you get an error on your deploy, let me know and we’ll work through it.
You may have to refresh your screen if nothing changes in a couple of minutes.
Optional – Change your site name
by default your url will be something like https://wierd-words-12dsfdds.netlify.app You can change the front part so it is more like my-project.netlify.app.
- Click the “Site settings” button
- Click the “Change site name” button
- Enter the name you want (it will be the part before .netlify.app). Remember that it can not have spaces in the name.
- Click the “Save” button
Other Tutorials
Here are links to some other people going over Deploying to Netlify. They don’t take into account that your site is in an organization like in our class, but the general idea is the same.
2 comments