
This post covers how to get your site in the web using Netlify’s servers.
TERMINOLOGY
Some words you might not know
- Netlify: Netlify is a hosting platform specializing in hosting projects build with workflows like ours (static site generator and GitHub).
- They have a generous free pricing tier that is great for the kind of personal projects we’re doing in class.
- Deploy: This is the process of moving your files from your local dev environment (your computer and GitHub Repository) to a web site everyone in the world can see.
STEPS TO DEPLOY TO NETLIFY
- Before you start make sure:
- Setup your GitHub repository through Classroom
- AND Accepted Membership in our Organization (more info on above link).
- Have pushed your latest changes to GitHub (no changes showing as uncommitted in Codespace or local dev environment).
- Sign up for Netlify using your GitHub account
- After you complete your info it should ask you to Deploy your first project. Click on Import from Git

- If you don’t see that and are on the Netlify start Page Click the “New site from Git” button
- If you don’t see that either click Sites > Add New Site > Import Existing Project
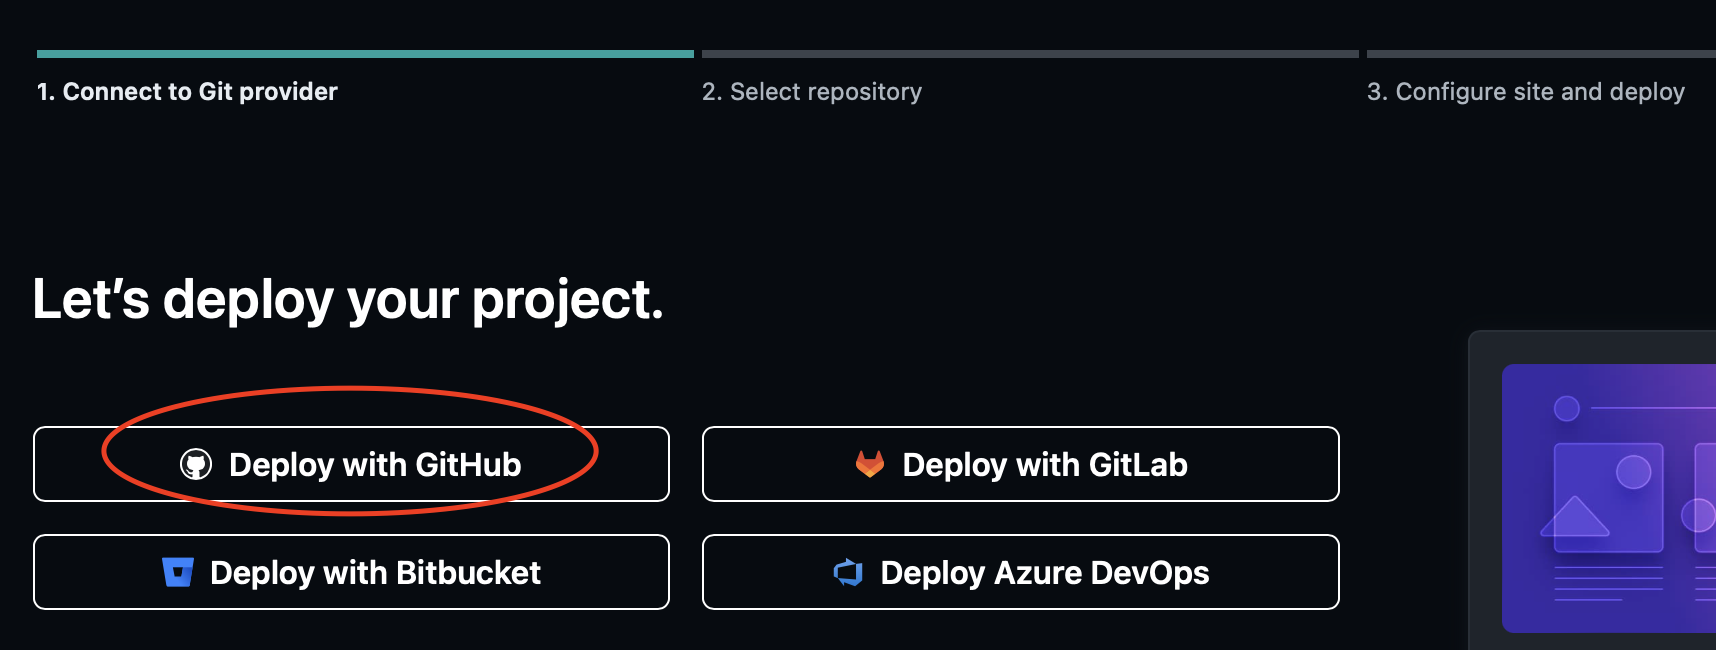
- Select “Deploy with GitHub” button
- Authorize Netlify on Github (you should be taken there automatically)
- Select your Portfolio repository on stein-bmcc
- Change to the Stein-BMCC organization. If you didn’t accept membership before on GitHub then this won’t be visible
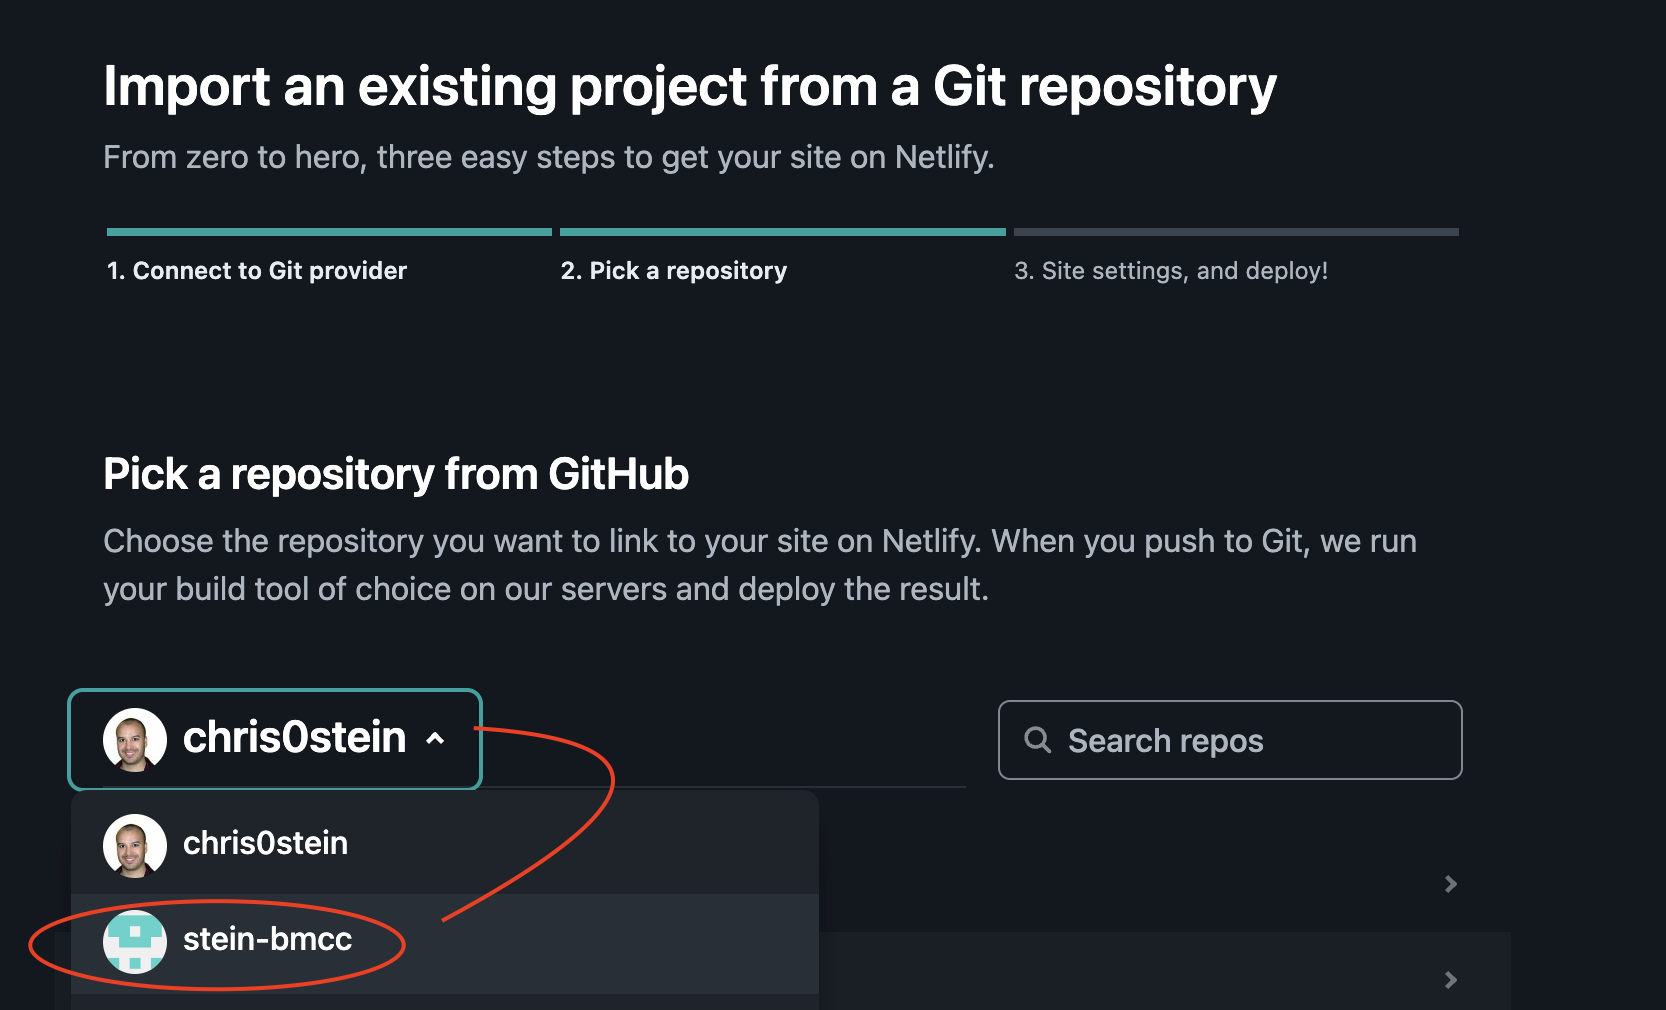
- Type in your GitHub username in the Search Repos box and press return/enter key
- Select your eleventy-personal-site (note you won’t see this if you didn’t start the site in GitHub Classroom.

- Change the Publish Directory to Dist. Settings should look as follows (things in bold MUST be entered exactly):
- Site Name: Choose a name for your site. This has to be unique for ALL Netlify users so it may take a few tries. If you don’t put anything here then a random name will be chosen for you.
- It will end up being https://sitename.netlify.app
- Branch to deploy: main
- Base Directory: leave this blank
- Build Command: npm run build
- Publish directory: _site
- Site Name: Choose a name for your site. This has to be unique for ALL Netlify users so it may take a few tries. If you don’t put anything here then a random name will be chosen for you.
- Click the “Deploy” button
It will go to a new screen and show that your site deploy is in process. When it’s done you will see a check mark next to step 1 on that screen.
If you get an error on your deploy, let me know and we’ll work through it.
You may have to refresh your screen if nothing changes in a couple of minutes.
Optional – Change your site name
If you did not select a site name above, then your default your url will be something like https://wierd-words-12dsfdds.netlify.app You can change the front part so it is more like my-project.netlify.app.
- Click the “Site settings” button
- Click the “Change site name” button
- Enter the name you want (it will be the part before .netlify.app). Remember that it can not have spaces in the name.
- Click the “Save” button