Composite images are images you make by combining multiple images.
There are many ways to combine images in Photoshop but we will focus on a few techniques and tools that will help you.
- Selection
- Layer Masks
- Blend Mode
Hands-on Tutorials

Photoshop has a number of built-in tutorials that help you learn how to do things. The Hands-on tutorials are nice because they literally guide you through what to click on and provide the source images so it’s easier to follow along. To find them click Help > Hands-on Tutorials
Here are a few we will look at. If we don’t have time to go through all of them, then you can do them on your own.
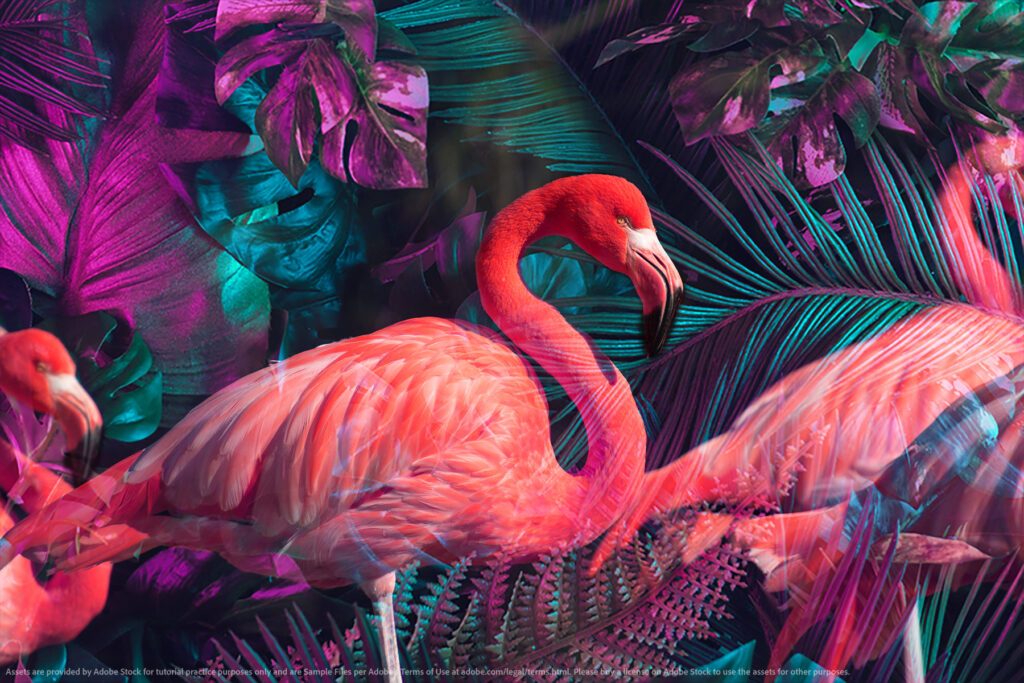

Combine Images with Blend Modes
Setting the Blend mode for a layer allows two images to blend together. Here Screen blend mode is used. This tutorial also uses a Hue/Saturation Adjustment Layer to make the colors pop.
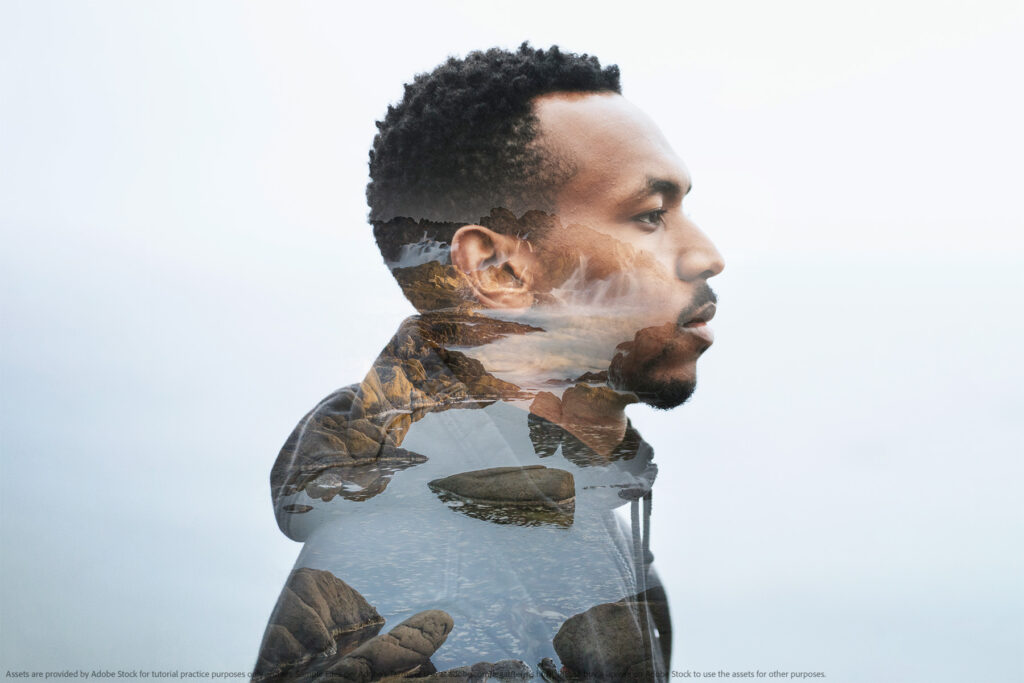
Make a Double Exposure
This is very similar to the previous hands-on and uses blend modes as well. This time we erase what’s outside of the base image. This technique is also used in video as in the True Detective Intro seen below.

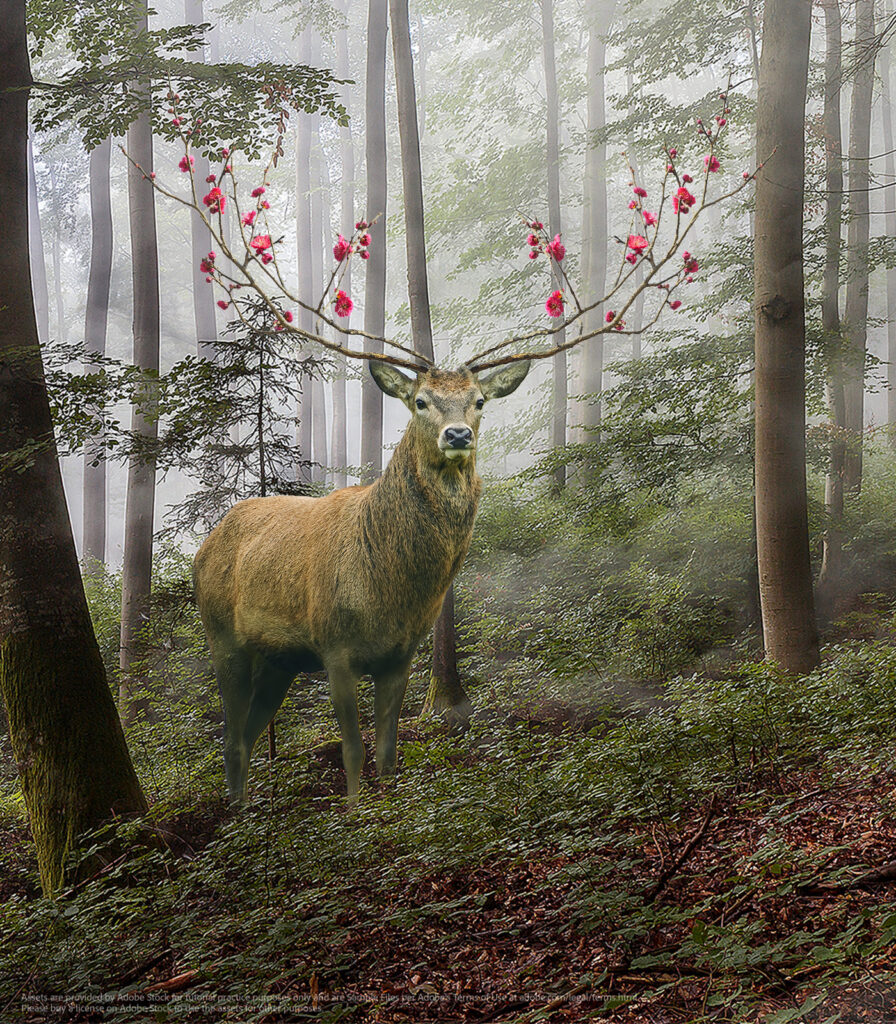
Combine Images to Create a Composite with Layer Masks
In this hands-on three images (deer, forest, branches) are combined to place the deer in the forest and give it branches instead of antlers.
In this tutorial you learn to use brushes to adjust what is in or out of the mask. It also shows using Select > Color Range with inverse.
There is only one branch image which you duplicate and then Transform > Flip Horizontal to get the second one.

Selecting, Masking and Copying
Airplane
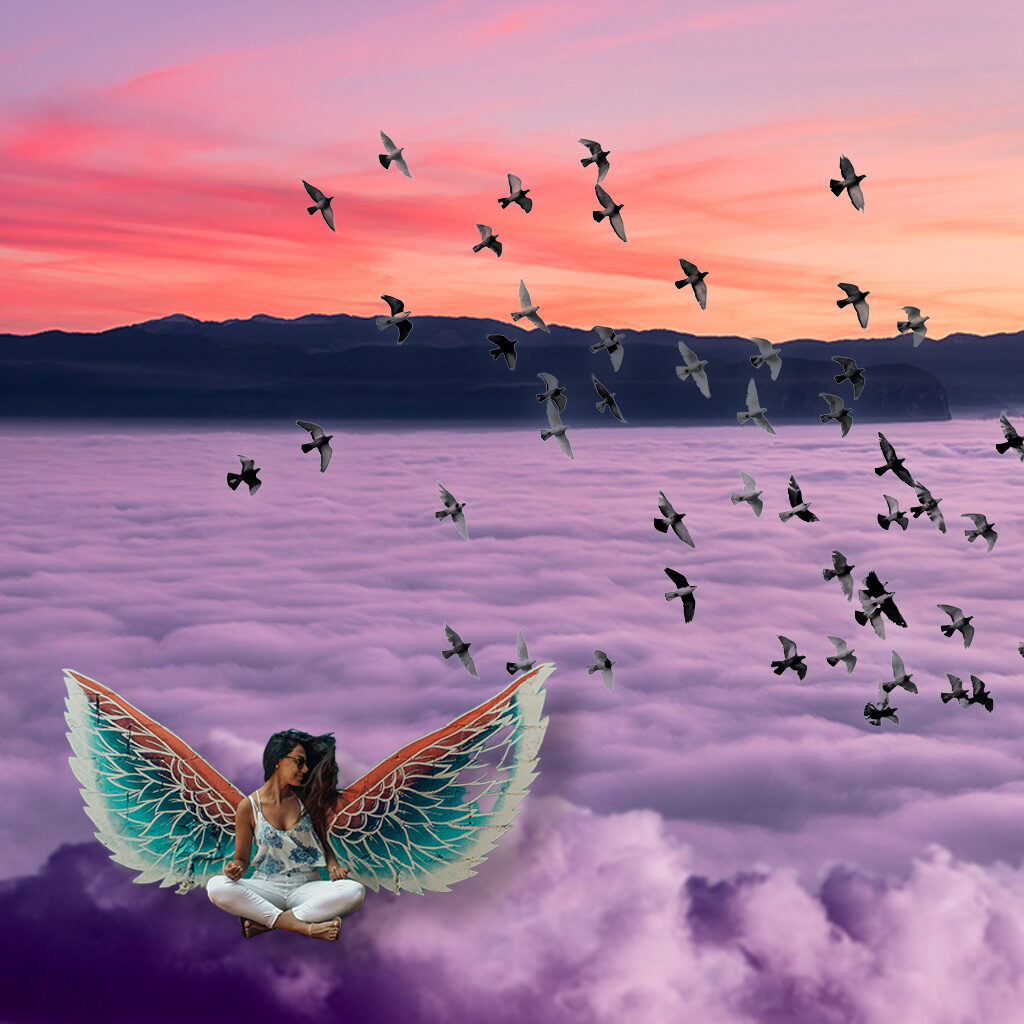
This image was created from four Unsplash images:
Images used
Winged Woman photo by DESIGNECOLOGIST on Unsplash
Clouds and Mountains photo by Ales Krivec on Unsplash
Birds photo by Mehdi Sepehri on Unsplash
Cloud photo by Wolf Zimmermann on Unsplash
It’s good to experiment with different ways of selecting items in order to be able to composite them together. Most of the time there is a way to get Photoshop to do most of the work for you.
Selecting
To select the woman with wings I used Select > Subject. I was moving fast so I didn’t notice that on the right some of the wing was not selected so now you can see clouds behind it. I could go back in and add to the election by choosing a selection tool (Rectangular Marqee, Lasso etc) and then hold down Shift (a + sign appears by the pointer) to add to the selection and going over the part I wanted to add. To remove from a selection, hold down Alt (Option in macOS) and a – sign appears by the pointer.
For the birds selecting subject didn’t work so I chose Select > Sky and then checked the inverse box. This basically selects the sky behind the birds and then, when you click inverse, selects the birds.
For the bottom cloud I was able to use Select > Subject.
Masking and Copying to New Layer
Once you’ve selected what you want then there are two basic options:
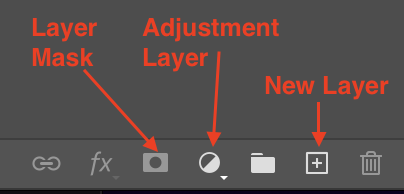
- Create a layer mask from the selection: Click the new Layer Mask button at the bottom of the Layers Panel:

- Copy the selection (Control/Command + C) and then create a new layer and paste into the new layer.
Generally masking is more flexible but there may be times when you want to have multiple copies of the selection and pasting multiple times is a fast way to do this.
Note: in the layer Properties you may see a Remove Background button which basically does the selecting and masking for you in one step.
Here are the three most used buttons at the bottom of the Layers panel:
Resources
Photoshop Compositing Walkthrough
Here is a YouTube video where a professional compositor shows a workflow that goes from getting inspiration in Adobe Firefly through creating an image by combining stock photos.
In the beginning there is a lot of talk and going through how to work with the generative AI. That’s not as important for this class but it is worth noting that he (Ted Chin) just used the AI for inspiration, not the final image. He is using some advanced techniques and goes quickly, but it’s good to see that a lot can be done with many of the tools we’ve already gone over. He of course has a lot of practice and a good eye.
Notice that he makes mistakes, has to go back and name layers (and use color coding for the layers) and try out different things.
Some points of interest (there are others in the YouTube description on YouTube)
- 21:49 masking and combining two photos
- 23:54 add the second image
- 28:35 add the third image
- 38:06 copy a layer to add reflection
- 41:05 add fourth image (clouds)
More info on Ted Chin
- Linktree
- website
- Example story on Instagram: merge two photos with Generative Fill in PS