Character design for animation
Process
Creating a memorable animated character is a process that requires time and thoughtful decision-making. A character doesn’t materialize on the screen out of thin-air. Each of its attribute (i.e: its size, features, color palette, posture etc.) should work in unison to create a clear, unique and cohesive look and personality.
Career
In large studios such as Disney and Pixar, character designers work exclusively on developing characters. They create visual references and specifications to guide subsequent stages in the movie making process (such as 3D modelling and animation). In smaller productions an animator may also be in charge of the character design. This job listing from Pixar gives you a good overview of the type of skills necessary to be a character designer.
Exploration & Research
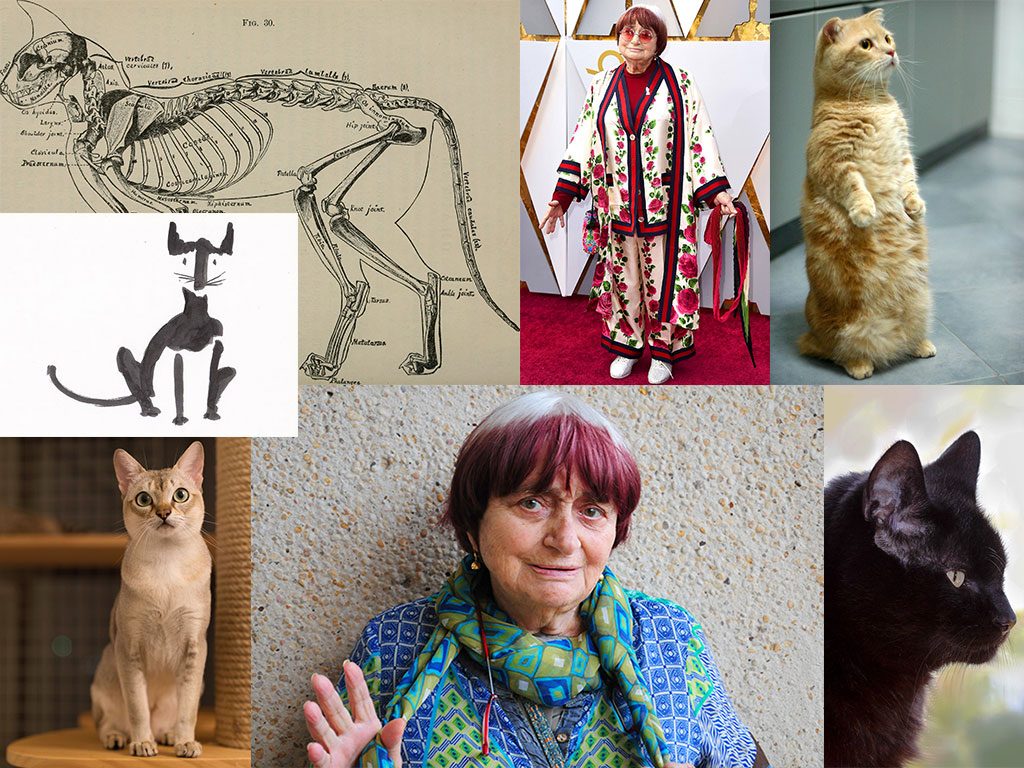
Whether you are assigned a predetermined character to work on, or have complete freedom, you should explore different possibilities, do some research, and gather some visual inspiration. Every character could be interpreted in a multitude of ways. Think about your character’s gender, species/race, height/weight, mood etc.

Sketches
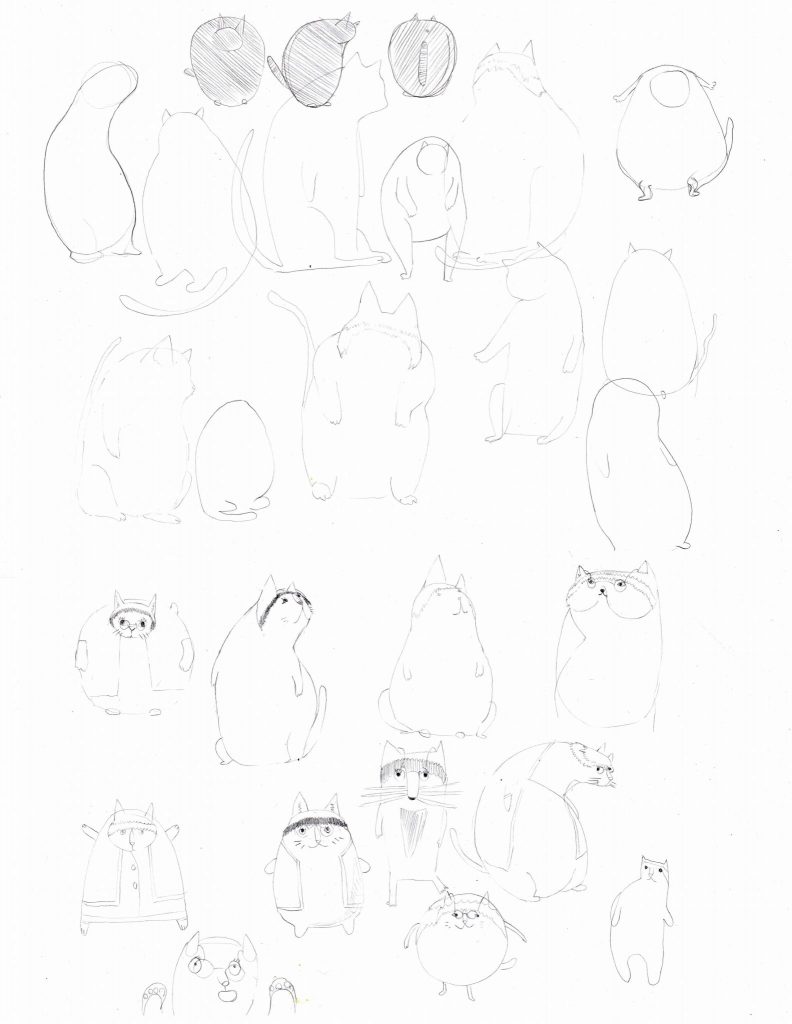
The first attempts at rendering your vision for a character should be very loose. Make sketches – a lot of them! Pencil and paper are the preferred tools for most artists at this stage (although pen, watercolor, even collages can work too). Don’t spend time on tiny details. This is still the exploratory phase of the the process – don’t settle for the first idea you put on paper. Let your imagination run wild.

Biography
If you are creating your own story/character from scratch, writing up a little “biography” can be very useful in defining your character for yourself and possible collaborators. Give your character a name and summarize the elements you’ve gathered during the exploration phase in a short paragraph.
“Agnes is an elegant older cat. She walks on two legs, like a human, and is very smart. While her bones are frail and her vision a bit blurry (she has to wear thick glasses) she loves to stroll around the city with her pet snail. Her artistic disposition is reflected in her choice of clothes and unique haircut. She is on the shorter side and a bit round.”
Turnaround
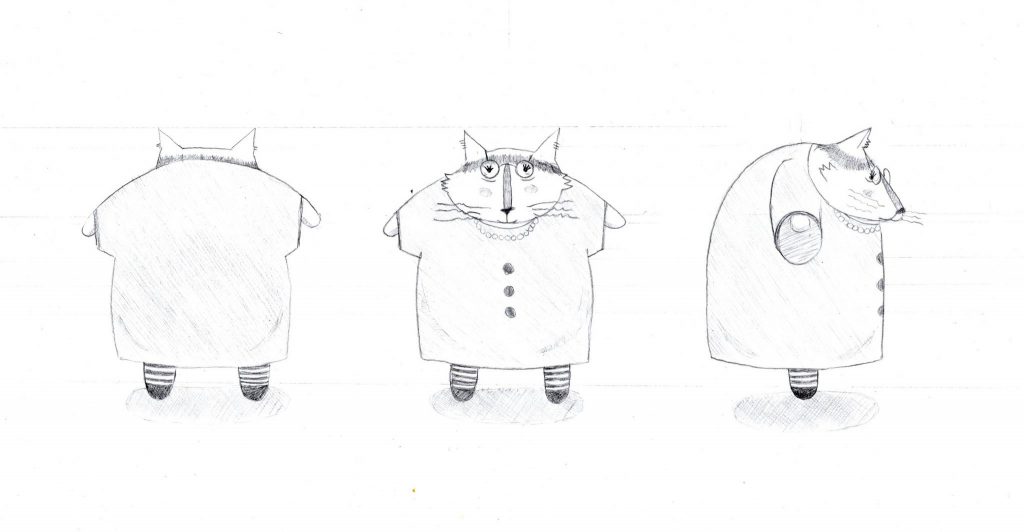
The next step is to refine your favorite sketches into a character turnaround. This document provides a visual reference for the way your character looks from different angles (at least front, side, and back). Start with the front view and draw horizontal lines at the height of each important elements (i.e: top of head, chin, feet, hands etc.) across the width of the sheet of paper to align all views.

Basic Shapes
The overall shape and silhouette of your character has an enormous impact on the way your audience will relate to it. Is it round and friendly? Long and scary? Small and sneaky? Square and stable? Angular and unwieldy? This video about Pixar’s “Inside Out” provides a great example of how simple shapes can be used as the core of a character’s design. This blog post by artist Tomatataro is another good example of the characteristics of simple shapes.
Anatomy and Proportions
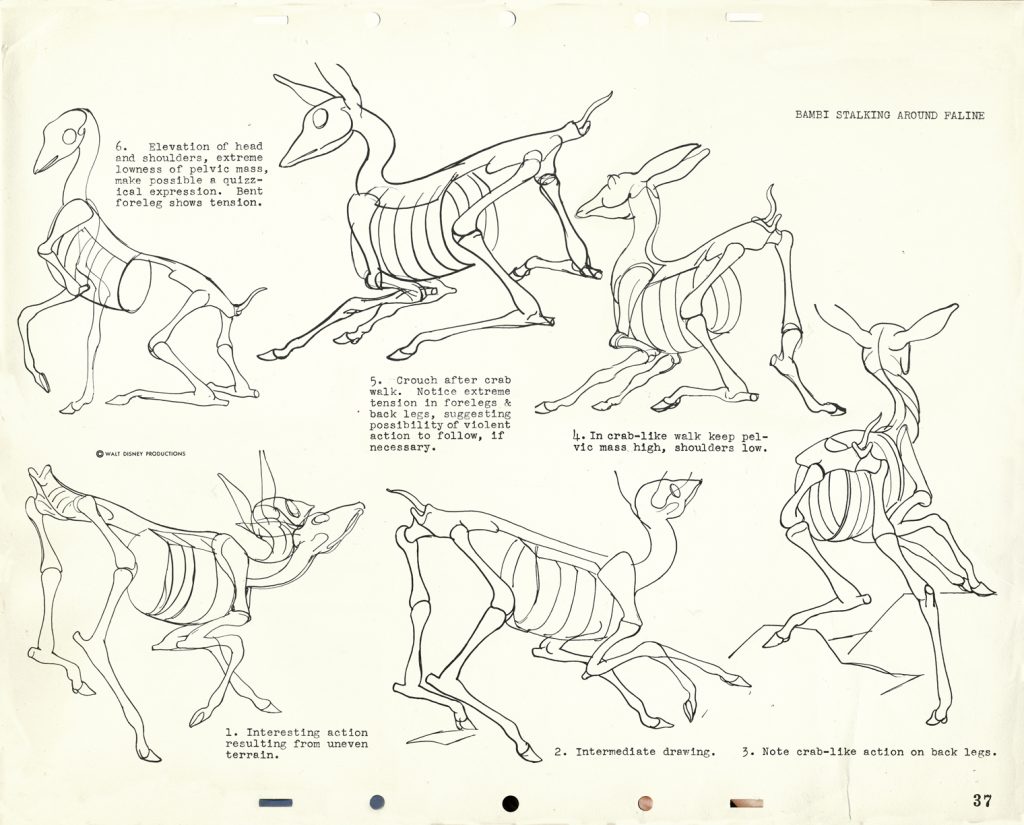
Defining the basic skeletal structure of your character can be very helpful in understanding how it will move. You could research basic human or animal anatomy and adapt these references to your character. Animated characters rarely abide to realistic proportions (after all, exaggeration is one of the 12 principles), but it’s good to have a point of departure.

Disney animators studied the anatomy of deers to animate Bambi. Image source: http://www.michaelspornanimation.com/splog/?p=1463
Style
While Disney has had a huge influence on the style of animated characters (past and present), there are other approaches. Your story, the emotion and mood you are trying to convey, should be taken into consideration. Will your stylistic approach be cartoony? Realistic? Minimalist? Modern? Traditional? Jarring? Comforting? etc. Don’t over complicate your character – remember that you will need to animate it… thus draw it over and over again. Furthermore, unnecessary design flourishes may distract from your character’s essential features and traits.
Appeal
Appeal is one the 12 principles of animation – perhaps the most subjective one. An appealing character isn’t necessarily “beautiful” or “cute” – an “ugly” or “scary” subject can (and should) be appealing too. Appeal comes from a combination of design and motion that makes the character fascinating to watch. Review this principle here.
Final project, step 1: character design
This week, you will design the character you will animate for the rest of the semester.
Start by brainstorming ideas and sketching them out. You may use pencil/paper or a tablet. These sketches can (and even should) be rough but there should be plenty of them. You will be working with this character for several weeks – don’t settle for the first idea. Explore different possibilities before making a final decision. Gather visual references for your final design (i.e: if your character is a cat-version of your favorite singer, gather images of cats and of the celebrity the character will resemble).
Write a biography for your character. This doesn’t need to be long – just a short paragraph including its name and essential traits (see example above).
Once you’ve decided what you want your character’s essential traits (design and personality) to be, create a character turnaround. You may use pencil/paper or a tablet.: this is a document often used in animation showing different views of a character on a single sheet of paper. Make sure you include its front, side & back. Start with the front view and draw horizontal lines at the height of each important elements (i.e: top of head, chin, feet, hands etc.) across the width of the sheet of paper to align all views).
Format
The sketches and turnaround should be exported as JPGs. The biography should be typed up.
Submission
Create a new post on your Open Lab portfolio. Your post should include your sketches, bio, and turnaround as well as a short description (reflections on your process, challenges, goals etc. are also welcome).
On Blackboard submit a link to your Open Lab post.