This tutorial shows how to create a web project using GitHub and Replit. This is how you will be expected to create your project for the Web Design Module. We are going to go over this in class as well.
Before you start: it is important to have both a GitHub account and a Replit account. Start with creating the GitHub account and then, when you go to Replit, click to Sign in with GitHub. This will link the two accounts and make the process below work smoothly.
Step 1: Create GitHub Repository
GitHub is a place where you can save and share coding projects of all kinds. Even through Microsoft runs the site, it is free for public projects and it is the most widely used site for open source projects. Another benefit is that it can be the server to host web sites like what we will make in class.
A REPOSITORY is basically a fancy word for a folder. It is the general name for a single project on GitHub and where all of your files are stored.
(a) Sign in to GitHub
(b)Create a New Repository
You can use the + sign in the black bar at the top of the page
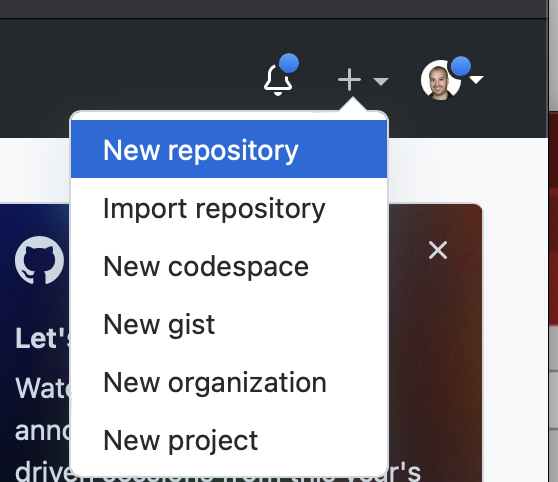
or click the green New button on the left side of your GitHub dashboard.
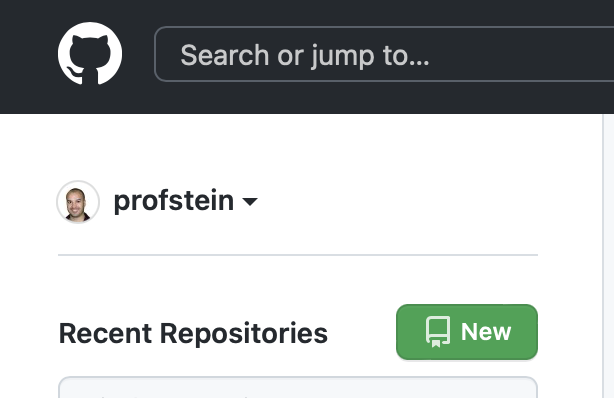
You must be signed in to do either of these.
(c) Fill out the Info to create a new Repo (short for repository)
- Give your repository a name. Any spaced in the name will be converted to dashes – NOTE you can’t change this later.
- Description is optional. You can add or change this later
- Check Add a README file. This is another place to add a longer description to your file.
- Optionally Choose a license. You don’t have to do this. If you have work that you want to retain copyright over (like photos etc) then do not chose one of these as they generally are open source licenses.
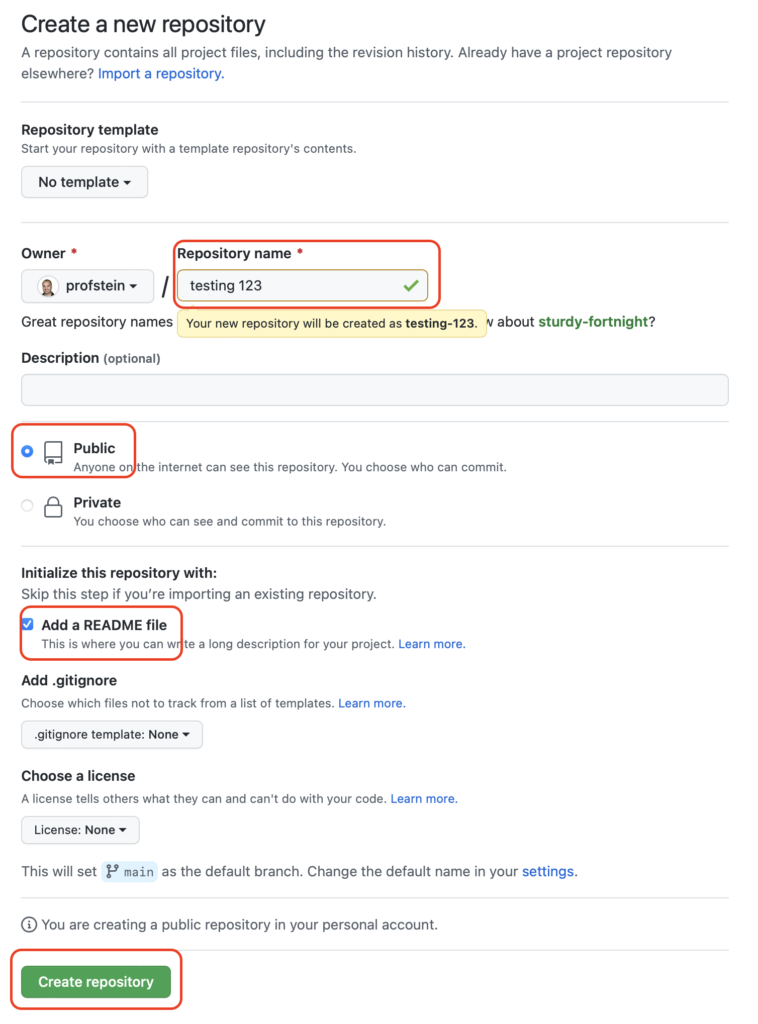
(d) Click Create Repository
This will create a blank repository.
Step 2: Create a Repl
A project in Replit is called a Repl (I know close to repo, it stands for Read, Eval, Print, Loop that is a programming thing).
We are going to create one that can read from and write files to our GitHub repository.
(a) Go to Replit
(b) Click the + Create button
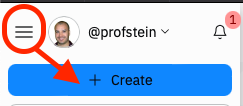
(c) Click to Import from GitHub.
This is important! We want to use the GitHub repo we created in step 1 and not just create a new repl.

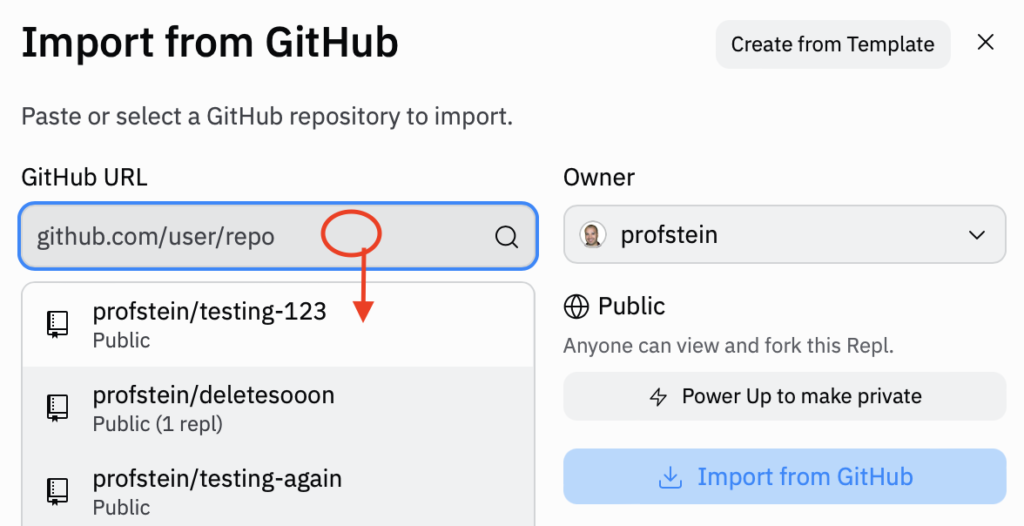
(d) Click in the box under GitHub URL and find the repo you created in Step 1.
This will only show properly if you’ve signed in to Replit with your GitHub account.
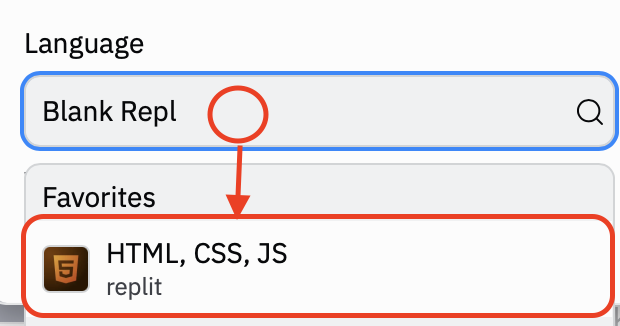
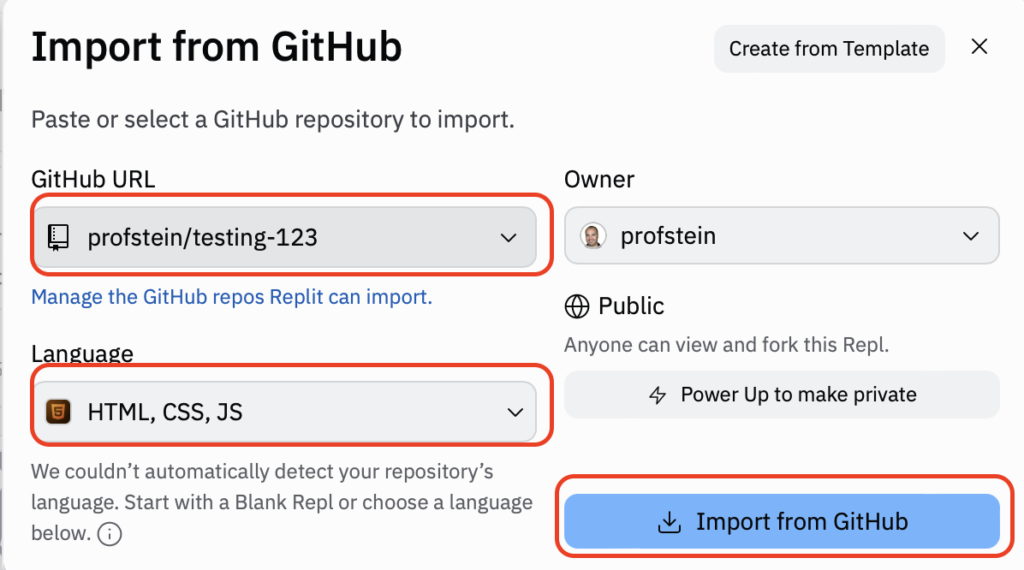
(e) Choose your Language as HTML, CSS, JS.
If you don’t see it in your favorites then start typing HTML and it should show up.
(f) Click the Import from GitHub button.
You may have to wait for a while and see an animation like this

The End… for now
You should now have a Repl that is linked to your GitHub Repository. The next steps are creating the HTML and CSS files for your project.
